Loading…


KnowledgeBase
Invite Your Team: How to Add and Manage Users in AI Engage CRM
What is a User?#
A User is anyone with a login to your workspace. Every teammate who needs to access contacts, send campaigns, manage deals, or view reports must be added as a user.
💡
Create your Profiles and Roles before inviting users — you assign both at invite time. If they are not set up yet the fields will be empty and you will need to come back and assign them later.
Step 1 — Open Settings#
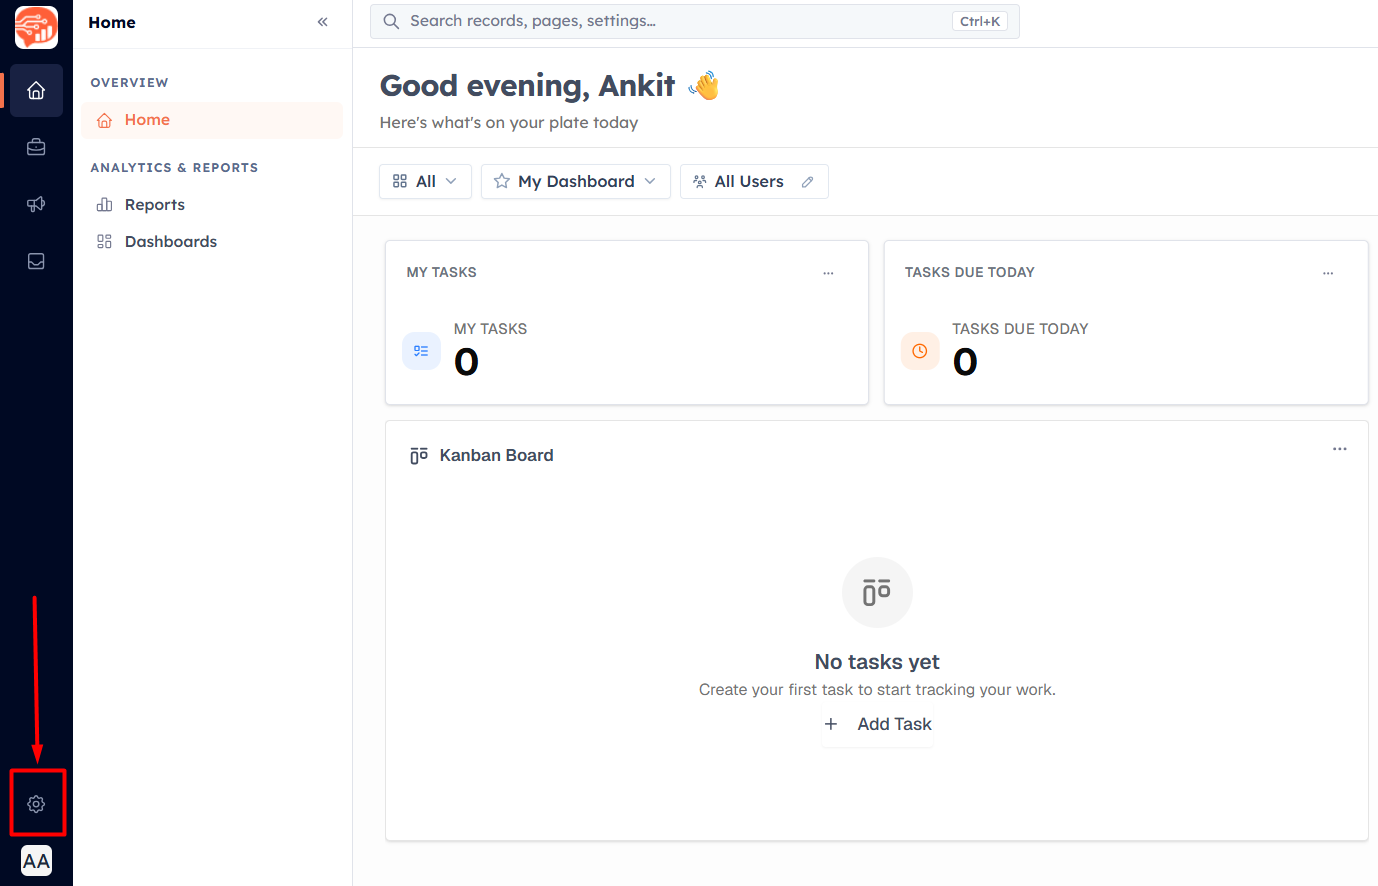
Click the Settings icon in the left sidebar.
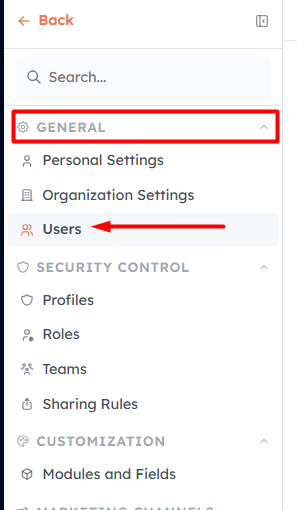
Step 2 — Click Users#
Under General, click Users. On a blank account, you will only see yourself.
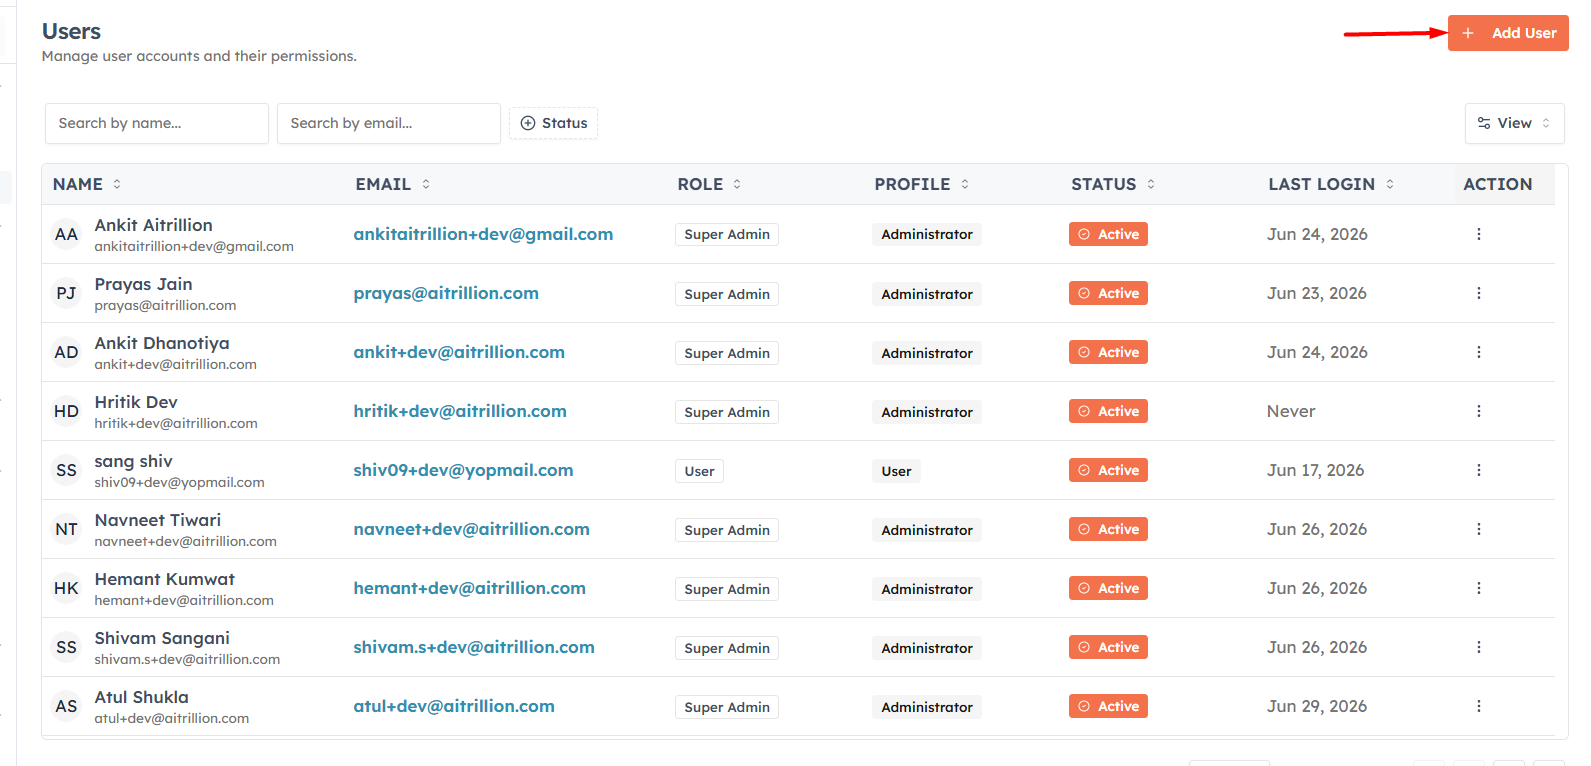
Step 3 — Click Add User#
Click Add User at the top right to open the invitation form.
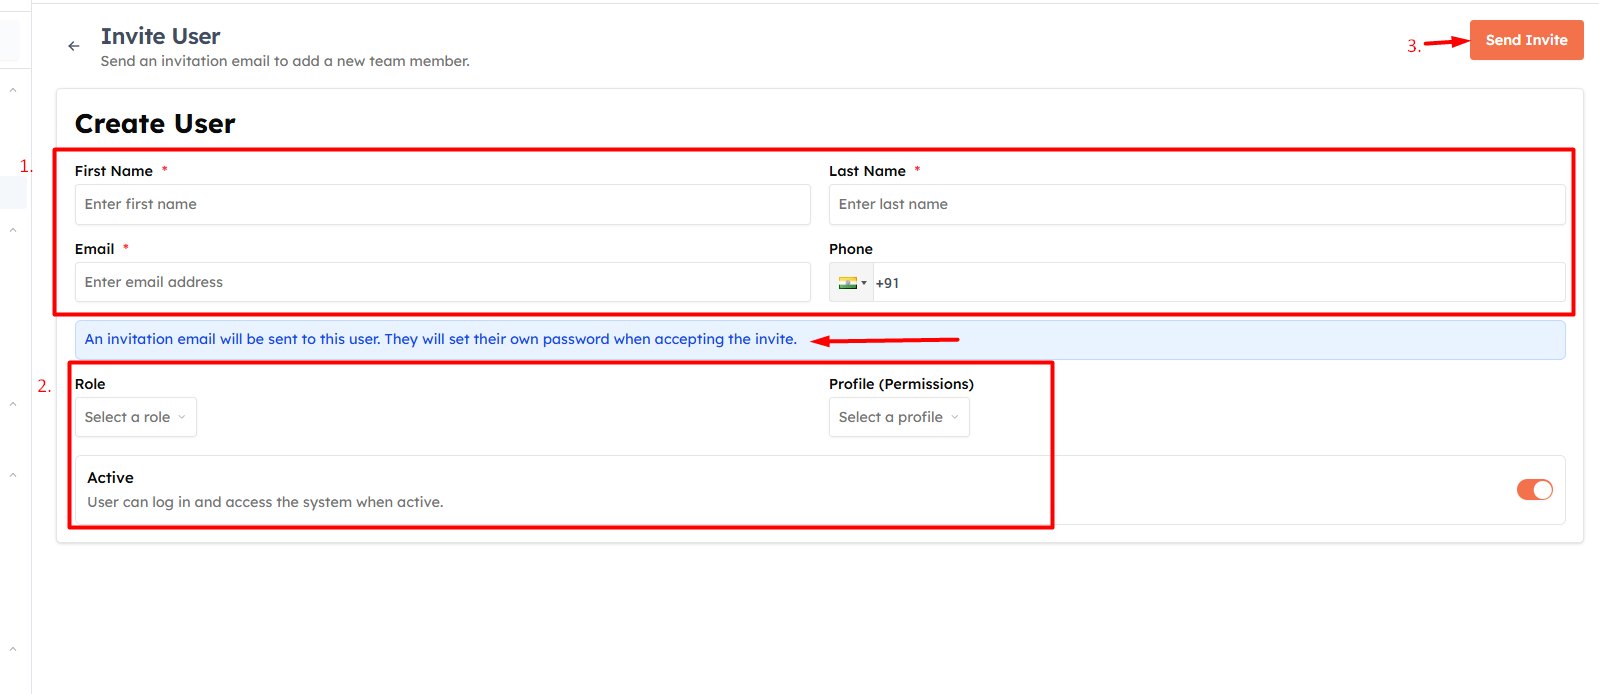
Step 4 — Fill in the form#
The form contains:
Email Address — Becomes their login username
First Name / Last Name — Their display name in the CRM
Profile — Controls what they can do (create, edit, delete)
Role — Controls whose records they can see
Team — Optional: assigns them to a team immediately
What the invited person sees#
Your teammate receives an email invitation. They click the link, set a password, and land in the CRM — the full walkthrough for them is Accepting Your Invitation.
💡
Each active user (and each pending invitation) uses a seat on your plan. If you’re out of seats, add more first — see Billing & Subscription.
💡
The invite link is valid for 48 hours. To resend it, go to Settings → Users and click Resend Invite next to their name.
💡
Deactivate users who leave the company — never delete them. Deactivating preserves all their records and history while removing their login access.
Was this article helpful?
Ready to implement this?
OpenAI Engage and apply what you just learned to your own workspace.
Open AI Engage CRM