Loading…


KnowledgeBase
Choose & Reorder Your List Columns (Manage Columns)
Every module's list view shows your records in a table, and you control exactly which fields appear as columns and in what order. This lets you build a focused list that surfaces the information you care about — hiding the fields you rarely look at and putting the most important ones first. AI Engage CRM gives you two ways to do this: a quick View popover for fast show/hide toggles, and a full Manage Columns panel for searching, reordering, and fine-tuning. This article walks through both.
💡
Column choices are saved per view. If you're looking at a shared or custom view, your column layout applies to that view; the "All Records" list has its own layout. Switching views switches column sets, so you can keep a different arrangement for each way of working.
Column choices are saved per view. If you're looking at a shared or custom view, your column layout applies to that view; the "All Records" list has its own layout. Switching views switches column sets, so you can keep a different arrangement for each way of working.
Quick toggle from the View popover#
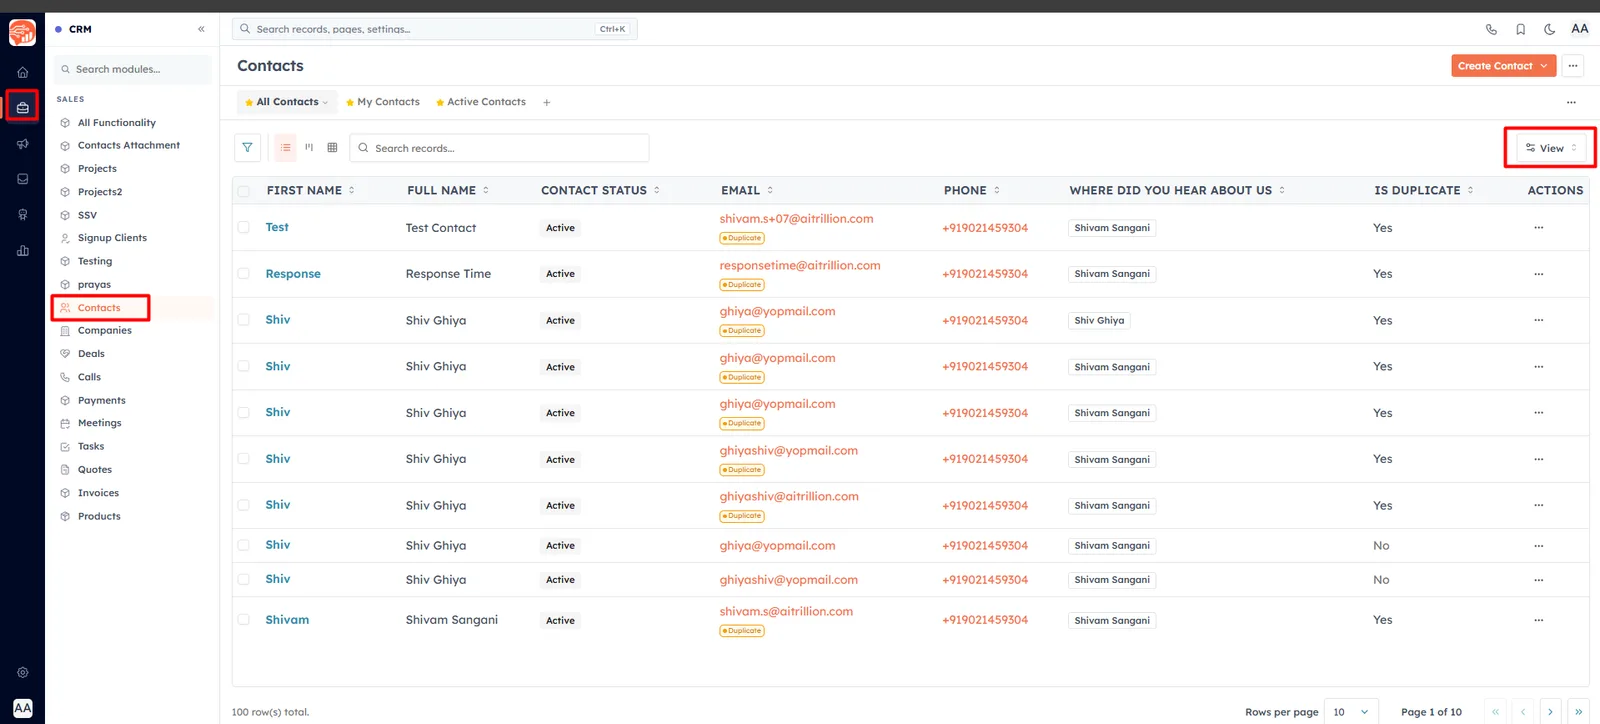
In any module's list view, click the View button (with the gear icon) at the top-right of the table.
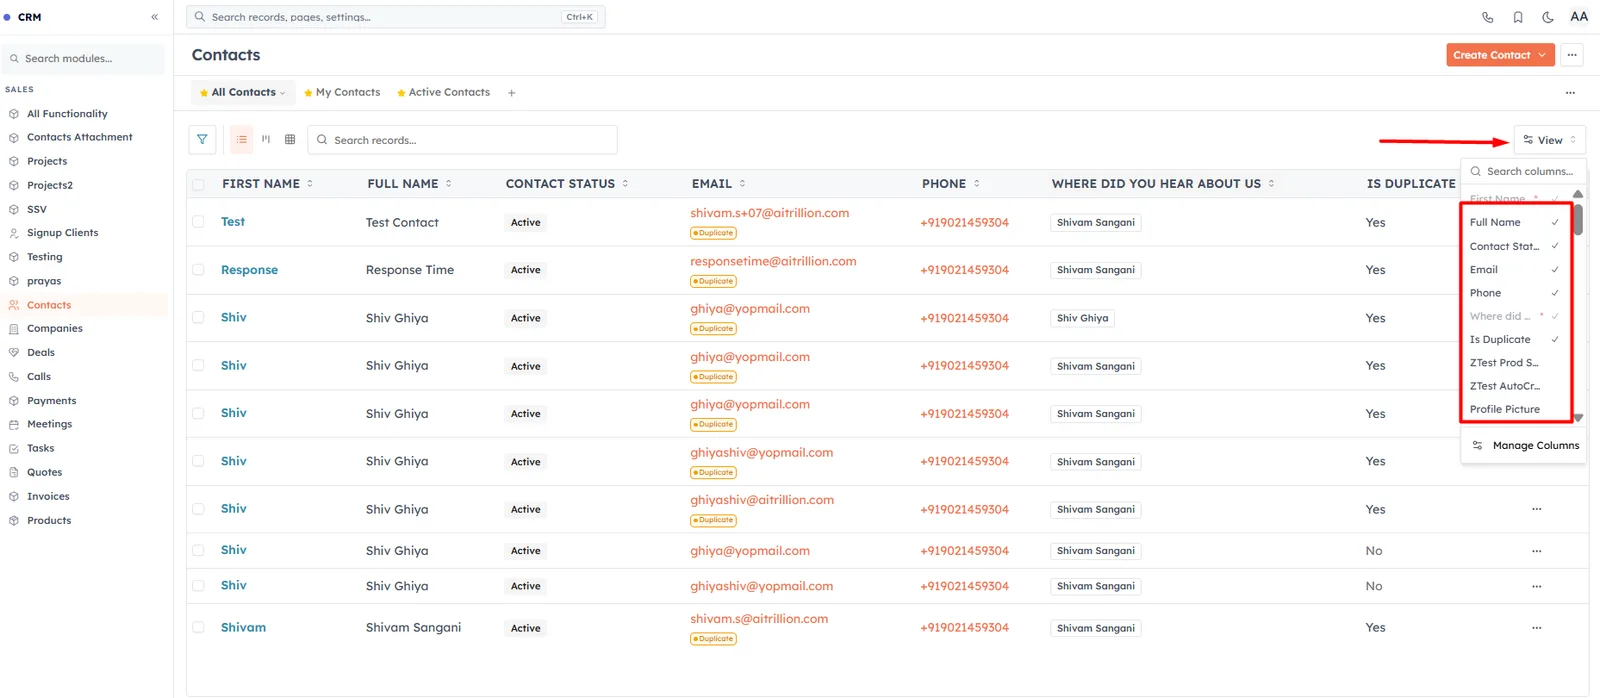
A popover opens with a Search columns… box and a checklist of every field. A check mark next to a field means it's currently shown.
Click any field to toggle it on or off. The list updates immediately, so you can toggle several in a row.
Required fields are locked visible and marked with an asterisk (*) — you can't hide them.
If you try to hide the last remaining column, the change is blocked and you'll see the message "At least one column must remain visible." The table must always show at least one field.
Open the full Manage Columns panel#
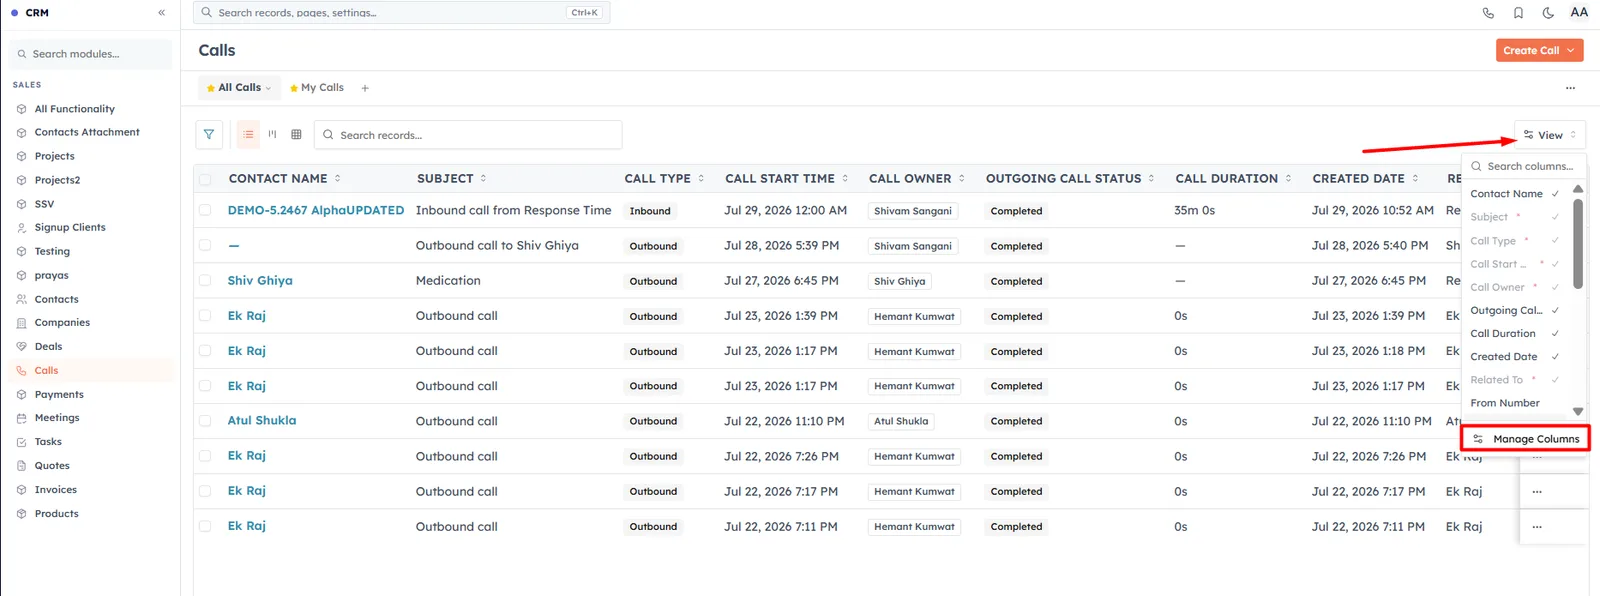
For reordering columns and working through a long field list, use the dedicated panel:
Open the View popover as above.
Click Manage Columns at the bottom of the popover. The popover closes and a panel slides in from the right.
At the top, the panel confirms which view you're editing with the line "Syncing to view: {view name}" — so you always know where your changes will apply (for example, All Records or the name of your active custom view).
Show, hide, and reorder#
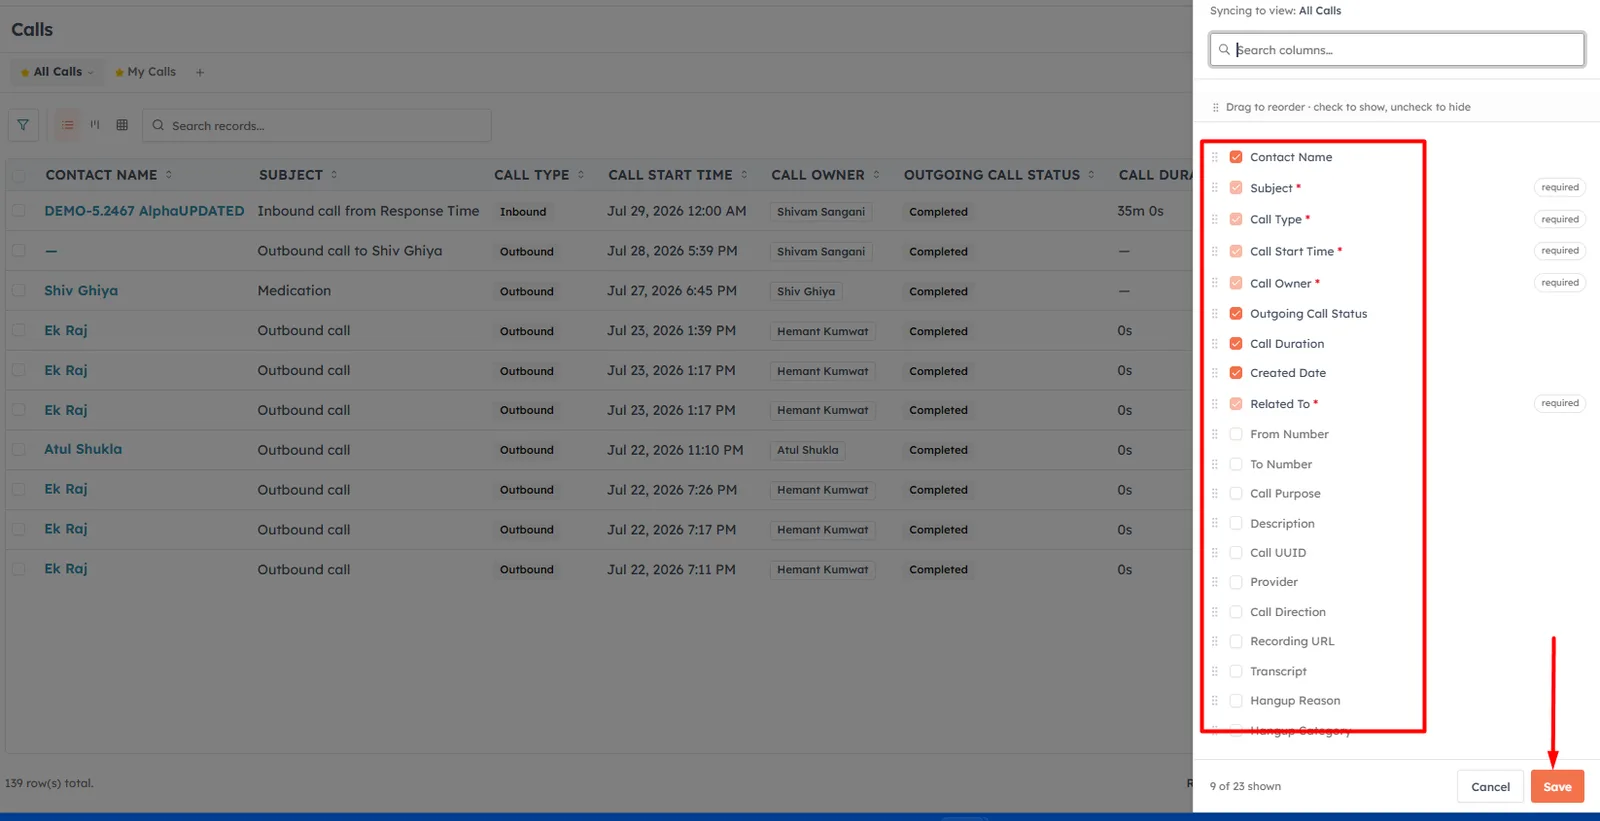
The panel presents all your columnable fields in one unified list, with visible fields first followed by hidden ones:
Search columns… — type to filter the list by field name; handy when a module has many fields.
Checkbox — check to show, uncheck to hide a field. Unchecked (hidden) fields appear dimmed.
Drag handle — grab the grip icon on the left of a row and drag it up or down to change column order. The order you set here is the left-to-right order of columns in the table.
Required fields — marked with a red asterisk (*) and a required tag. Their checkbox is locked on; they always stay visible.
The footer shows a live count — "{n} of {total} shown" — so you can see how many columns your list will display.
💡
You can't reorder columns while a search filter is active. The instruction bar switches to "Clear search to reorder" as a reminder — clear the search box first, then drag. (Dragging to reorder isn't supported on touch screens, so use a mouse or keyboard for reordering.)
You can't reorder columns while a search filter is active. The instruction bar switches to "Clear search to reorder" as a reminder — clear the search box first, then drag. (Dragging to reorder isn't supported on touch screens, so use a mouse or keyboard for reordering.)
Save your layout#
When you're happy with the selection and order, click Save. Your layout is applied to the current view and remembered for next time.
Click Cancel to discard your changes and close the panel without touching the saved layout.
Your edits are only committed on Save, and only if something actually changed — so opening the panel to take a look and clicking Save won't disturb a shared view. As with the quick popover, you can never save a layout with zero columns; at least one must remain checked.
💡
A tidy, well-ordered column set makes scanning and searching your list far faster. Set it once per view and it's there every time you come back.
A tidy, well-ordered column set makes scanning and searching your list far faster. Set it once per view and it's there every time you come back.
Related settings#
Columns are saved to the active view. To create, share, and manage those views, see Create, Share & Manage Custom Views.
Which fields exist on a module — and which are marked required — is controlled by your form and field setup. See Field Layouts & Required Fields.
Was this article helpful?
Ready to implement this?
OpenAI Engage and apply what you just learned to your own workspace.
Open AI Engage CRM