Loading…


KnowledgeBase
Customize Your CRM: Add Custom Fields and Configure Module Layouts
Why customise fields?#
AI Engage CRM comes with system fields built into every module — First Name, Email, Lead Status, and others. But every business tracks information specific to its industry, process, or product. A real estate agency tracks Property Type and Listing Price. A SaaS company tracks Plan Name and Renewal Date. An events company tracks Event Date and Venue.
Custom fields let you add exactly those fields — stored in the module, searchable, filterable, and available in reports — without any coding. You can also rearrange how fields appear on the create form, quick-create panel, and detail view.
💡
Only administrators with the Module Customization feature permission can access Modules and Fields. Profile-level users see the forms but cannot change the field structure.
Step 1 — Open Settings#
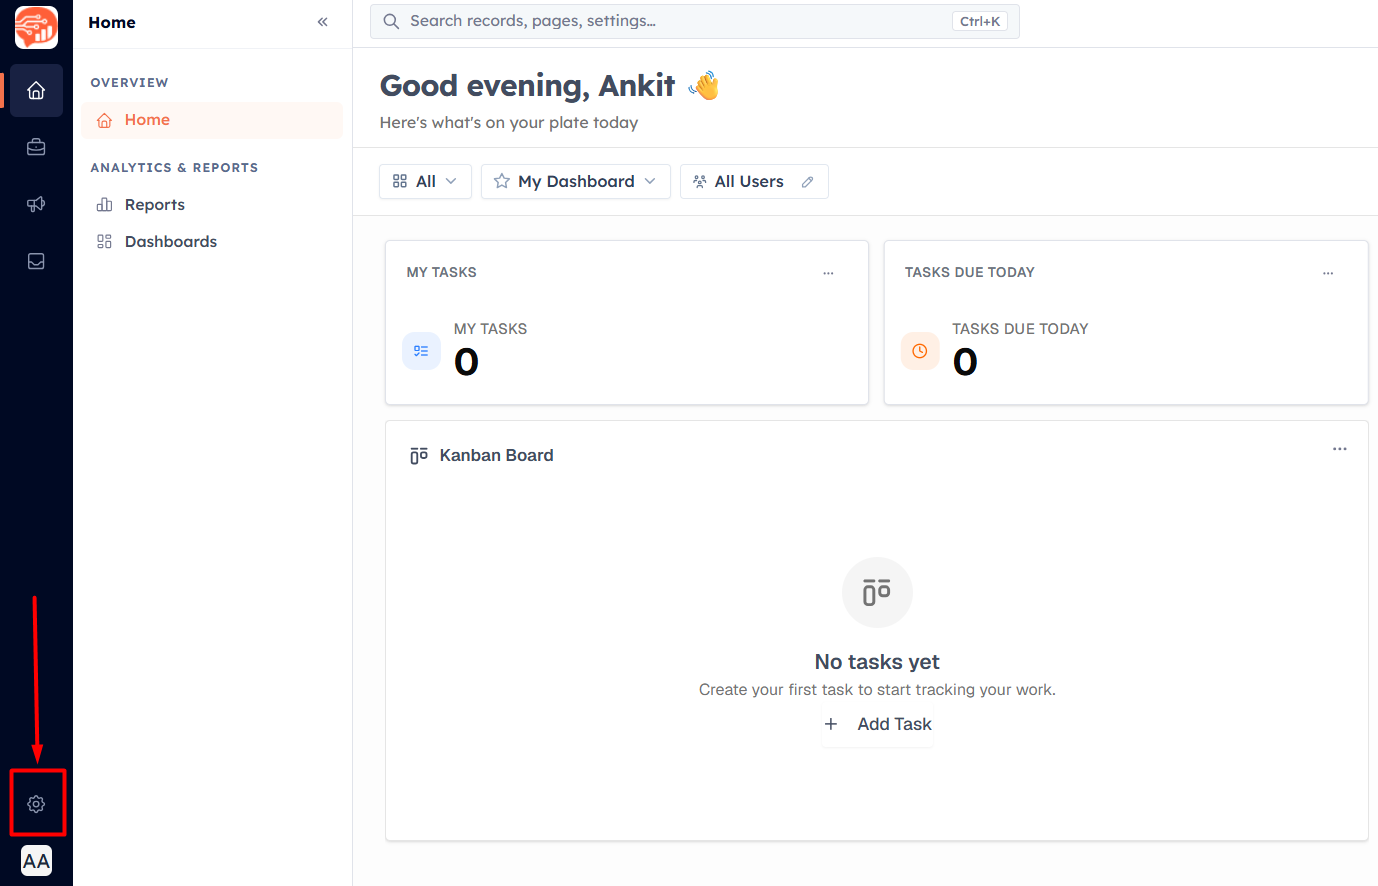
Click the Settings icon in the left sidebar to open the Settings panel.
Step 2 — Go to Modules and Fields#
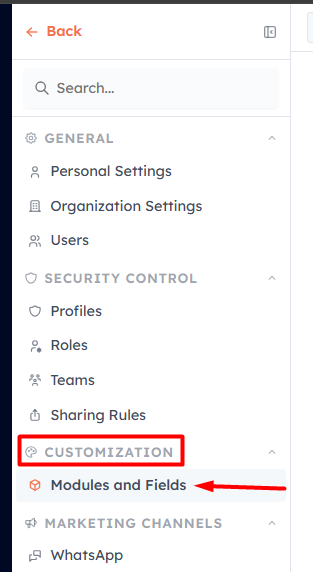
Under the Customization section, click Modules and Fields. This takes you to a list of all your active modules.
Step 3 — Select a module to customise#
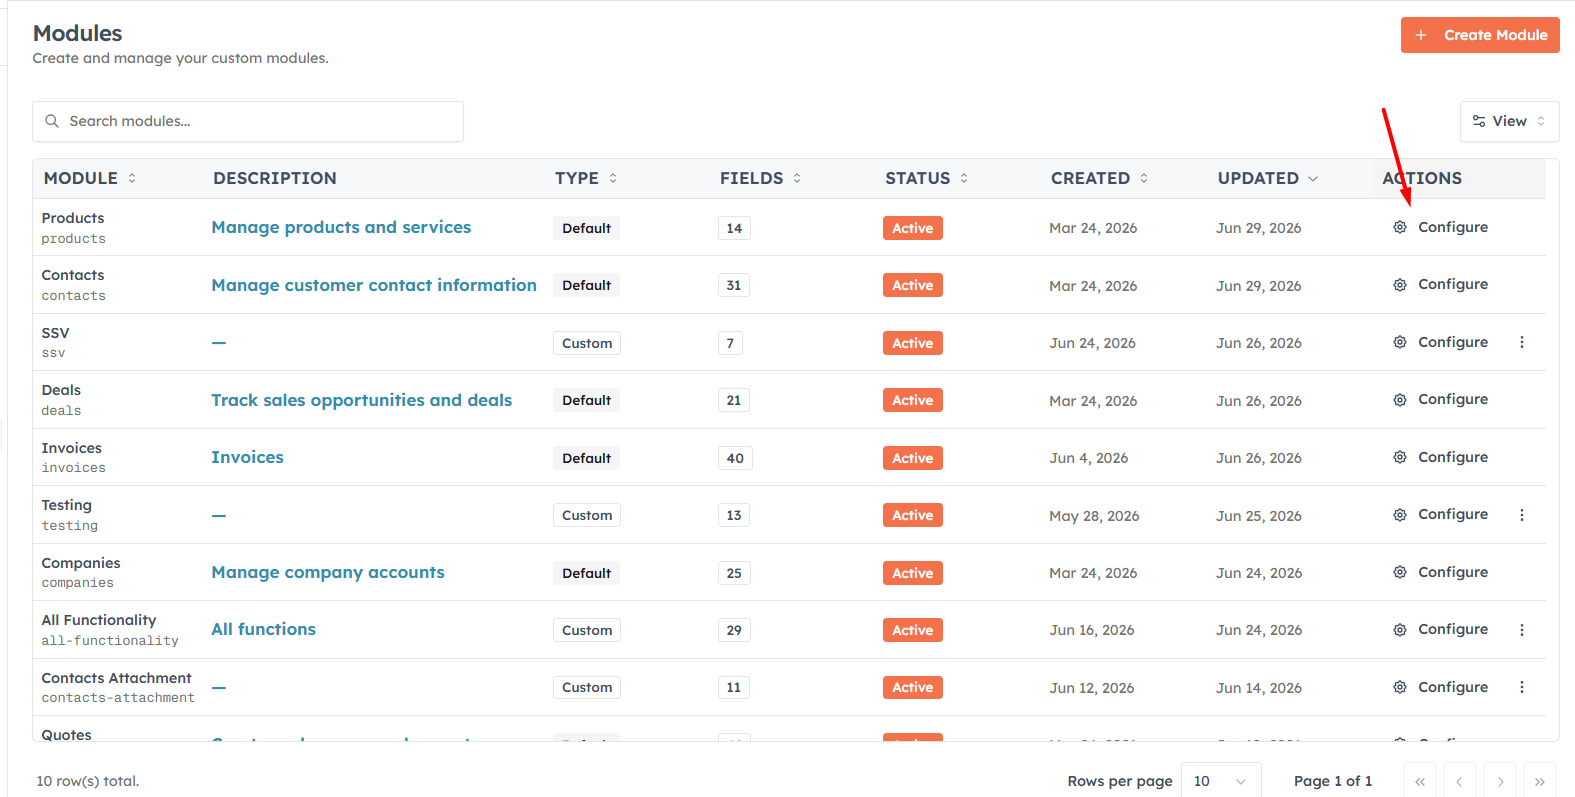
Click Configure on any module row to open its Module Builder. You can customise fields for built-in modules like Contacts, Leads, and Deals, or any custom module you have created.
Step 4 — The Module Builder interface#
The Module Builder opens in a three-panel layout:
Left panel — Field Palette: All available field types, organised into categories. Drag a type onto the canvas or click it to add instantly.
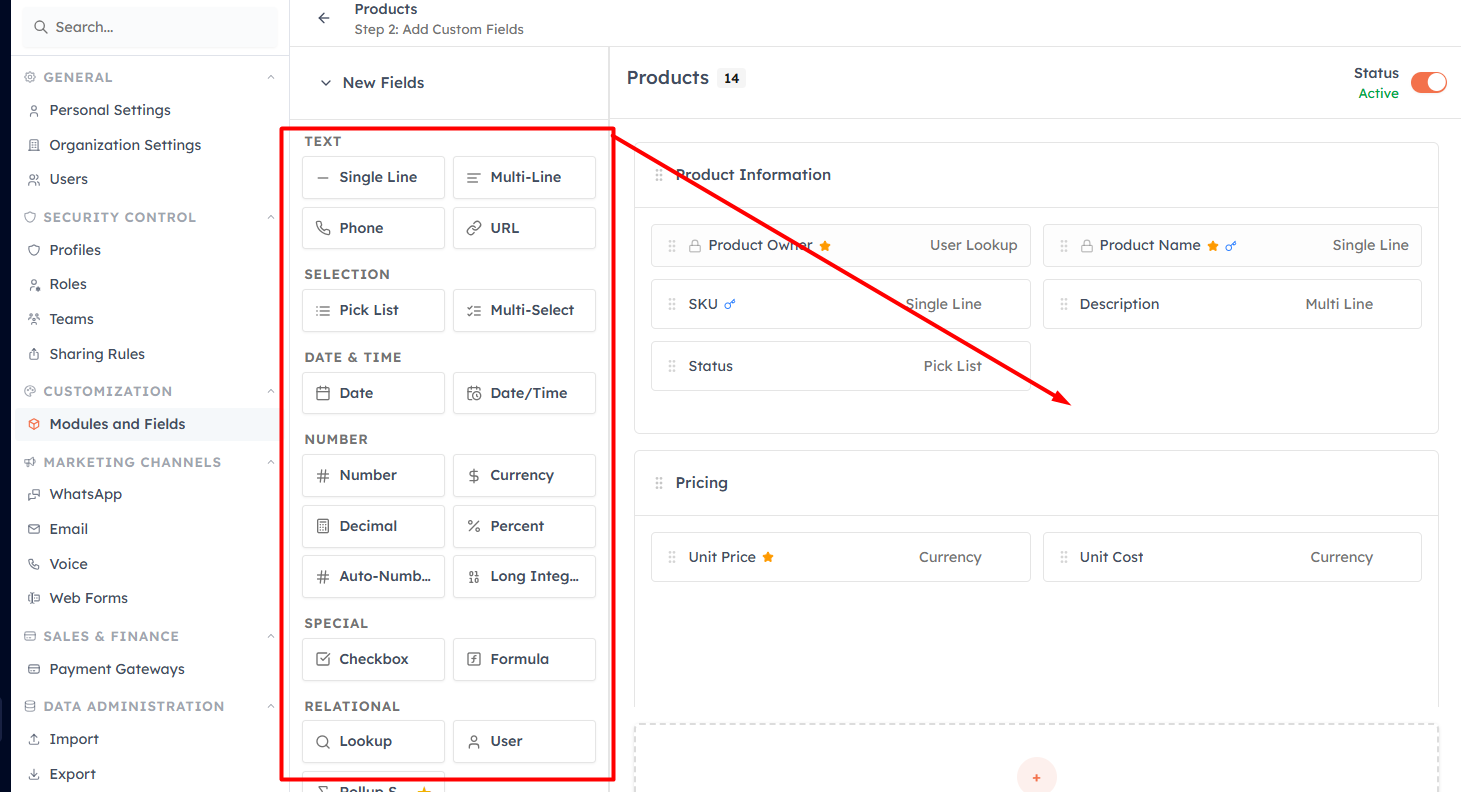
Centre panel — Canvas: A live preview of your module's form layout. Fields are grouped into sections. Drag fields to rearrange them.
Right panel — Field Config: Configuration options for the selected field — name, required/unique toggles, options, display settings, and validation.
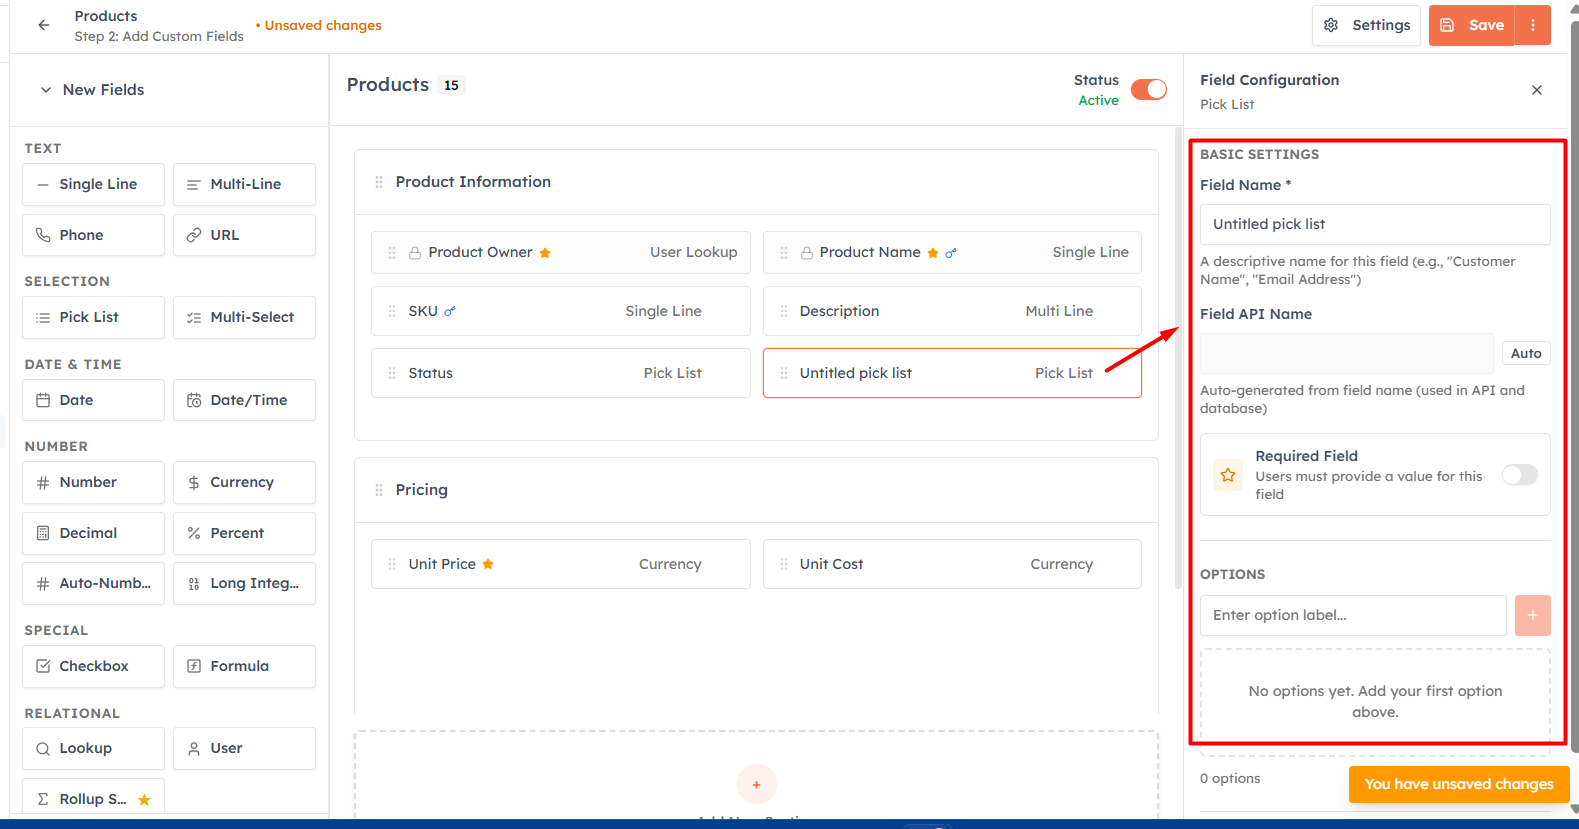
At the top of the builder, three tabs switch between the layouts you are editing: CREATE (the create record form), QUICK (the quick-create dialog), and DETAIL VIEW (the record detail page).
Step 5 — Add a new field#
There are two ways to add a field:
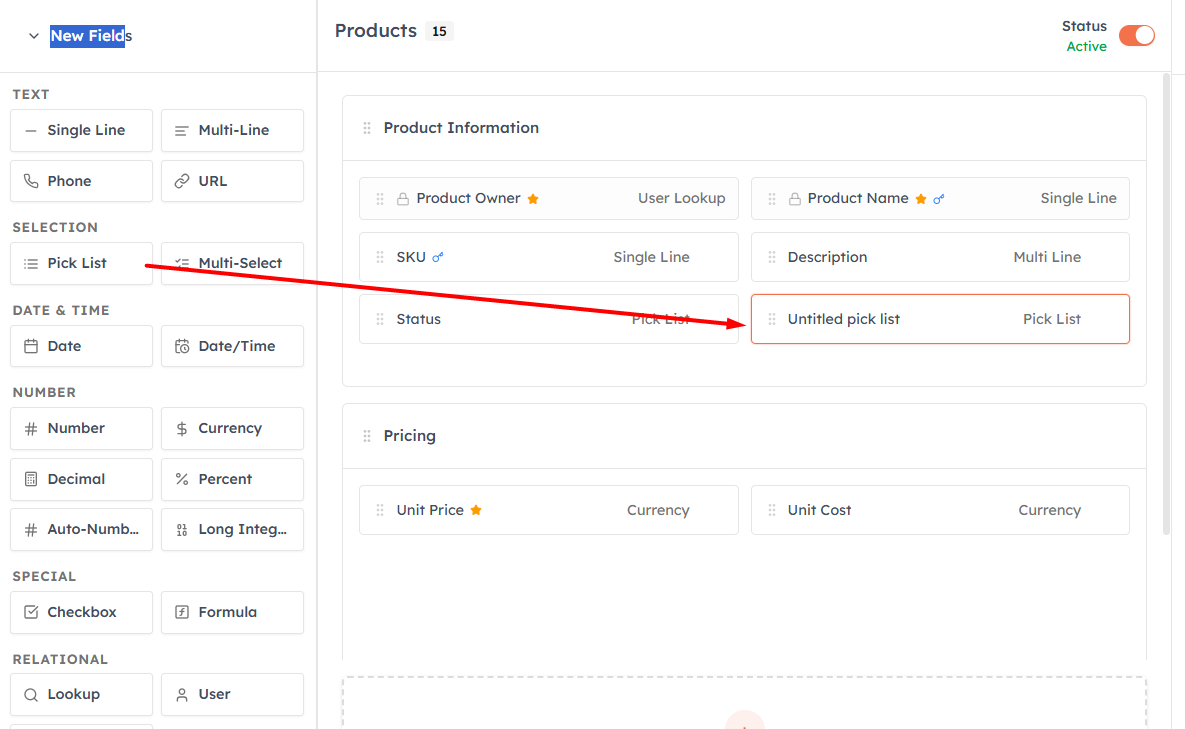
Click: Click any field type in the palette. The field is added to the first section on the canvas and immediately selected.
Drag: Drag a field type from the palette and drop it exactly where you want it — between two existing fields or into a different section.
💡
The Custom Fields Left counter at the bottom of the palette tracks your remaining custom field quota (up to 300 per module).
Field types reference#
Choose the field type that matches how your team will use the data:
Text - Single Line Short text — names, codes, IDs (max 255 chars)
Multi Line - Longer text — notes, descriptions, addresses
Phone - Phone numbers with country dial-code picker
URL - Website links — validated as URL format
Pick List - One choice from a predefined list (e.g., Priority)
Multi-Select - Multiple choices from a predefined list (e.g., Tags)
Date - Calendar date only (e.g., Renewal Date)
Date/Time - Date and time (e.g., Meeting Scheduled At)
Number - Whole numbers (e.g., Employee Count)
Currency - Monetary values with currency code and decimals
Decimal - Numbers with decimal places (e.g., Rating 4.5)
Percent - Percentage values (e.g., Discount, Probability)
AutoNumber - Auto-increments on each new record (e.g., Ticket ID)
Long Integer - Very large whole numbers
Checkbox - True/false toggle (e.g., Newsletter Subscribed)
Formula - Computed from other field values — read-only
Lookup - Links to a record in another module (e.g., Company → Contacts)
User - Links to a CRM user (e.g., Account Manager)
Rollup Summary - Aggregate value from a child module (Sum, Count, Max, Min)
File - Attach documents (PDF, Word, Excel, etc.)
Image Upload - Attach images (JPG, PNG, GIF, etc.)
Country - Country picker with flag State
State/Region - filtered by selected country
Step 6 — Configure the field#
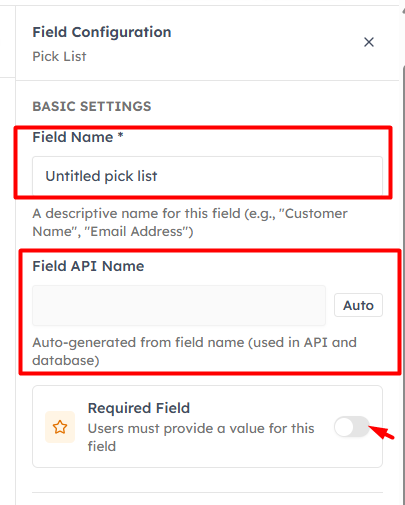
Click any field on the canvas to open its configuration in the right panel. The Basic Settings section has four core controls:
Field Name — the label users see on the form. Max 50 characters, letters and numbers only. Renaming a field changes only the display label; the internal API name stays fixed to preserve data integrity.
Field API Name — auto-generated from the field name, shown in grey. Used in workflows, filters, reports, and the API. It is locked after creation.
Required field — when on, users must fill this field before saving a record.
💡
Do not mark a field Required unless you intend to enforce it on every new record. Required fields block all imports and API creates that do not include a value for that field.
Step 8 — Set display options#
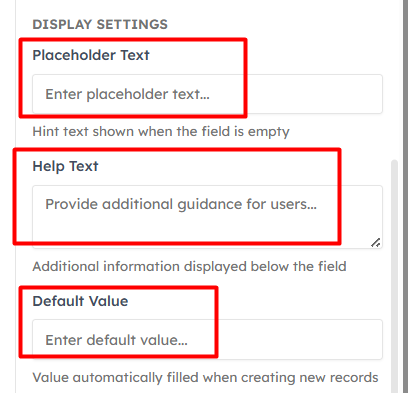
In the Display Settings section of the right panel, you can set three additional properties:
Placeholder Text — hint text shown inside the empty field (e.g., "Enter your company name")
Help Text — a short sentence displayed below the field to guide users (e.g., "Include country code")
Default Value — pre-fills the field when a new record is created. The user can override it.
Step 9 — Rearrange fields and sections#
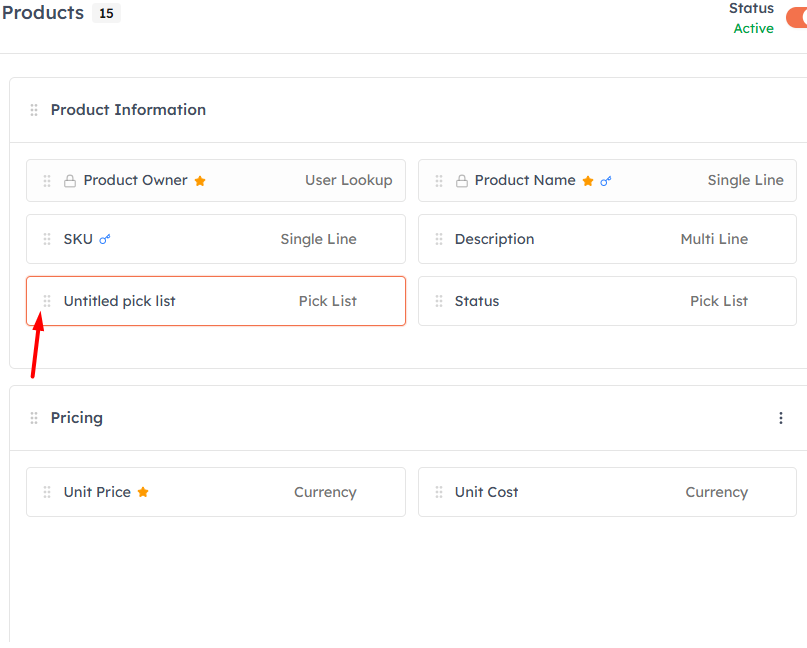
On the canvas, you can drag fields to change their order within a section, or drag them into a different section. The form layout is immediately previewed as you drag.
To add a new section, click the NEW SECTION button at the bottom of the field palette. Give the section a name (e.g., "Contract Details") and start dragging fields into it.
💡
The canvas has three layout tabs: CREATE, QUICK, and DETAIL VIEW. Changes on the CREATE tab do not automatically apply to DETAIL VIEW — configure each layout separately to show the right fields in each context.
Step 10 — Save your changes#
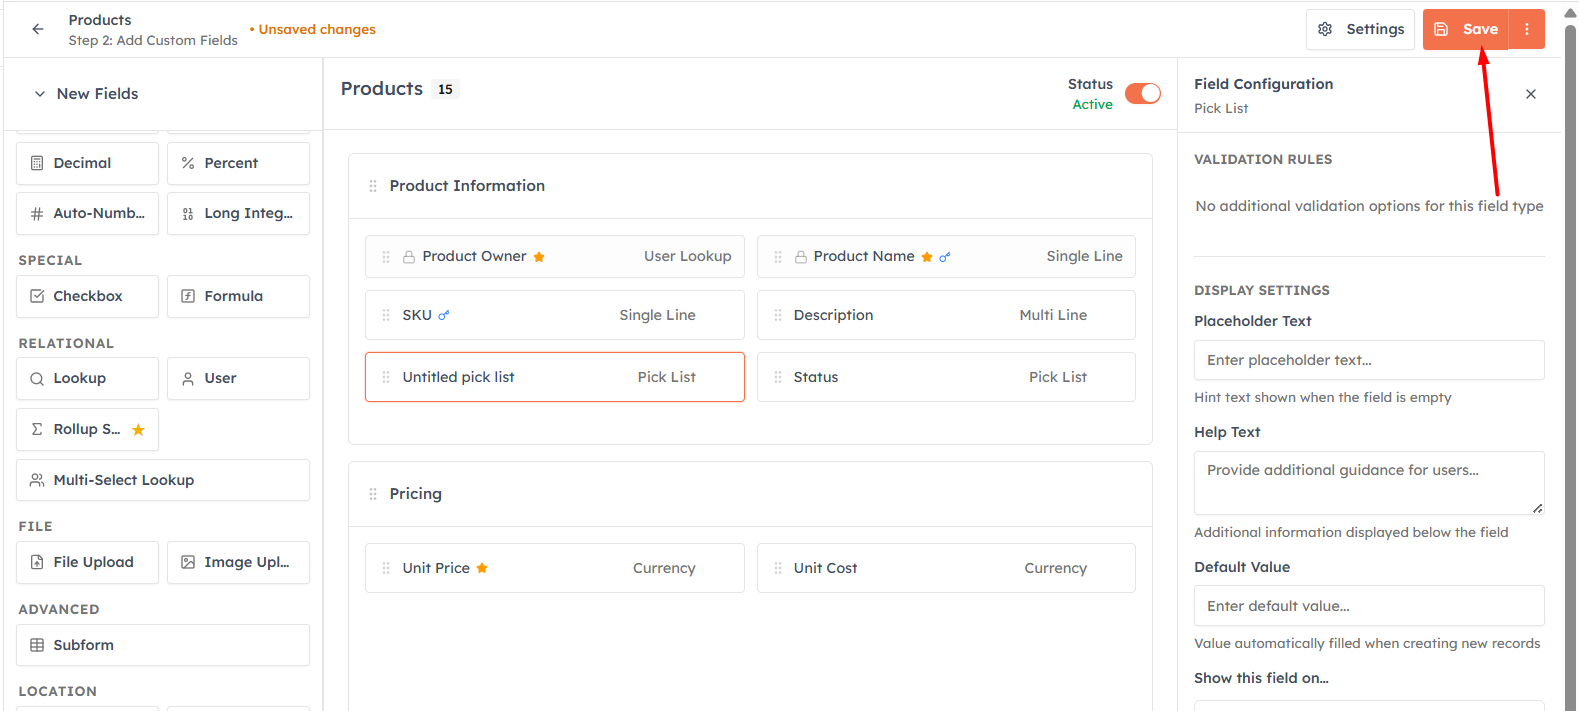
Click the Save button in the toolbar at the top of the page. The changes take effect immediately — the next time any user opens the create form or record detail, they will see the updated fields.
💡
Your custom fields are now active. They appear in the create form, detail view, filters, search, reports, and are available for workflow conditions and actions.
💡
Never delete a field that has data in it. Deleting a field permanently removes all values stored in that field across every record. Instead, hide the field from forms — the data is preserved and the field can be reactivated later.
💡
Related: After adding custom fields, use Sharing Rules to control which teams can see records with those fields, or set up Workflows to auto-populate your new fields based on conditions.
Was this article helpful?
Ready to implement this?
OpenAI Engage and apply what you just learned to your own workspace.
Open AI Engage CRM