Loading…


KnowledgeBase
Choose Which Related Lists Each Layout Shows: Show, Rename and Pick Columns per Layout (Step-by-Step)
What are related lists, and why choose them per layout?#
When you open a record — for example a contact — the lower part of the page shows its related lists: the deals, quotes, invoices, tickets, calls, meetings, tasks and notes that belong to that contact. Each related list is a small card with a few columns from the related records.
Different teams care about different related records. A sales team wants to see a contact’s deals with their amount and stage at a glance; a support team cares about tickets and calls, not quotes. With Related Records Columns you decide, for each layout:
which related lists are shown on records opened with that layout,
what each list is called there, and
which columns (up to 8) each list shows, and in what order.
Example used in this guide. On the Contacts module’s Sales layout you switch on the Deals list, rename it to Open Deals, give it the columns Deal Owner, Deal Name, Amount, Stage, Closing Date and Pipeline, and switch off the Tasks list. Then you check that the Standard layout is unchanged.
Key words used in this guide#
| Term | What it means |
|---|---|
| Related list | A card on a record’s page listing the records linked to it, for example a contact’s deals. |
| Related Records Columns | The panel at the bottom of the Layout Builder’s Detail View tab where you set up related lists for that layout. |
| Column name | The name a related list is shown under on the record page, for this layout. |
| Columns | The fields of the related records shown in the list, for example Amount and Stage for deals. |
| Lookup field | A field that links a record to a record in another module. Every related list (except the activity lists) comes from a lookup field pointing at this module. |
Before you begin#
You need permission to customise modules (the Administrator profile has it).
A related list only appears once another module has a lookup field pointing at this one — for example Deals has a Contact Name lookup to Contacts. Activity lists (Calls, Meetings, Tasks, Notes) are always there.
Know which layout you want to change. See Create a New Layout for a Module if you need another one.
Part 1: Open the layout’s Detail View#
Step 1: Open the layout in the Layout Builder#
Click the gear icon at the bottom of the left menu bar (Setup), click Modules and Fields under CUSTOMIZATION, click Configure on the module, then click the gear (Open in Layout Builder) on the layout’s row.
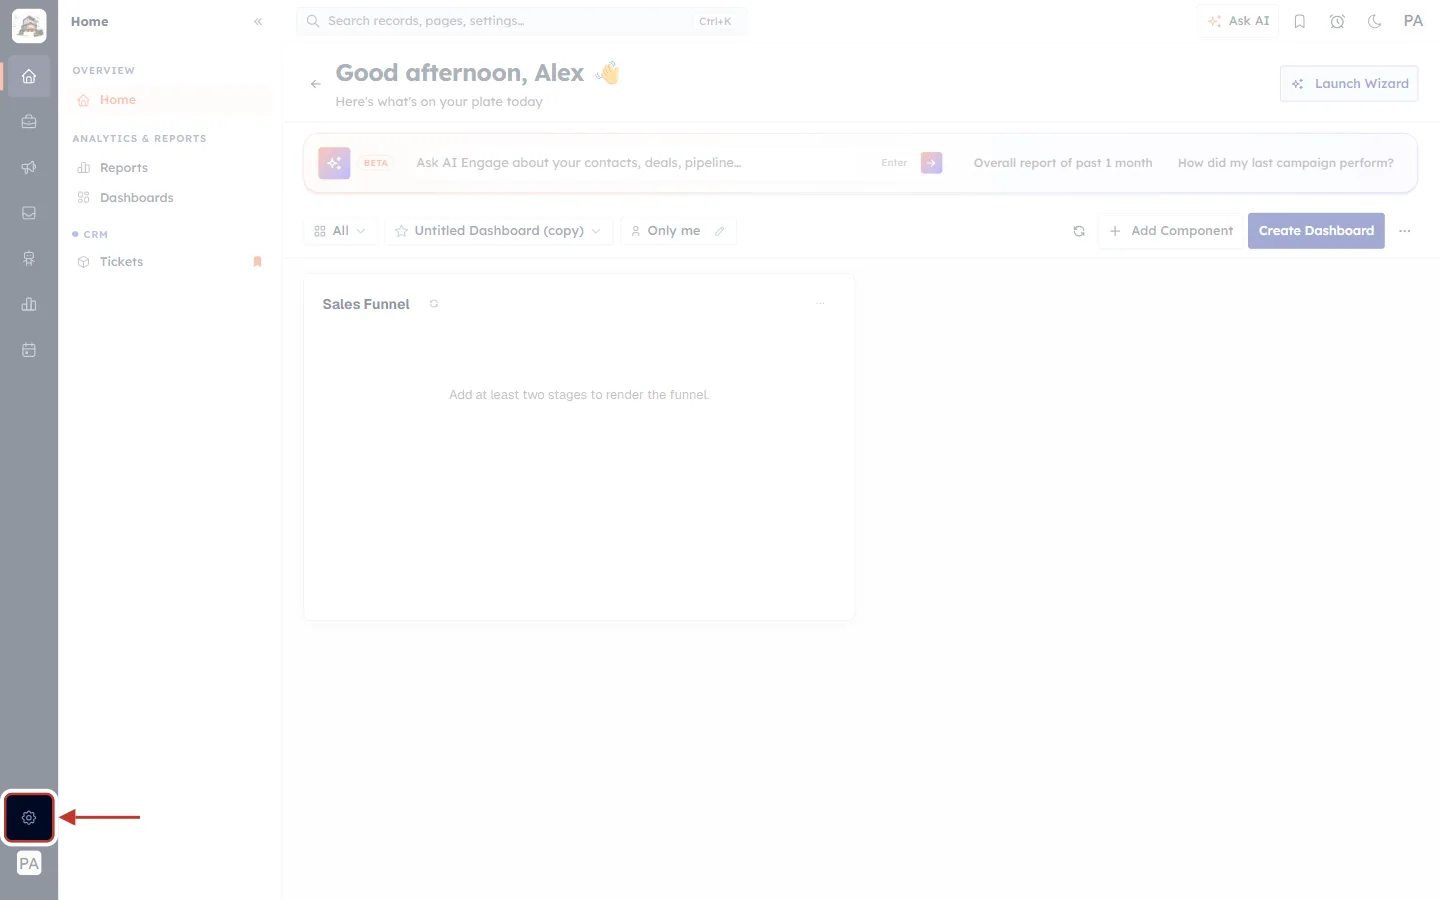
What this screenshot shows. The CRM home page with the gear icon ringed at the bottom of the narrow dark menu bar.
It opens Setup.
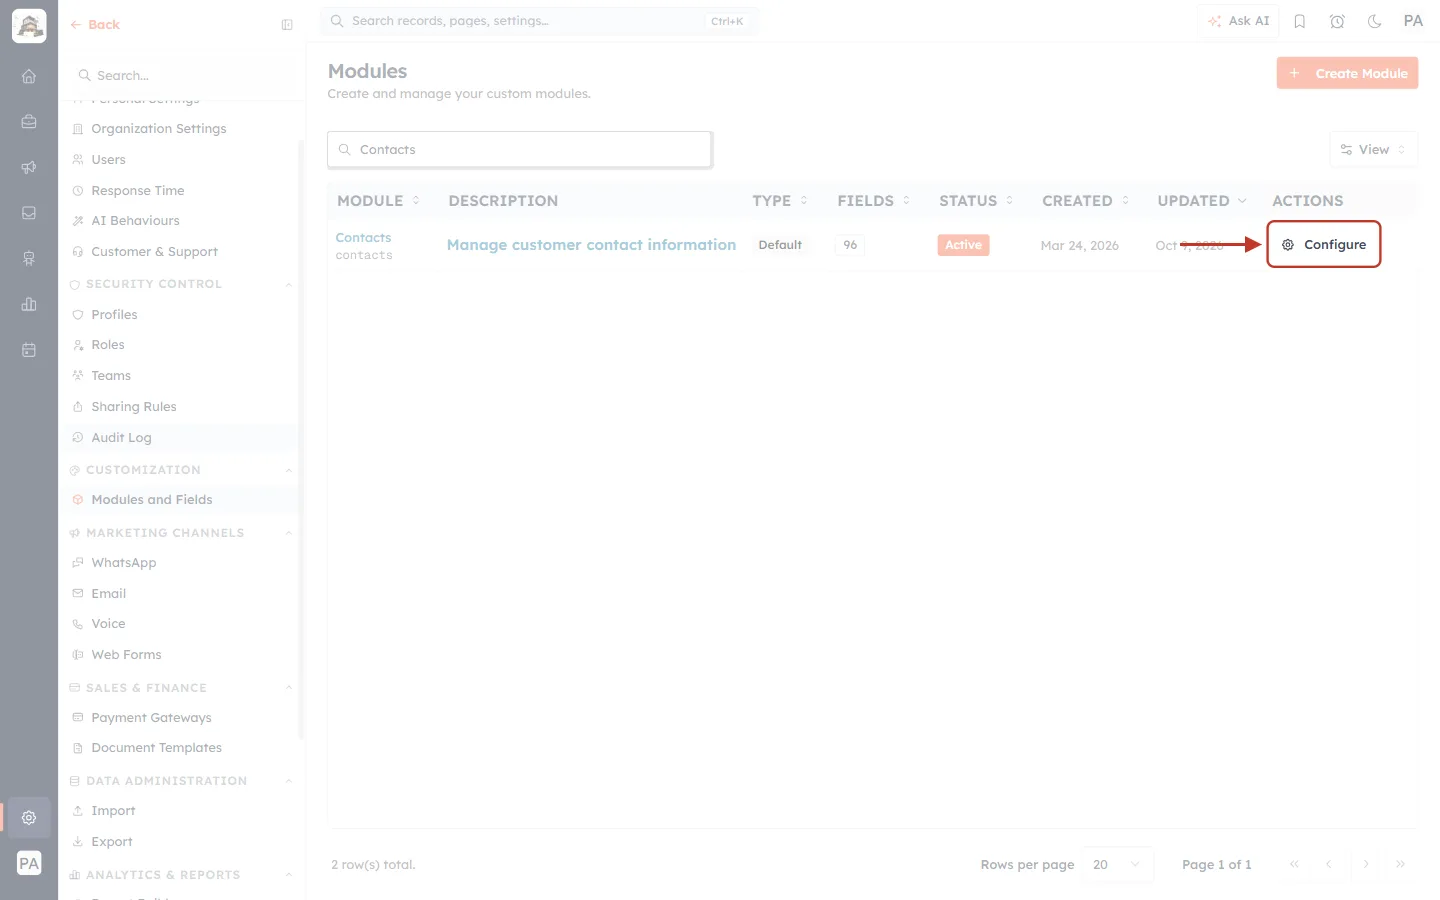
What this screenshot shows. The Modules page filtered to “Contacts”, with Configure ringed.
It opens the module’s Layouts page.
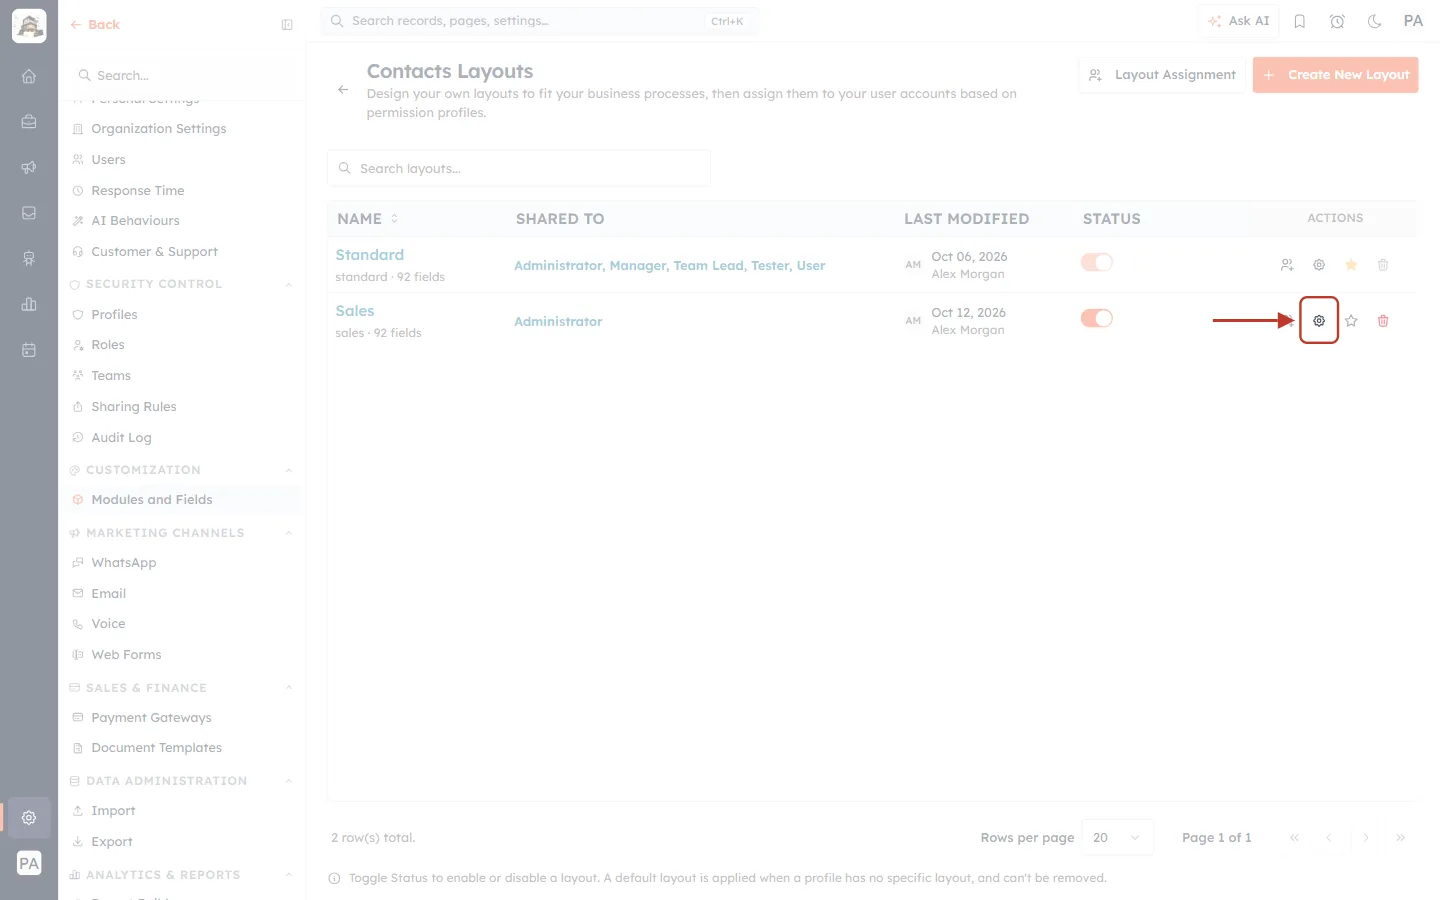
What this screenshot shows. The Contacts Layouts page with the gear on the Sales row ringed.
Each layout has its own related-list settings, so open the layout you want to change.
Step 2: Click the Detail View tab#
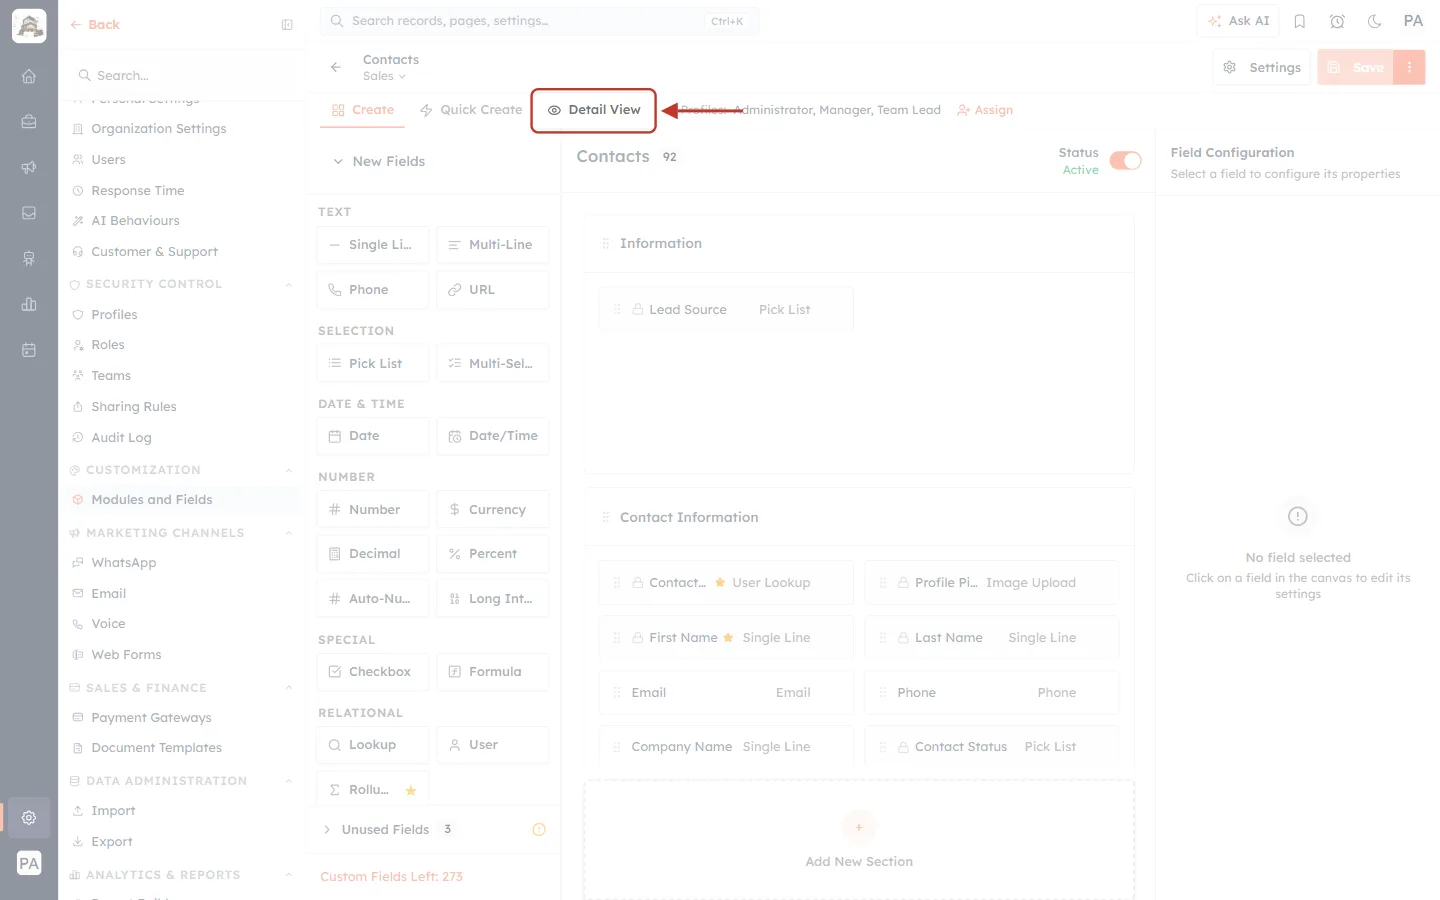
What this screenshot shows. The tabs under the builder’s header, with Detail View ringed. The header shows Contacts / Sales.
Create and Quick Create are the forms people fill in.
Detail View is how a record reads when someone opens it — including its related lists.
Step 3: Scroll down to Related Records Columns#
On the Detail View tab, scroll the canvas (the middle column) to the very bottom, below the sections and the Add New Section box.
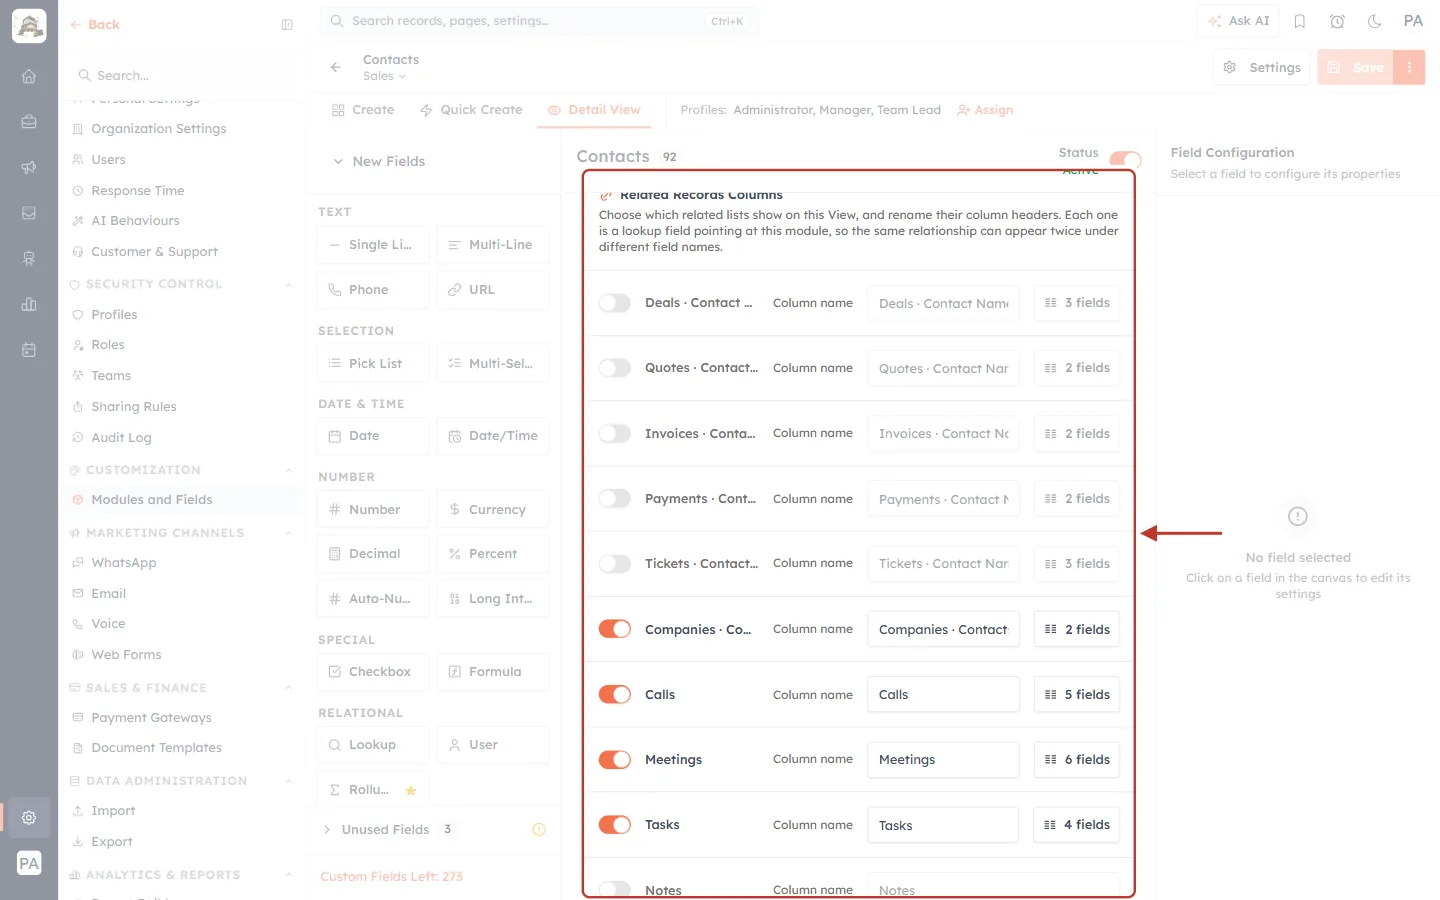
What this screenshot shows. The Related Records Columns panel, ringed, at the bottom of the Detail View canvas.
The note at the top says: choose which related lists show on this View and rename them. Each one comes from a lookup field pointing at this module, so the same module can appear twice under different field names.
Each row is one related list. Its name shows the module and the lookup field it comes from, for example Deals · Contact Name (deals whose Contact Name is this contact).
On each row: an on/off switch, the list’s name, a Column name box, and a fields button (for example 3 fields).
Here, Deals, Quotes, Invoices, Payments and Tickets are off; Companies, Calls, Meetings and Tasks are on.
ℹ️
If the panel says “Nothing points at this module yet”, no other module has a lookup field to this one. Add a Lookup field in another module first — see Advanced Field Types.
Part 2: Show a related list and set it up#
Step 4: Switch the list on#
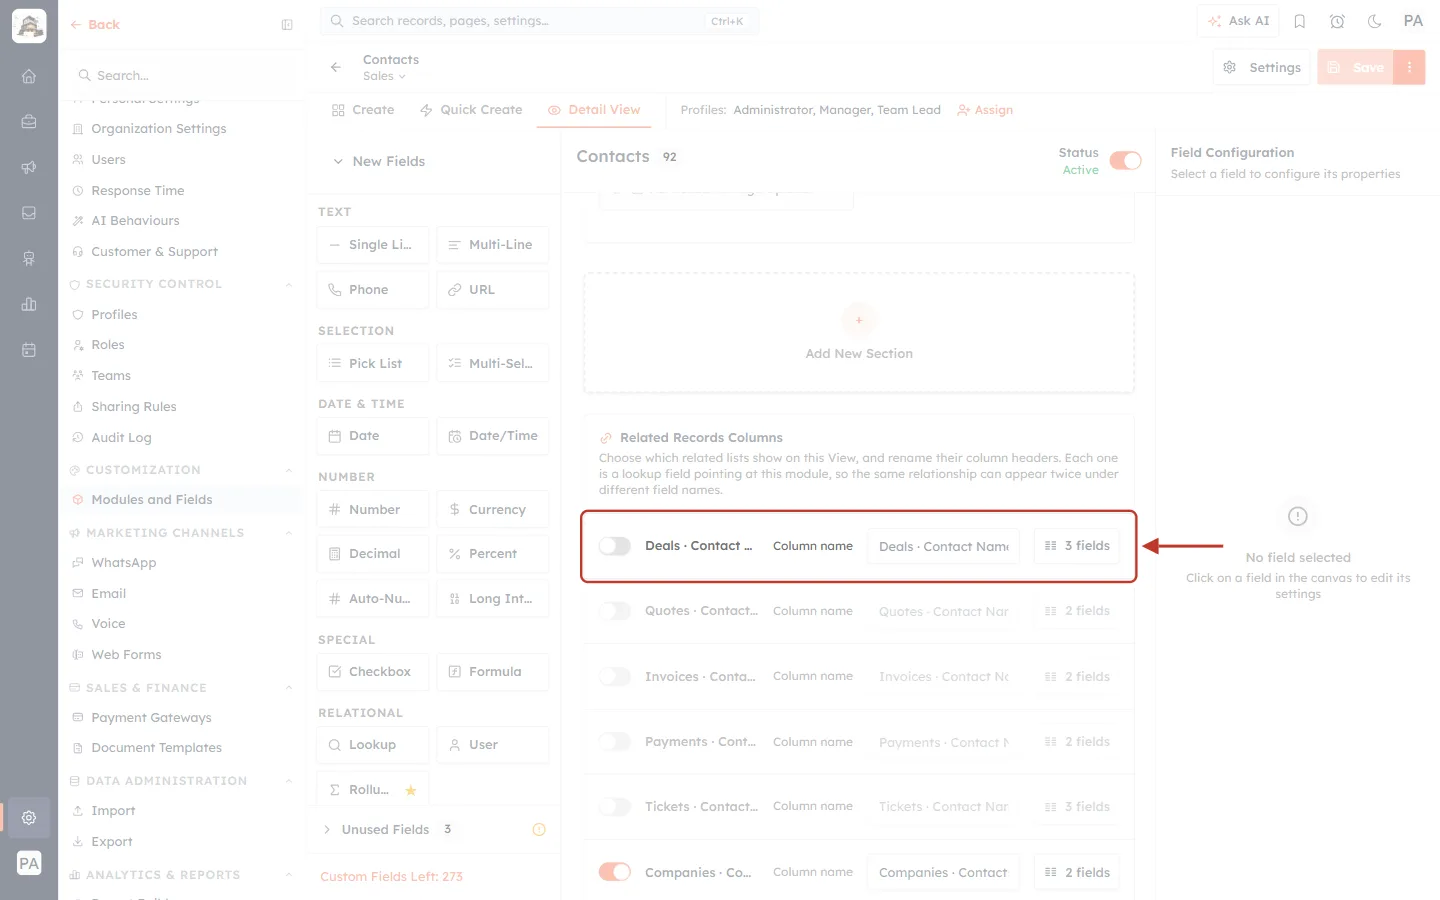
What this screenshot shows. The Deals · Contact Name row, ringed. Its switch is off (grey), and its Column name box and fields button are faded.
While a list is off, it is not shown on records opened with this layout, and its name and columns can’t be edited.
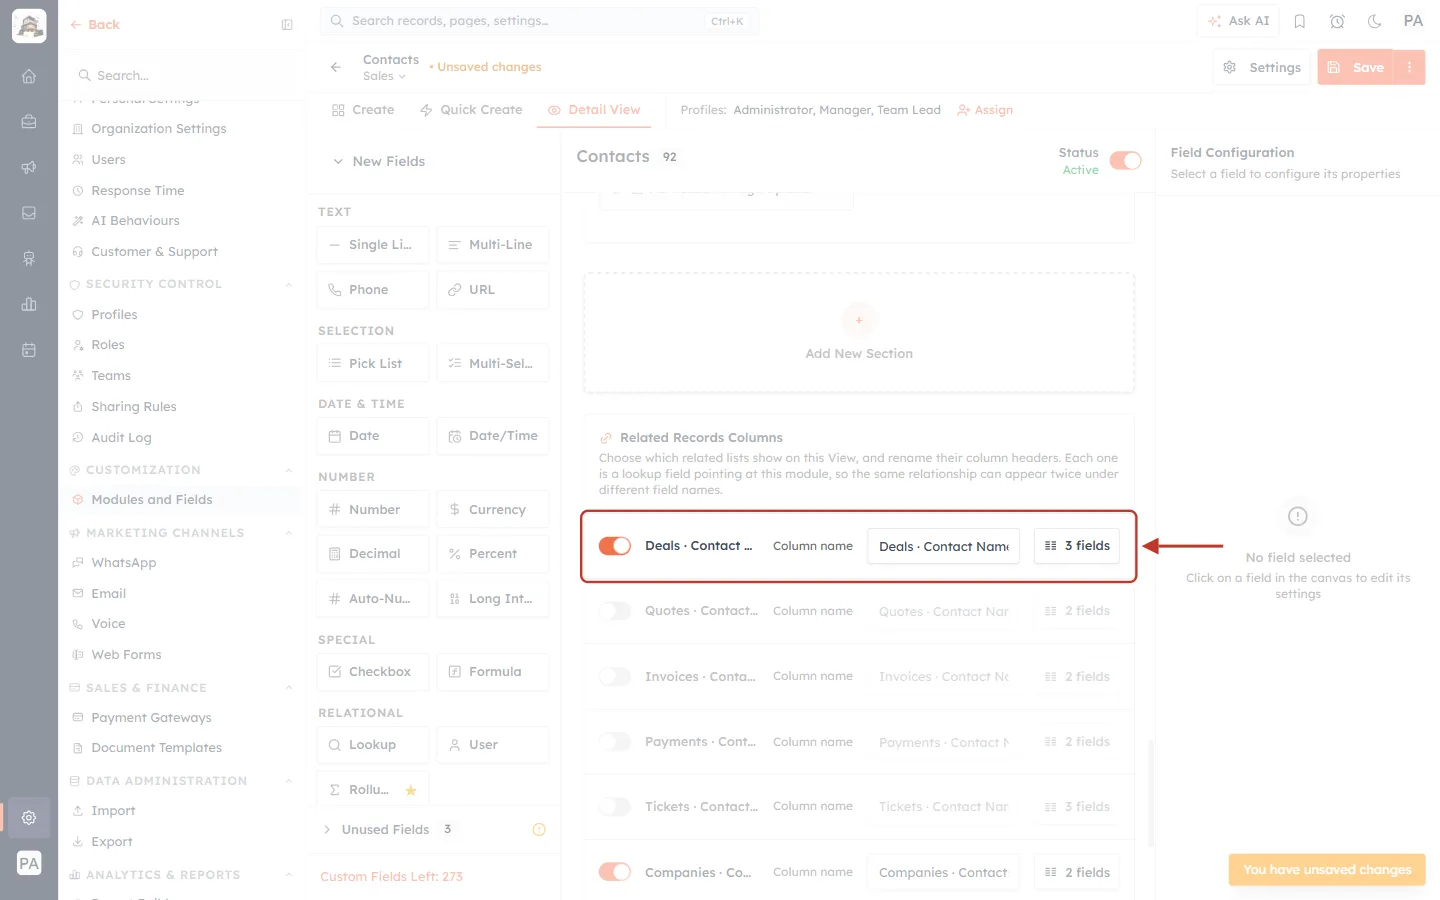
What this screenshot shows. The same row after clicking the switch, ringed. The switch is orange and the row can be edited.
The orange • Unsaved changes label appears at the top of the builder.
Step 5: Rename the list for this layout#
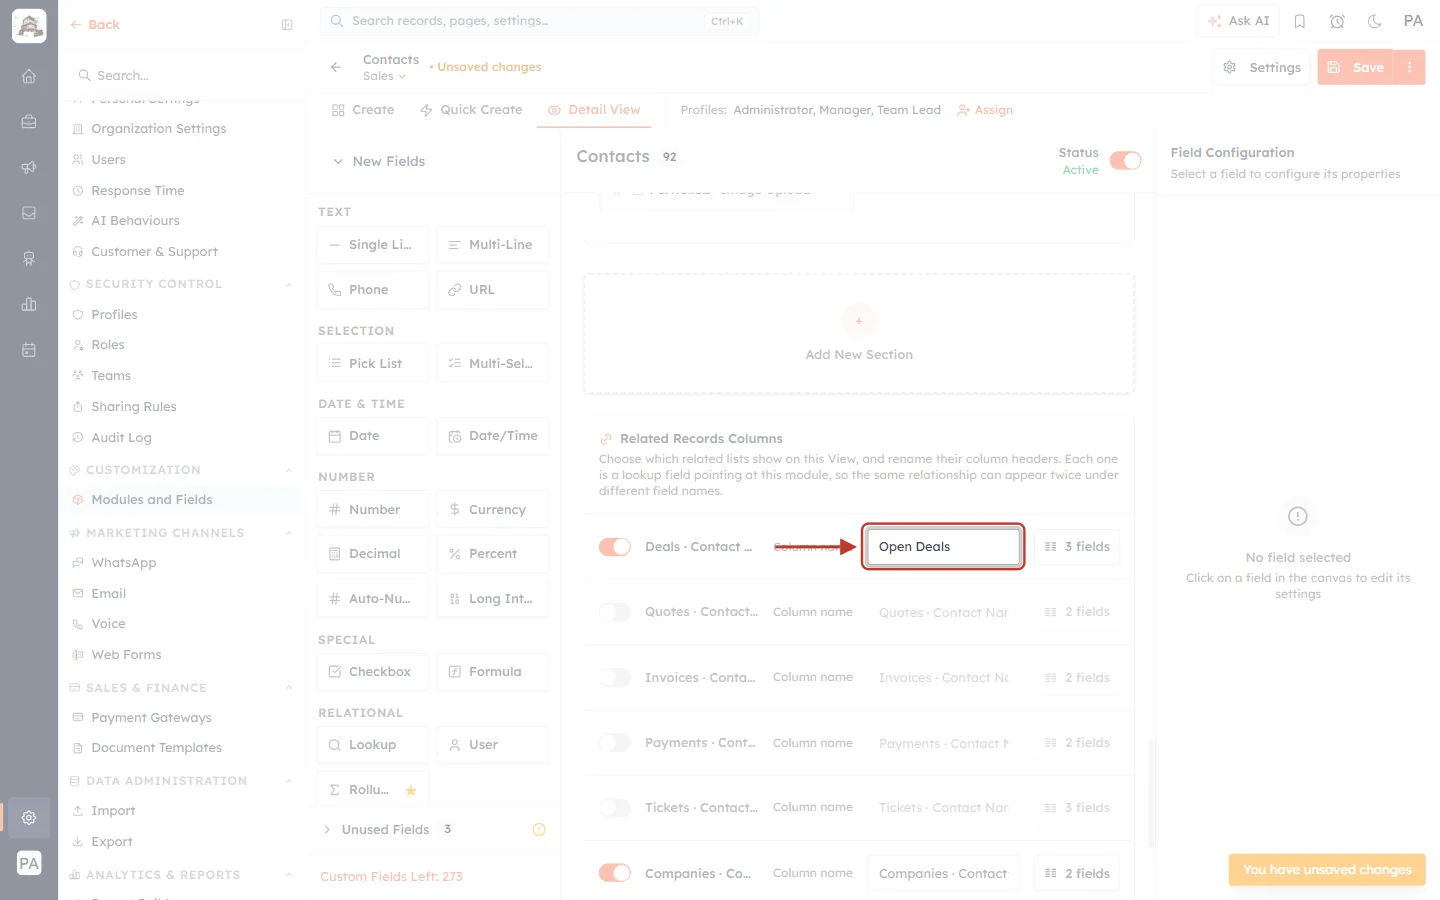
What this screenshot shows. The Column name box of the Deals row, ringed, with Open Deals typed in.
This is the name the list is shown under on records opened with the Sales layout.
Other layouts keep their own name for the same list.
Step 6: Open the column picker#
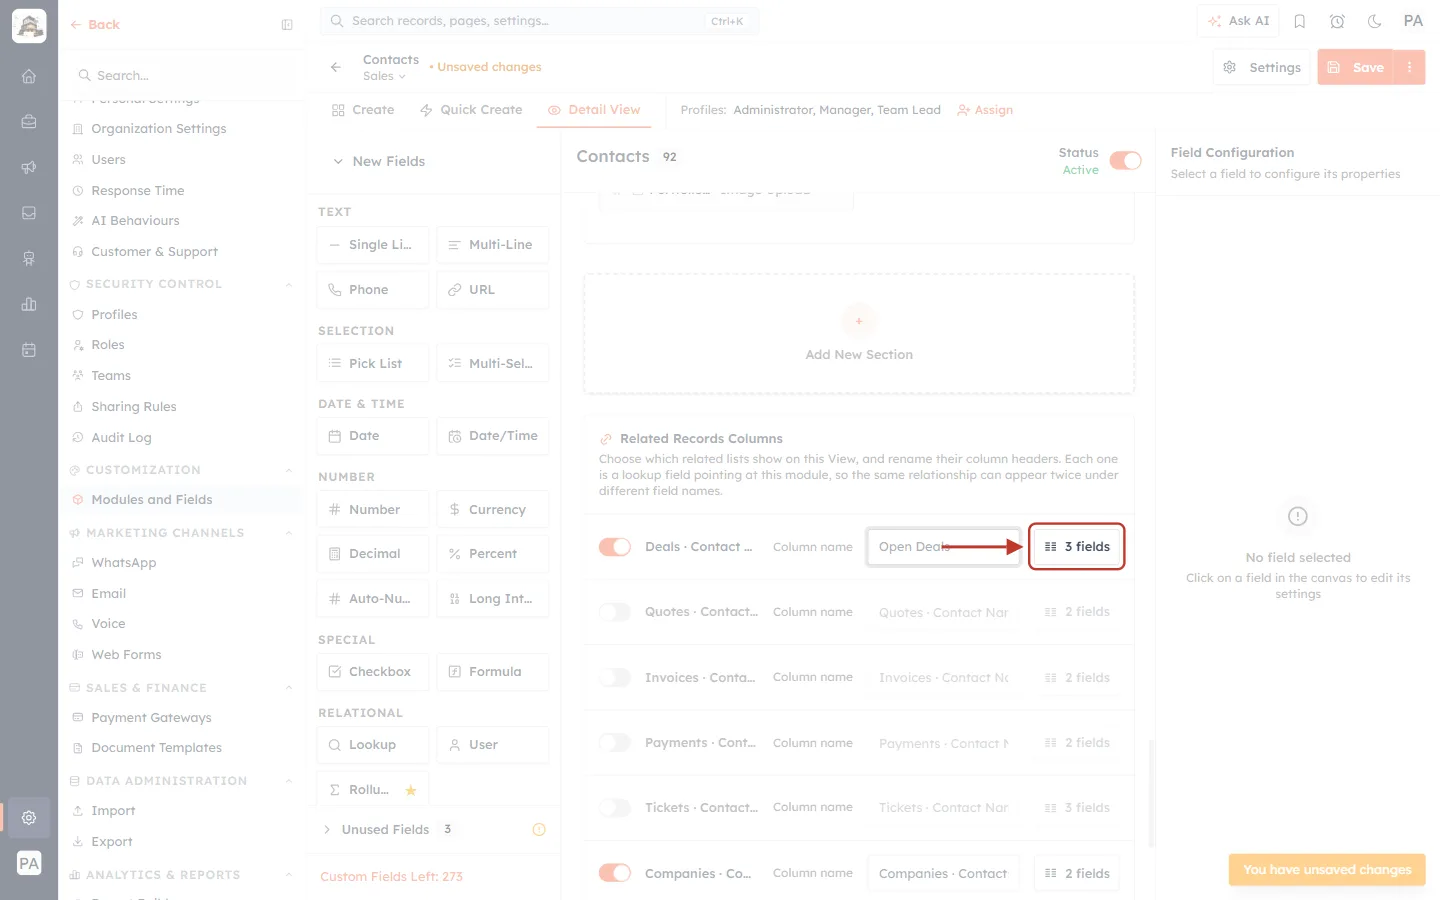
What this screenshot shows. The 3 fields button at the right end of the Deals row, ringed.
It says how many columns the list shows now. Before you choose any, it counts the related module’s required fields, which are shown by default.
The Notes row has no fields button: notes are shown as text, not in columns.
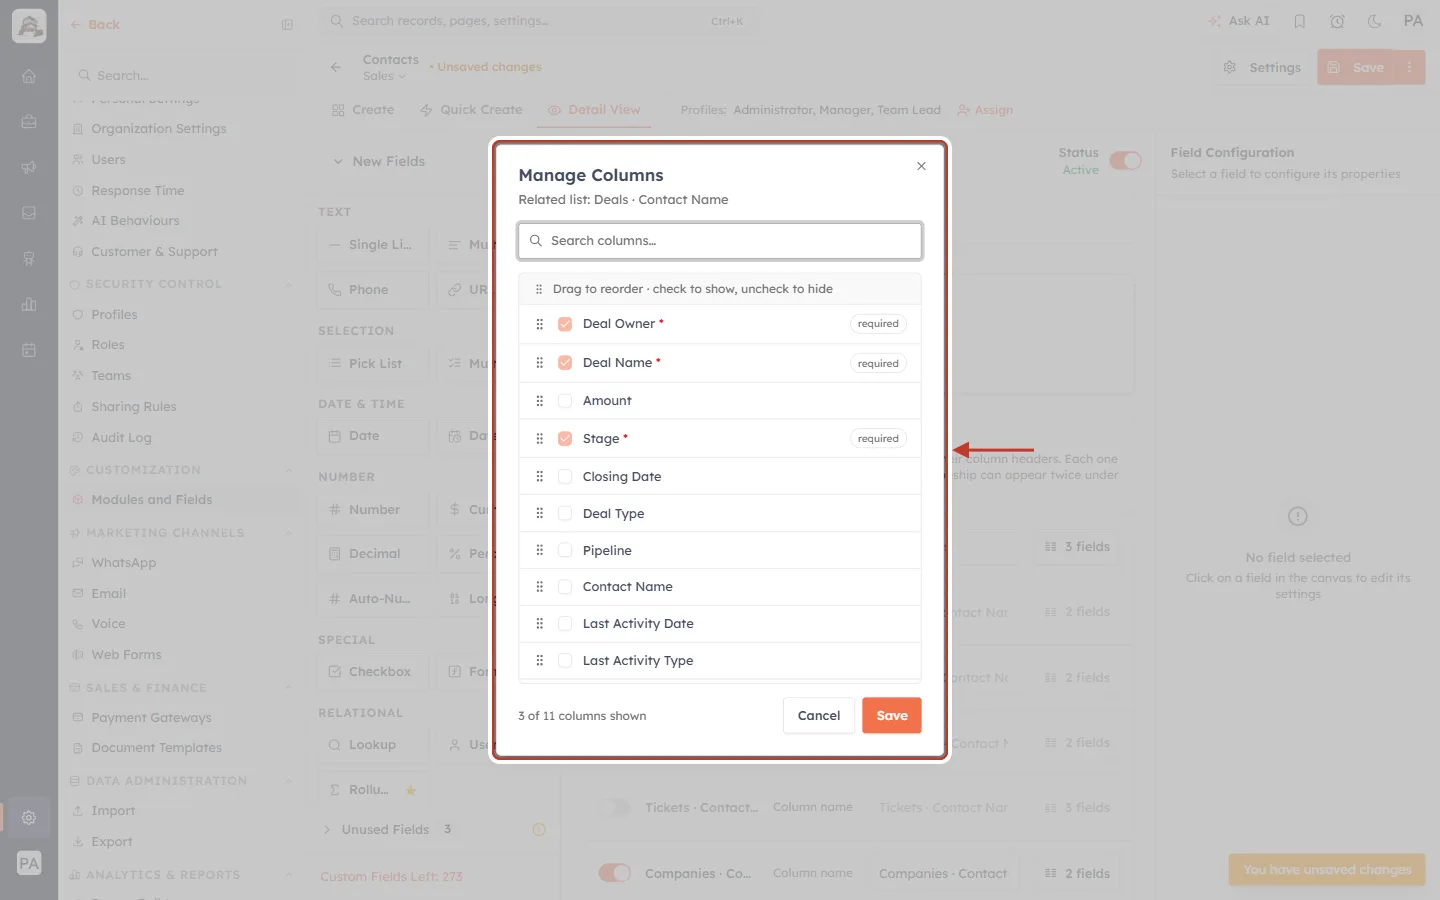
What this screenshot shows. The Manage Columns window, ringed. Under the title: Related list: Deals · Contact Name.
Search columns… — find a field quickly.
The list of fields, with the note Drag to reorder · check to show, uncheck to hide.
Deal Owner, Deal Name and Stage are ticked and marked required: required fields are always shown and can’t be unticked, so every row stays readable.
The footer reads 3 of 11 columns shown. Cancel and Save are on the right.
Fields that don’t fit in a small card — long text, rich text, files and images — are not offered.
Step 7: Tick the columns you want and put them in order#
Tick the fields to show. Drag a field by the dots on its left to change the order: the list shows columns top to bottom in this order. In this example, tick Amount, Closing Date and Pipeline.
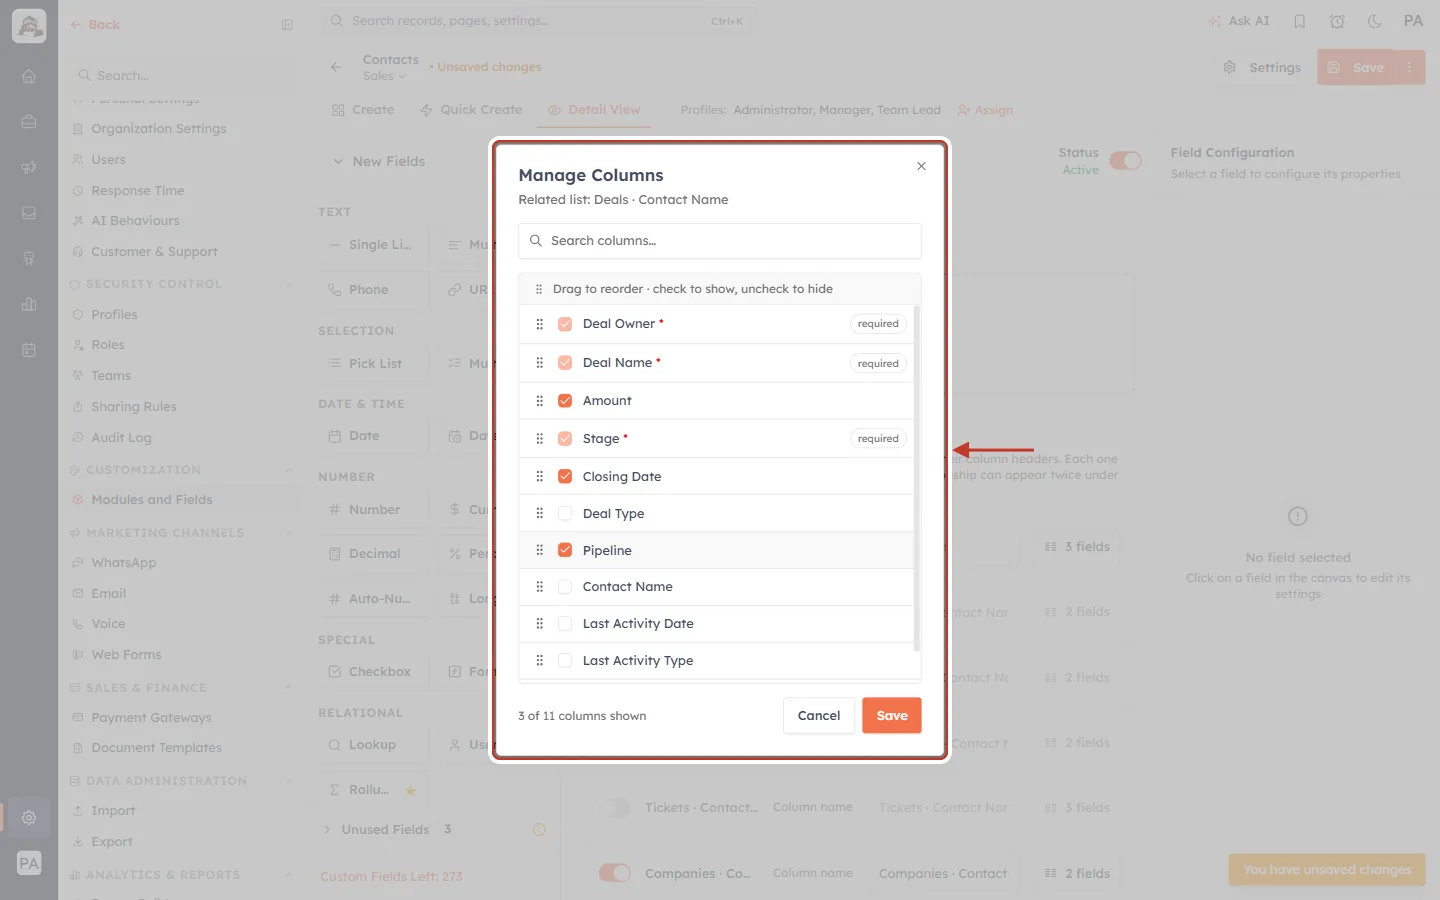
What this screenshot shows. The field list after ticking, ringed: Amount, Closing Date and Pipeline now have a tick next to the three required fields.
Untick a field to hide it again (required fields stay ticked).
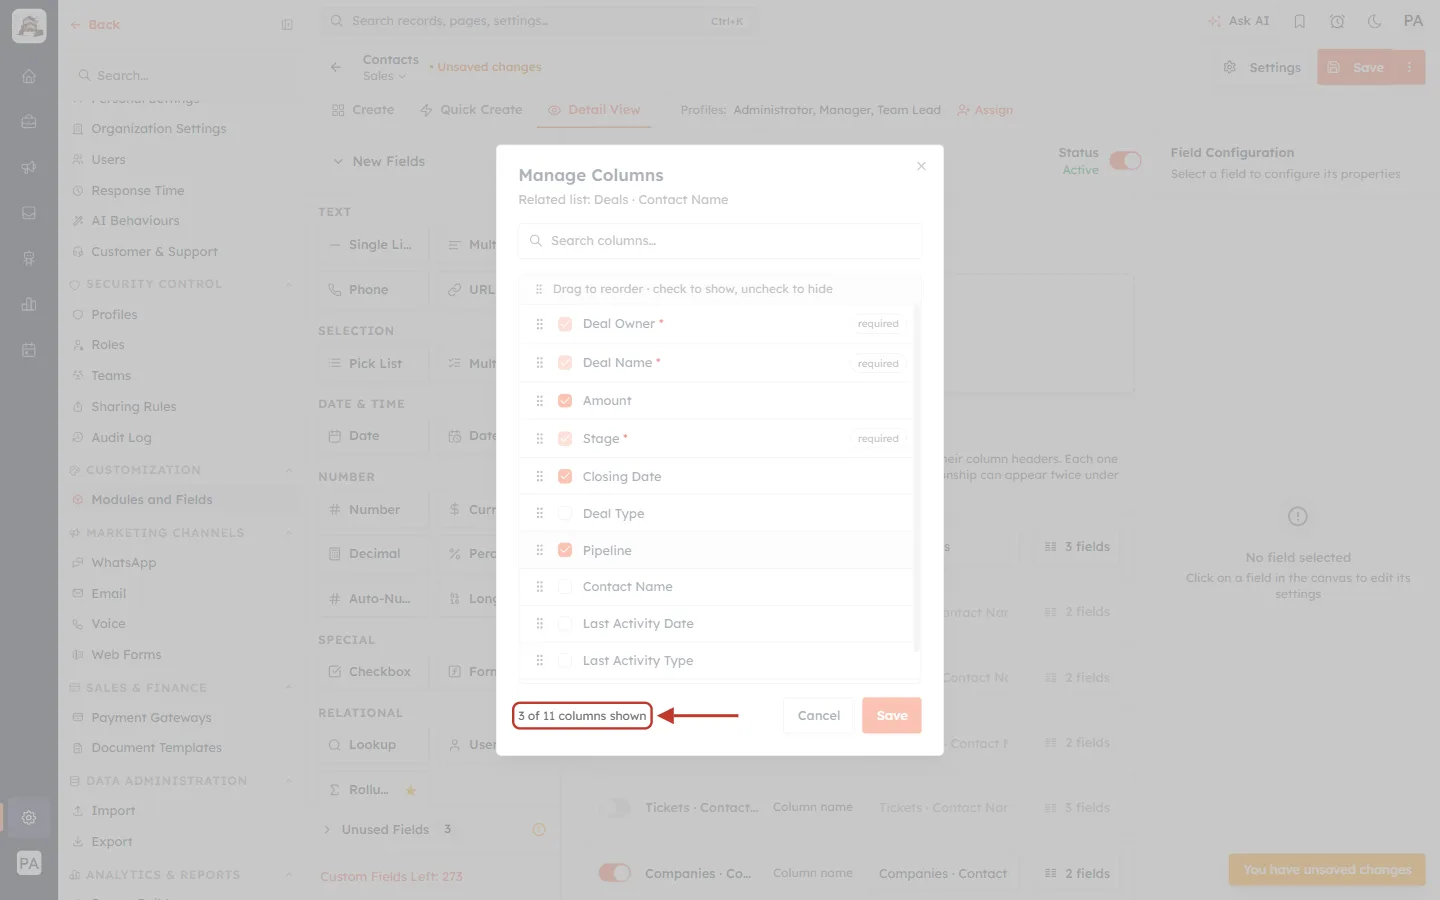
What this screenshot shows. The footer of the window, ringed: 6 of 11 columns shown.
It updates as you tick and untick.
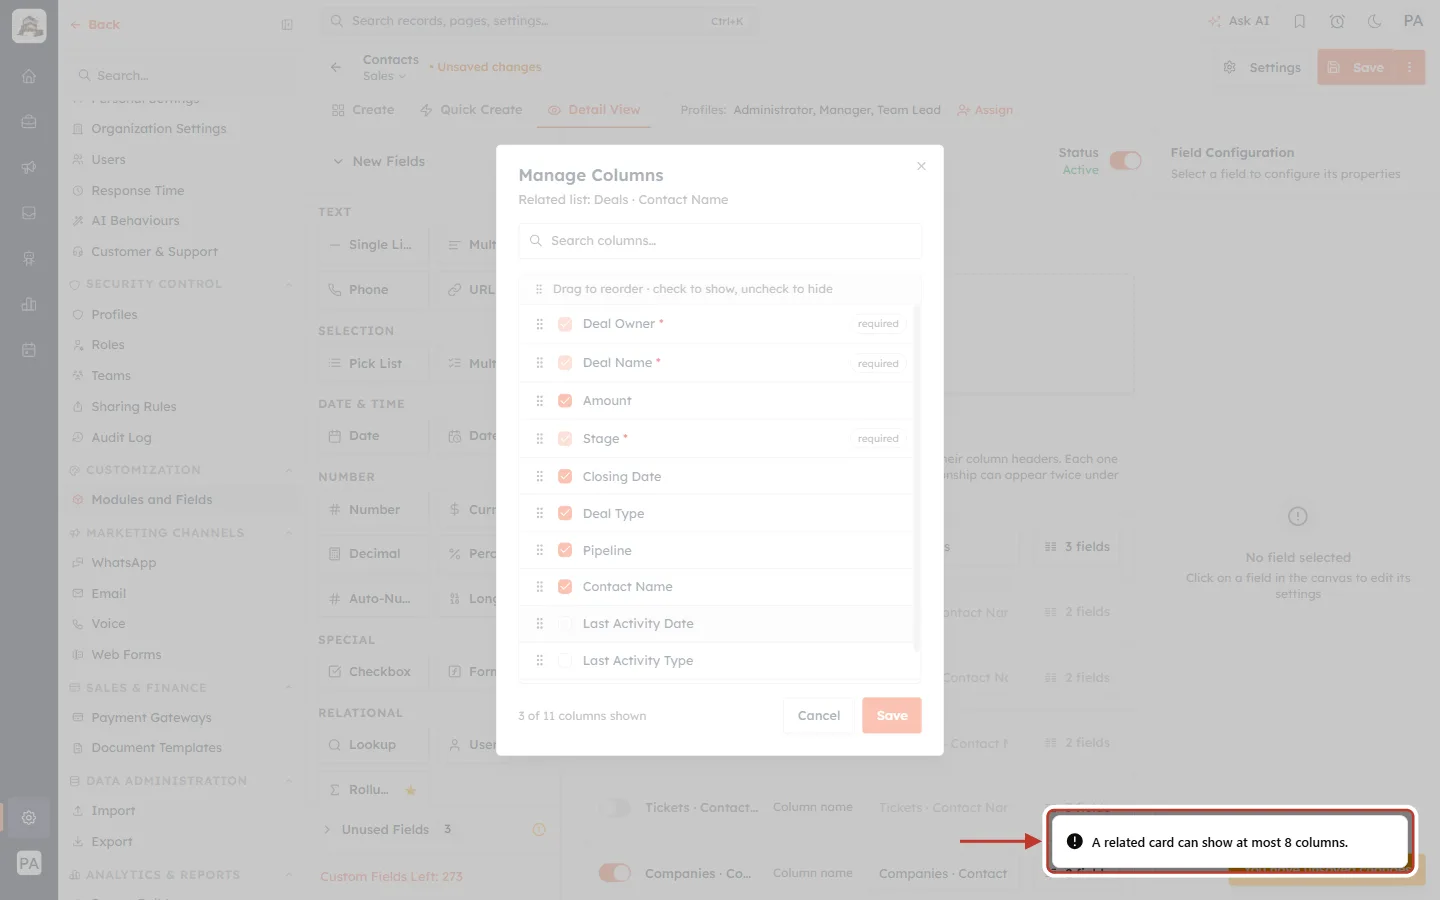
What this screenshot shows. What happens if you try to tick a ninth column: the message “A related card can show at most 8 columns.” (ringed) and the field stays unticked.
A related list is a short summary. Untick another column first if you want to swap one in.
Step 8: Save the columns#
Click Save in the Manage Columns window.
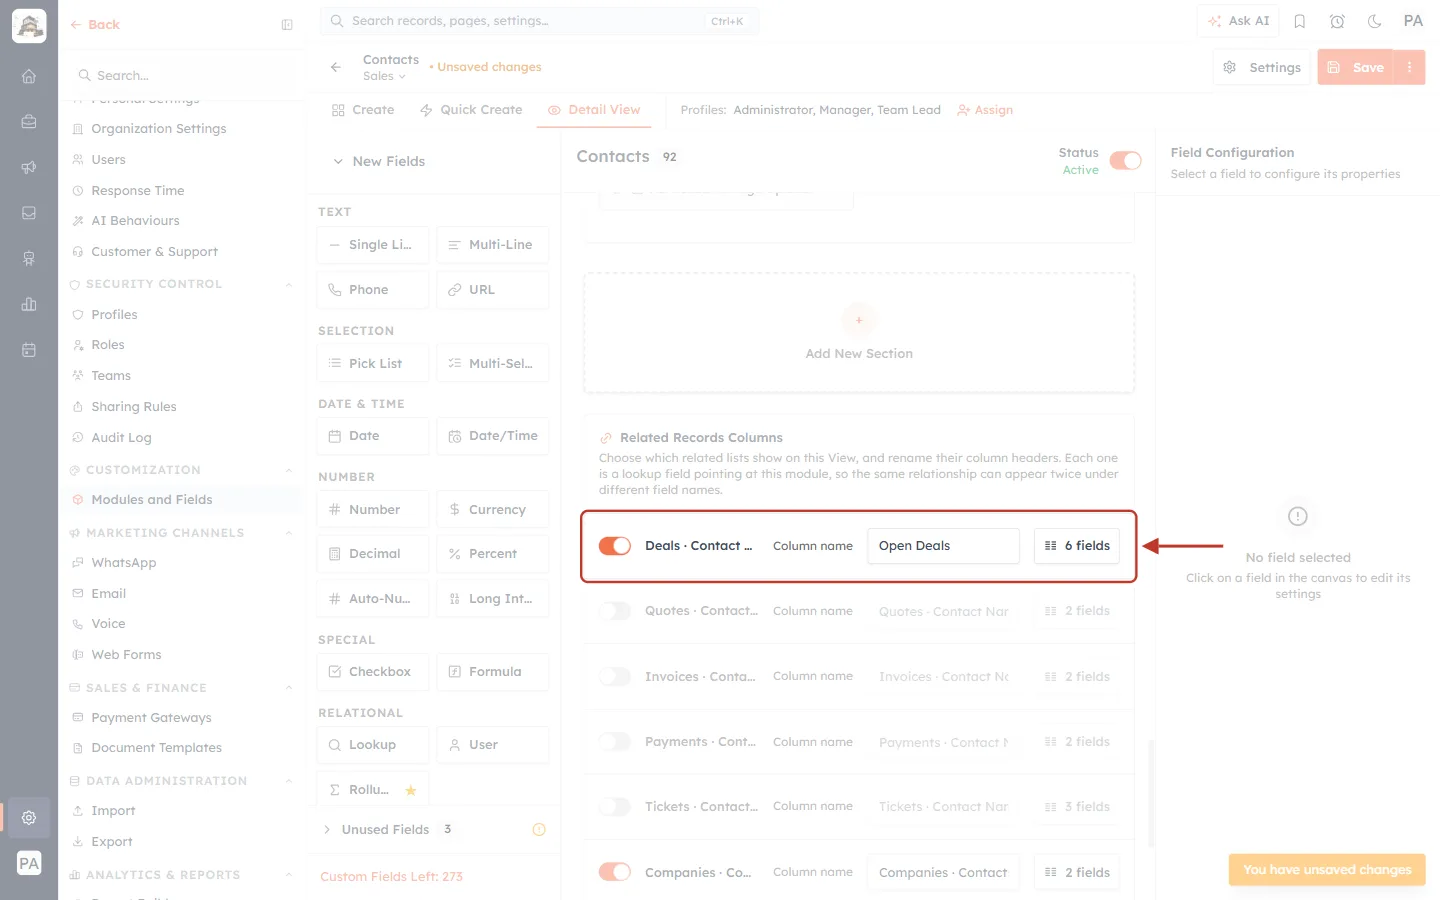
What this screenshot shows. The Deals row back in the panel, ringed: switch on, Column name Open Deals, and the button now reads 6 fields.
The window’s Save only keeps your choice in the builder — the layout itself is saved in Step 10.
Part 3: Hide a related list on this layout#
Step 9: Switch the list off#
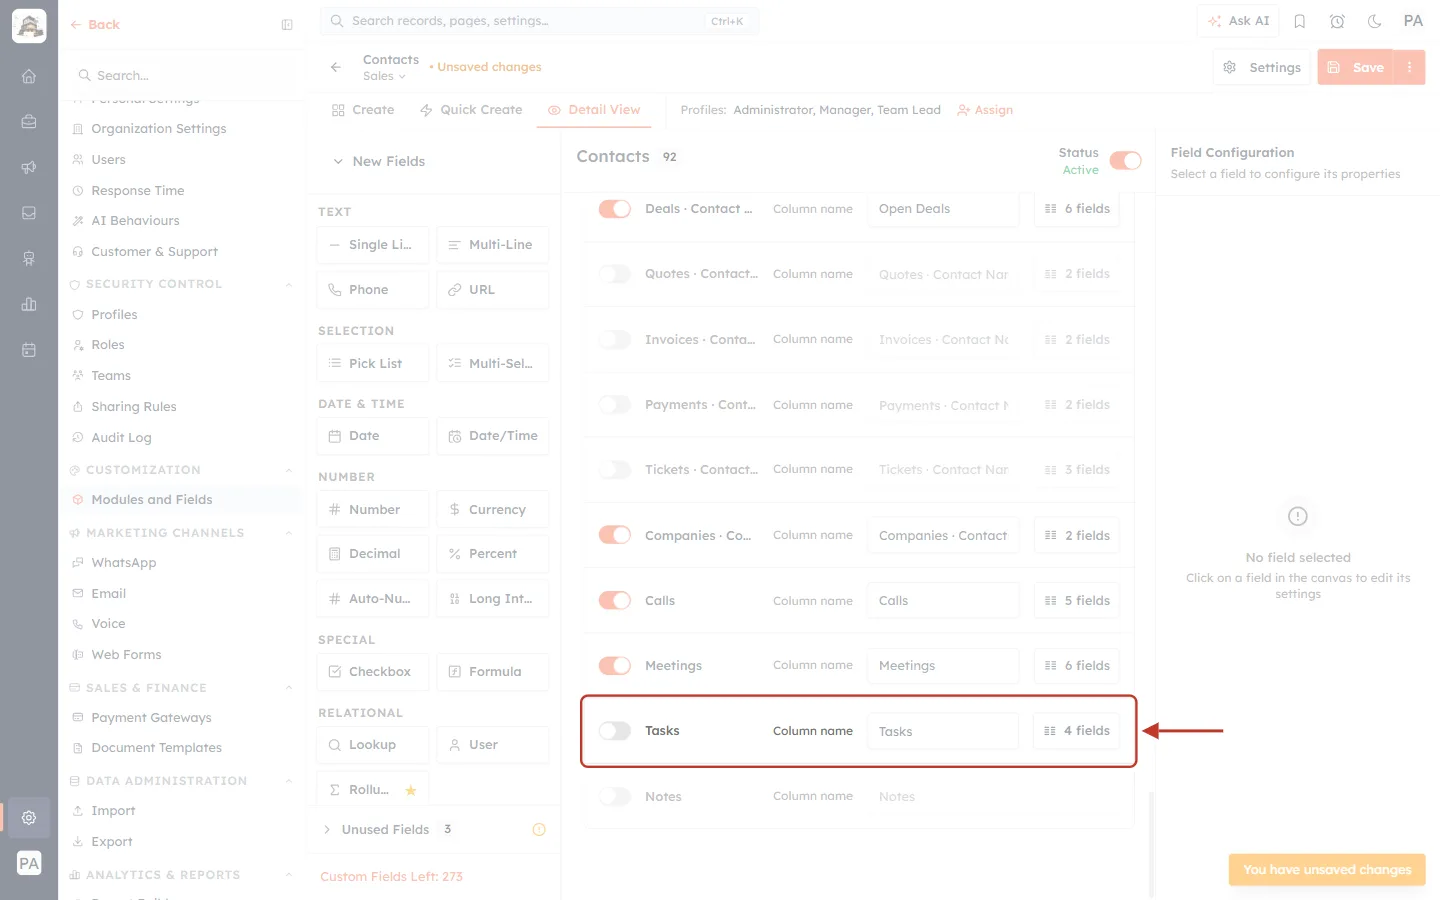
What this screenshot shows. The Tasks row, ringed. Its switch is now off and the row is faded.
Records opened with the Sales layout will no longer show the Tasks list.
Nothing is deleted: tasks still exist and still appear on other layouts that show the list. Switch it back on any time.
Part 4: Save the layout#
Step 10: Click Save at the top of the builder#
Related Records Columns has no Save button of its own. Your changes are saved together with the rest of the layout by the builder’s orange Save button.
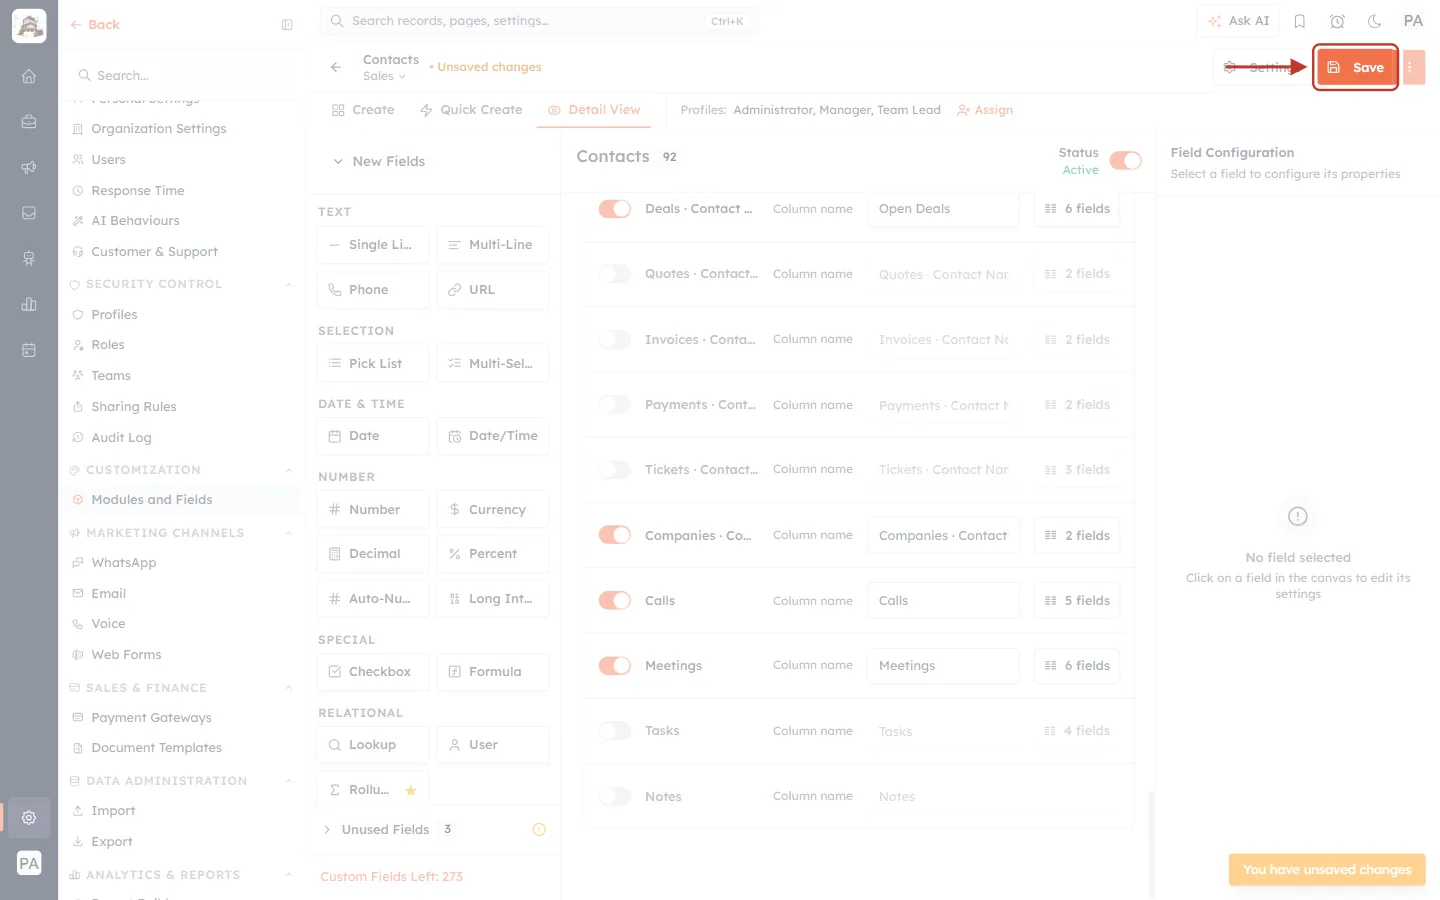
What this screenshot shows. The orange Save button at the top right of the builder, ringed.
To throw your related-list changes away instead, use Discard Changes in the menu next to Save.
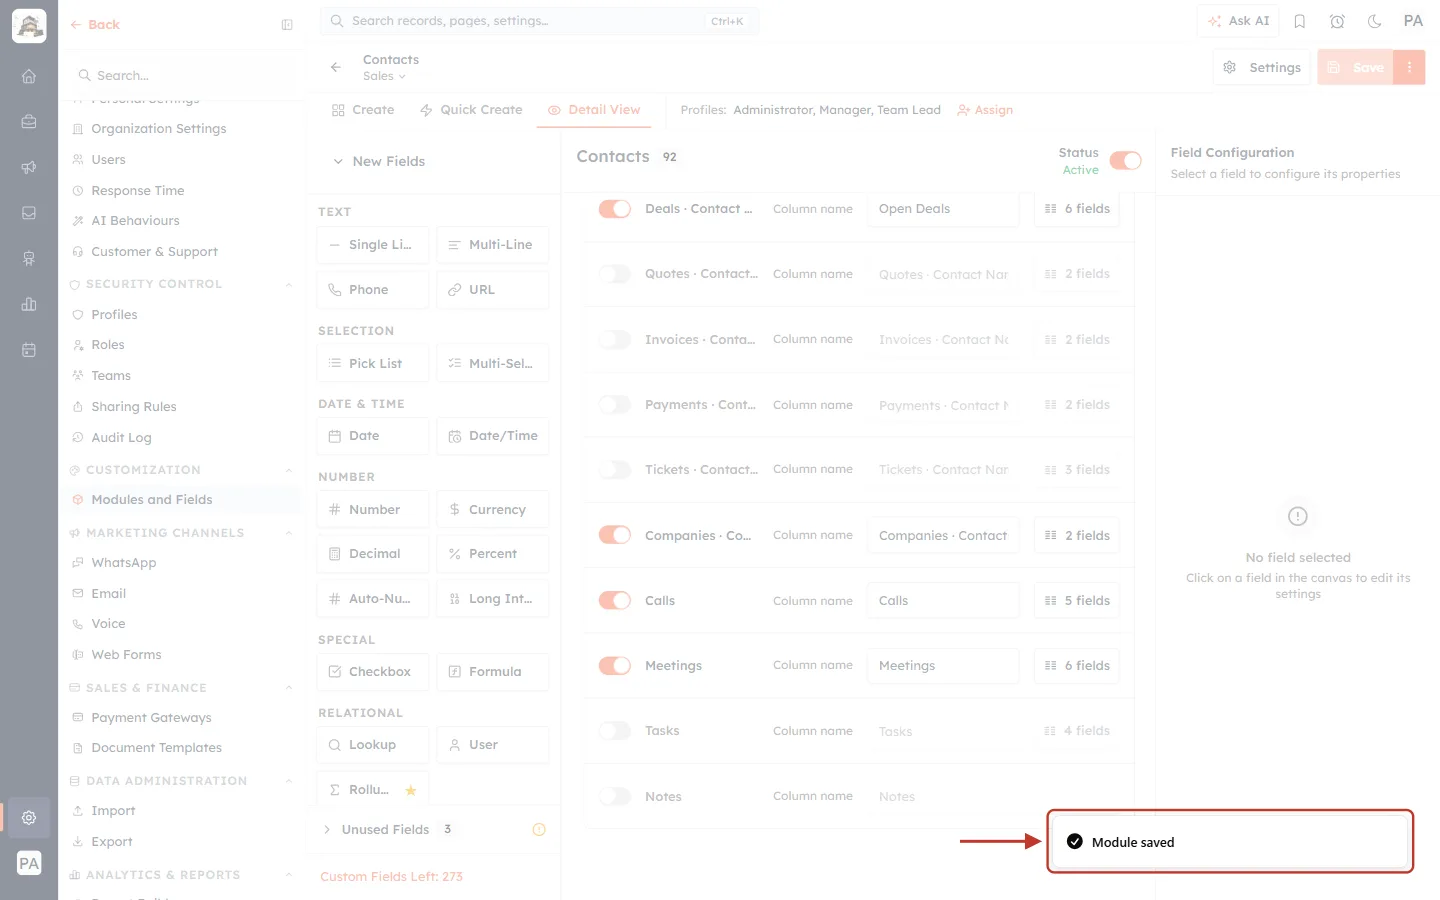
What this screenshot shows. The confirmation at the bottom right, ringed: Module saved.
Records opened with the Sales layout now show Open Deals with your six columns, and no Tasks list.
Step 11: Check another layout#
Switch to another layout with the layout name at the top left of the builder (here Standard), open its Detail View tab and scroll to Related Records Columns.
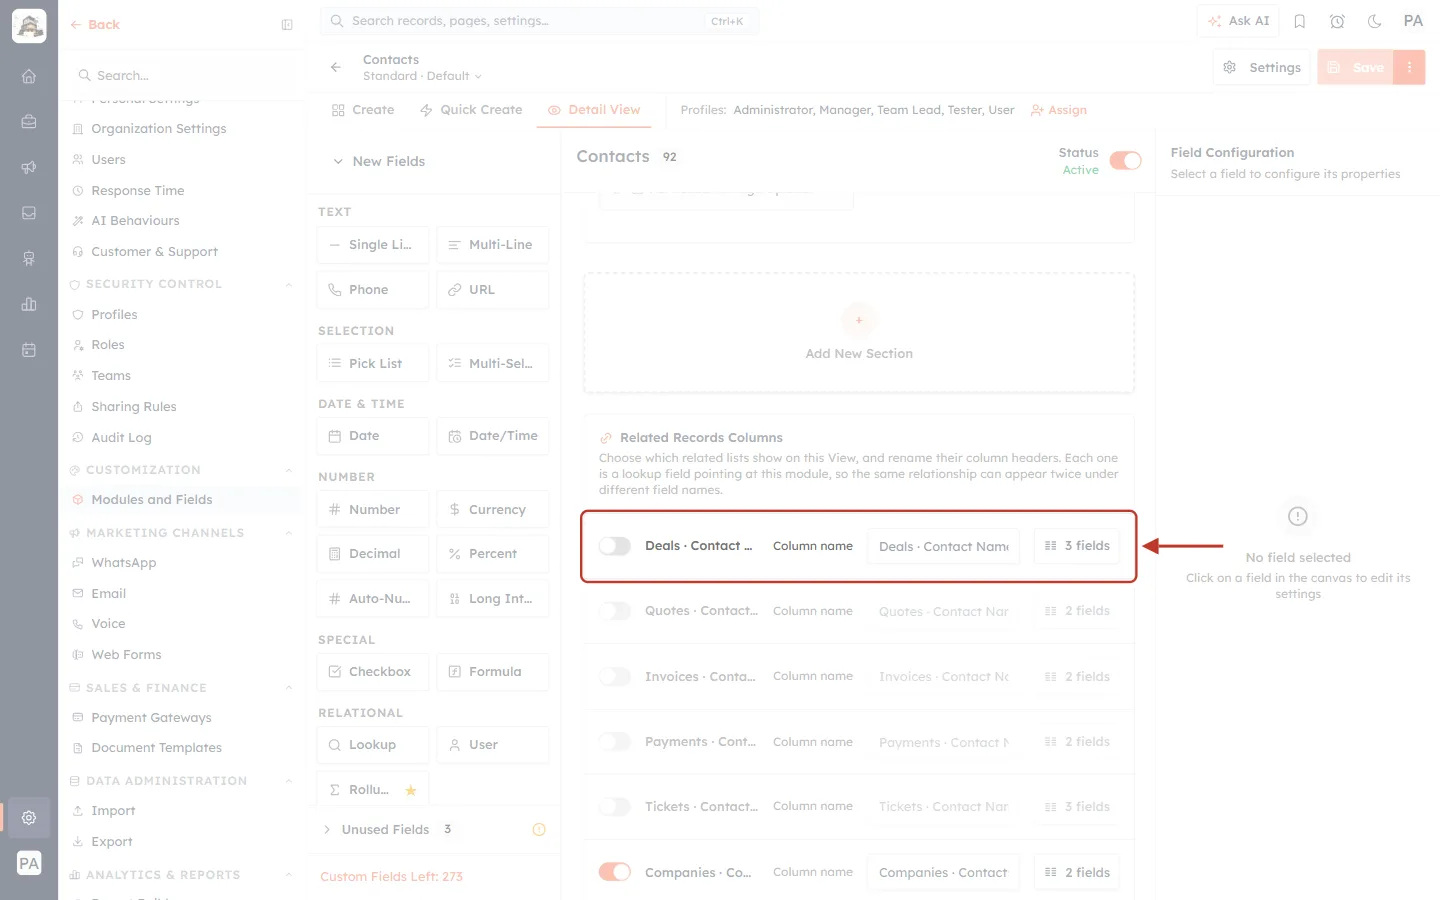
What this screenshot shows. The Deals · Contact Name row on the Standard layout, ringed.
It is still off, still named Deals · Contact Name and still shows the default 3 fields: the Sales changes did not touch Standard.
Every layout keeps its own related-list settings.
✅
Open a contact whose layout is Sales to see the result. If someone opens it on another layout, they see that layout’s related lists instead.
Common questions#
Why does the same module appear twice in the panel?#
Each row comes from one lookup field. If Deals has two lookup fields to Contacts (for example Contact Name and Referred By), each gives its own related list, and you can show, name and set up each one separately.
What if I never set up a related list?#
It behaves as it always has: it shows with its default name and the related module’s required fields as columns.
Does hiding a related list delete anything?#
No. It only hides the list on records opened with that layout. The related records are not changed.
Can I show more than 8 columns?#
No. A related list is a short summary card, so 8 columns is the maximum. Open the related record to see all its fields.
My changes disappeared. What happened?#
Changes in the panel are only saved by the builder’s Save button. If you left the builder without saving, or clicked Discard Changes, make them again and click Save.
Previous and next#
Previous: Delete a Layout and Move Its Records: Remove a Form Without Losing Any Data
Next: Quick Create Fields per Layout: Choose the Short Form for “+ New”
Related articles#
Was this article helpful?
Ready to implement this?
OpenAI Engage and apply what you just learned to your own workspace.
Open AI Engage CRM