Loading…


KnowledgeBase
Create a New Module: Build Custom Modules for Your CRM
What is a custom module?#
AI Engage CRM ships with a Contacts module as standard. A custom module lets you extend the CRM with any other type of record your business tracks — Projects, Invoices, Properties, Support Tickets, Vendors, or anything else.
Each module you create gets its own data table, its own list view with sorting and filtering, and its own set of custom fields that you design using the visual Module Builder — no coding required.
💡
Custom modules require the Module Customization feature. If the Create Module button is greyed out, check your plan or contact your account owner.
Step 1 — Open the Modules list#
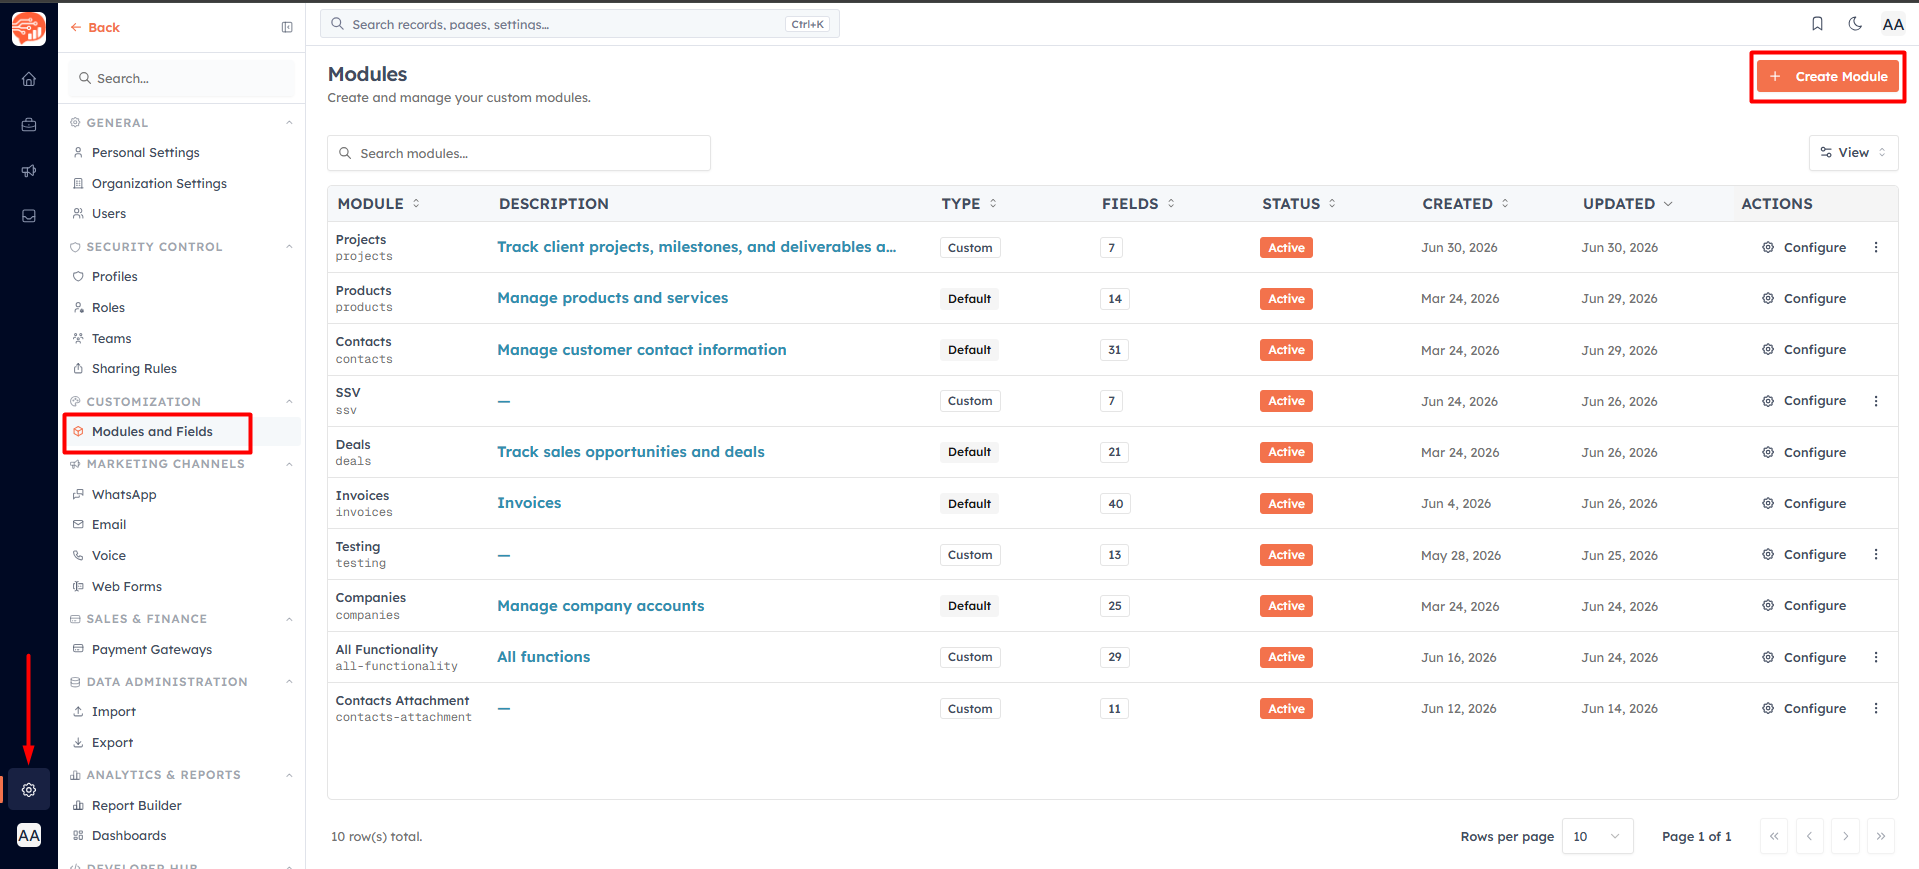
From the left sidebar, navigate to Settings → Modules. You will see all modules currently in your CRM — both default system modules and any custom ones already created.
Click the Create Module button at the top right of the page.
Step 2 — Fill in the module details#
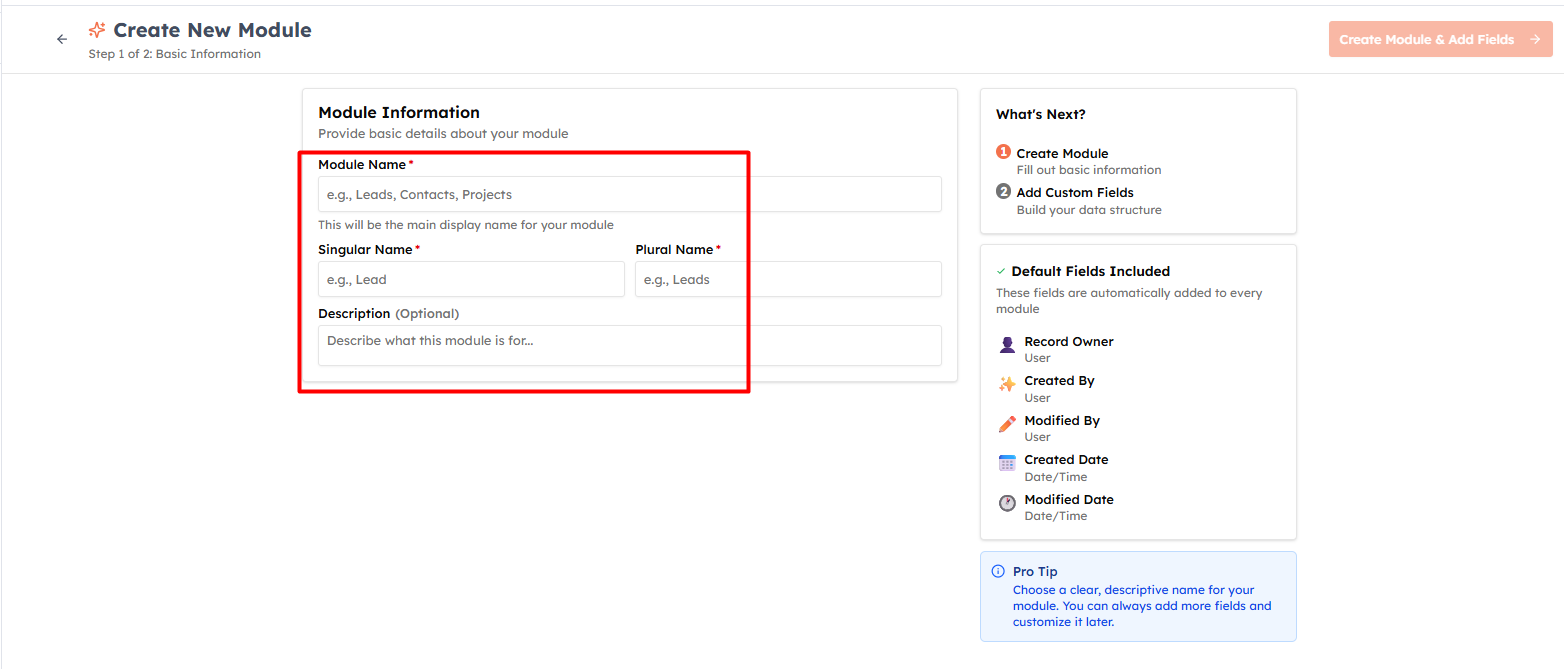
The Create Module form has four fields:
Module Name — The internal name used throughout the CRM (letters, numbers, and spaces only). Example: Projects
Singular Name — What one record is called. Auto-fills from Module Name. Example: Project
Plural Name — What multiple records are called. Auto-fills with an "s". Example: Projects
Description — Optional note about what this module tracks. Only visible to admins.
💡
The Singular and Plural Names auto-fill as you type the Module Name. Edit them manually if the auto-fill is wrong — for example, "Company" should become "Companies", not "Companys".
💡
Every custom module automatically gets five system fields: Record Owner, Created By, Modified By, Created At, and Updated At. These cannot be removed.
Step 3 — Create the module#
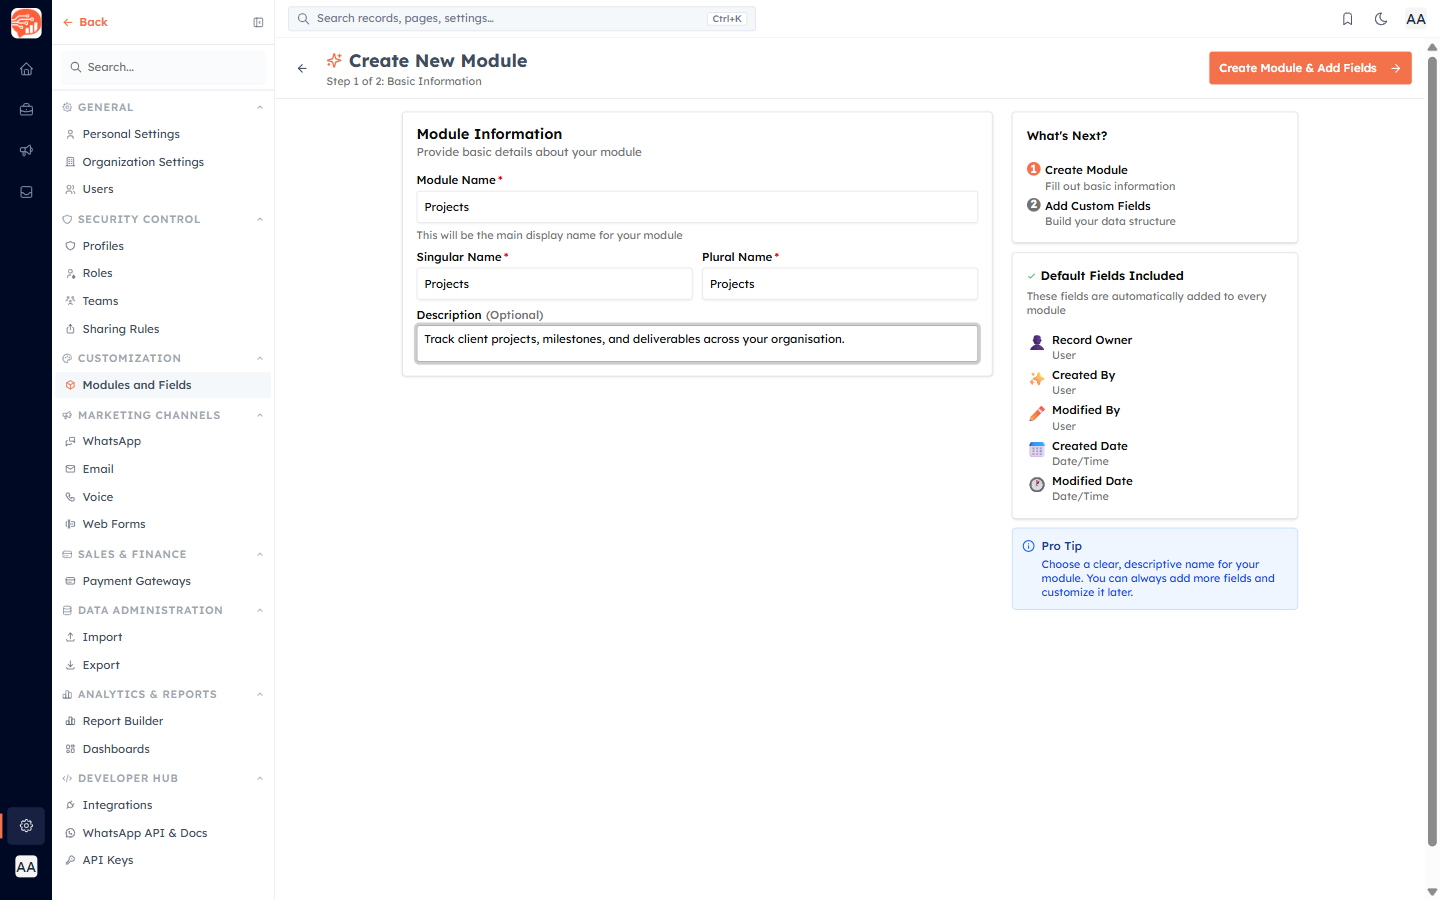
Once all three name fields are filled in, the Create Module & Add Fields button becomes active. Click it to create the module — you will be taken directly to the Module Builder to design your fields.
Step 4 — Design your fields in the Module Builder#
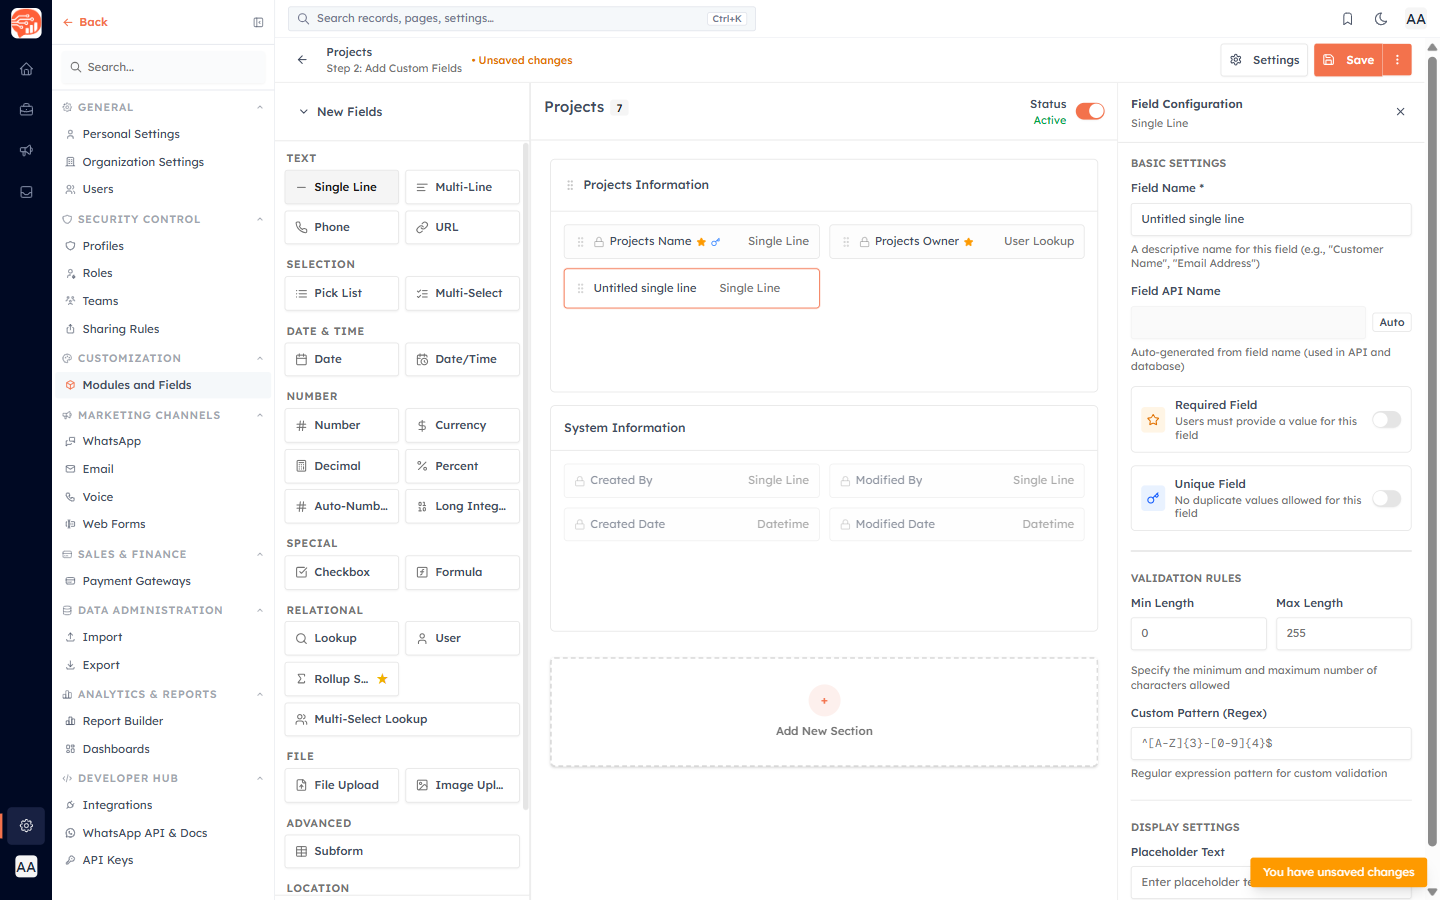
The Module Builder has three panels:
Left — Field Palette: all available field types. Click any type to add it to the canvas.
Centre — Canvas: your module's layout. Fields are organised into sections. Drag to reorder.
Right — Config Panel: appears when you select a field. Set the label, mark it required, add validation, or configure options for pick lists.
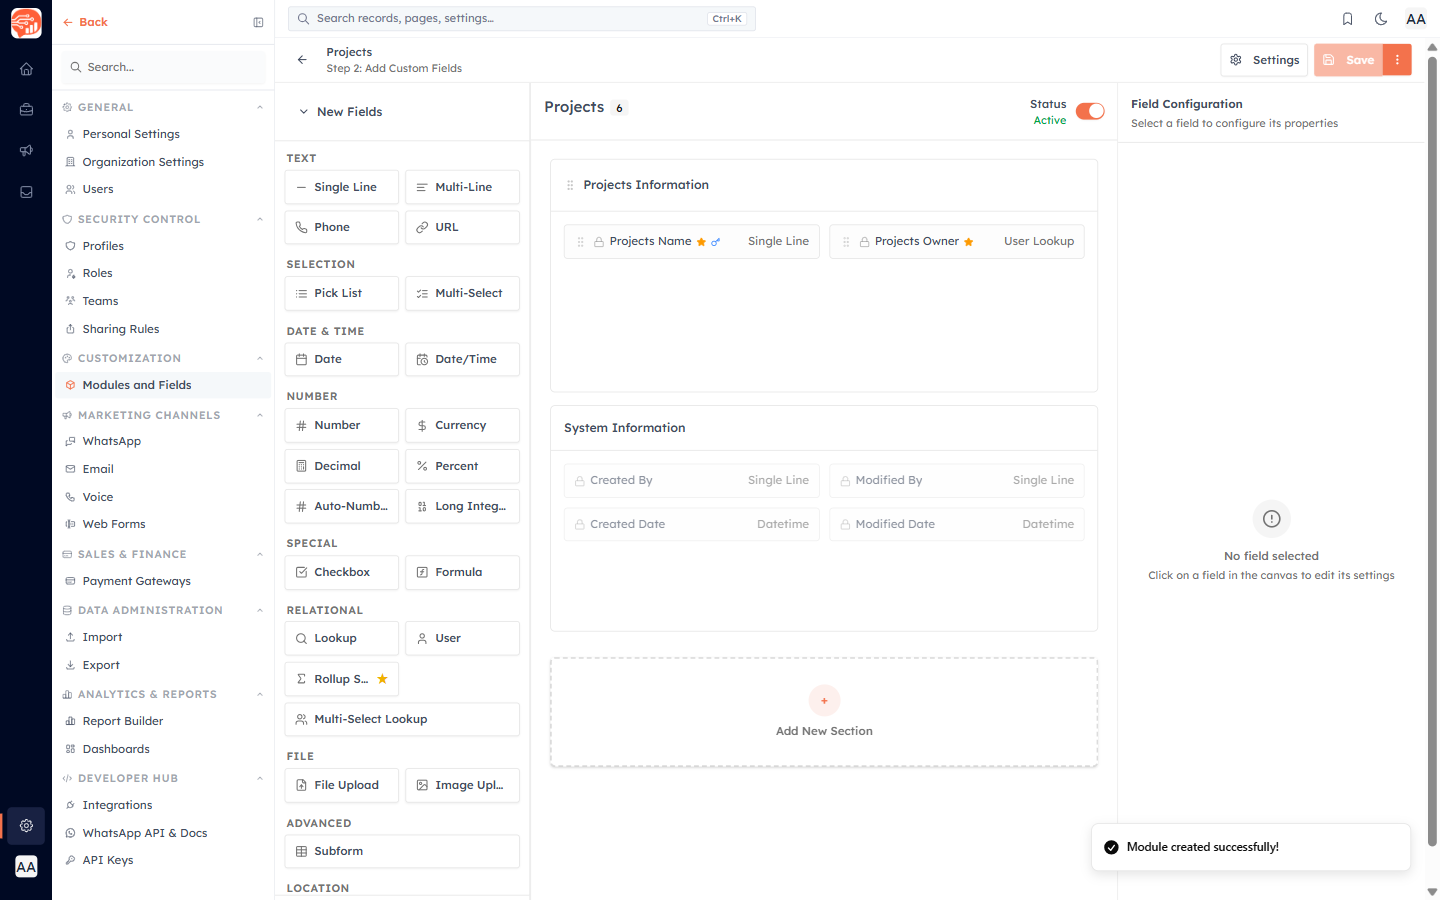
Click a field type in the palette to add it. The Config Panel opens immediately so you can set the field name and properties before continuing.
💡
A field's type cannot be changed after you save. If you need a different type — for example, converting a Text field to a Pick List — you must delete the field and add a new one. Plan your field types carefully before clicking Save.
💡
Add a required field for your main identifier first (e.g., Project Name, Invoice Number). This ensures every record has a meaningful label when it appears in list views and lookup dropdowns in other modules.
Step 5 — Save the module#
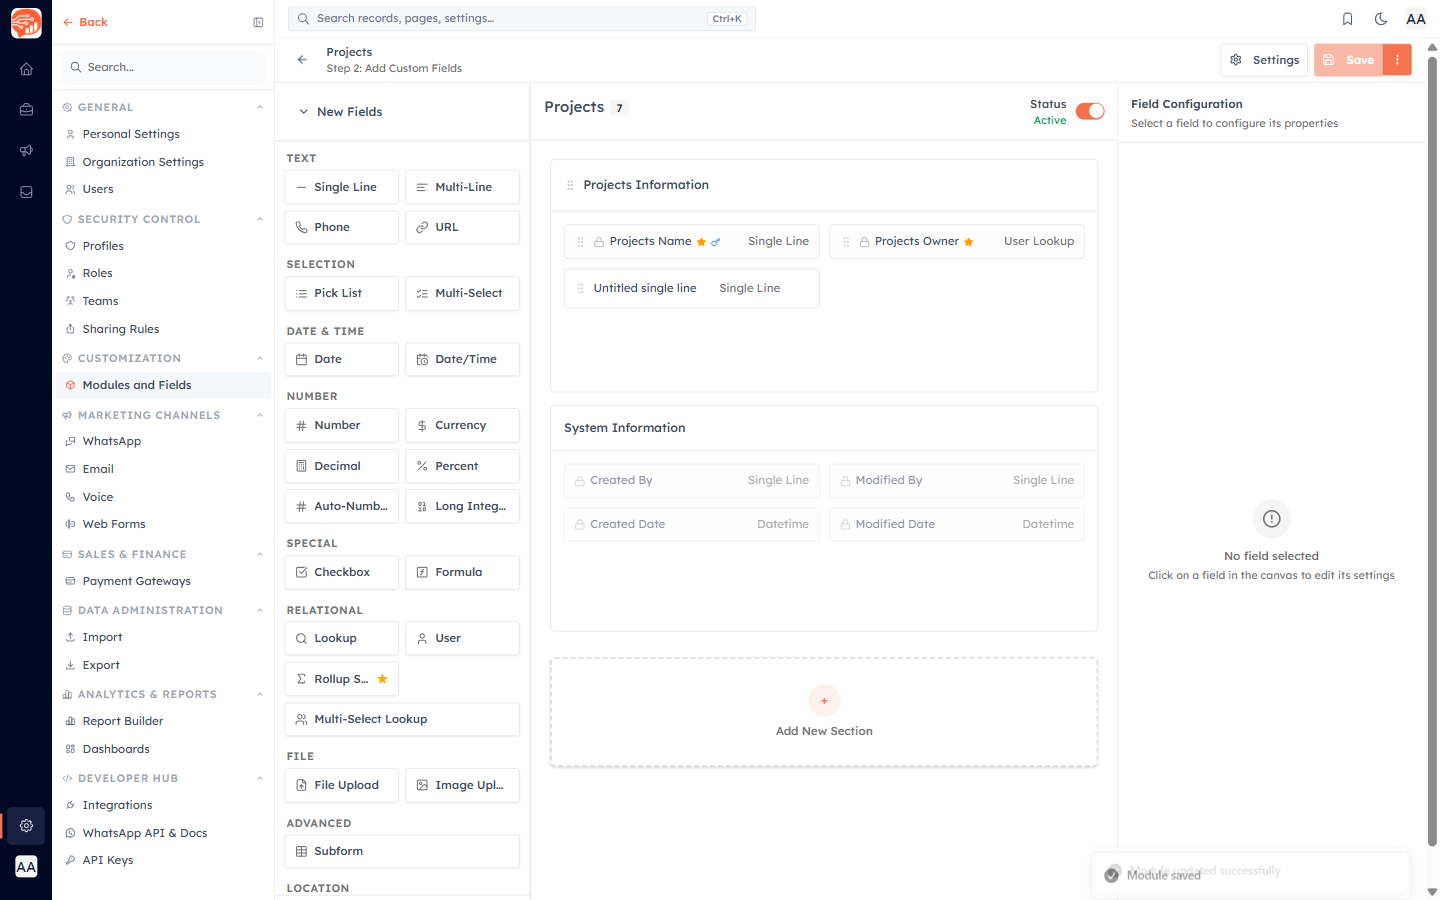
When your fields are ready, click the Save button in the top-right toolbar. The dropdown gives you two options:
Save — Saves the module and keeps the builder open so you can continue editing
Save and Close — Saves and returns you to the Modules list
💡
After saving, your new module is live. It appears in the left sidebar and team members with the right permissions can start creating records immediately.
💡
You can edit your module's fields at any time. From Settings → Modules, click the Configure button (settings icon) next to any module to reopen the Module Builder.
💡
Deleting a module permanently deletes all records inside it and cannot be undone. The default Contacts module cannot be deleted.
💡
Next up: Read Add Custom Fields and Configure Module Layouts for a complete guide to every field type and layout option in the Module Builder.
Was this article helpful?
Ready to implement this?
OpenAI Engage and apply what you just learned to your own workspace.
Open AI Engage CRM