Loading…


KnowledgeBase
Make a Field Required on One Layout Only: Ask Each Team for the Fields They Need (Step-by-Step)
Why make a field required on one layout only?#
A required field must be filled in before a record can be saved. That is useful — but a field that one team must fill in is often a field another team can’t fill in at all. Your sales team always knows a contact’s company, while your support team often deals with private customers who have none. If Company Name were required for everyone, support agents would be stuck typing “N/A”.
When a module has more than one layout, AiEngage CRM lets you decide per layout whether a field is required:
Required on one layout — the field must be filled in on, for example, the Sales layout, and stays optional on Standard and every other layout.
Optional on one layout — a field that is required elsewhere can be made optional on one layout.
Example used in this guide. The Contacts module has two layouts, Standard and Sales. You make Company Name required on Sales only, check that Standard is unchanged, and then see what your team sees when they create a contact with each layout.
Key words used in this guide#
| Term | What it means |
|---|---|
| Layout | A named form for a module (for example Standard or Sales), with its own fields and sections. |
| Required field | A field that must have a value before the record can be saved. It is marked with a star (★) in the Layout Builder and an asterisk (*) on the form. |
| Per-layout Required | A Required setting that applies to one layout only. The builder says which one: “Users must provide a value on the Sales layout”. |
| Layout picker | The box at the top right of the Create form where people choose which layout to fill in. |
Before you begin#
You need permission to customise modules (the Administrator profile has it).
The module needs at least two layouts. With only one layout, the Required switch reads “Users must provide a value for this field” and applies everywhere. See Create a New Layout for a Module.
The field must be on the layout you want to make it required on — placed in a section of its Create form, not in Unused Fields.
Part 1: Open the layout in the Layout Builder#
Step 1: Go to the module’s Layouts page#
Click the gear icon at the bottom of the left menu bar (Setup), click Modules and Fields under CUSTOMIZATION, and click Configure on the module’s row.
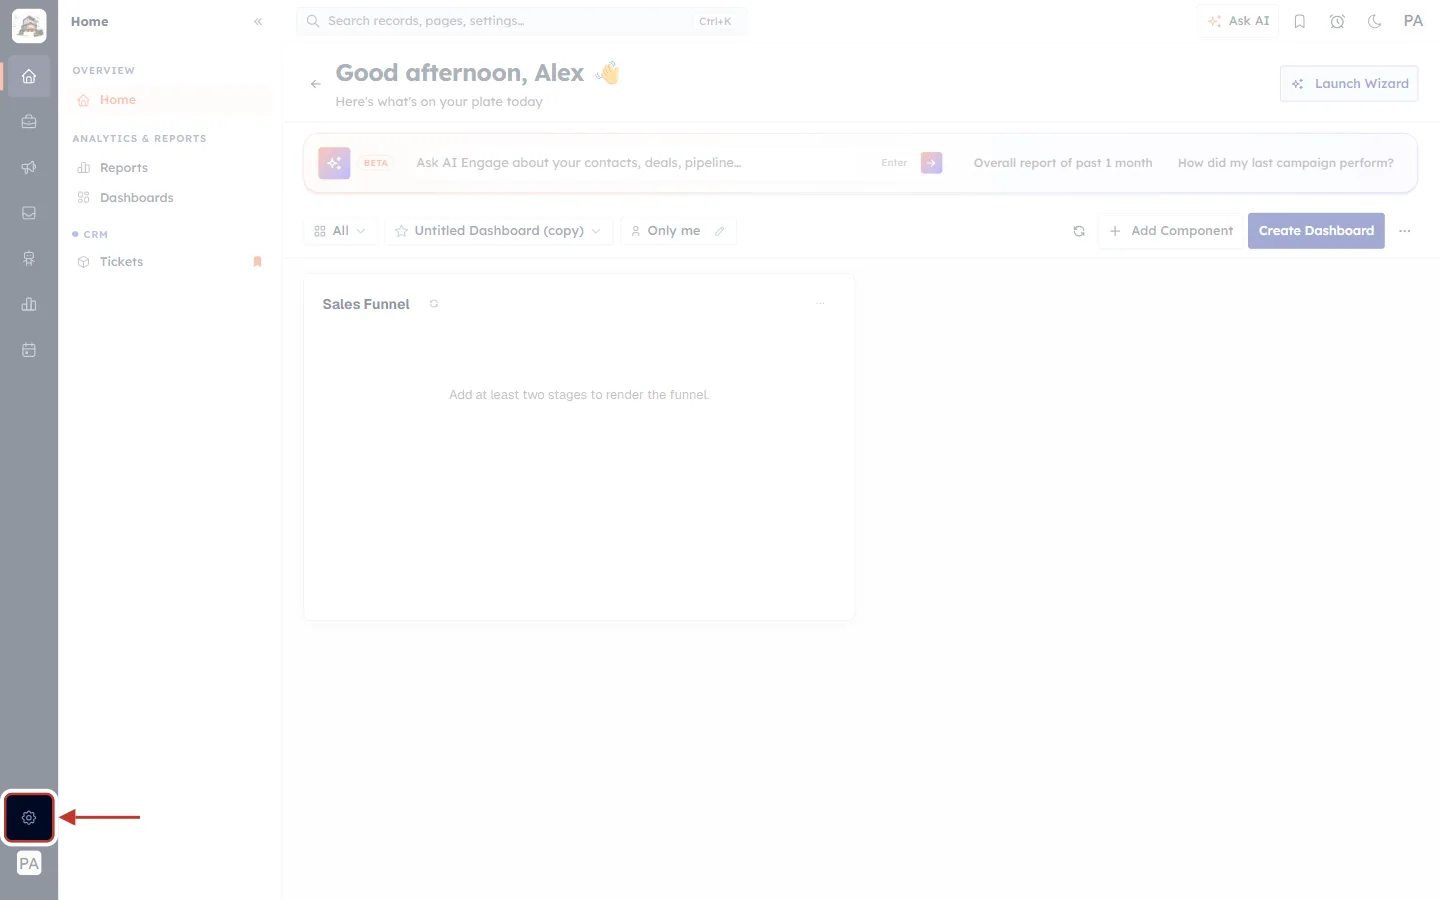
What this screenshot shows. The CRM home page with the gear icon ringed at the bottom of the narrow dark menu bar on the left.
It opens Setup, where all CRM settings live.
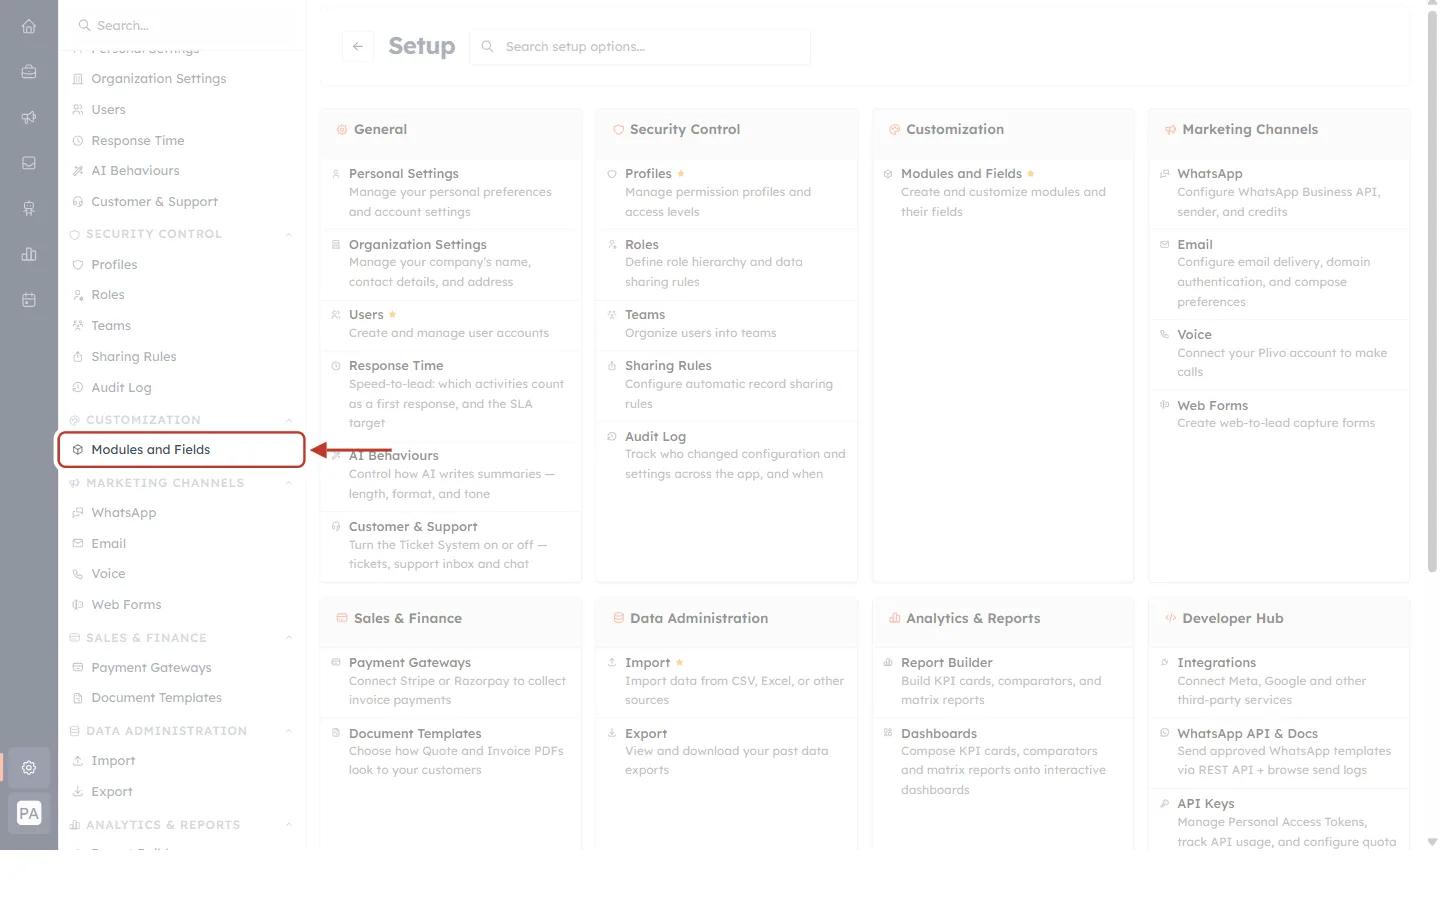
What this screenshot shows. The Setup page with Modules and Fields ringed under CUSTOMIZATION in the Setup menu.
The cards in the middle of the page link to the same settings.
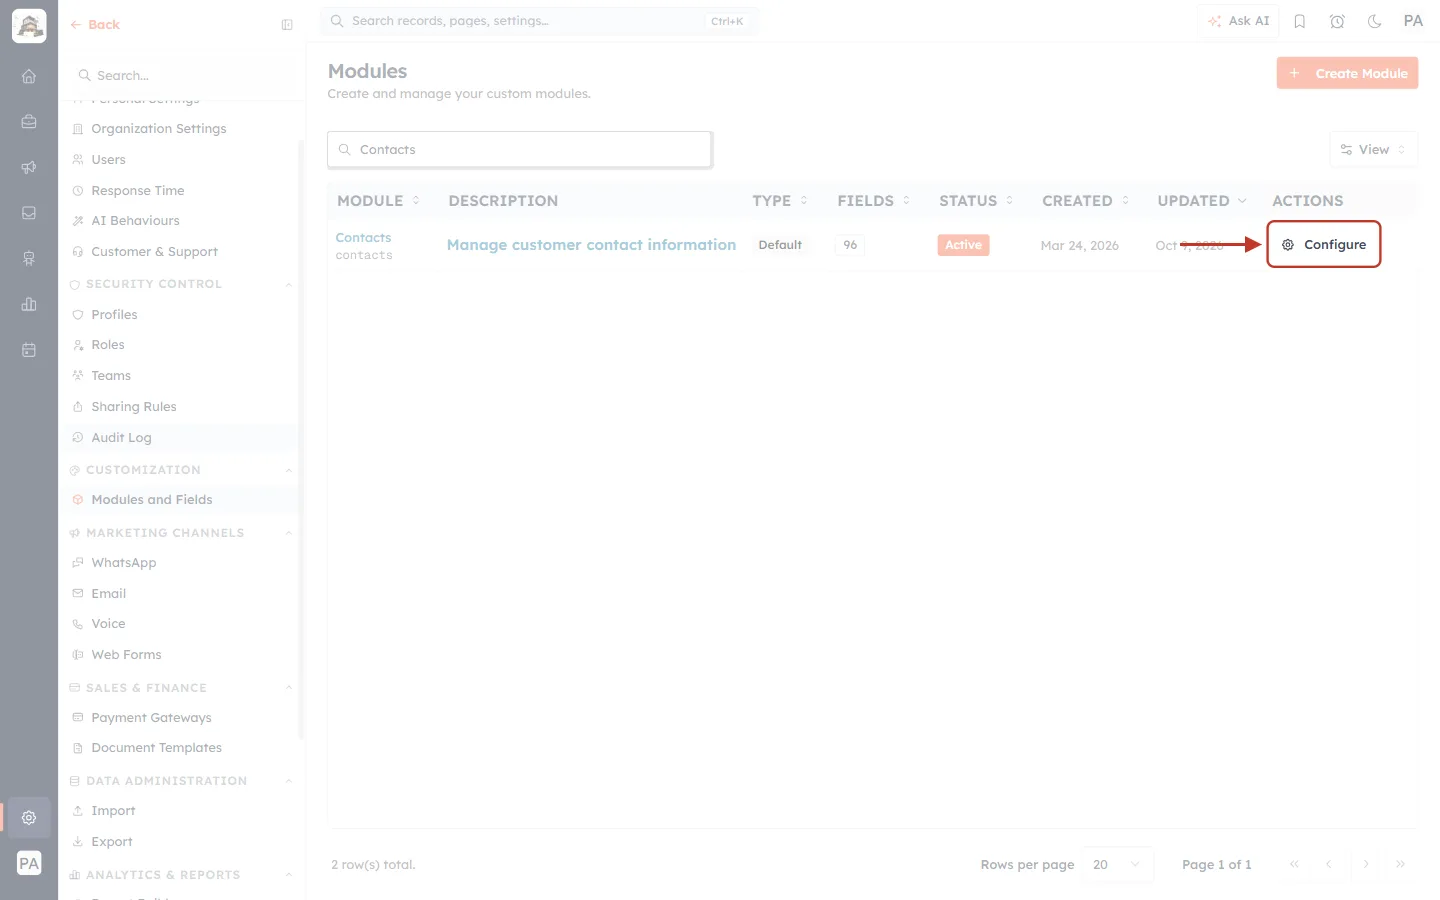
What this screenshot shows. The Modules page filtered to “Contacts”, with Configure ringed.
Type the module’s name in Search modules… to find it quickly.
Step 2: Open the layout that needs the required field#
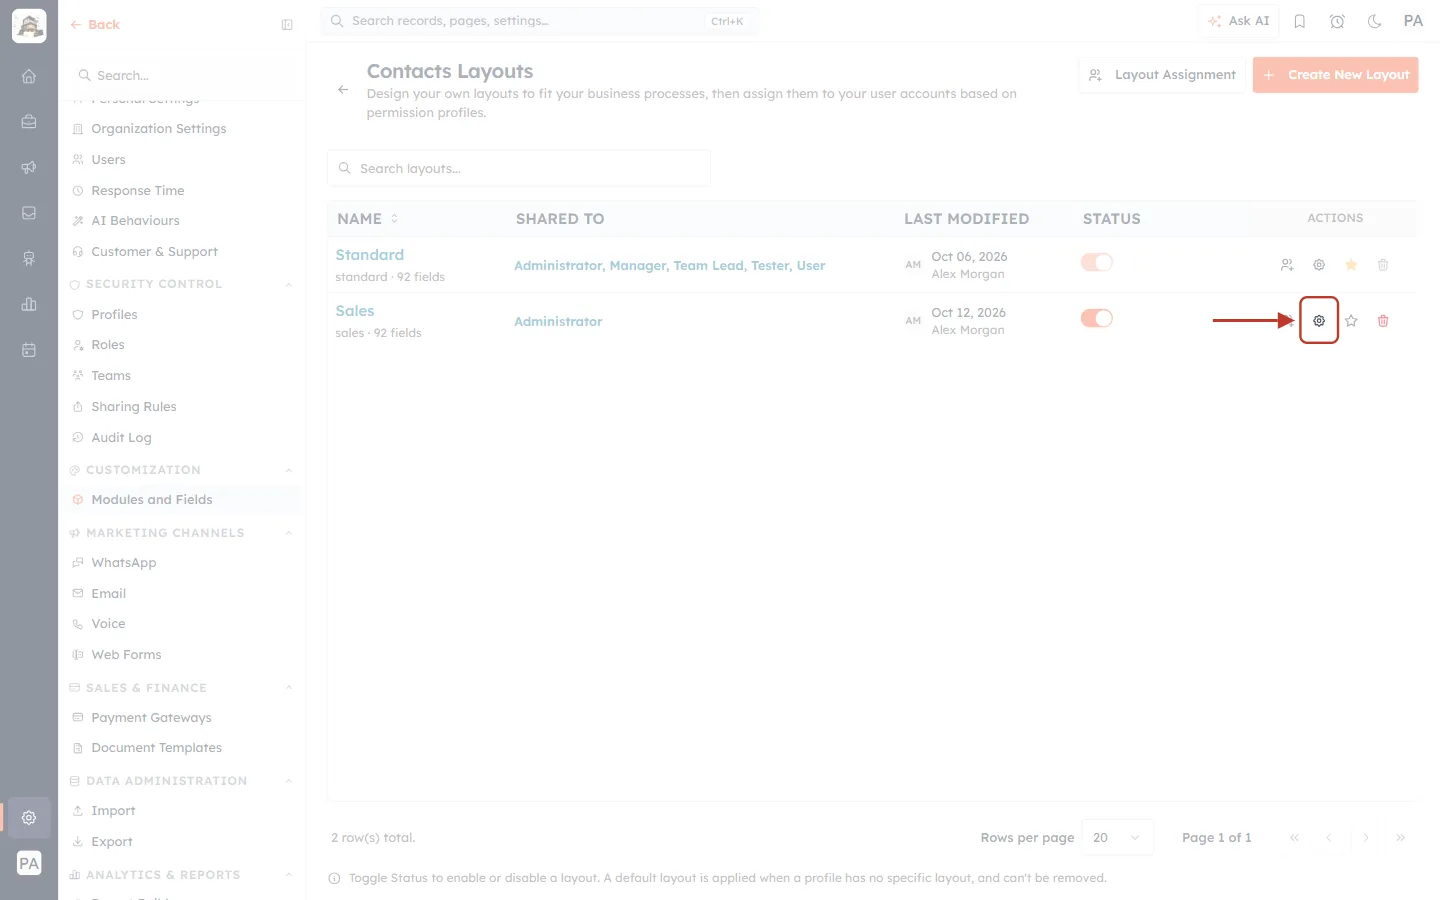
What this screenshot shows. The Contacts Layouts page. The gear icon (Open in Layout Builder) on the Sales row is ringed.
Click the gear, or click the layout’s name, to open it.
Open the layout of the team that must fill in the field — here Sales.
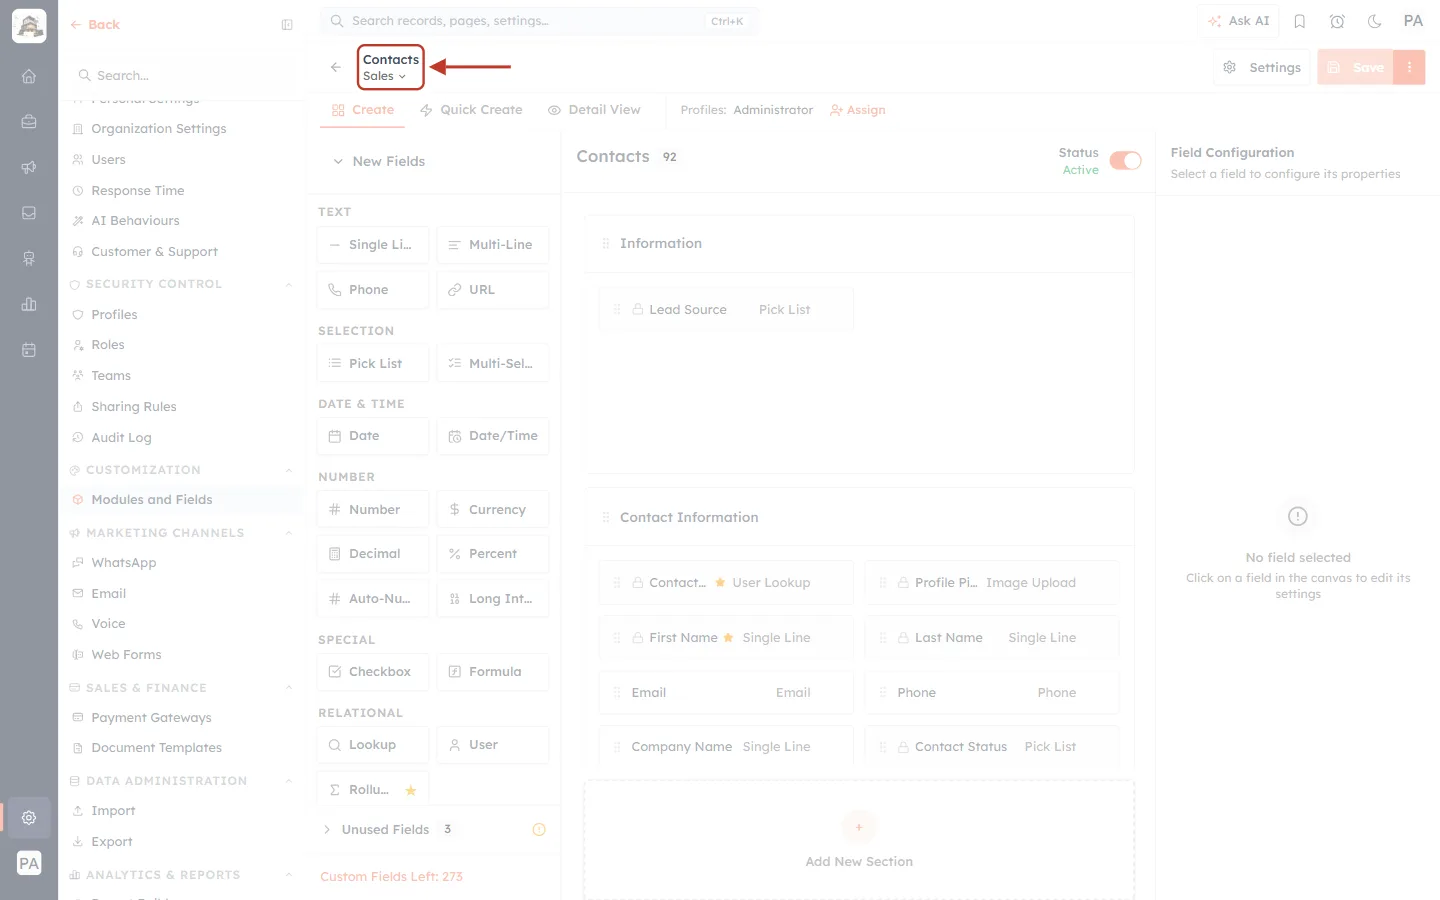
What this screenshot shows. The top left of the Layout Builder, ringed: Contacts and, under it, Sales ⌄ — the layout you are about to change.
Always check this name: the Required switch only changes the layout shown here.
Part 2: Make the field required on this layout#
Step 3: Click the field#
On the canvas (the middle column), find the field and click it. In this example, click Company Name in the Contact Information section.
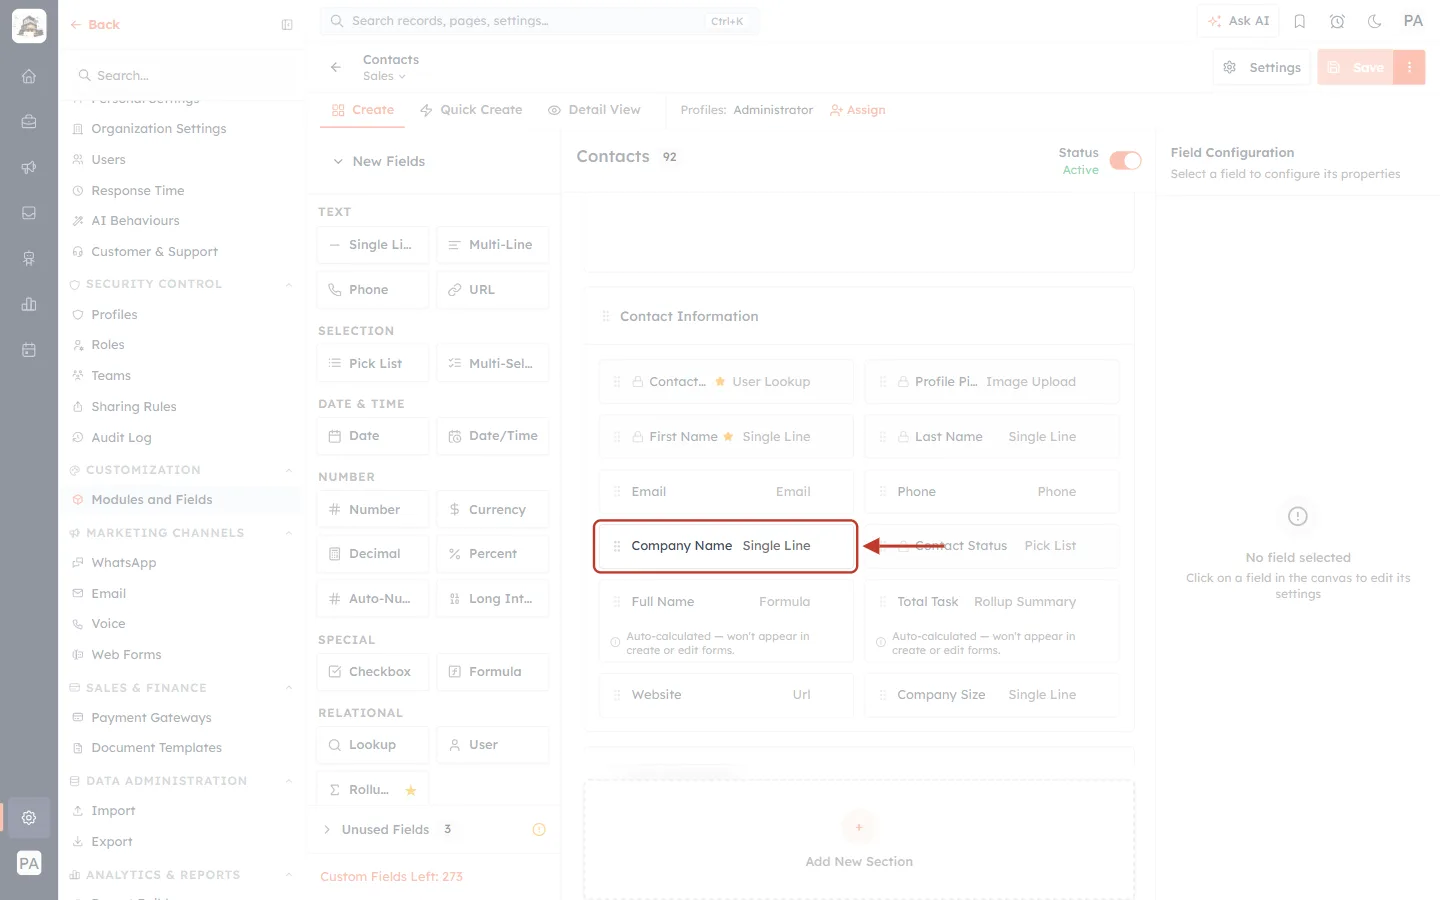
What this screenshot shows. The Company Name field card, ringed. It shows its type, Single Line, and has no star — it is optional right now.
Fields with a small orange ★ after their name (Contact Owner, First Name) are already required on this layout.
Click the card itself, not the dotted drag handle on its left edge.
Step 4: Find the Required Field switch#
The field’s settings open in the Field Configuration column on the right. The Required switch is the third item, under BASIC SETTINGS.
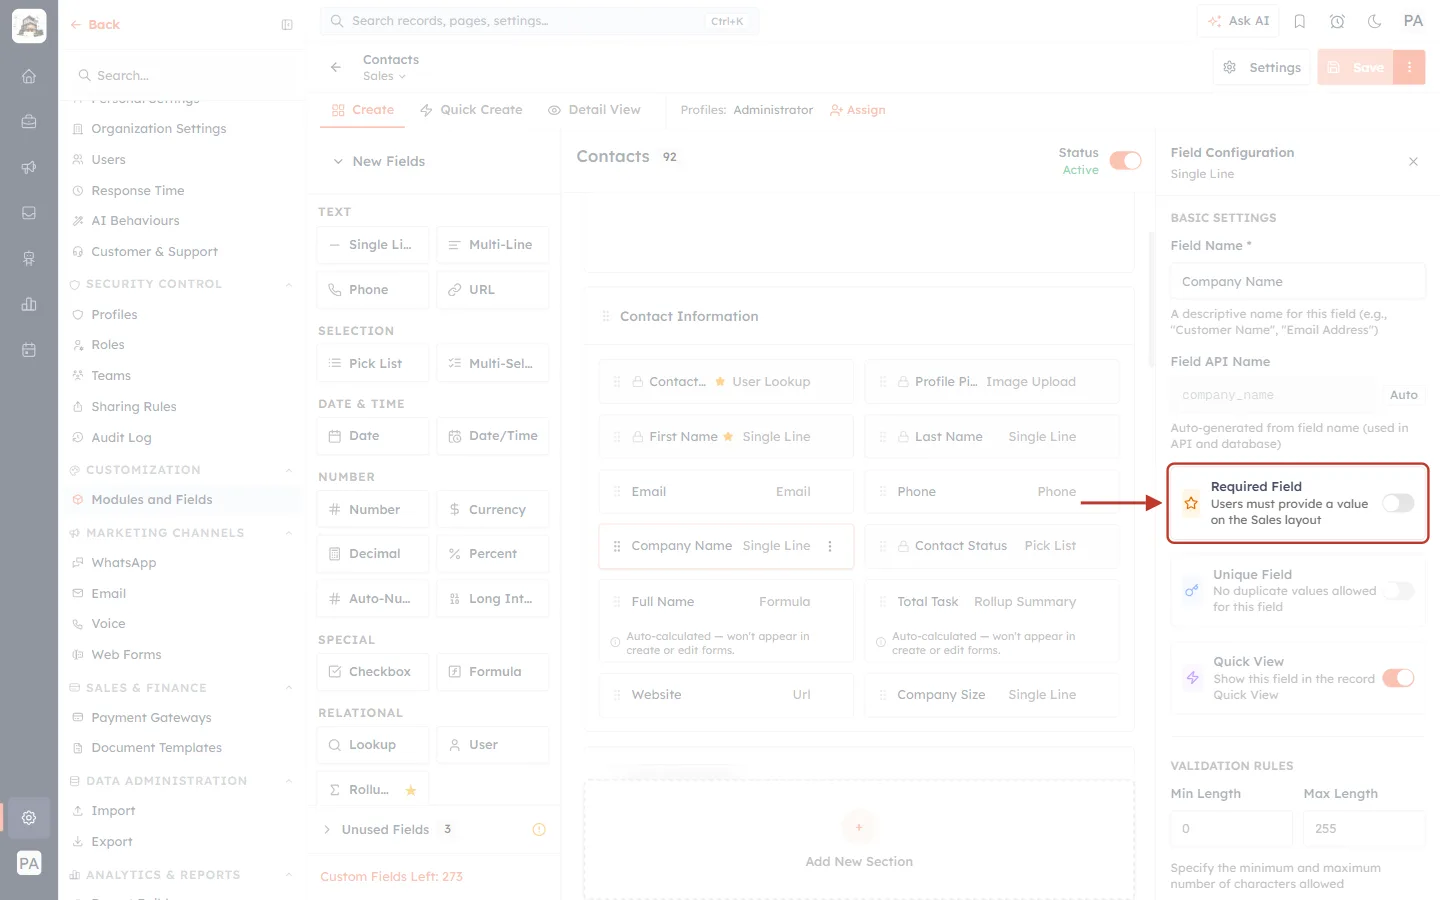
What this screenshot shows. The Required Field box in the Field Configuration column, ringed. The switch is off (grey).
Read the line under the title: “Users must provide a value on the Sales layout”. The layout name tells you this switch only affects Sales.
If the line reads “Users must provide a value for this field” instead, the module has only one layout, and the switch would make the field required everywhere.
Above it are the field’s Field Name and Field API Name; below it are Unique Field and Quick View.
Step 5: Turn the switch on#
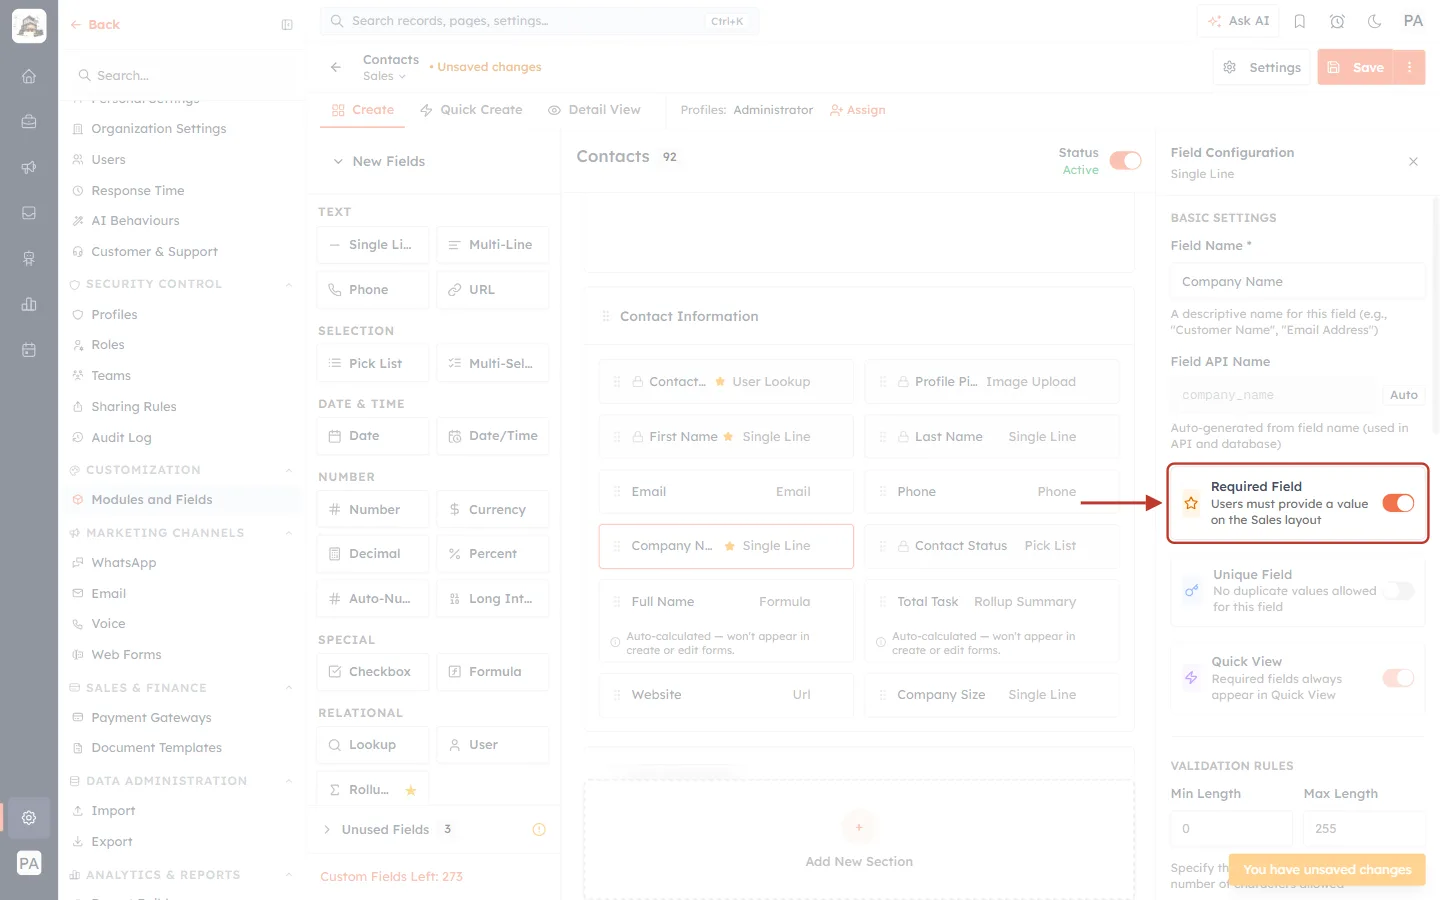
What this screenshot shows. The same Required Field box after clicking the switch, ringed. The switch is now on (orange).
Company Name is now required on the Sales layout only.
The orange • Unsaved changes label appears at the top of the builder — the change is not saved yet.
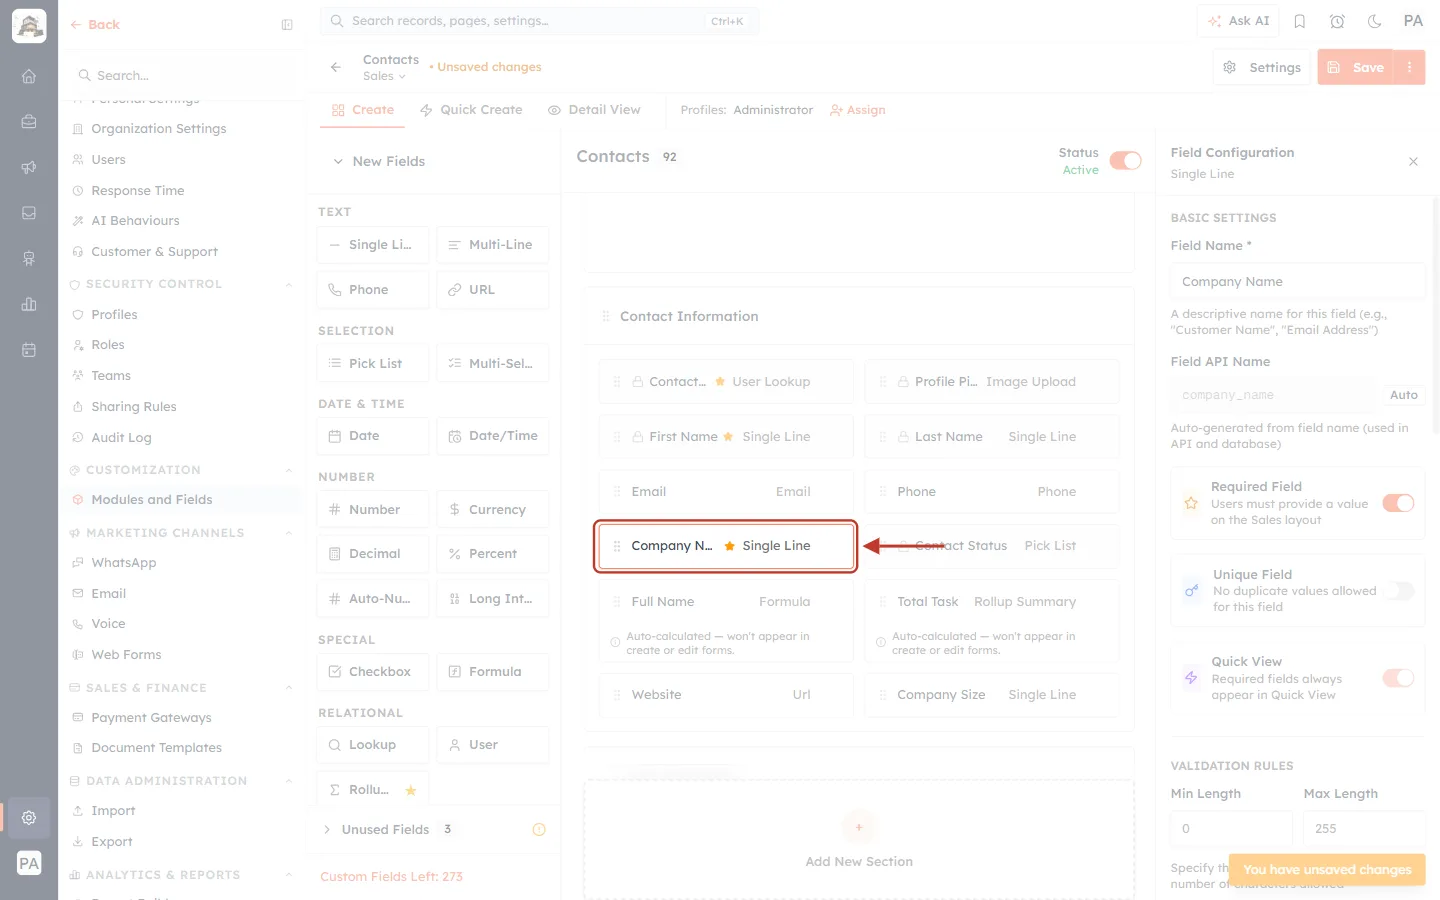
What this screenshot shows. The Company Name card on the canvas, ringed. An orange ★ now follows its name.
The star lets you see at a glance which fields are required on the layout you are editing.
Step 6: Notice what changes with it#
A required field must always be fillable, so turning Required on also changes two other settings of the field on this layout.
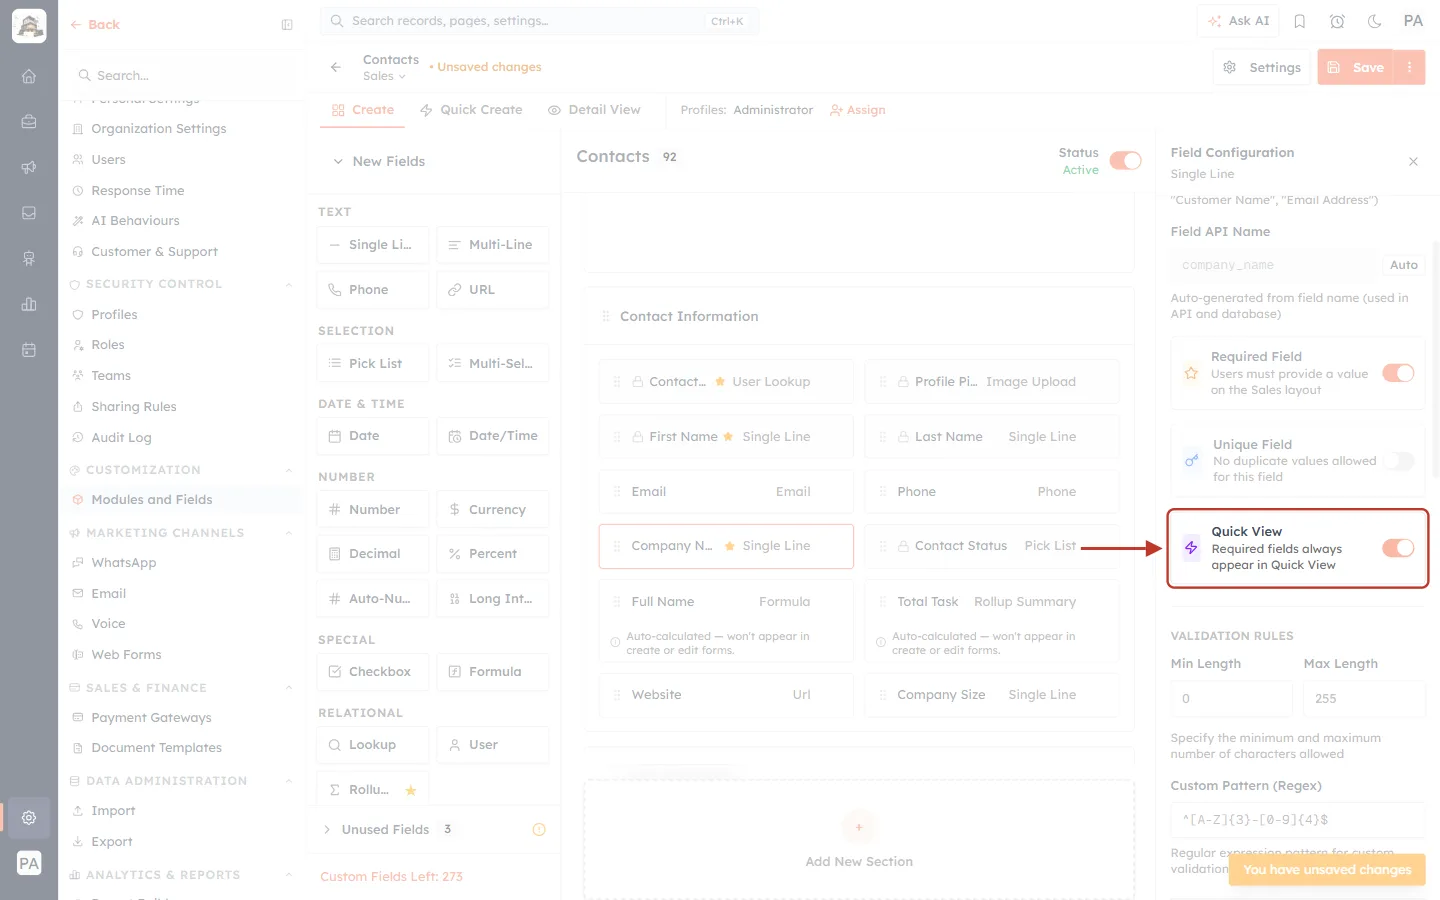
What this screenshot shows. The Quick View box, ringed. Its switch is on but faded, and the text now reads “Required fields always appear in Quick View”.
You can’t turn Quick View off while the field is required.
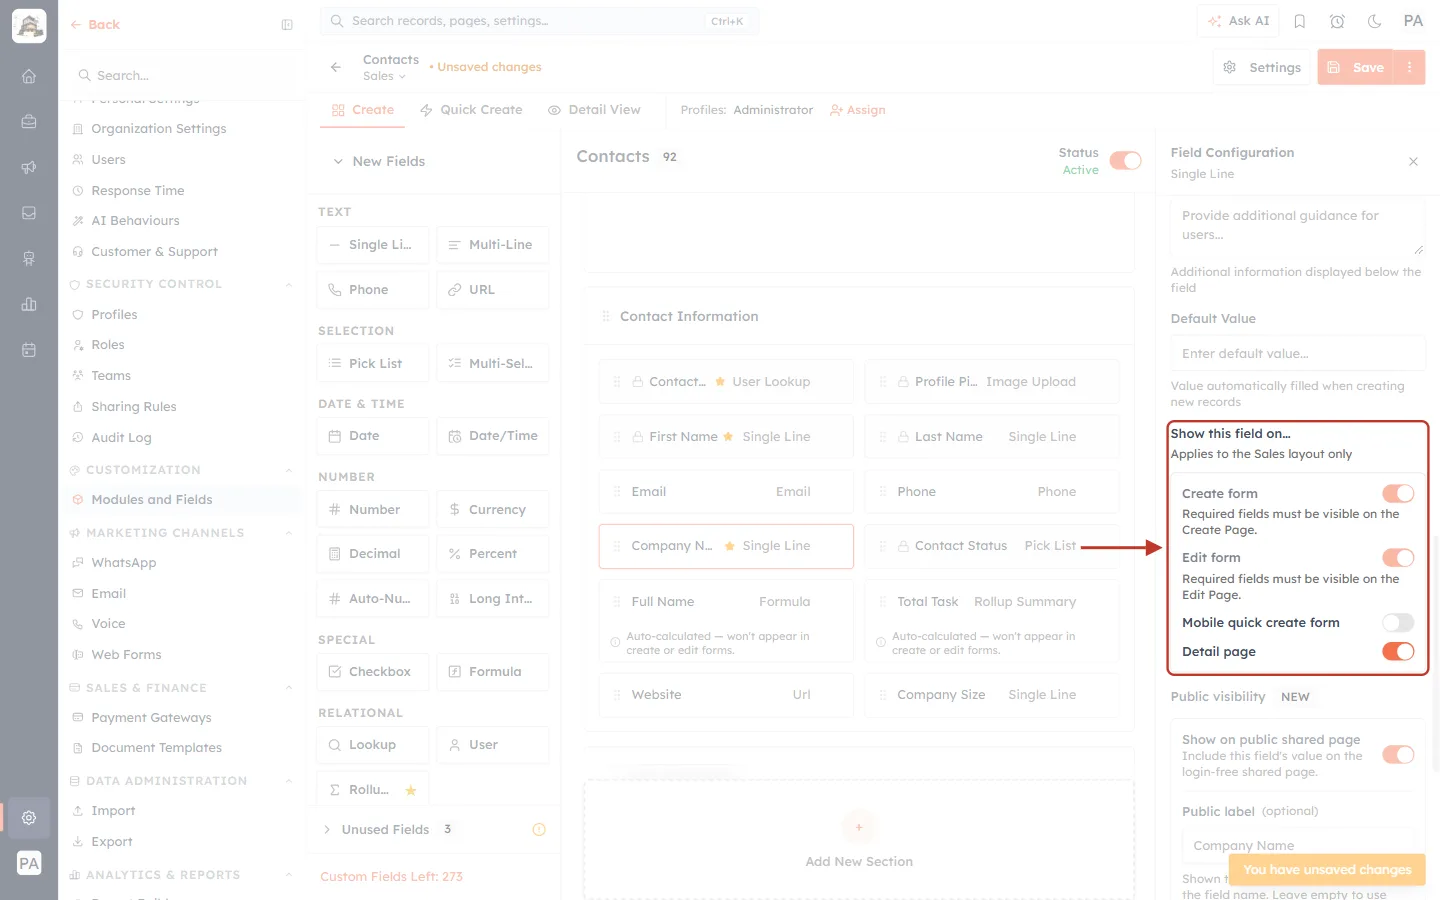
What this screenshot shows. The Show this field on… block further down the column, ringed. It reads Applies to the Sales layout only.
Create form and Edit form are locked on, with the notes “Required fields must be visible on the Create Page” and “… on the Edit Page”. A required field can’t be hidden from the form people must fill in.
Mobile quick create form and Detail page can still be switched as you like.
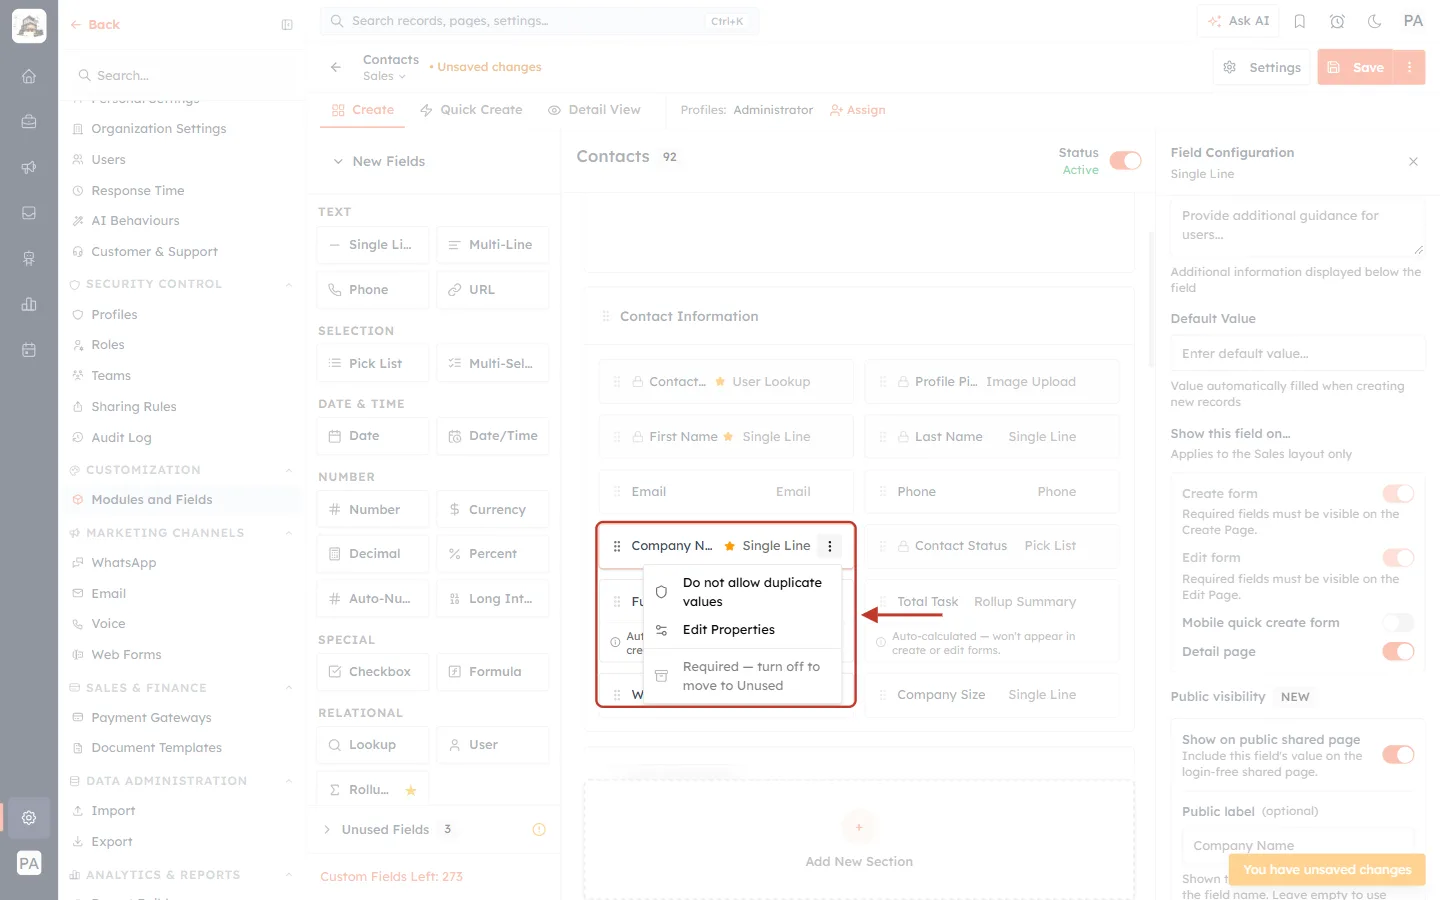
What this screenshot shows. The ⋮ menu of Company Name, ringed. The last item is greyed out and reads “Required — turn off to move to Unused”.
A required field can’t be taken off the layout. To remove it, turn Required Field off first.
Step 7: (Optional) Make a field optional on this layout only#
It works the other way round too. A field that is required on your other layouts can be made optional on this one. Click the field and turn its Required switch off. In this example, First Name is required on every layout:
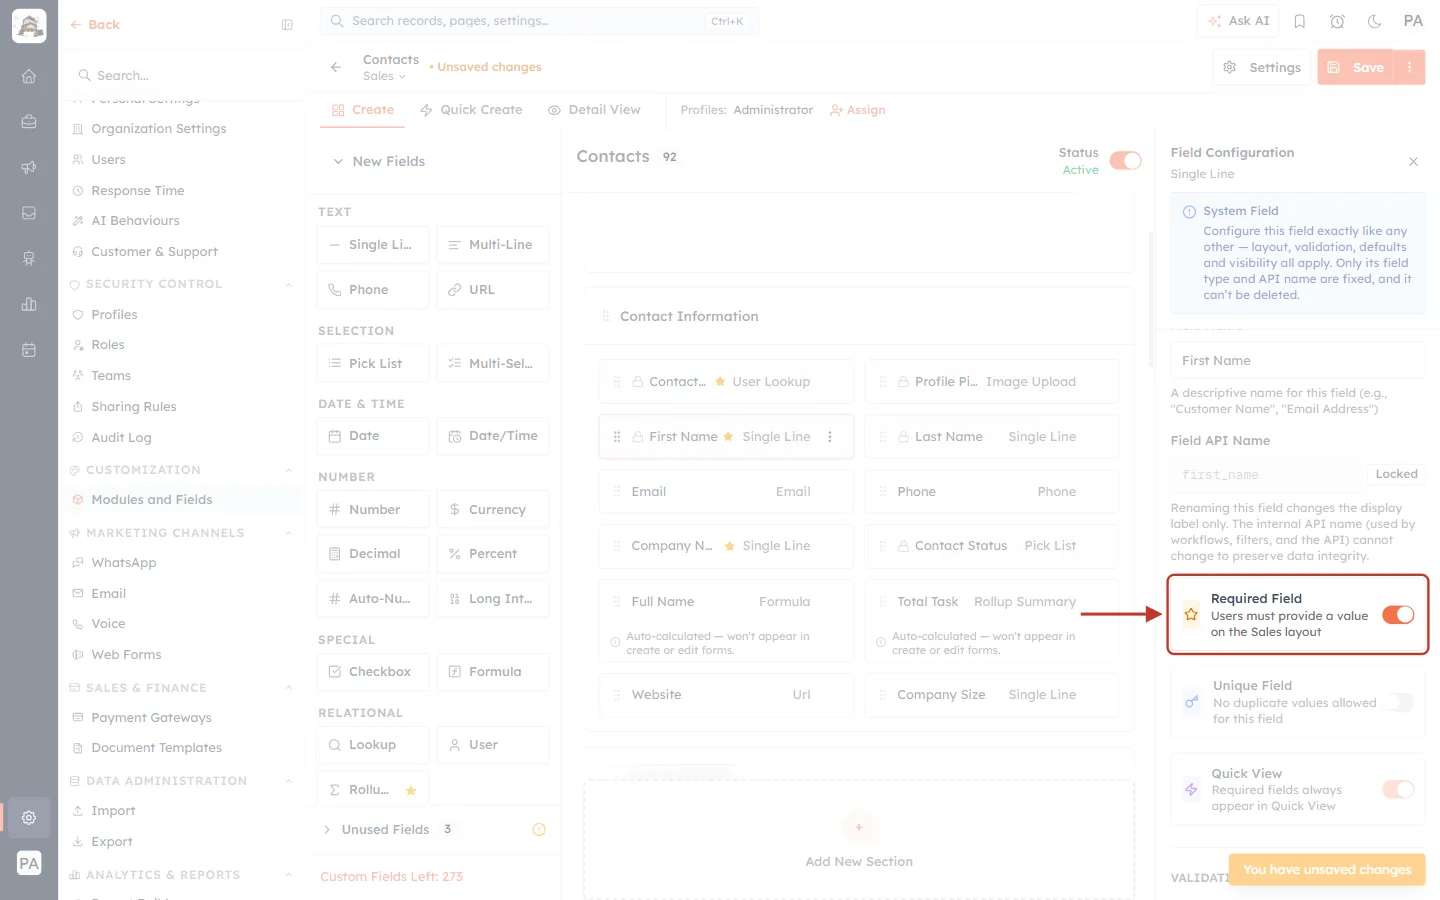
What this screenshot shows. The Required Field box for First Name, ringed, with the switch on.
First Name is a system field. A blue System Field note at the top of the column says you can configure it like any other field — layout, validation, defaults and visibility all apply — and only its field type and API name are fixed.
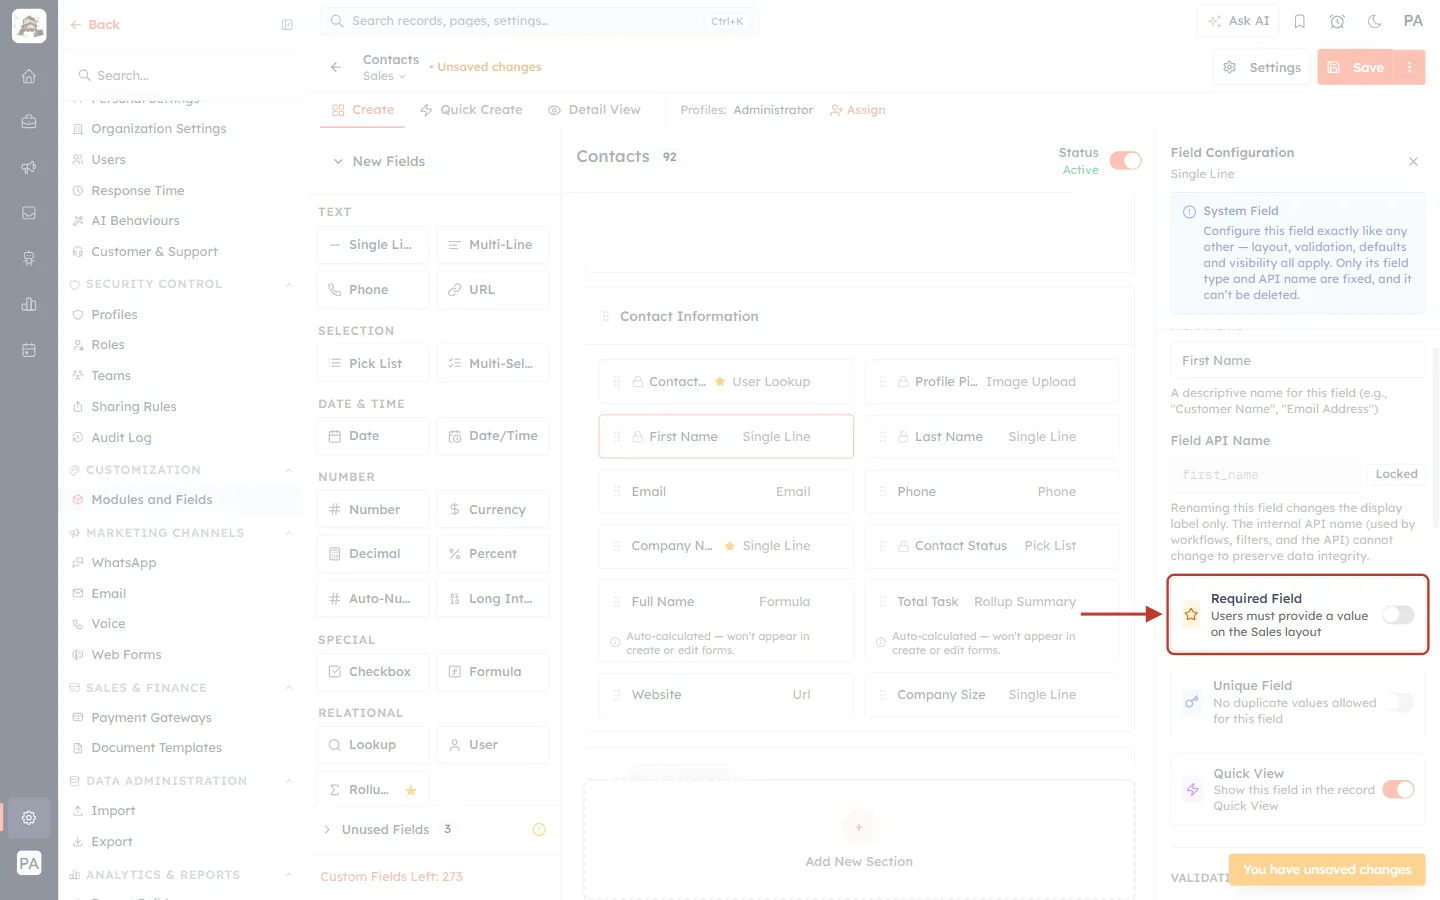
What this screenshot shows. The same box after clicking the switch, ringed. The switch is now off.
First Name is now optional on Sales, and still required on every other layout.
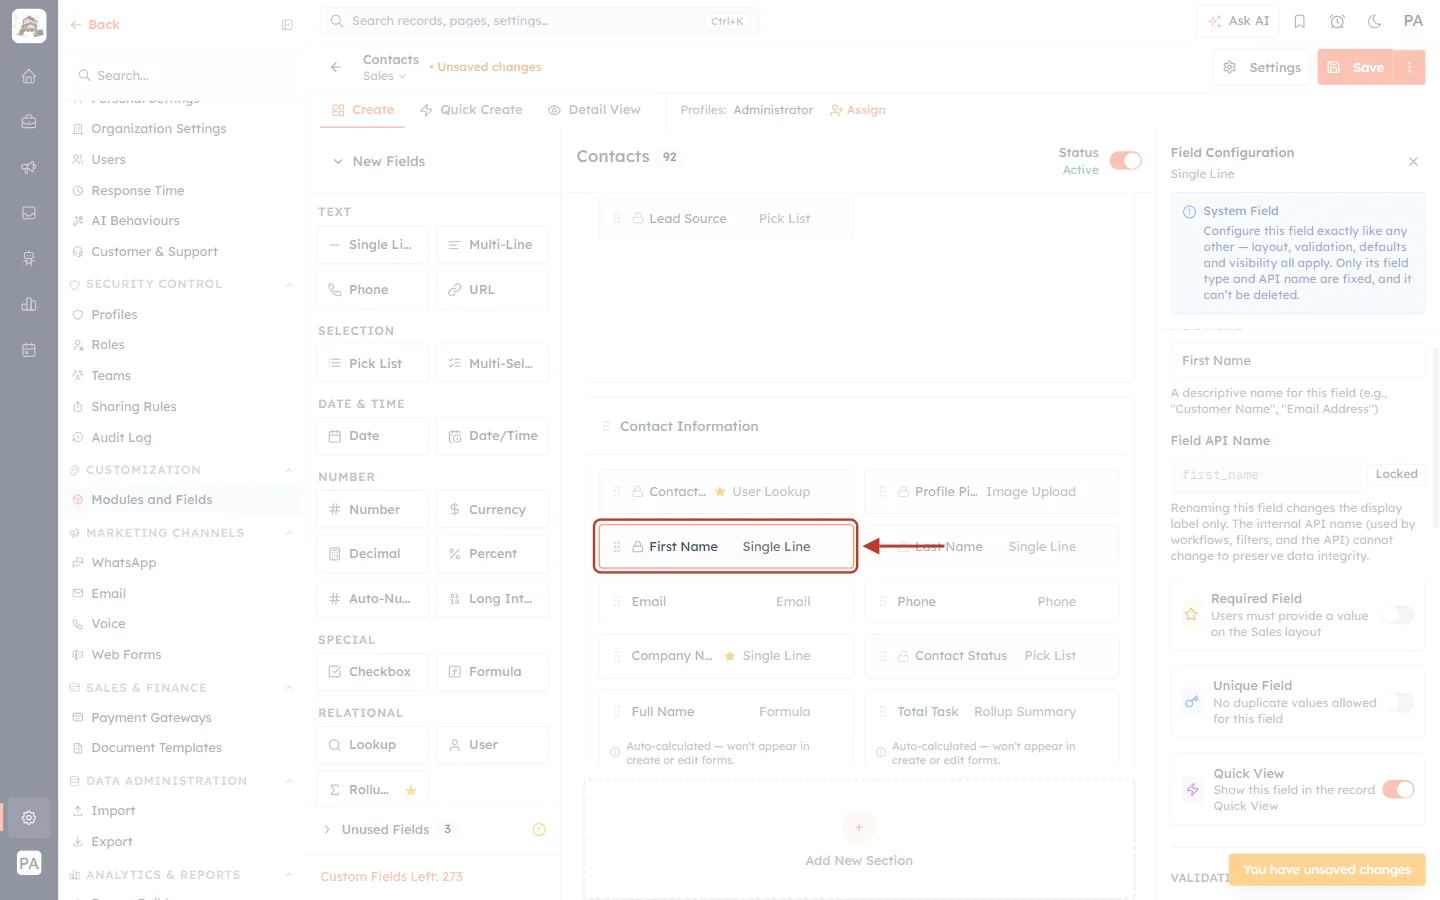
What this screenshot shows. The First Name card on the canvas, ringed. Its ★ has gone.
This guide turns First Name back on before saving, so only the Company Name change is kept.
Step 8: Save the layout#
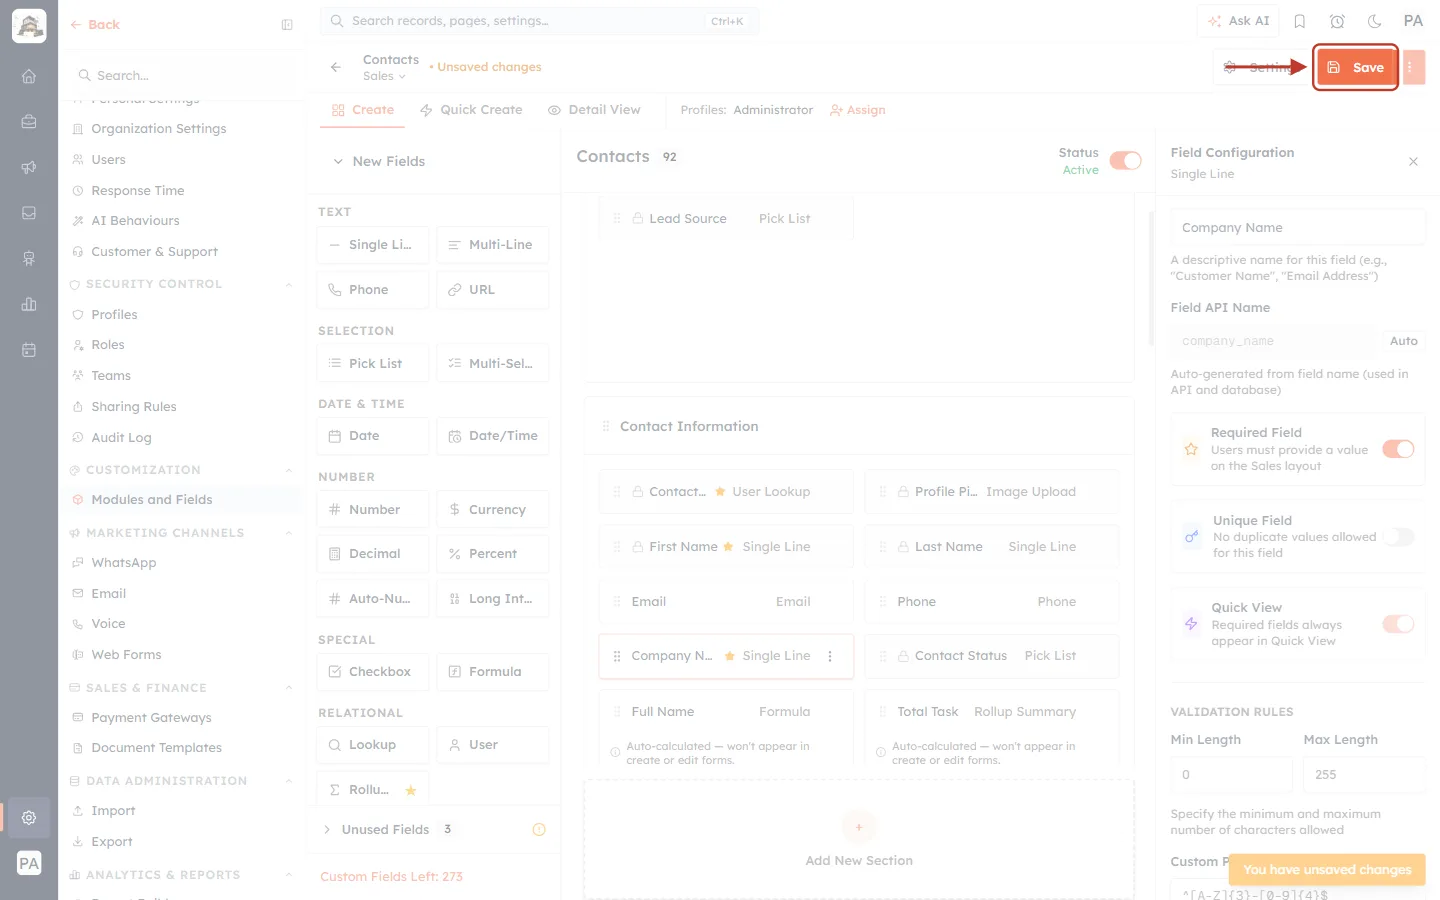
What this screenshot shows. The orange Save button at the top right of the builder, ringed.
Click it to save the Required change (and any other change you made on this layout).
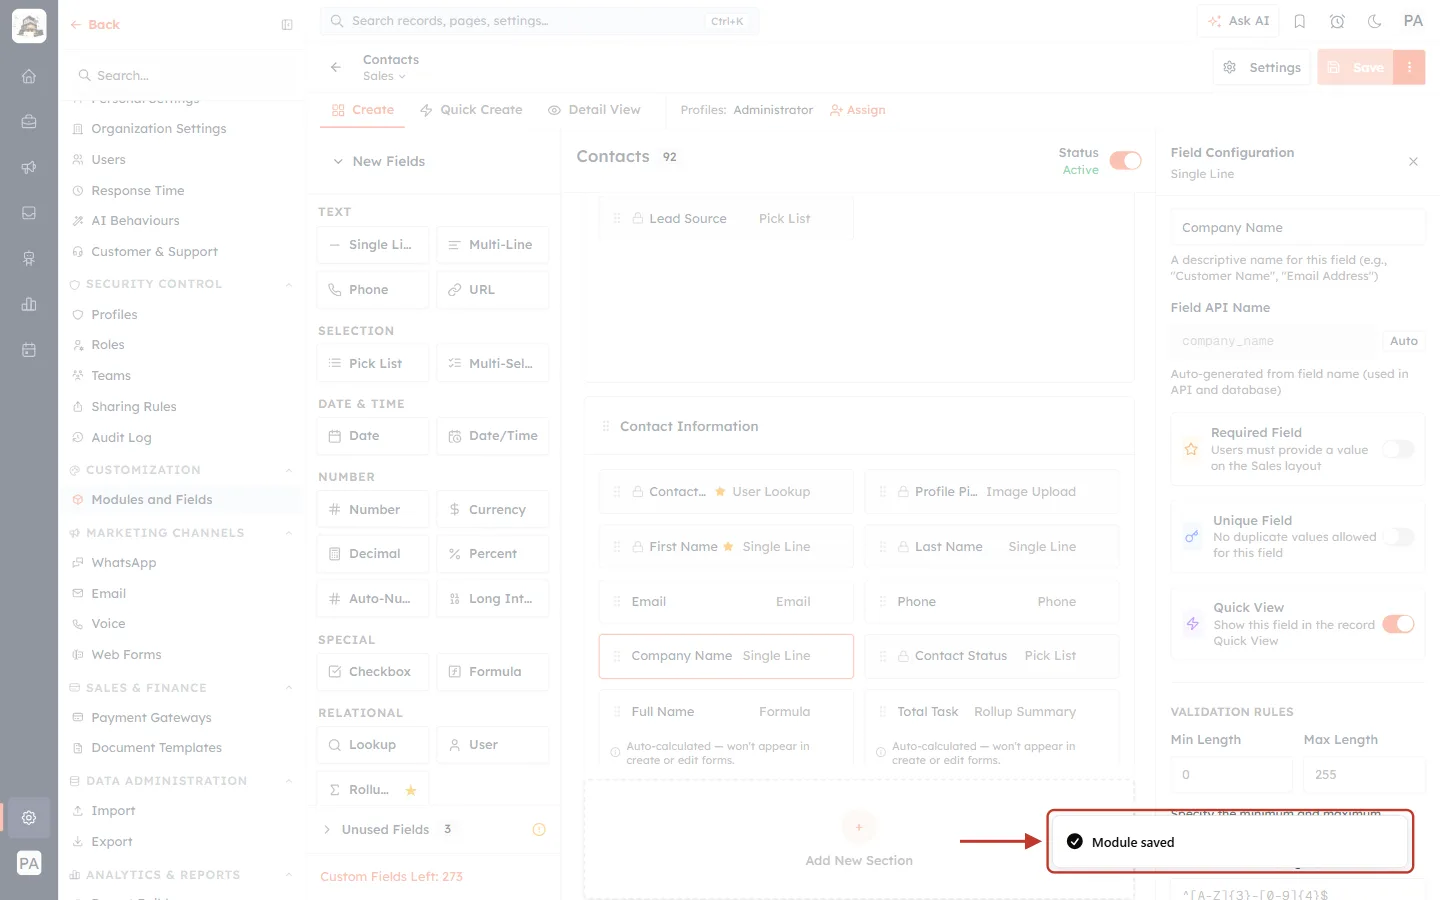
What this screenshot shows. The confirmation at the bottom right of the screen, ringed: Module saved.
From now on, anyone creating or editing a record with the Sales layout must fill in Company Name.
Part 3: Check that the other layouts are unchanged#
Step 9: Switch to another layout#
Click the layout name (Sales ⌄) at the top left of the builder and click Standard.
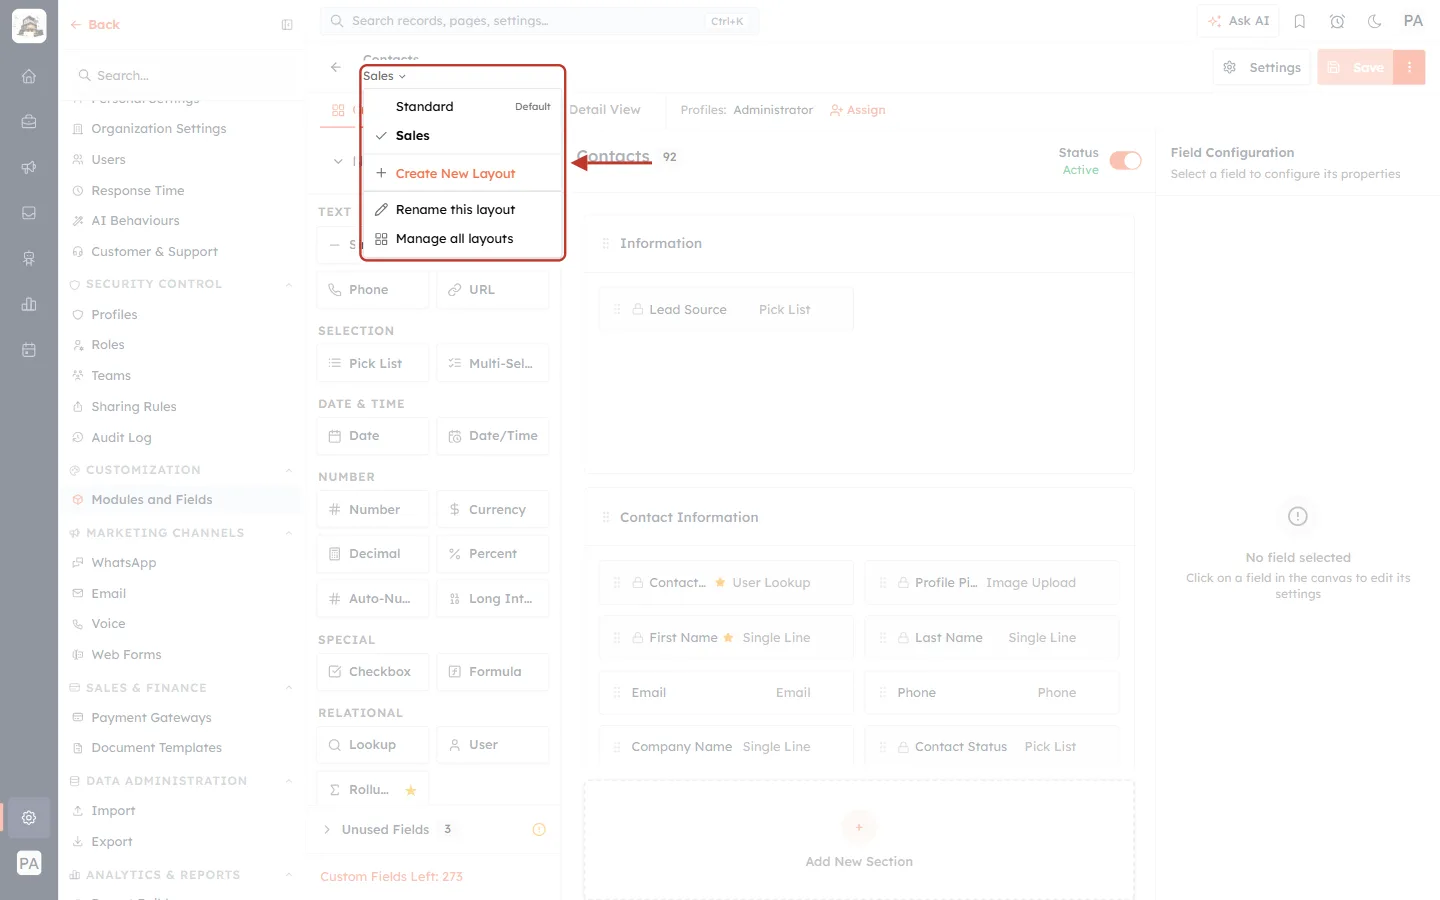
What this screenshot shows. The layout menu, opened and ringed. Sales has a tick because it is open; Standard is marked Default.
Click Standard to open it. If you had unsaved changes, the CRM would ask you first.
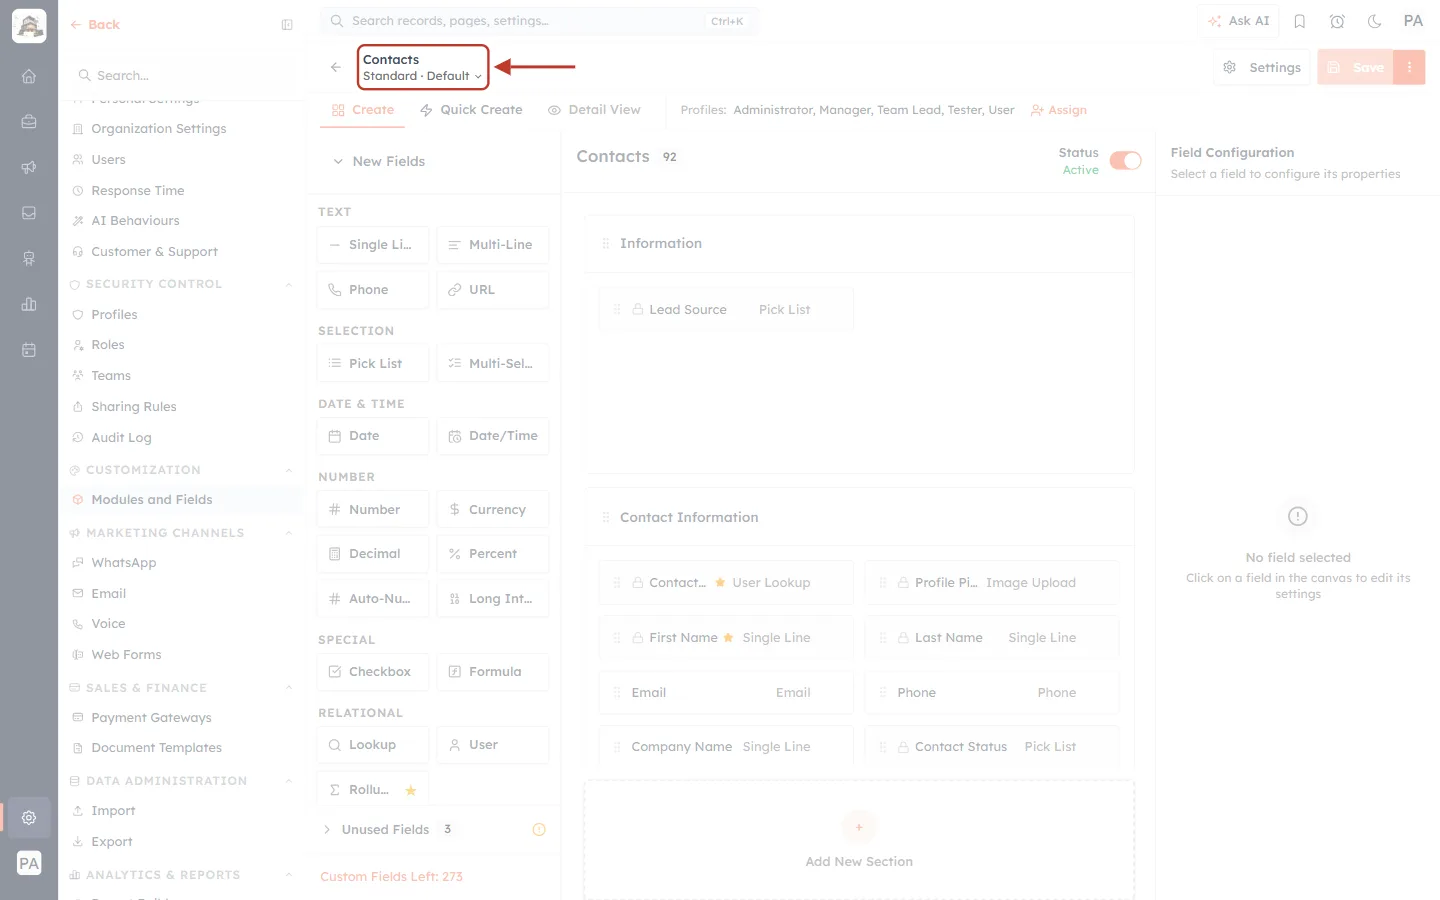
What this screenshot shows. The top left of the builder, ringed. It now reads Standard · Default.
You are now looking at the Standard layout.
Step 10: Look at the same field#
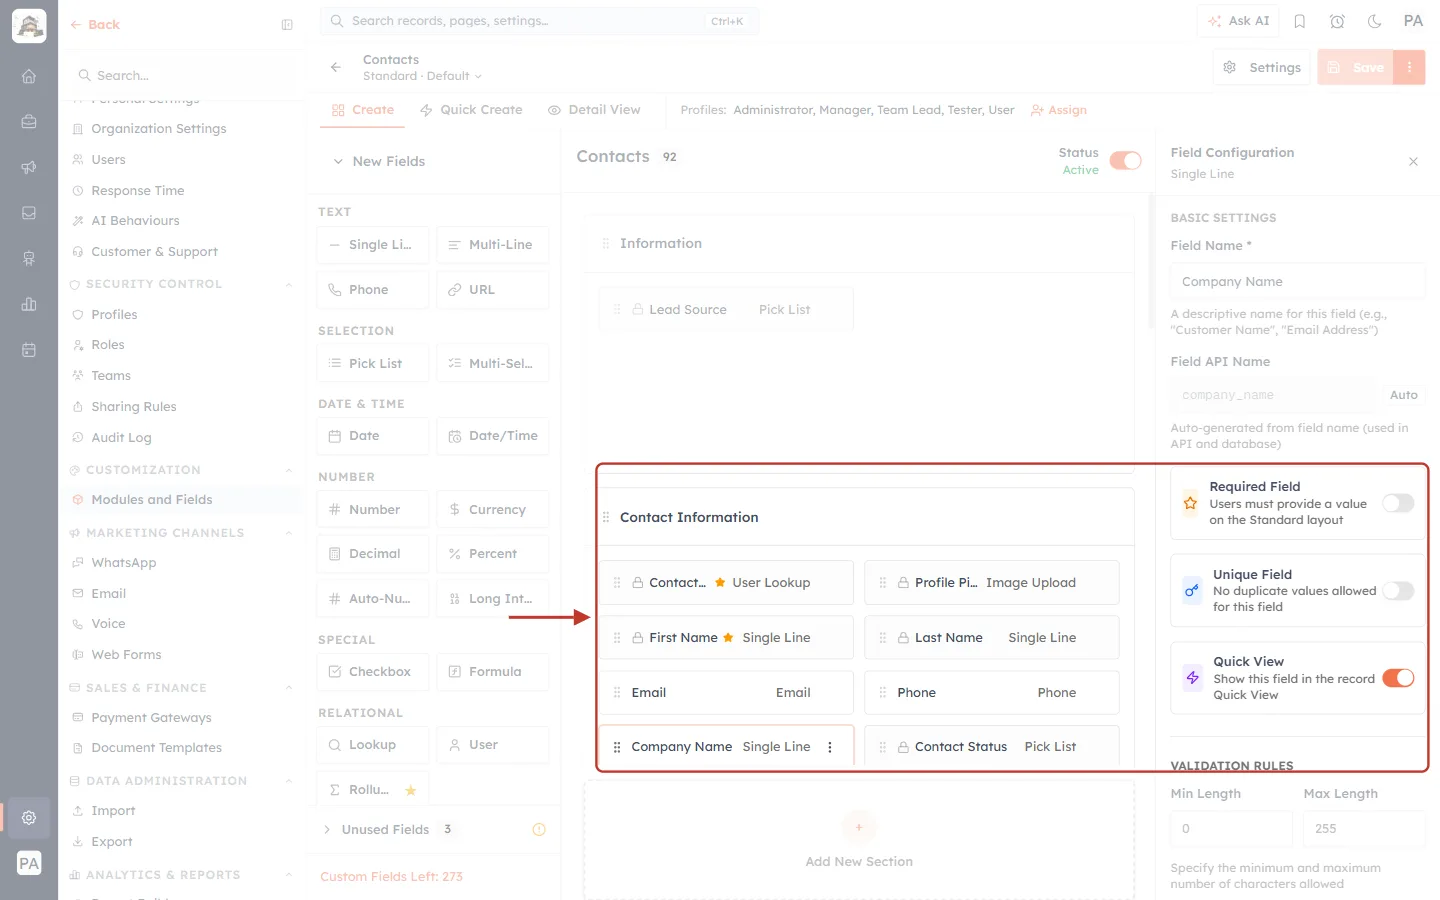
What this screenshot shows. The Required Field box for Company Name on the Standard layout, ringed.
The switch is off, and the text reads “Users must provide a value on the Standard layout” — the setting here is separate from the one on Sales.
On the canvas, Company Name has no star on Standard.
✅
Every layout keeps its own Required settings. When you create a new layout by cloning an existing one, the new layout starts with a copy of that layout’s Required settings, and you can change them from there.
Part 4: What your team sees#
Here is the Create Contact form, as your team sees it after the change.
Step 11: The layout picker on the Create form#
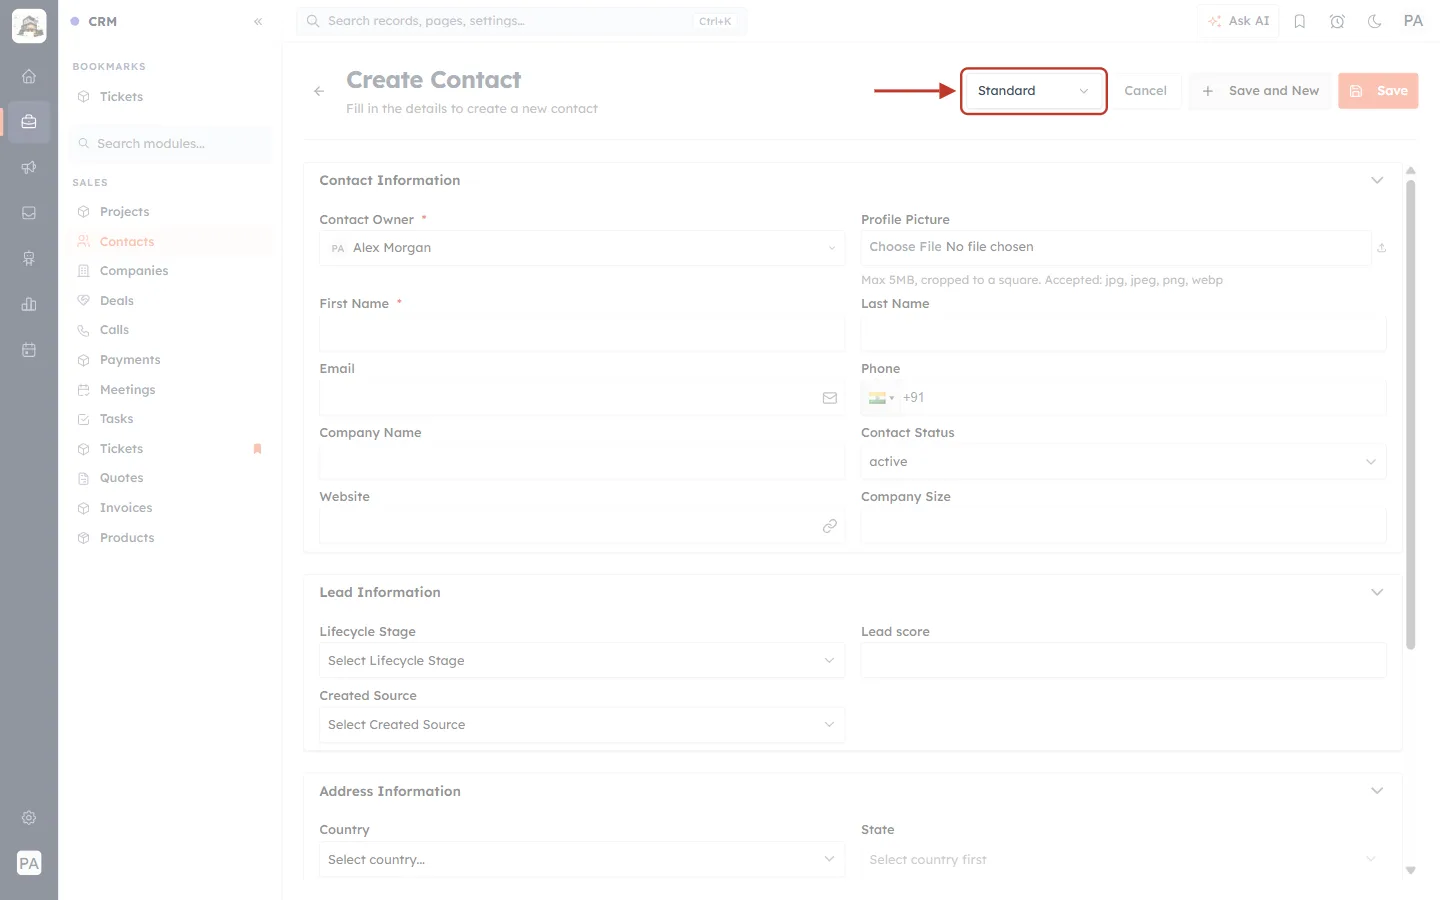
What this screenshot shows. The top of the Create Contact form, with the layout picker ringed. It shows Standard.
The picker appears only when the module has two or more active layouts and the person’s profile can use more than one of them. Otherwise the form simply opens on their layout.
On Standard, Company Name (in Contact Information) has no asterisk.
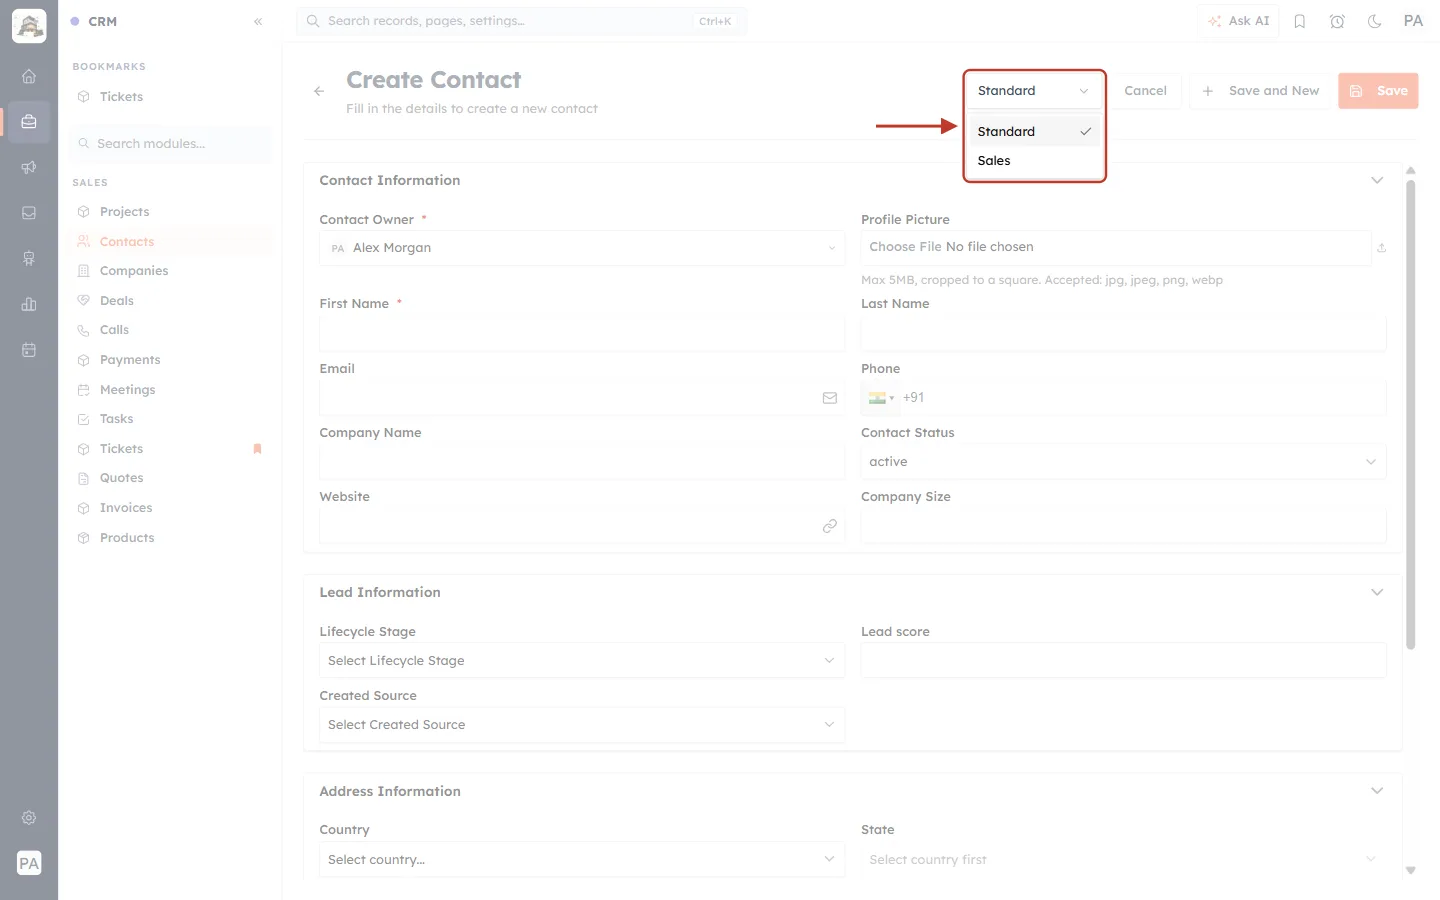
What this screenshot shows. The layout picker, opened and ringed, listing Standard (ticked) and Sales.
Your sales team picks Sales here (or it opens by default if Sales is their profile’s default layout).
Step 12: Company Name is required on Sales#
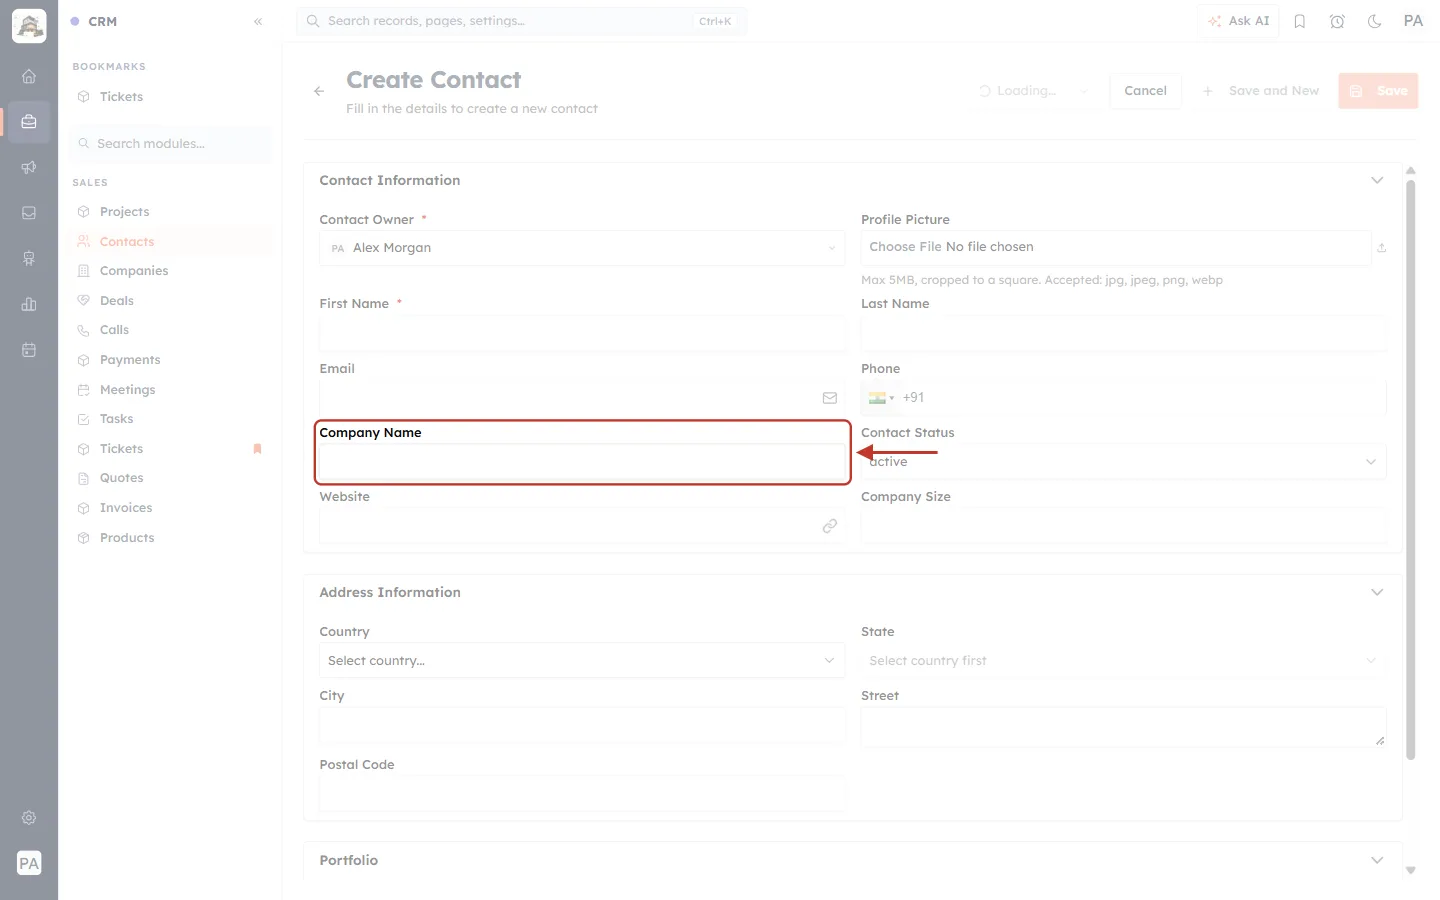
What this screenshot shows. The form after choosing Sales. The Company Name field is ringed, and its label now has a red *.
The asterisk tells people this field must be filled in before they can save.
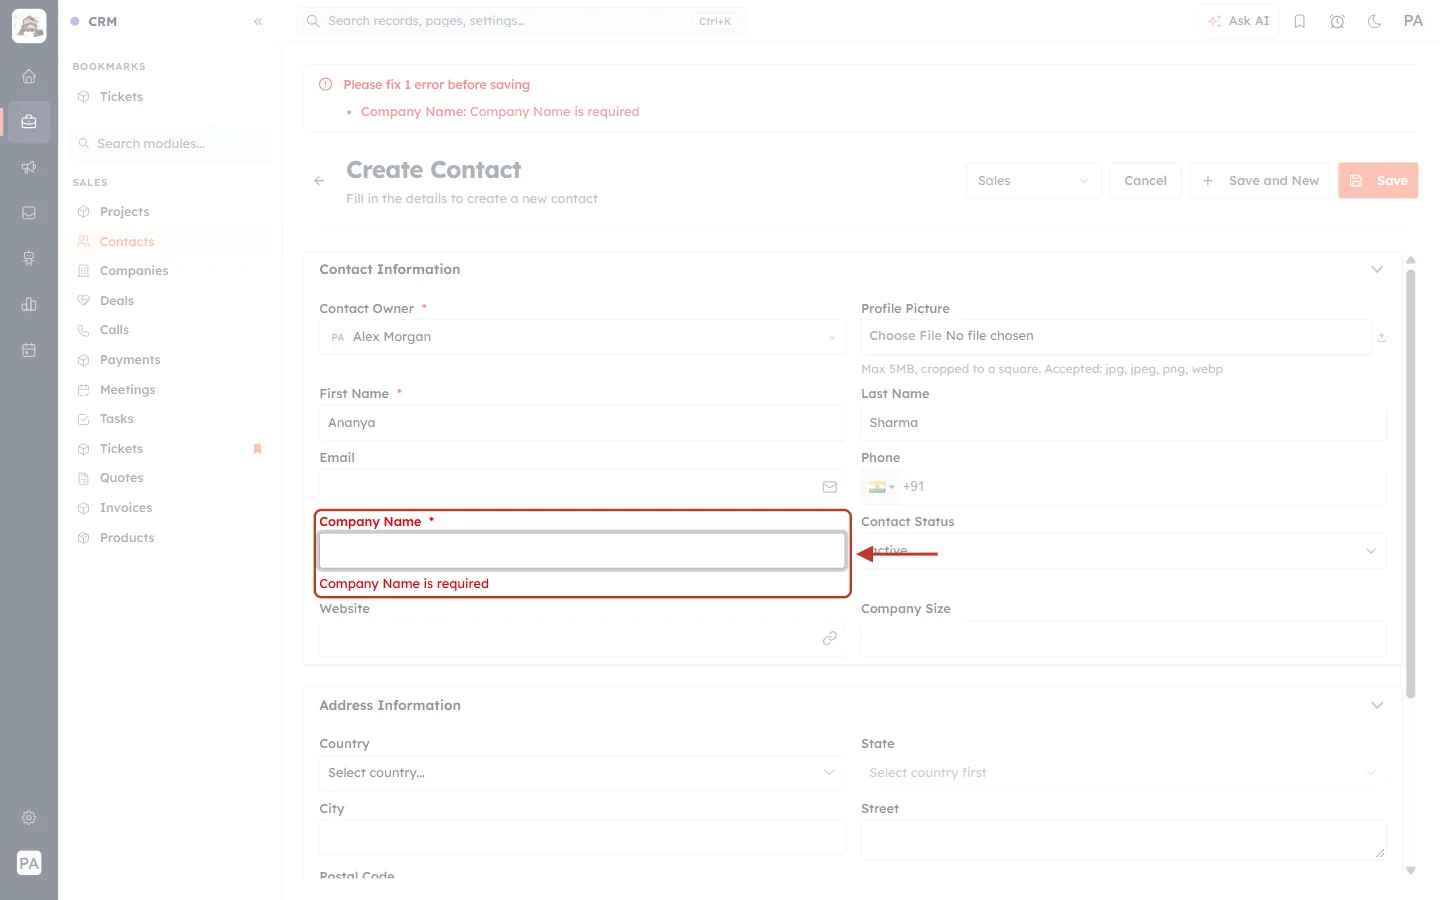
What this screenshot shows. What happens when someone clicks Save on the Sales form with Company Name empty. The field is ringed: it has a red border and the message “Company Name is required” under it.
A red summary also appears at the top of the form: “Please fix 1 error before saving — Company Name: Company Name is required”.
The record is not saved until Company Name is filled in.
Step 13: Company Name stays optional on Standard#
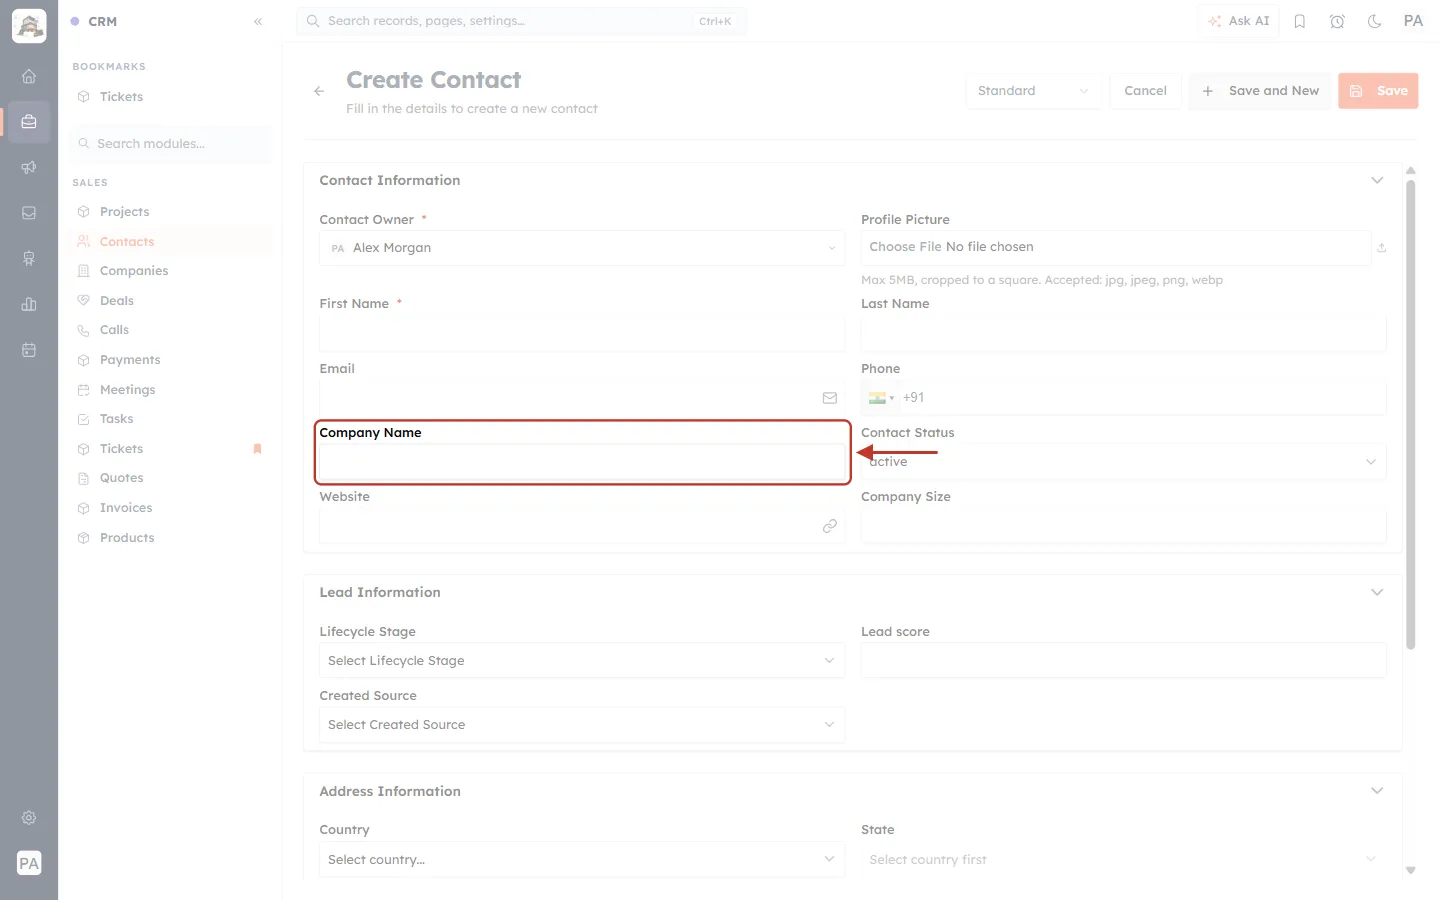
What this screenshot shows. A new Create Contact form on the Standard layout. Company Name is ringed: no asterisk.
People using Standard can save a contact without a company, exactly as before.
ℹ️
The CRM checks Required against the layout the record is on. A record created on Sales stays on Sales (unless someone uses Change Layout on it), so it keeps asking for Company Name when it is edited. Records already saved are not changed by this setting.
Rules and limits#
| Situation | What happens |
|---|---|
| The field is in Unused Fields on this layout | The Required switch is greyed out. Its tooltip says: “A field in Unused Fields can’t be made required. Drag it into a section first.” |
| The field is on Quick Create or Detail View but not on the Create form | The switch is greyed out: “This field isn’t on the Create form, so it can’t be made required. Drag it into a section first.” |
| The field is required and you try to move it to Unused Fields | Not allowed. The menu shows “Required — turn off to move to Unused”. |
| The module has only one layout | The switch reads “Users must provide a value for this field” and applies to the whole module. |
| Some field types (for example Formula or Rollup Summary) | They are calculated automatically and don’t appear on the Create form, so they have no Required switch. |
Common questions#
How do I tell whether a Required setting is per layout?#
Read the line under Required Field. “Users must provide a value on the Sales layout” means it applies to Sales only. “Users must provide a value for this field” means the module has one layout and it applies everywhere.
Can a field be required on two layouts but not on a third?#
Yes. Open each layout in turn and set the switch the way you want. Each layout keeps its own setting.
My team can’t see the layout picker. How do they reach the Sales form?#
The picker only appears when a person can use more than one layout. Make Sales the default layout for their profile with Layout Assignment on the module’s Layouts page, and the Create form opens on Sales for them.
Does making a field required fill in old records?#
No. Existing records keep their values (or lack of them). The rule applies when someone creates a record, or edits and saves one, on that layout.
Can I make a system field like First Name optional?#
On a module with two or more layouts, yes — on one layout at a time, as in Step 7. It stays required on the layouts where you leave it on.
Previous and next#
Previous: Edit a Layout in the Layout Builder: Rearrange Fields, Change Field Settings and Save
Next: Set the Module Default Layout: Choose the Form Everyone Falls Back On
Related articles#
Was this article helpful?
Ready to implement this?
OpenAI Engage and apply what you just learned to your own workspace.
Open AI Engage CRM