Loading…


KnowledgeBase
Bulk Actions on Records: Delete, Merge & Update Status
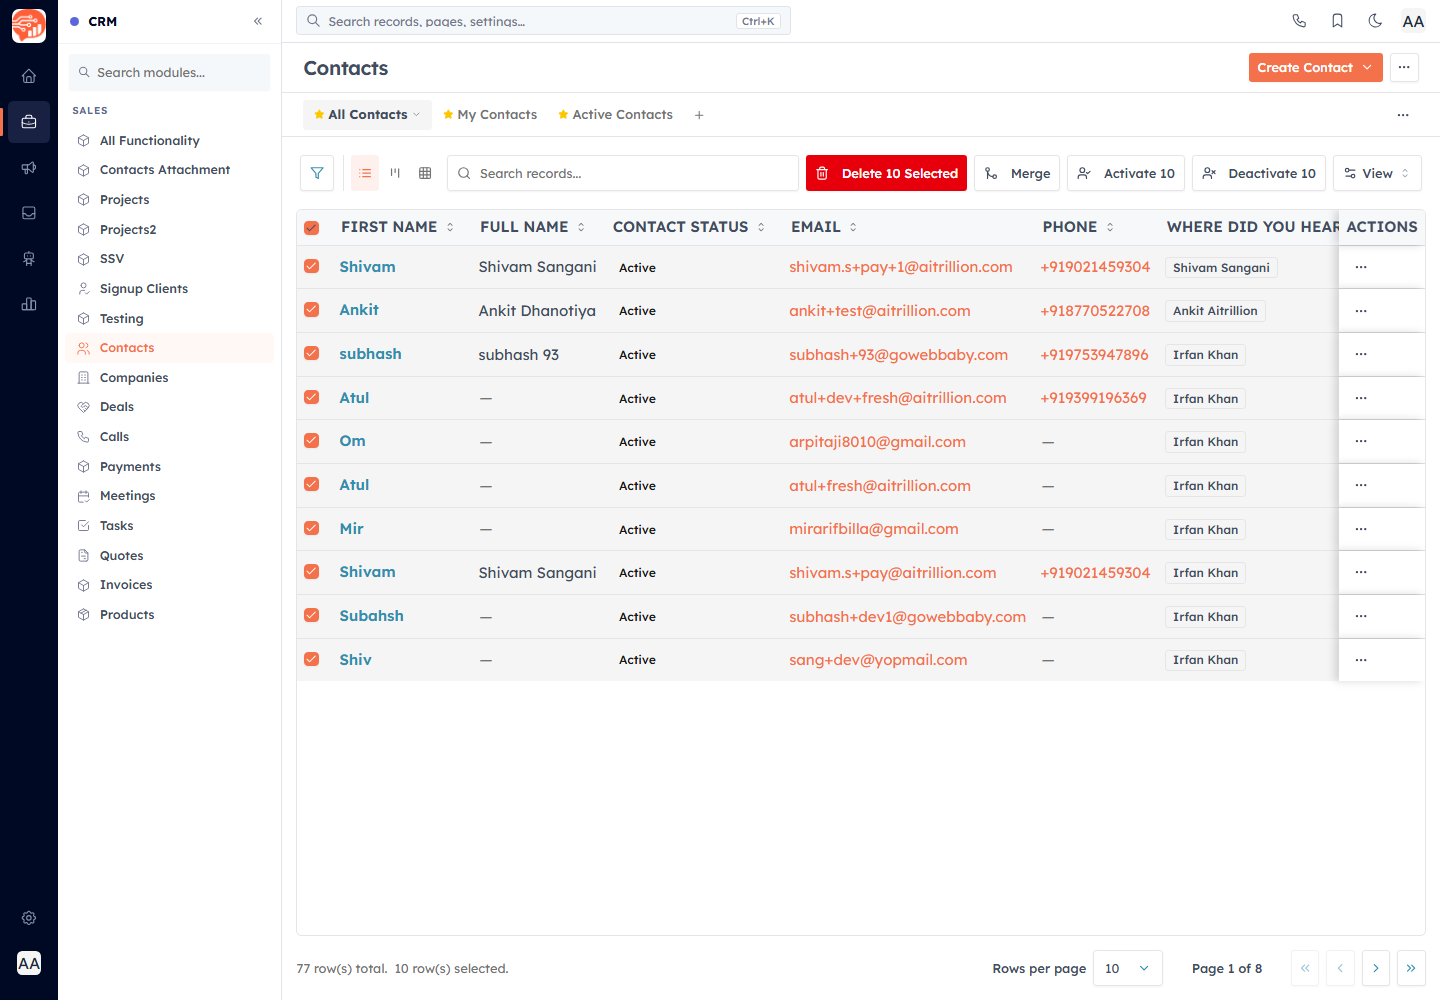
When you need to act on many records at once instead of opening them one by one, AI Engage CRM gives you bulk actions directly from any module's list view. Select the records you want, and a set of action buttons appears in the toolbar above the table. These actions work the same way across every module — Contacts, Leads, Deals, and any custom module you build — so once you learn the pattern it applies everywhere. This article covers how to select records, and how to use bulk delete, bulk merge, and the bulk status (Activate / Deactivate) actions, including the permissions each one needs.
Before you start#
Which bulk actions you see depends on your permissions and, for some actions, your plan and the module's settings:
Delete — you need delete permission on the module. If your role's delete permission is set to none, the delete button never appears.
Merge — you need both edit and delete permission on the module, your plan must include the record-merge feature, and the module's Duplicate Check & Merge setting must be enabled by an admin. Merge is also unavailable on transactional documents (invoices, quotes, payments), because each of those is a distinct numbered document rather than a duplicate to combine.
Activate / Deactivate — these status actions appear on the Contacts module only.
💡
Bulk actions appear in the toolbar the moment you select at least one record. If you don't see a button you expect, check the permission and plan requirements above — the button is hidden, not disabled, when a requirement isn't met.
Bulk actions appear in the toolbar the moment you select at least one record. If you don't see a button you expect, check the permission and plan requirements above — the button is hidden, not disabled, when a requirement isn't met.
Select the records you want#
Open any module's list view and locate the checkbox column on the far left of the table.
Tick the checkbox on each row you want to include, or use the checkbox in the table header to select every record on the current page.
Watch the footer below the table — it shows a running count such as "12 row(s) selected." next to the total row count.
Your selection persists as you page through the list: records you tick on page 1 stay selected when you move to page 2, so you can build a selection that spans several pages before acting on it.
Bulk delete records#
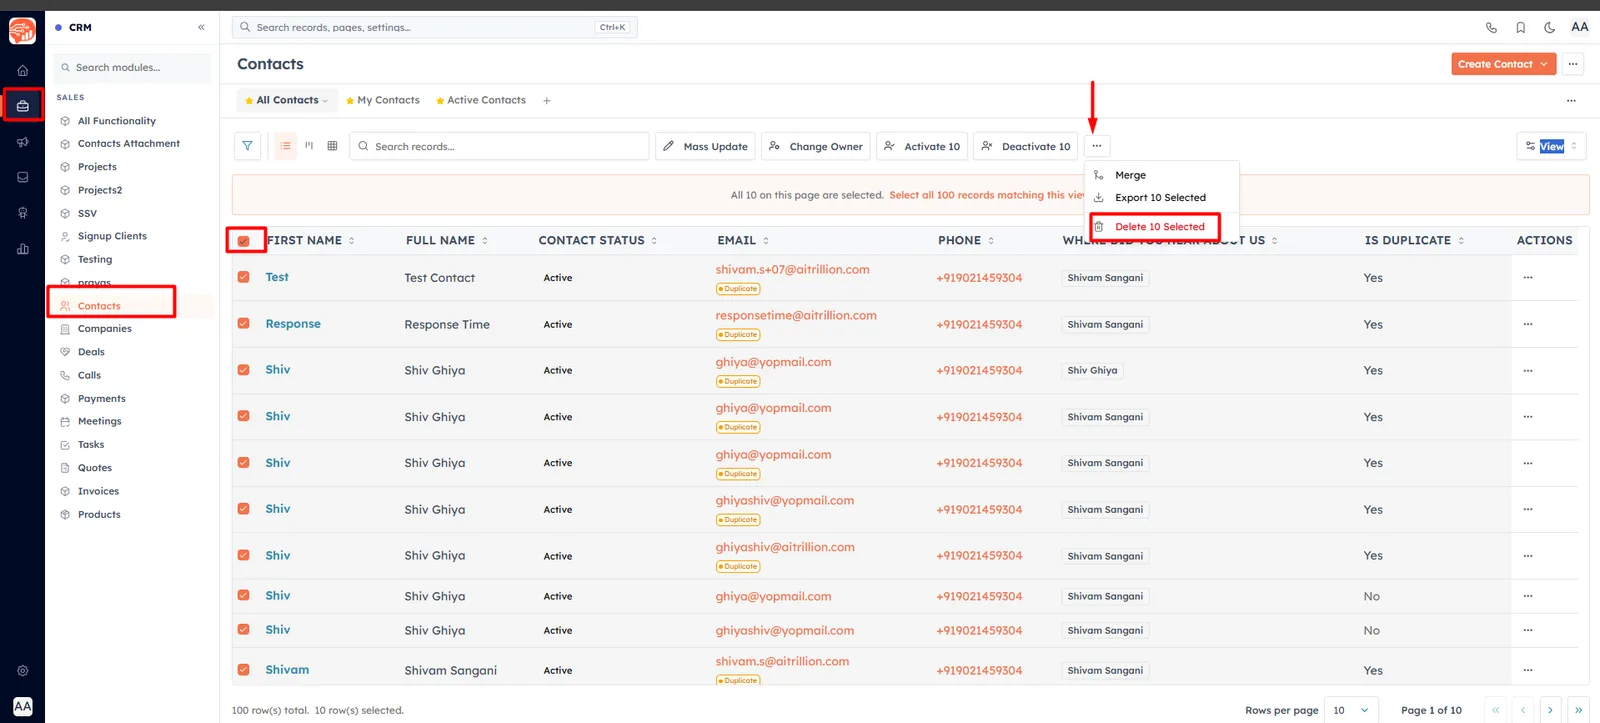
With one or more records selected, click Delete {n} Selected in the toolbar.
A confirmation dialog titled Delete {n} Record(s) opens. It warns that this action cannot be undone, and explains that all related child records (tasks, notes, and so on) and the activity history for each selected record will also be permanently deleted. Records in other modules that were linked to these will be preserved, but their references are cleared.
Click Delete {n} Record(s) to confirm. The button shows Deleting… while it works.
On success, you'll see the toast "Records deleted successfully" and your selection clears. If it fails, a red error toast explains why and nothing is deleted.
💡
Bulk delete is permanent. Along with the records themselves, it removes their child tasks, notes, and full activity history. Review your selection carefully before confirming — there is no undo.
Bulk delete is permanent. Along with the records themselves, it removes their child tasks, notes, and full activity history. Review your selection carefully before confirming — there is no undo.
Bulk merge duplicates#
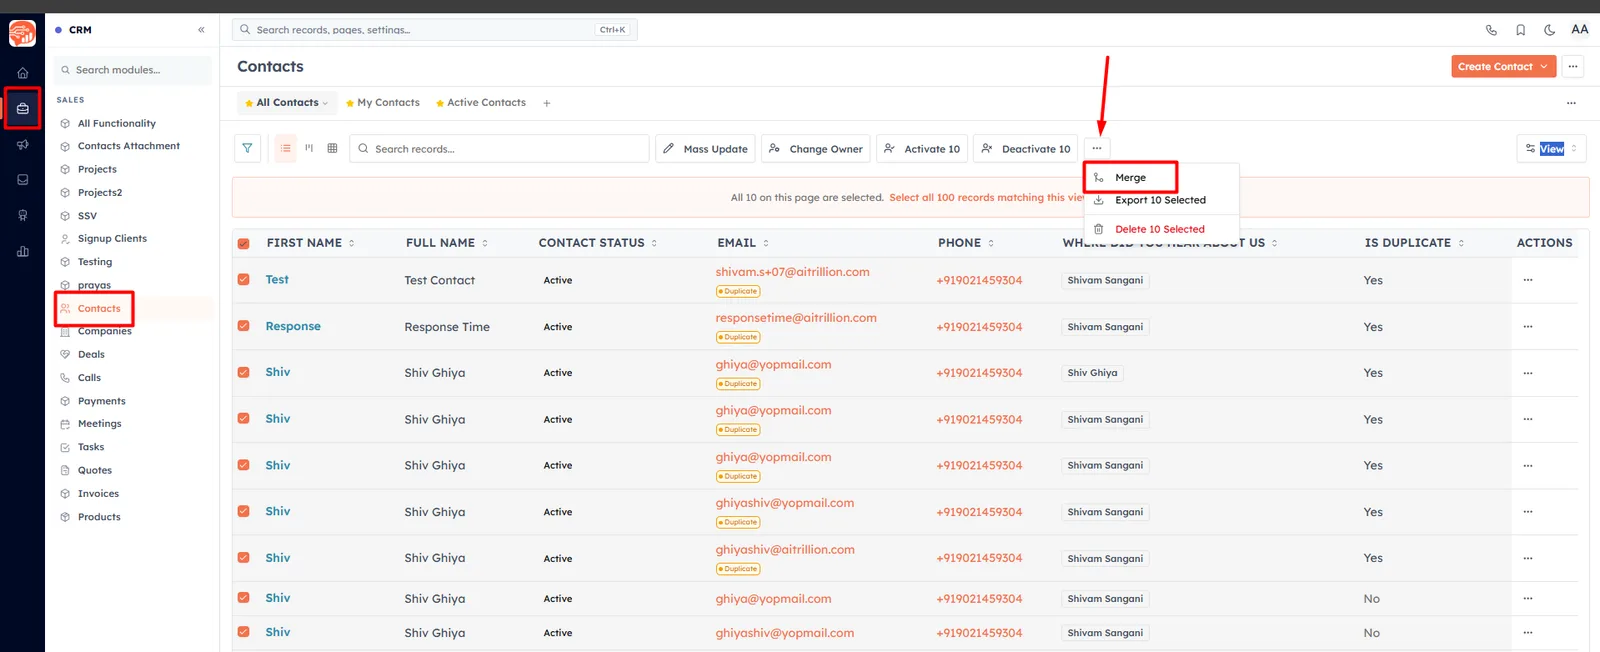
When two or more of the same real-world record exist, merge combines them into one master and removes the duplicates:
Select two or more records (the Merge button only appears with at least two selected and when all the merge requirements above are met).
Click Merge to open the merge dialog, where you choose the master record and confirm which values to keep.
Because merging re-parents related data onto the master and then deletes the other records, it requires both edit and delete permission. For the full step-by-step walkthrough, see Find & Merge Duplicate Contacts.
Bulk Activate / Deactivate contacts#
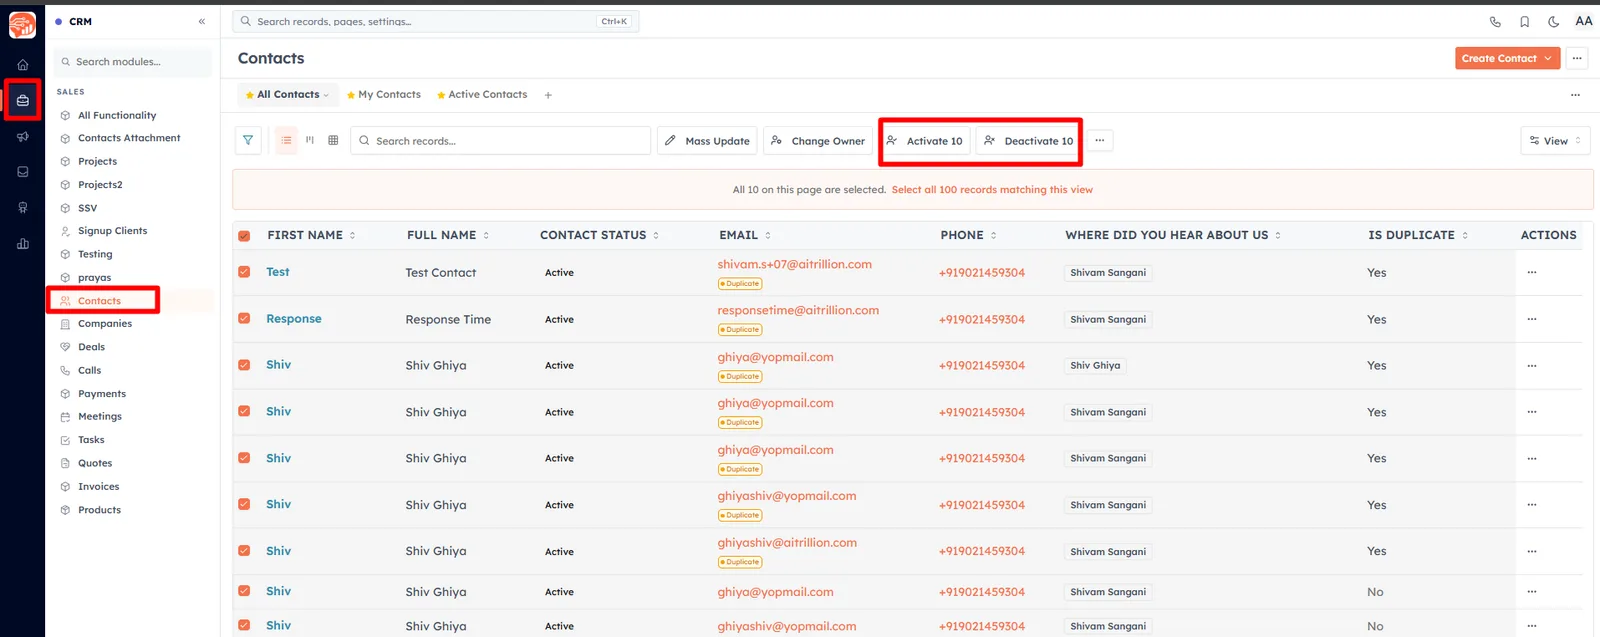
On the Contacts module, two extra buttons appear when you have records selected:
Activate {n} — marks the selected contacts as active. The confirmation dialog reminds you that active contacts count toward your plan limit.
Deactivate {n} — marks them inactive. The confirmation dialog notes that deactivated contacts will no longer receive regular communications.
In both cases, contacts that are already in the target status are skipped — activating a contact that's already active has no effect. Click the confirm button (it shows Activating… or Deactivating… while running) to start the job.
The live progress toast#
Because a status change can touch a large number of contacts, it runs as a background job with a progress toast pinned to the bottom-right corner of the screen. This toast:
Persists across navigation — you can move to another page in the CRM and the toast keeps tracking the job.
Updates every few seconds — while running it shows "Activating contacts…" or "Deactivating contacts…" with a progress bar, a percentage, and a processed / total count.
Reports the result on completion — for example "1,240 contacts activated", followed by an updated count and, if any were skipped, a skipped count.
Shows a failure state — if the job can't finish, the card turns to "Bulk Status Update Failed" with an error message.
Click the ✕ or the Dismiss button to close a finished card.
💡
You don't have to wait on the screen. Kick off an Activate or Deactivate on thousands of contacts, keep working elsewhere in the CRM, and the toast will follow you and confirm when it's done.
You don't have to wait on the screen. Kick off an Activate or Deactivate on thousands of contacts, keep working elsewhere in the CRM, and the toast will follow you and confirm when it's done.
Good to know#
Selection count — the footer always shows how many rows are selected, so you can confirm the scope before acting.
Cross-page selection vs. merge — while delete and status actions honor your full multi-page selection, merging works on the records visible on the current page.
Same everywhere — selection and bulk delete work on every module; merge depends on the module's Duplicate Check & Merge setting, and Activate / Deactivate are specific to Contacts.
Was this article helpful?
Ready to implement this?
OpenAI Engage and apply what you just learned to your own workspace.
Open AI Engage CRM