Loading…


KnowledgeBase
Importing Records When a Module Has Several Layouts: What Happens and How to Move Records (Step-by-Step)
Can I import records into a specific layout?#
Not directly. When a module has more than one layout (for example Standard and Sales on Contacts), the import wizard does not ask which layout the new records should use, and a Layout column in your file can’t be mapped — it is ignored. The CRM decides the layout of imported records itself.
This guide shows exactly what you will see when you import into such a module, and how to check which layout an imported record is on and move it to the right one afterwards.
| Question | Short answer |
|---|---|
| Can I pick a layout in the import wizard? | No. None of the four steps has a layout setting. |
| Can a “Layout” column in my file set it? | No. The Layout field is not offered in Map Fields, so the column is skipped. |
| Does the import fail if my file has a Layout column? | No. That column is simply not used; the other columns import as usual. |
| Can I change an imported record’s layout afterwards? | Yes — open the record and use Change Layout. |
Example used in this guide. You import two contacts from a file whose columns are First Name, Last Name, Email, Company Name and Layout (with the value “Sales”), into a Contacts module that has a Standard and a Sales layout.
Before you begin#
You need permission to import into the module.
For the full import walk-through (compliance, settings, owners, lists and the import history) see Import Data into Any Module. This guide focuses on what changes when a module has several layouts.
You don’t need to remove a Layout column from your file — but it won’t do anything.
Part 1: Start the import#
Step 1: Open Import Bulk#
Open the module (here Contacts), click the small arrow on the orange Create Contact button and choose Import Bulk (CSV, Excel).
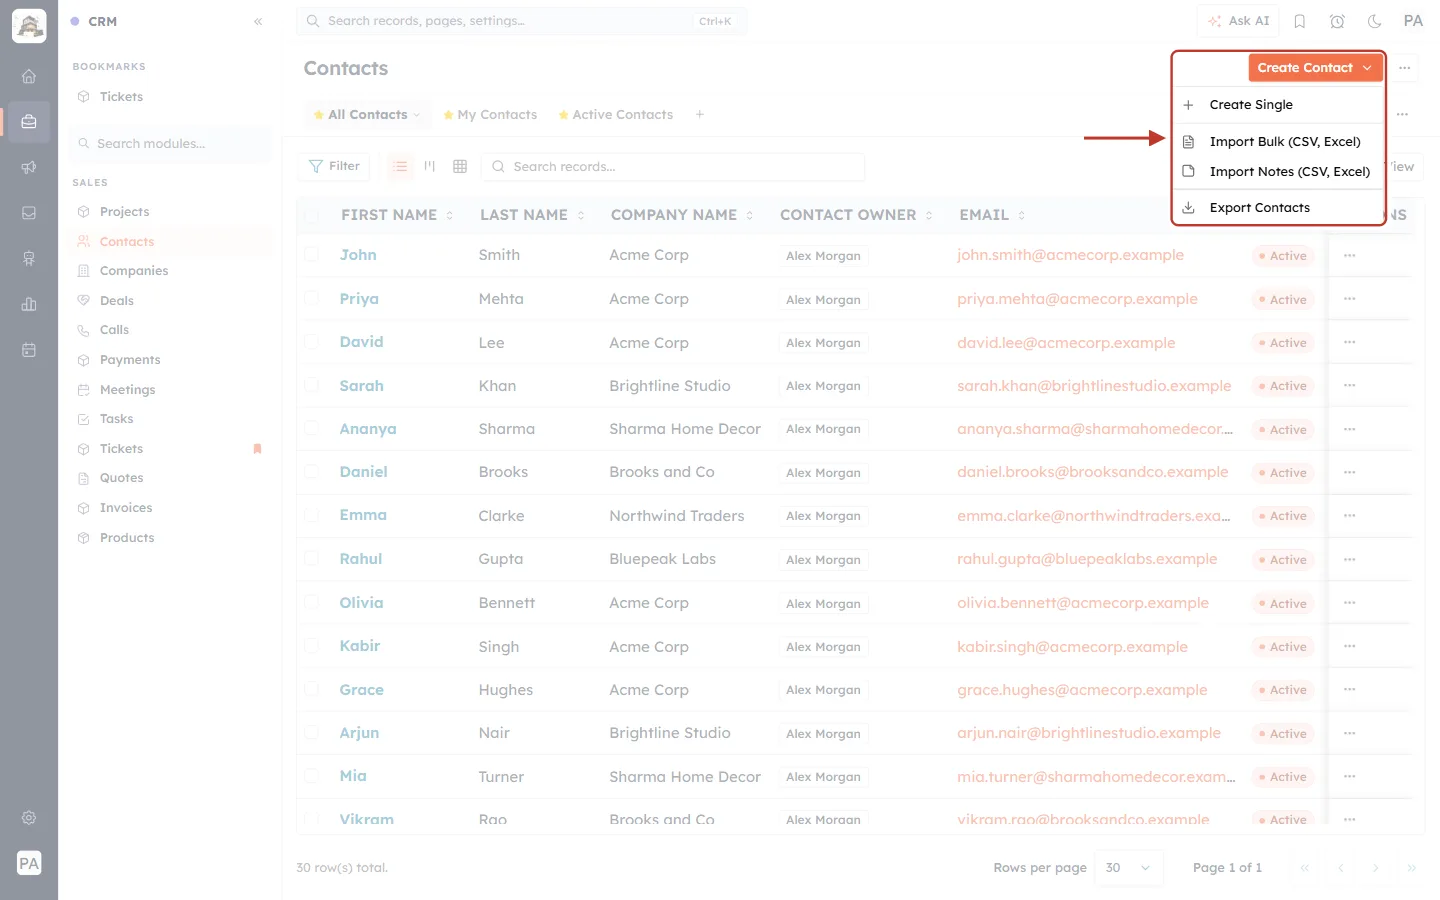
What this screenshot shows. The Contacts list with the Create Contact menu open, ringed.
Create Single — create one contact on the full form.
Import Bulk (CSV, Excel) — import many contacts from a file. Click this one.
Import Notes (CSV, Excel) and Export Contacts are the other file tools.
Step 2: Upload your file and fill in the settings#
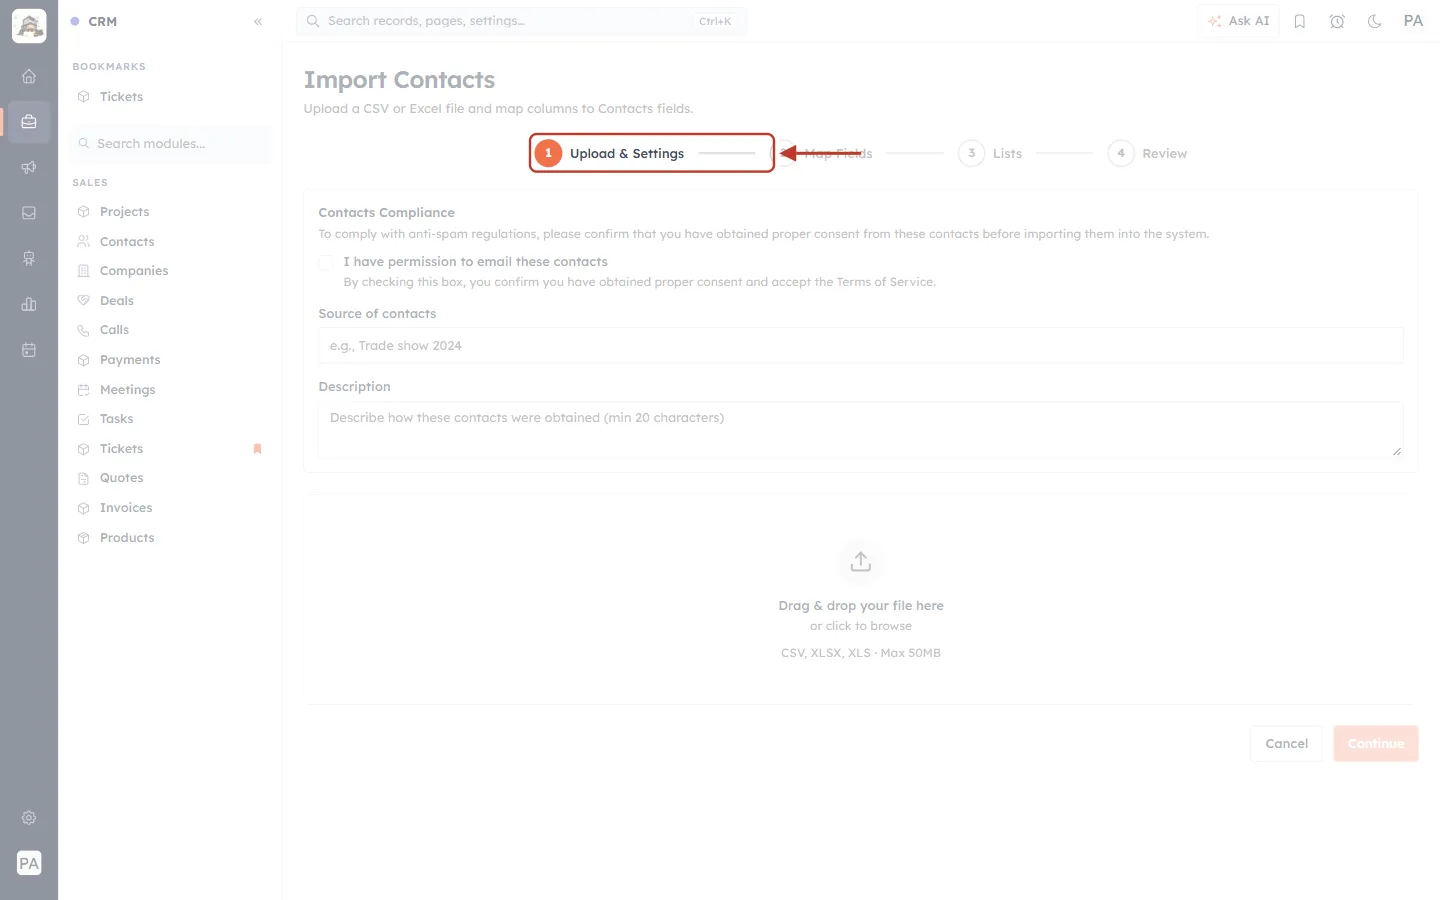
What this screenshot shows. The step bar at the top of the Import Contacts page, with step 1, Upload & Settings, ringed.
The wizard has four steps: Upload & Settings, Map Fields, Lists and Review.
There is no layout step, and no layout setting in any of them.
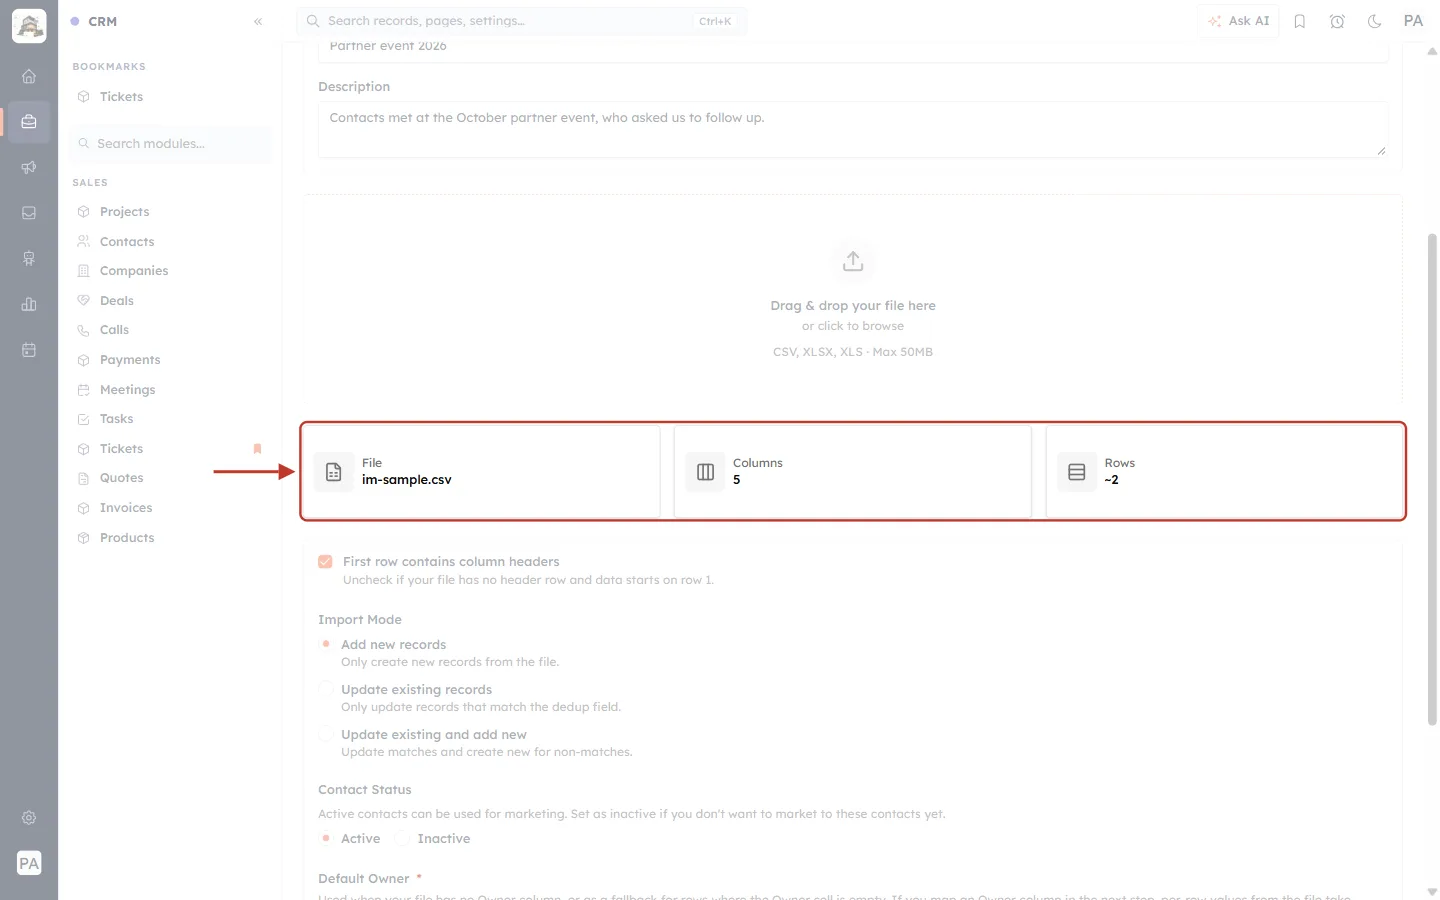
What this screenshot shows. The three cards that appear after you drop your file, ringed: File (im-sample.csv), Columns (5) and Rows (~2).
The file is read so you can map its columns in the next step. Nothing is imported until the final step.
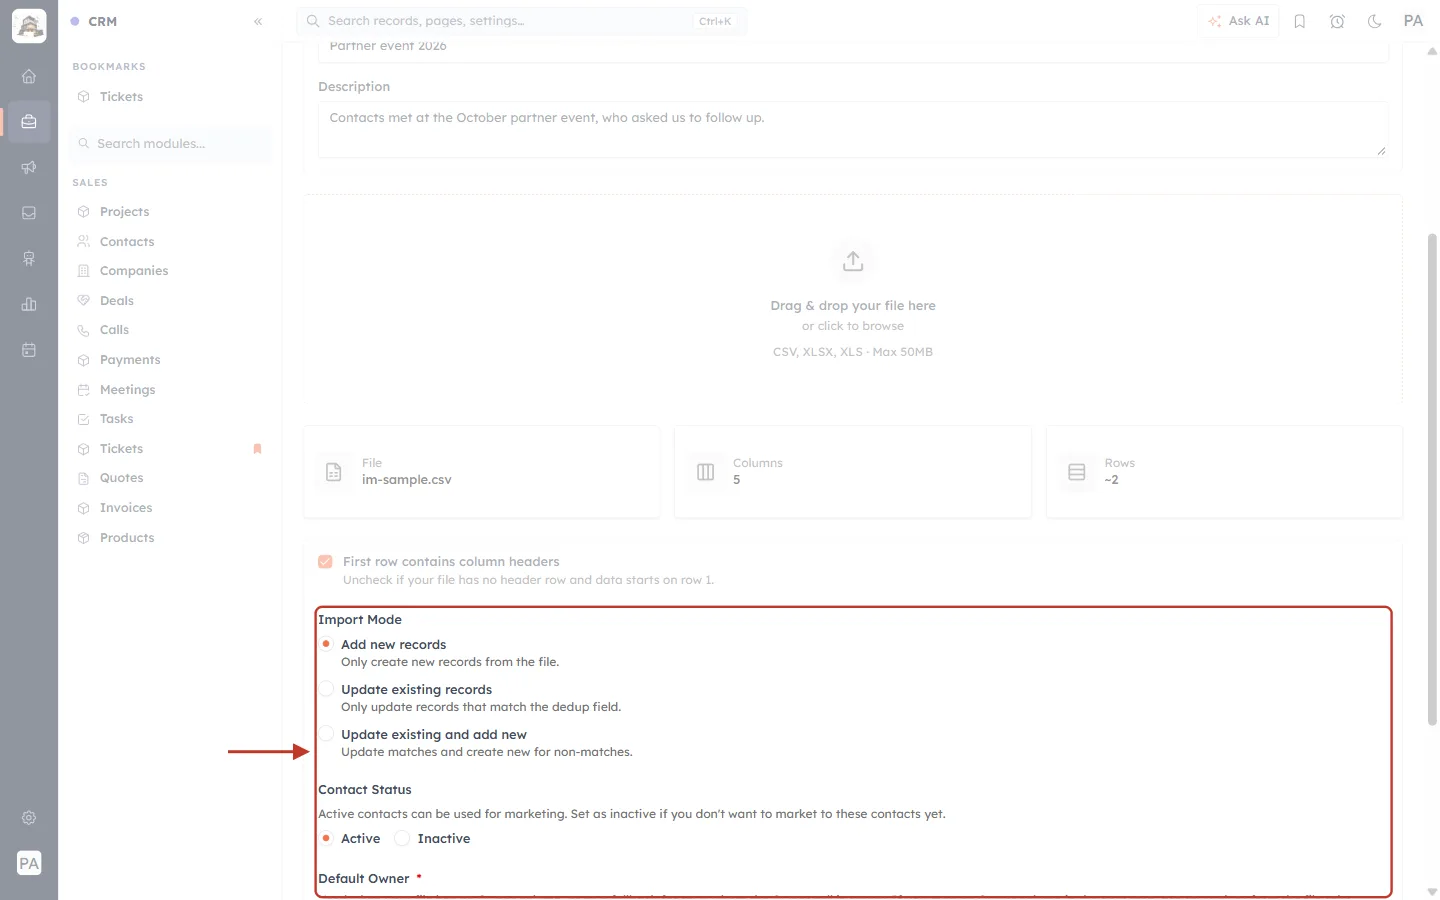
What this screenshot shows. The settings below the file, ringed.
Import Mode — add new records, update existing ones, or both.
Contact Status — whether the imported contacts start as Active or Inactive.
Default Owner — the owner for rows without one.
Notice that there is no Layout setting here. Fill these in, tick the compliance box at the top, and click Continue.
Part 2: Map your columns — and what happens to a Layout column#
Step 3: Check the mapping#
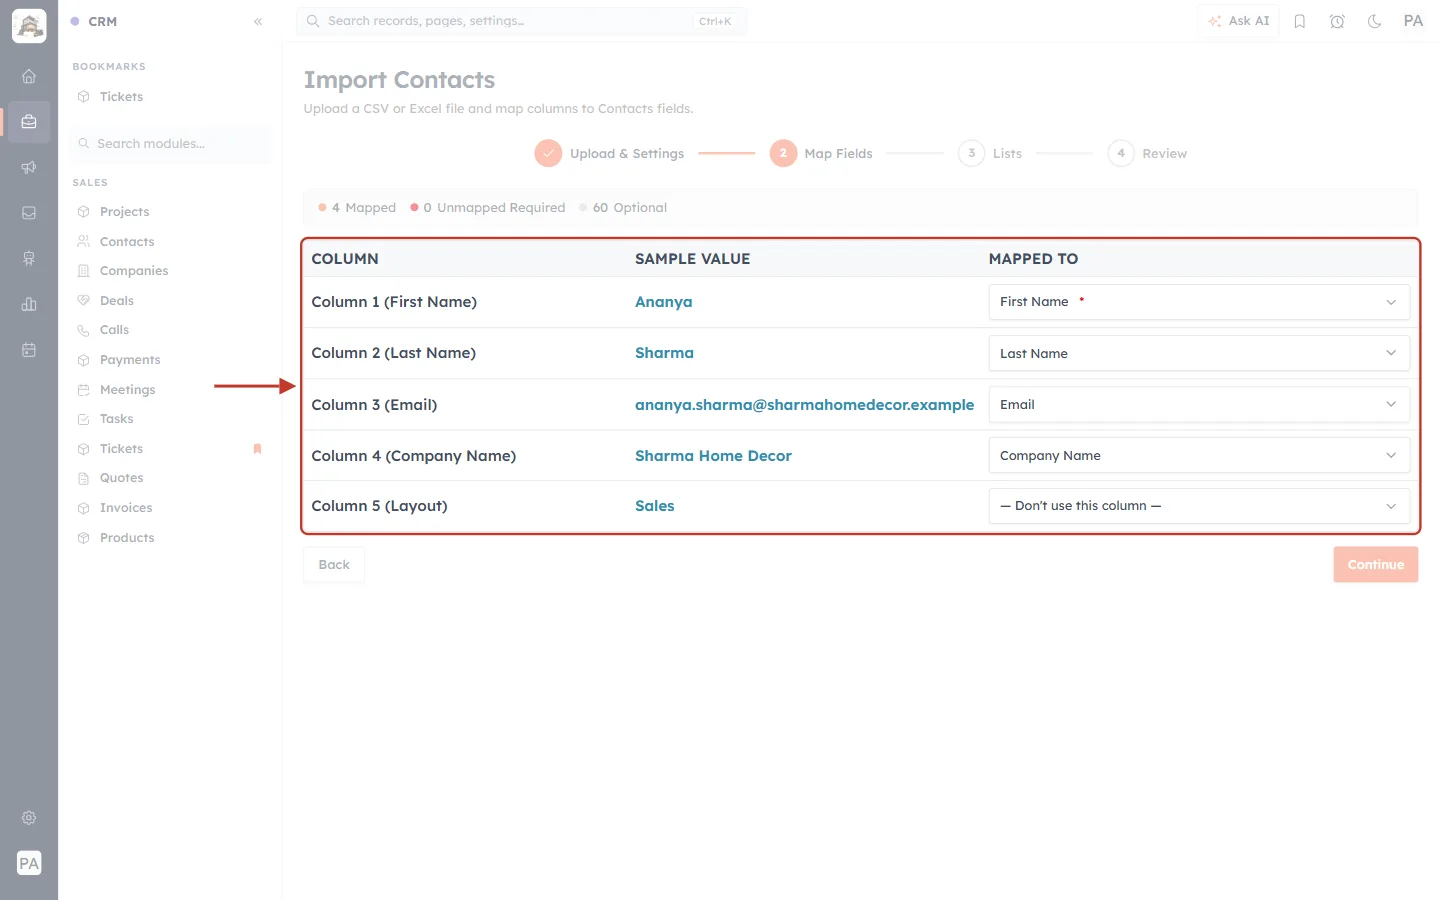
What this screenshot shows. The Map Fields step, with the mapping table ringed. Above it: 4 Mapped · 0 Unmapped Required · 60 Optional.
COLUMN — each column of your file (for example Column 1 (First Name)).
SAMPLE VALUE — the value in the first row (Ananya, Sharma…).
MAPPED TO — the CRM field the column fills. First Name, Last Name, Email and Company Name were matched automatically.
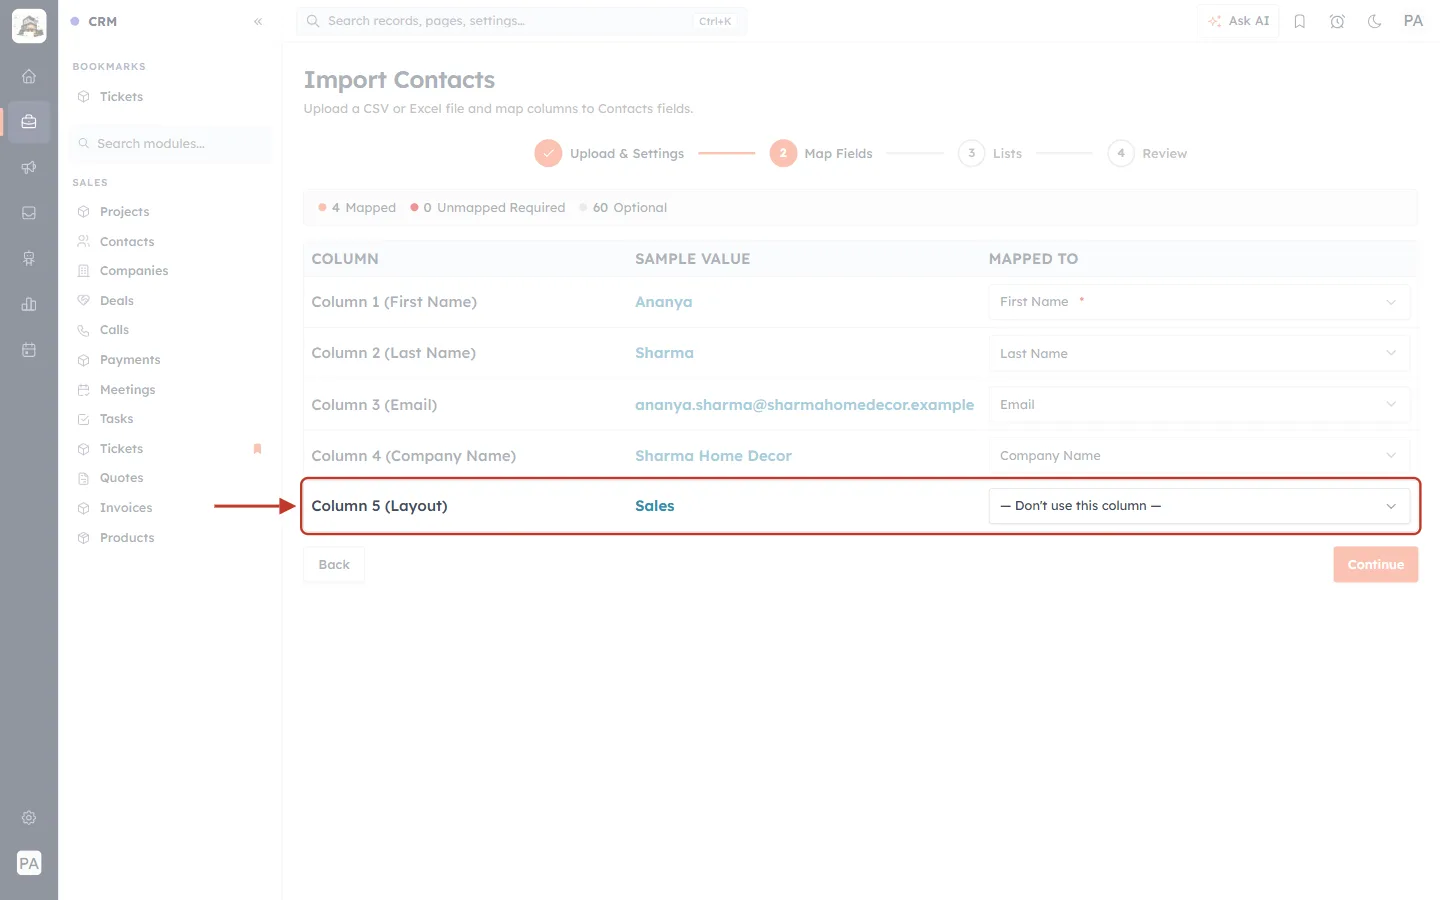
What this screenshot shows. The row for Column 5 (Layout), ringed. Its sample value is Sales, and it is mapped to — Don’t use this column —.
The CRM didn’t match it to any field, because there is no field it can fill.
Step 4: Try to map the Layout column#
Click the MAPPED TO box of the Layout row and type layout in its search box.
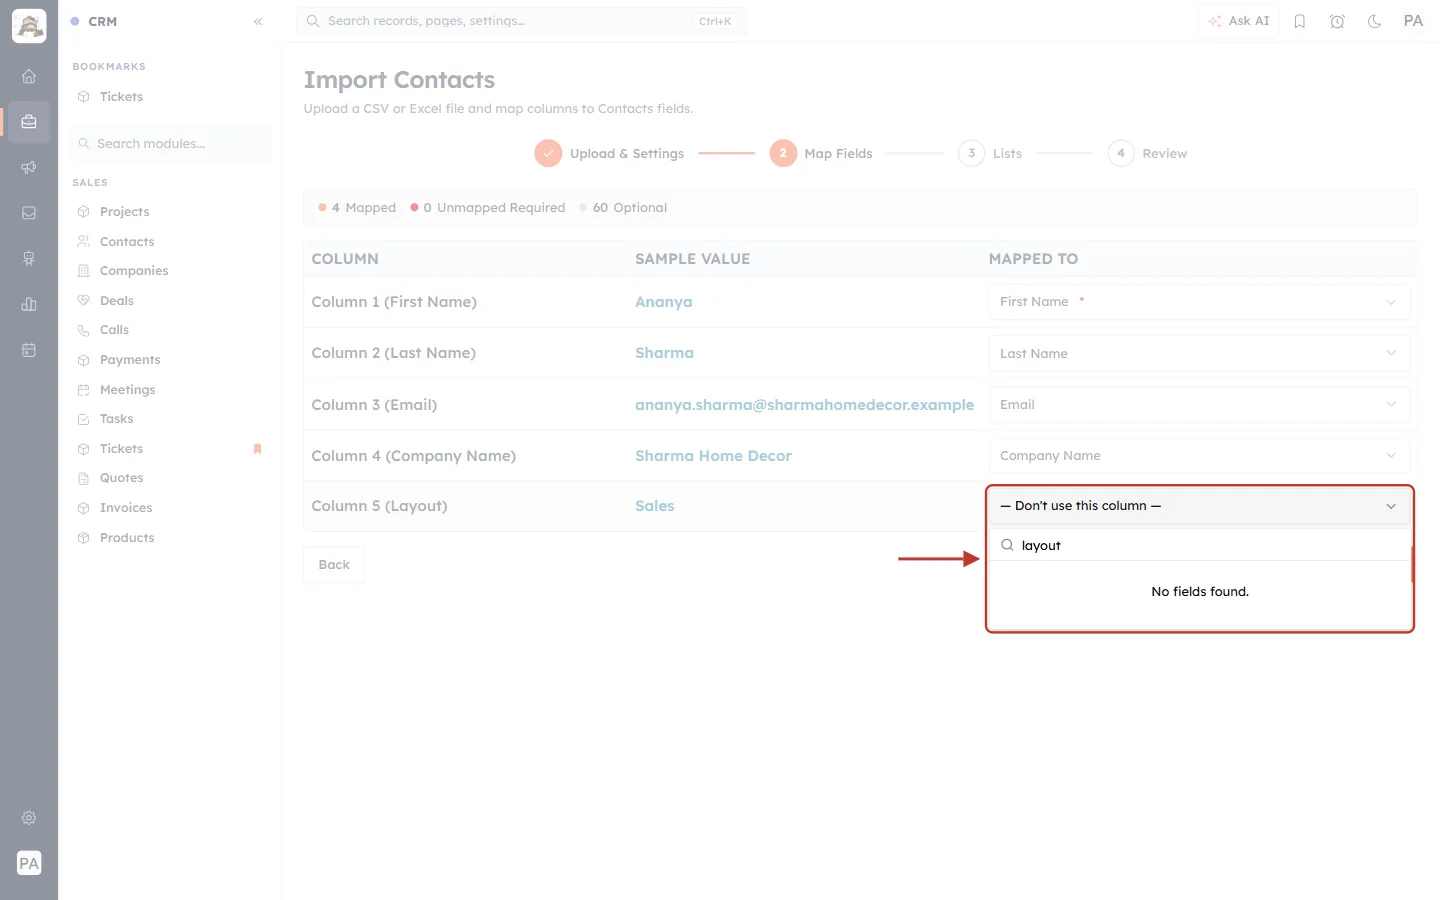
What this screenshot shows. The field list of the Layout row, open and ringed, with layout typed in the search box. It reads No fields found.
The Layout field is a system field that the CRM fills in itself, so it is never offered for mapping.
Leave the column on Don’t use this column and continue with Lists and Review as usual.
ℹ️
Why can’t a file set the layout? A layout is stored as an internal code (for example sales), while a file would hold names like “Sales”, and every row would be at risk of an invalid value. So the CRM sets the layout itself and keeps the Layout field out of imports.
Part 3: Check and change an imported record’s layout#
After the import has finished, open one of the imported records. If a record isn’t on the layout your team needs, move it with Change Layout. The pictures below use the sample contact Ananya Sharma.
Step 5: Click Change Layout on the record#
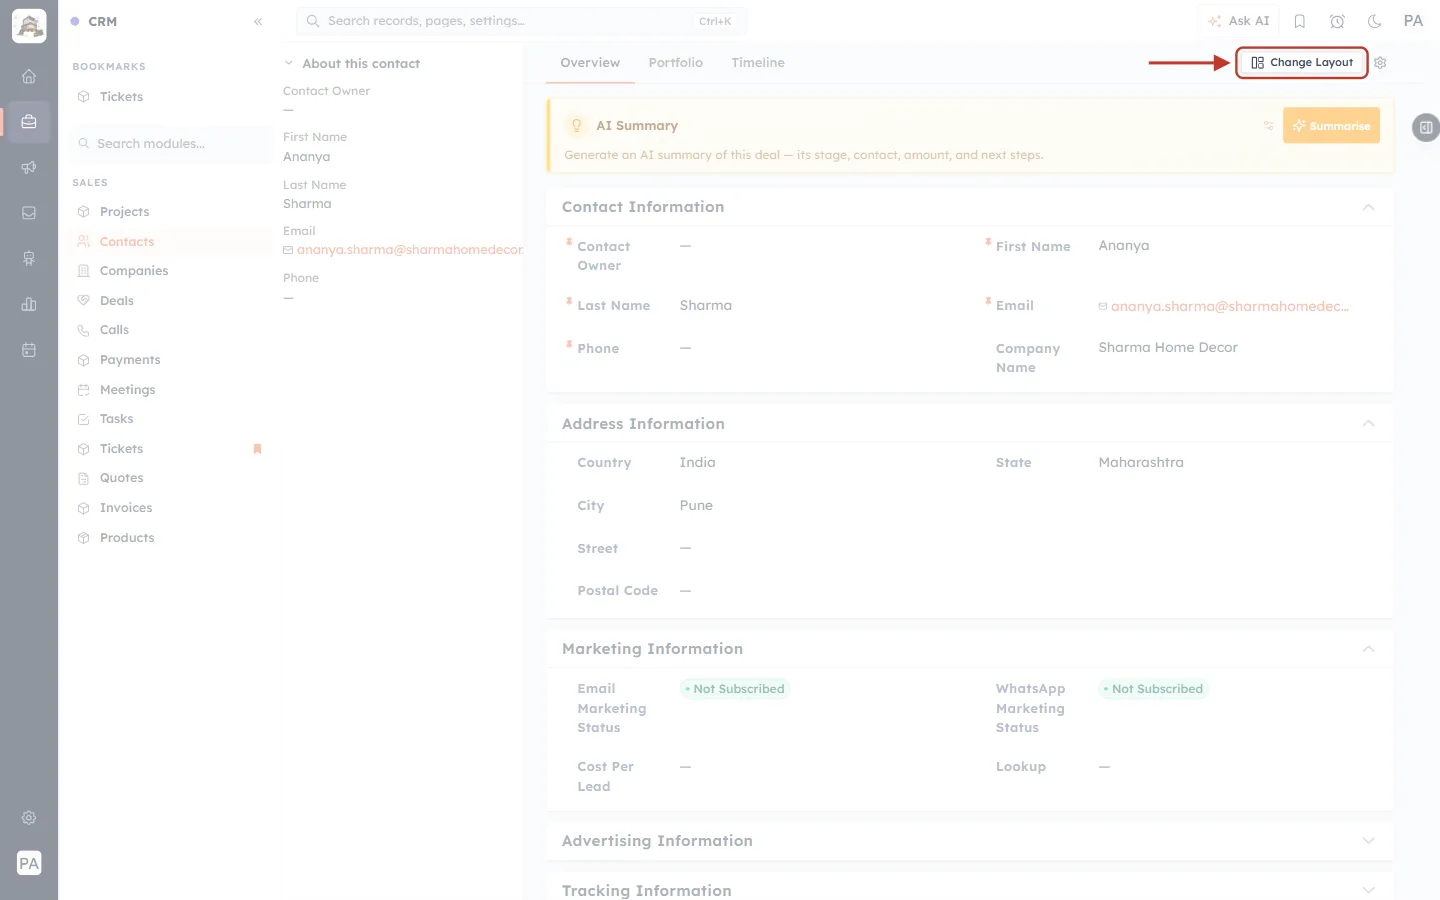
What this screenshot shows. The Change Layout button at the top right of the record, on the tabs row, ringed.
It appears only when the module has two or more active layouts and your profile can use more than one of them.
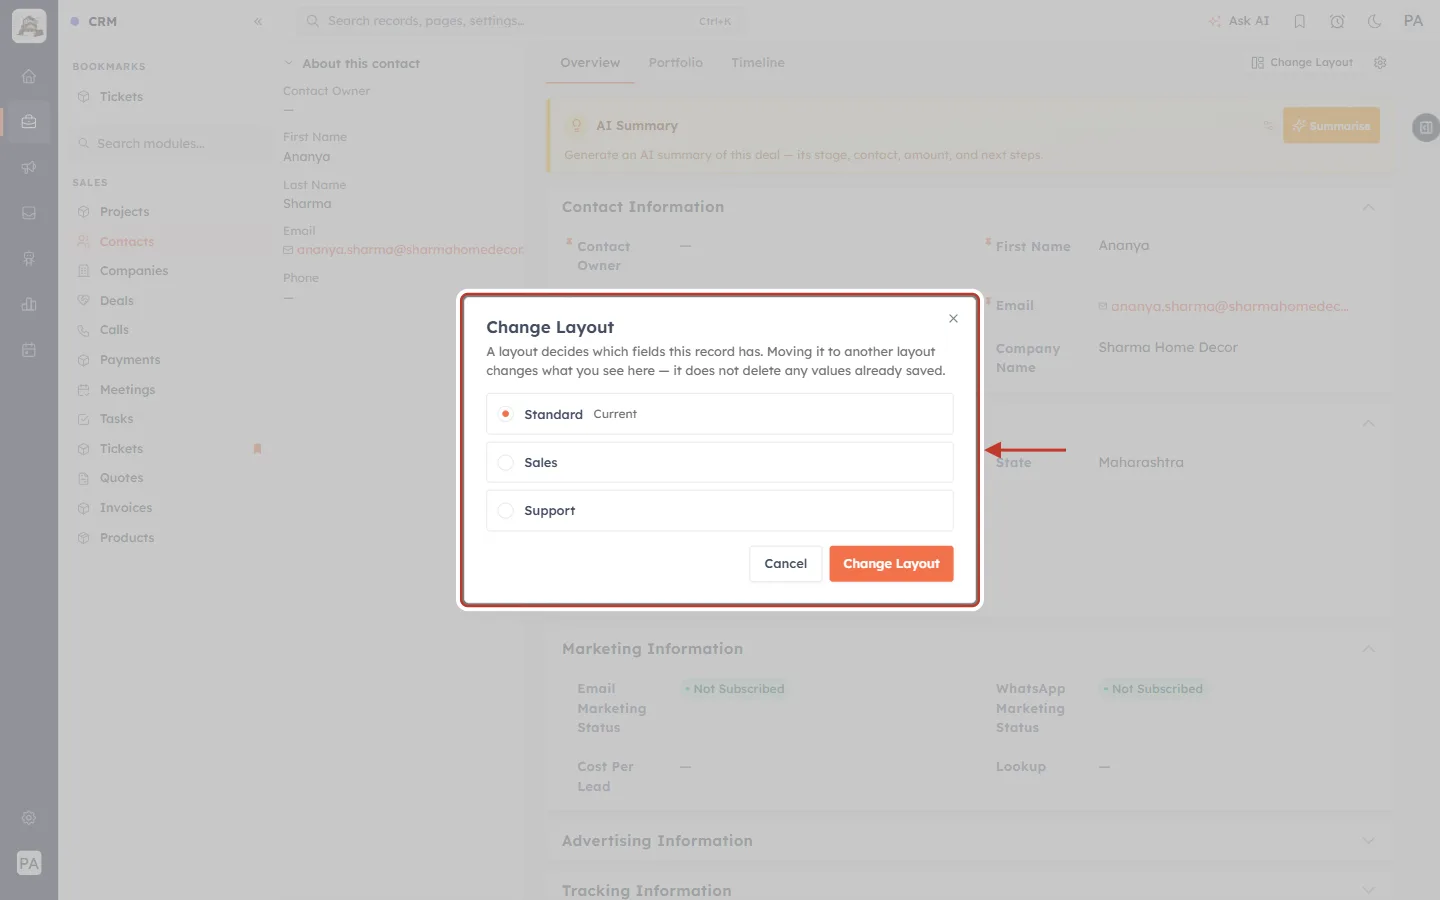
What this screenshot shows. The Change Layout window, ringed.
It lists every layout you can use. The layout the record is on now is marked Current — this is how you check which layout an imported record ended up on.
The note explains that a layout decides which fields the record shows; changing it does not delete any values.
Step 6: Pick the layout and confirm#
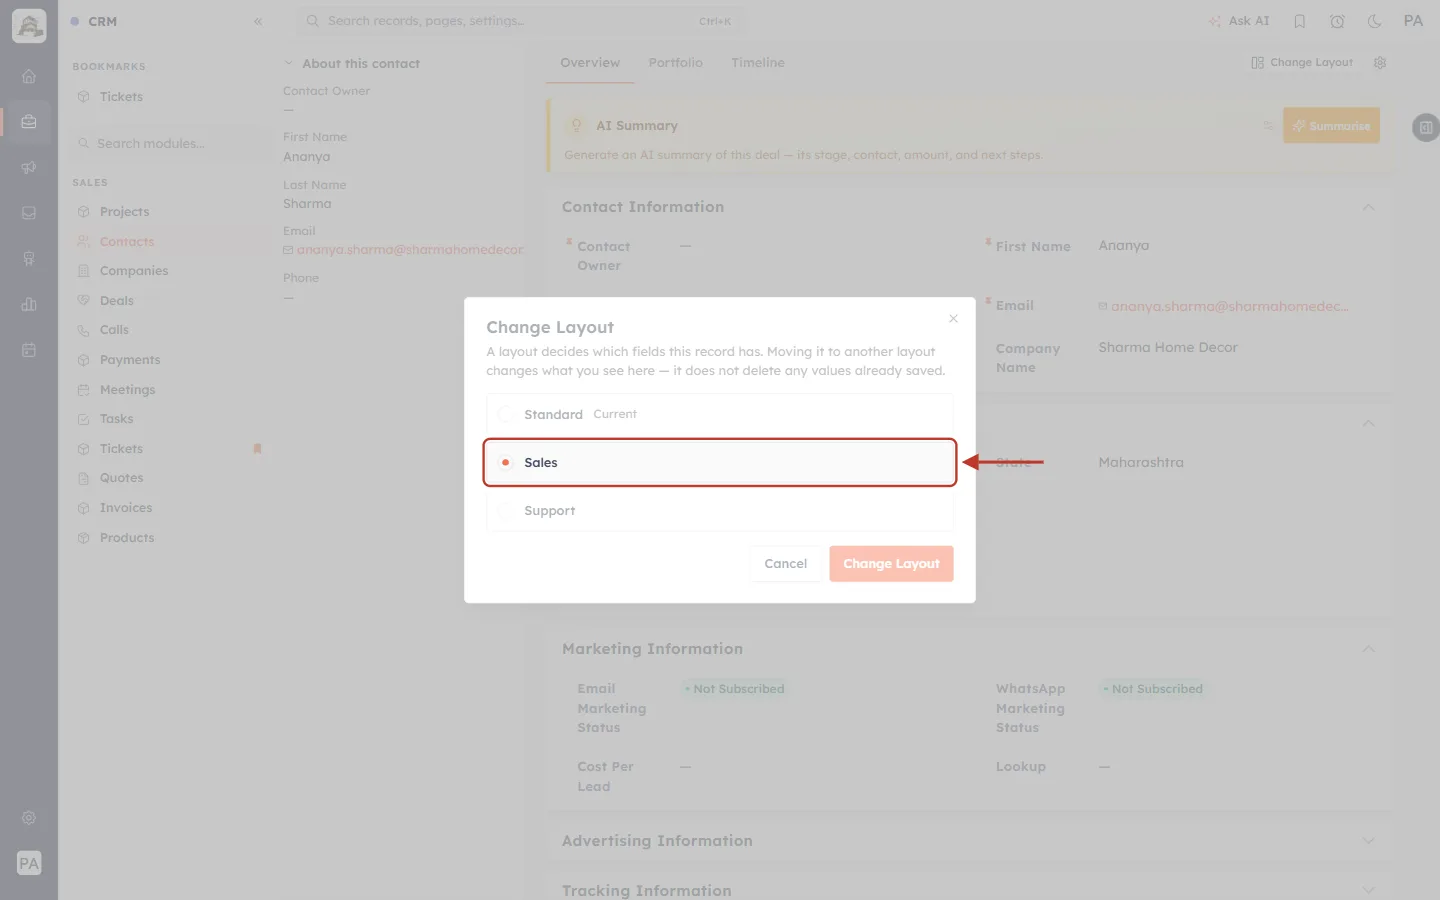
What this screenshot shows. The Sales option, selected, ringed.
Click anywhere on an option to select it.
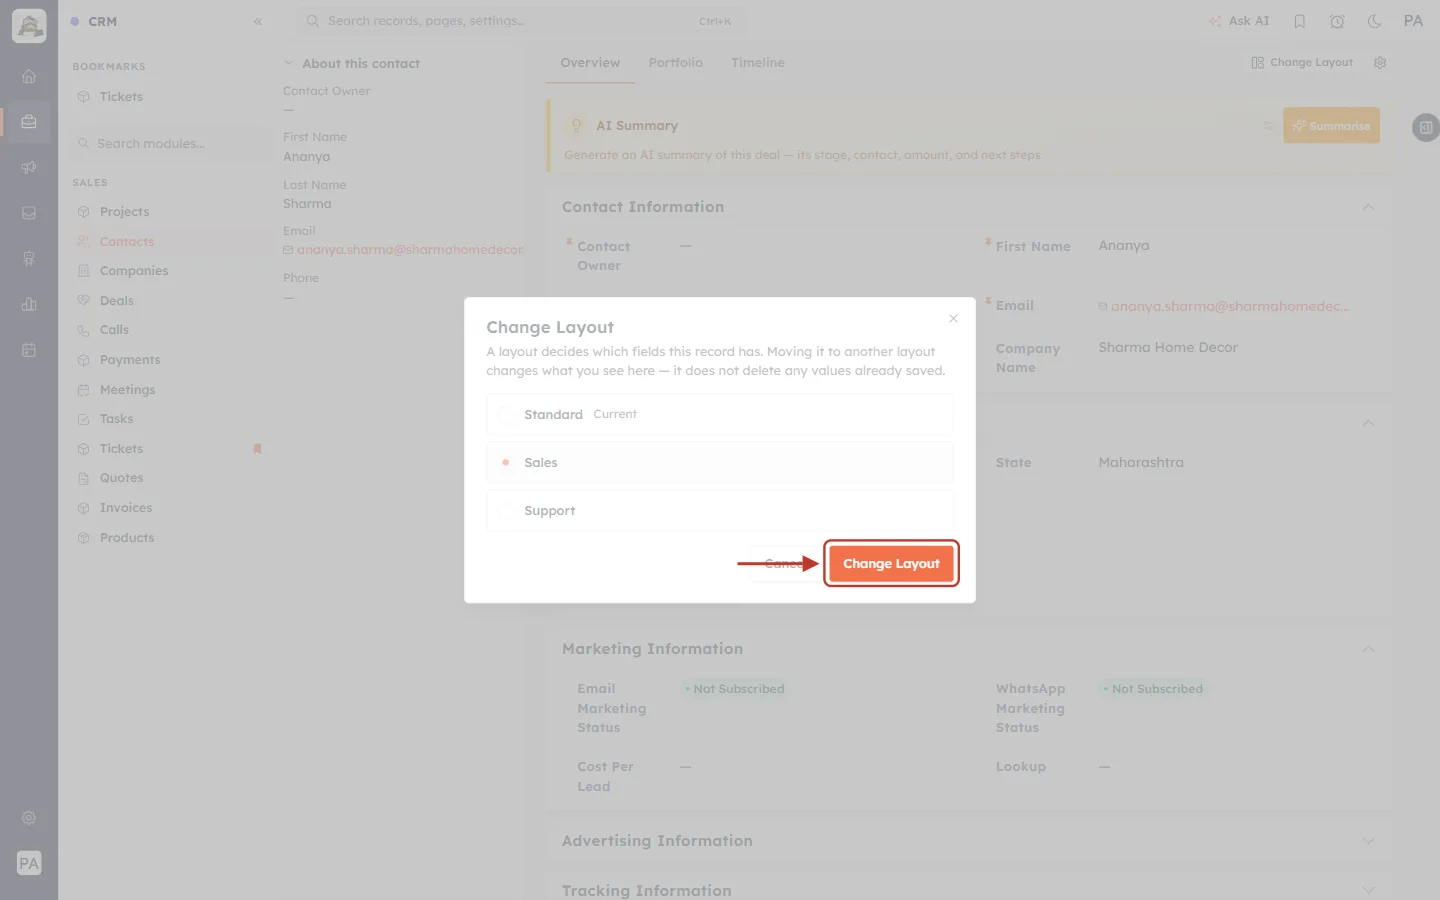
What this screenshot shows. The orange Change Layout button at the bottom of the window, ringed.
Click it to move the record.
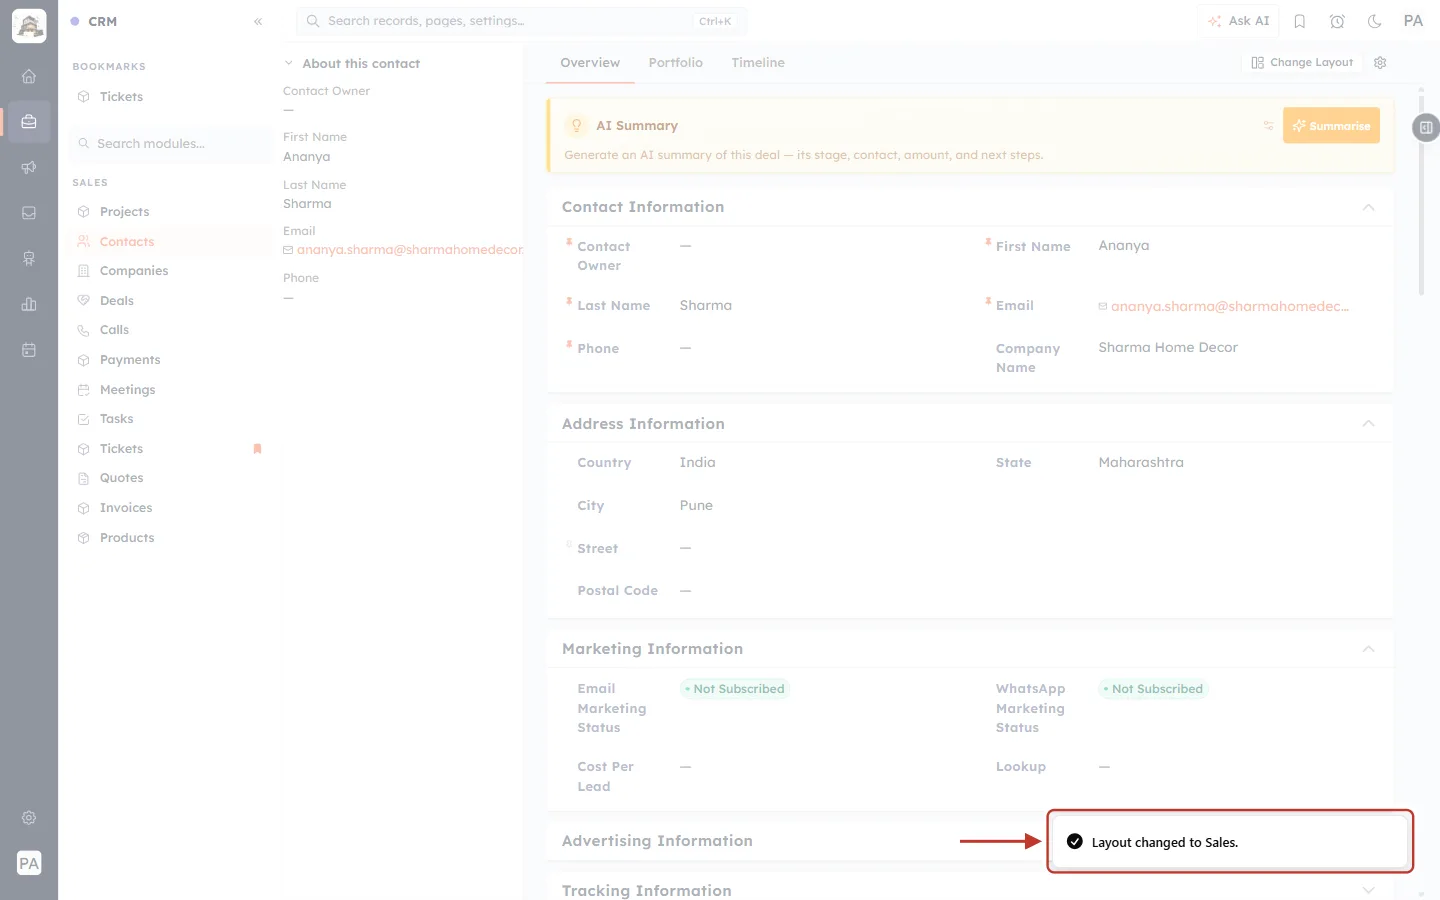
What this screenshot shows. The confirmation at the bottom right, ringed: Layout changed to Sales.
The record now opens on the Sales layout for everyone, with all its values kept.
⚠️
Change Layout moves one record at a time. If many imported records need another layout, plan for that before a large import, and check a few records right after the import finishes.
Common questions#
Which layout do imported records get?#
The CRM decides it during the import — your file and the wizard can’t choose it. Open an imported record and click Change Layout: the option marked Current is the layout it is on.
Should I delete the Layout column from my file?#
You don’t have to. It is left on “Don’t use this column” and ignored. Removing it just keeps the mapping table tidier.
Will a field that is required on one layout block my import?#
The import has its own checks for required fields: the Map Fields step shows how many Unmapped Required fields remain. Map every required field before you continue.
Can I move many imported records to another layout at once?#
Not from the import. Use Change Layout on each record that needs it.
Previous and next#
Previous: Quick Create Fields per Layout: Choose the Short Form for “+ New”
Next: Layouts FAQ and Troubleshooting: Answers to the Most Common Layout Questions
Related articles#
Was this article helpful?
Ready to implement this?
OpenAI Engage and apply what you just learned to your own workspace.
Open AI Engage CRM