Loading…


KnowledgeBase
Add Your First Contact: Creating Contact Records Step by Step
What is a Contact?#
A Contact is a person in your CRM — a customer, prospect, or partner. Every contact has their own record that stores details, logs call and email history, attaches notes, links deals, and tracks your full relationship history with that person.
💡
For bulk data entry, use Import Data (next article) to upload many contacts from a spreadsheet. Create contacts manually one at a time for individuals who come in through other channels.
Step 1 — Go to Contacts#
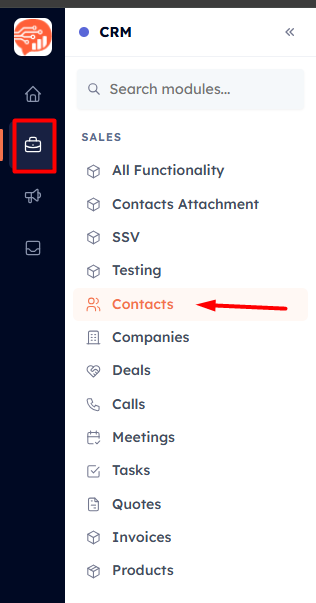
In the left sidebar, click CRM >> Contacts under your CRM modules.
Step 2 — Click Create contact#
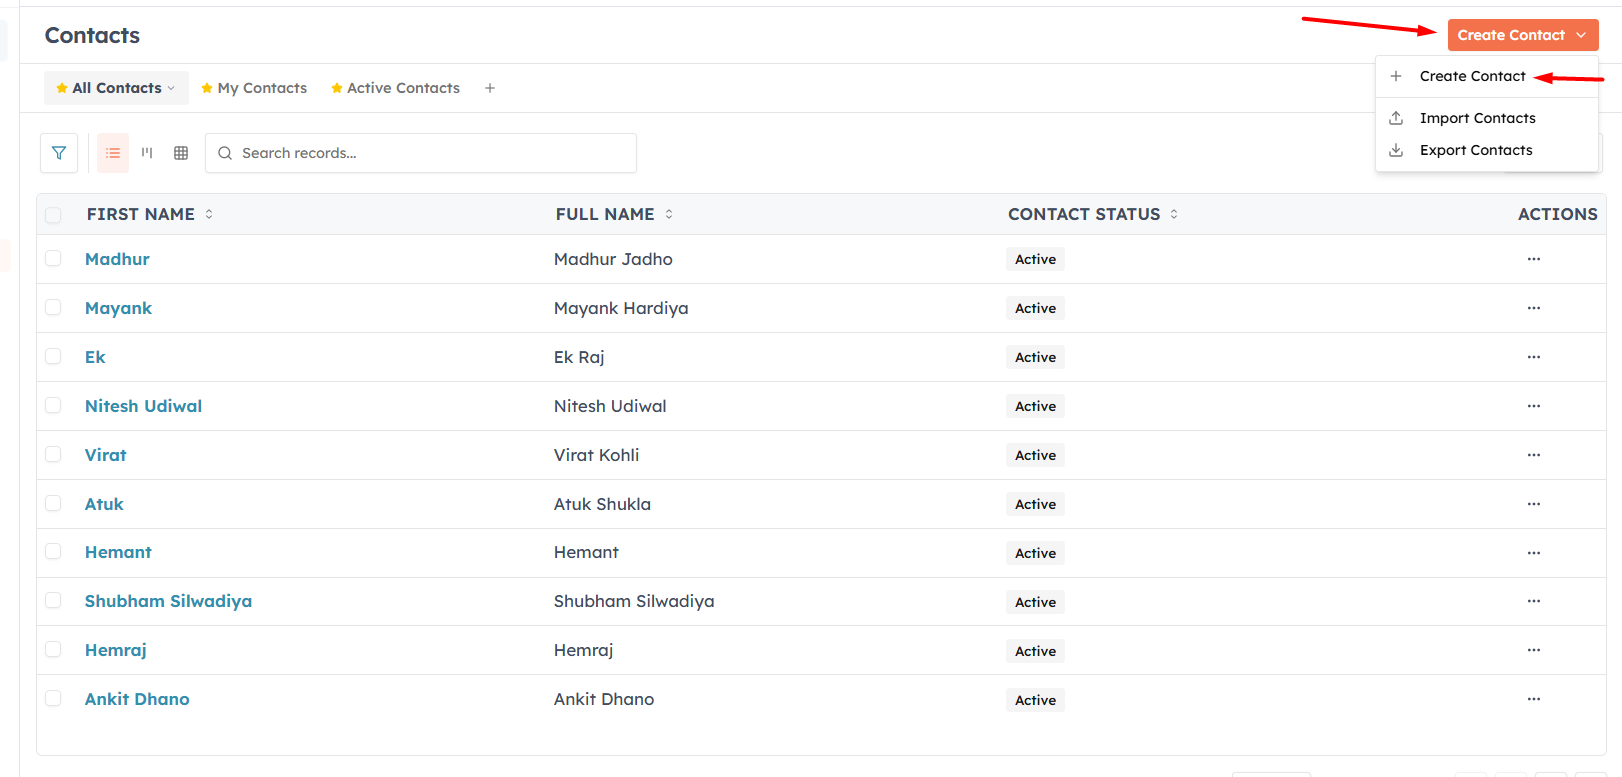
Click Create Contact at the top right to open the creation form.
Step 3 — Fill in the contact details#
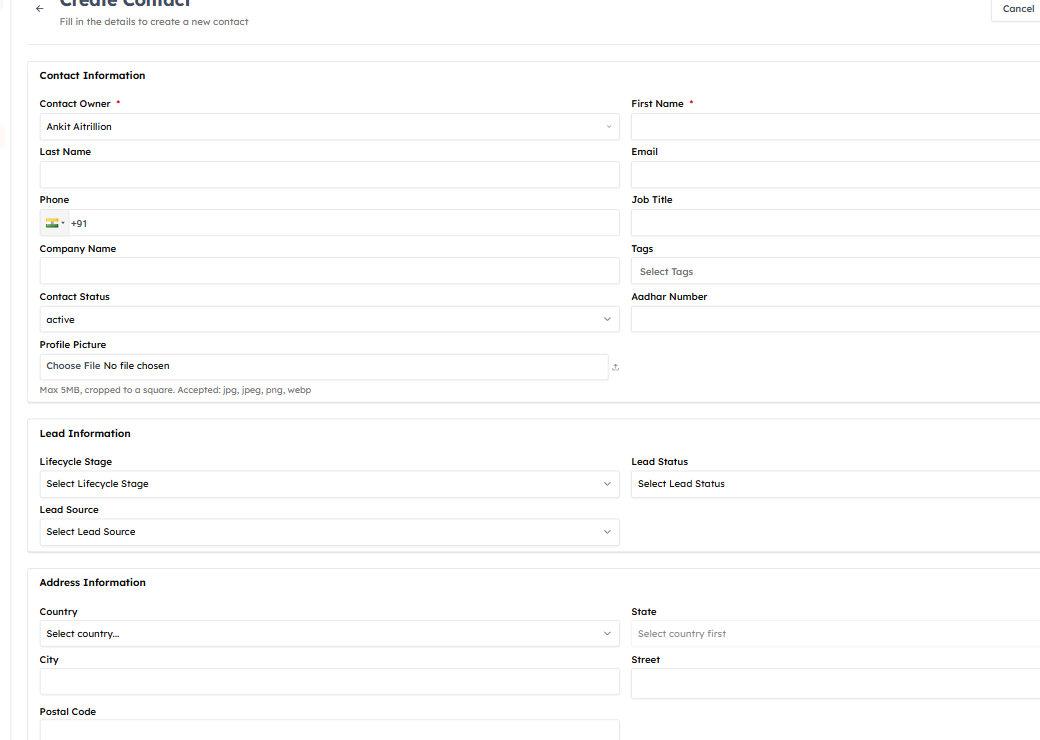
The Create Contact form opens with all fields configured for your Contacts module. Fill in as much as you know. The only required fields are:
- Contact Owner — auto-filled with your account. Change it to assign the record to a different salesperson.
- First Name — contact's given name (max 100 characters).
Everything else is optional — including Last Name, Email, and Phone. If you enter an Email it must be unique across your contacts (the system checks for duplicates on save); Phone does not need to be unique.
The remaining standard fields are all optional:
- Company — their organisation name
- Job Title — their role at the company
- Lead Source — how you acquired them (Website, Referral, Event, Cold Call, etc.)
ℹ️
Your Contacts module may have additional custom fields set up by your administrator. Fill in what you know — you can always edit the record by clicking any field directly on the contact detail page.
💡
Lead Source is worth setting consistently. It powers reports that show which acquisition channels generate the most contacts and deals — helping you decide where to focus marketing spend.
Step 4 — Set the Contact Owner and save#
The Contact Owner field is at the top of the form and defaults to your account. If you are creating a contact on behalf of a colleague — for example, adding a lead from a trade show they attended — change the owner before saving.
When ready, click Save at the top of the form.
✅
The contact record is created immediately. You land on the contact's detail page where you can log a call, send an email, attach a note, or create a follow-up task — all without leaving the record.
⚠️
AI Engage CRM enforces a unique email address on each contact. If another contact already uses the same email, you will see a duplicate warning. Review the existing record before proceeding — merging duplicates later is more work than preventing them now.
Step 5 — The contact detail page#
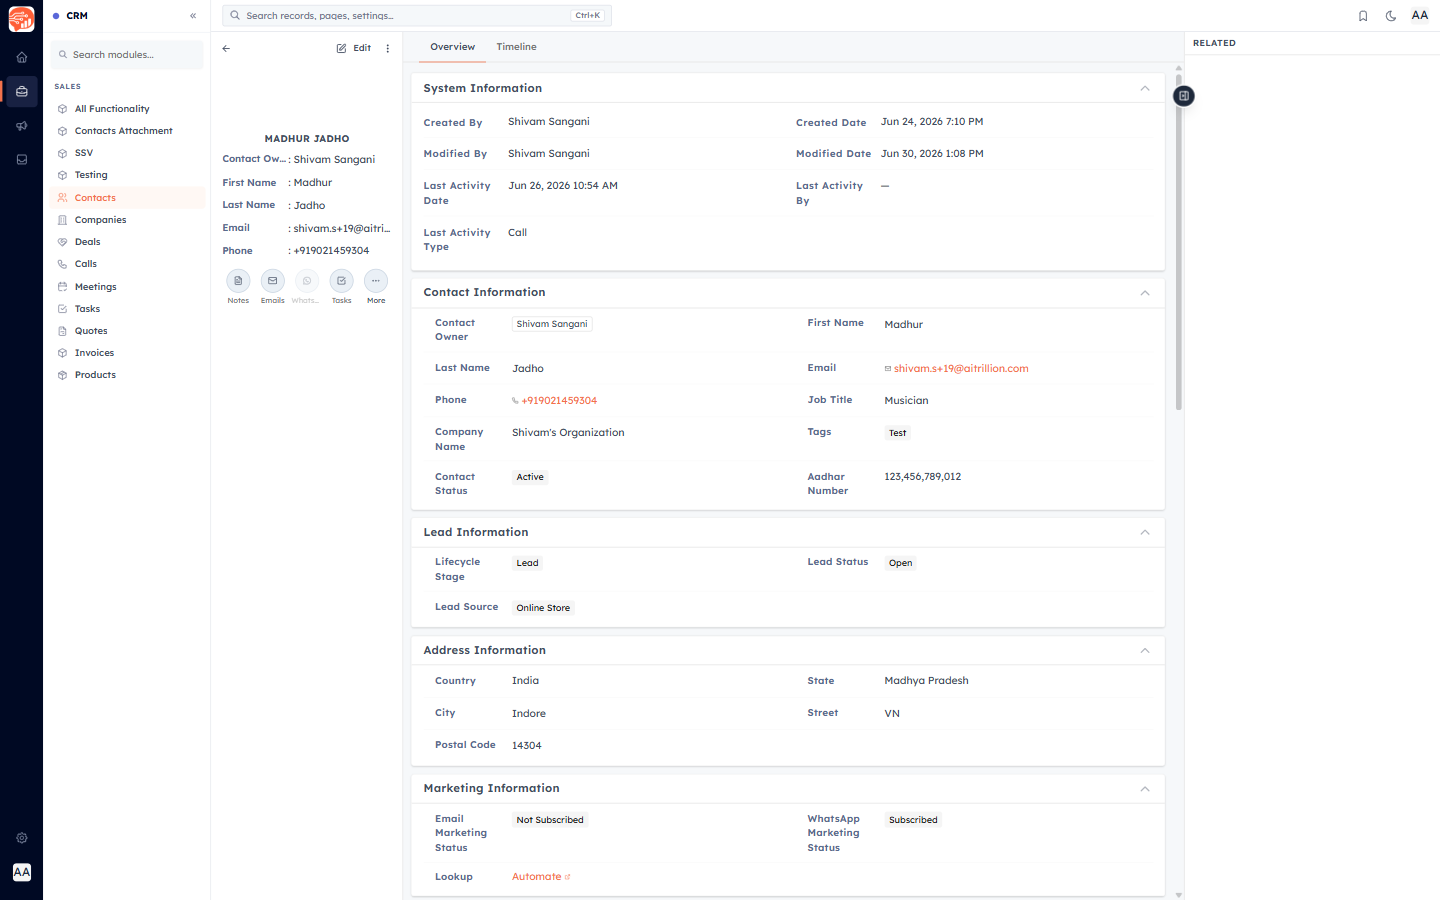
After saving, you land on the contact's detail page. From here you can:
- Edit any field — click directly on a field value to edit it inline
- Log a call or meeting — use the Activity section on the right panel
- Send an email — click the Email button in the action bar
- Add a note — capture context, meeting outcomes, or instructions for the team
- Create a task — set a follow-up reminder with a due date
- Link to a Deal — associate the contact with an open sales opportunity
💡
The fastest way to create a contact from anywhere in the CRM is the + Create button at the top of the sidebar. It opens a quick-create dialog so you can capture a name and contact detail without navigating away from what you are working on.
🔗
Next up: Once your first contacts are in, bring in the rest with Import Data — upload a spreadsheet and map your columns in minutes.
Was this article helpful?
Ready to implement this?
OpenAI Engage and apply what you just learned to your own workspace.
Open AI Engage CRM