Loading…


KnowledgeBase
How to Create a Workflow
The two steps of creating a workflow#
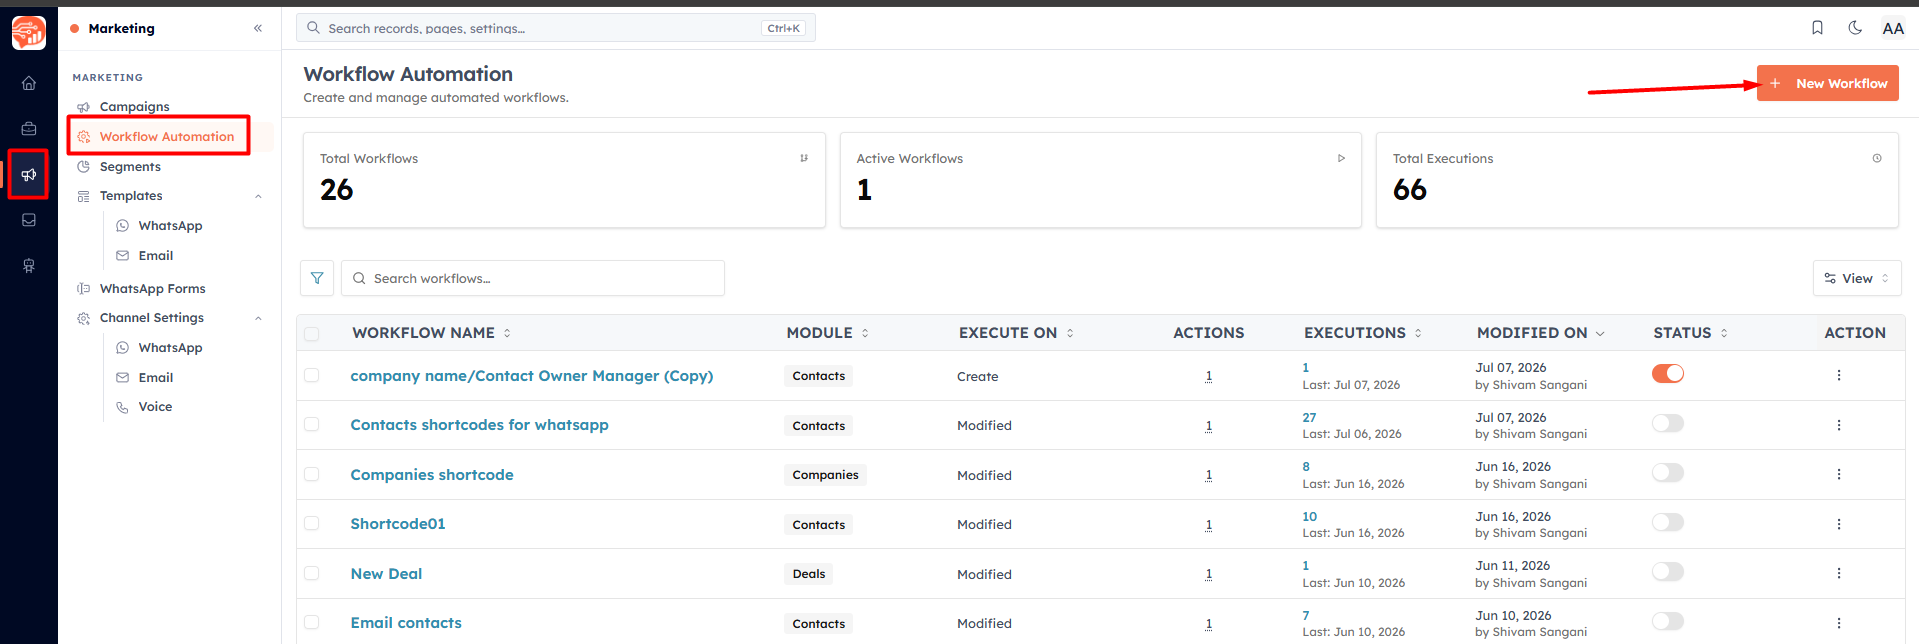
Go to Settings → Workflows and click New Workflow. Creating a workflow is a short two-step process: first the basics, then the visual editor.
Step 1 — Basic Information#
On the first screen, fill in:
Workflow Name (required) — a clear name so you know what it does at a glance, e.g. "New Contact — Welcome Email" or "Lead Qualification Rule".
Description (optional) — a note describing what the workflow does.
Target Module (required) — the module this workflow runs on: Contacts, Leads, Deals, and so on. Every trigger, condition, and field in the workflow is based on this module.
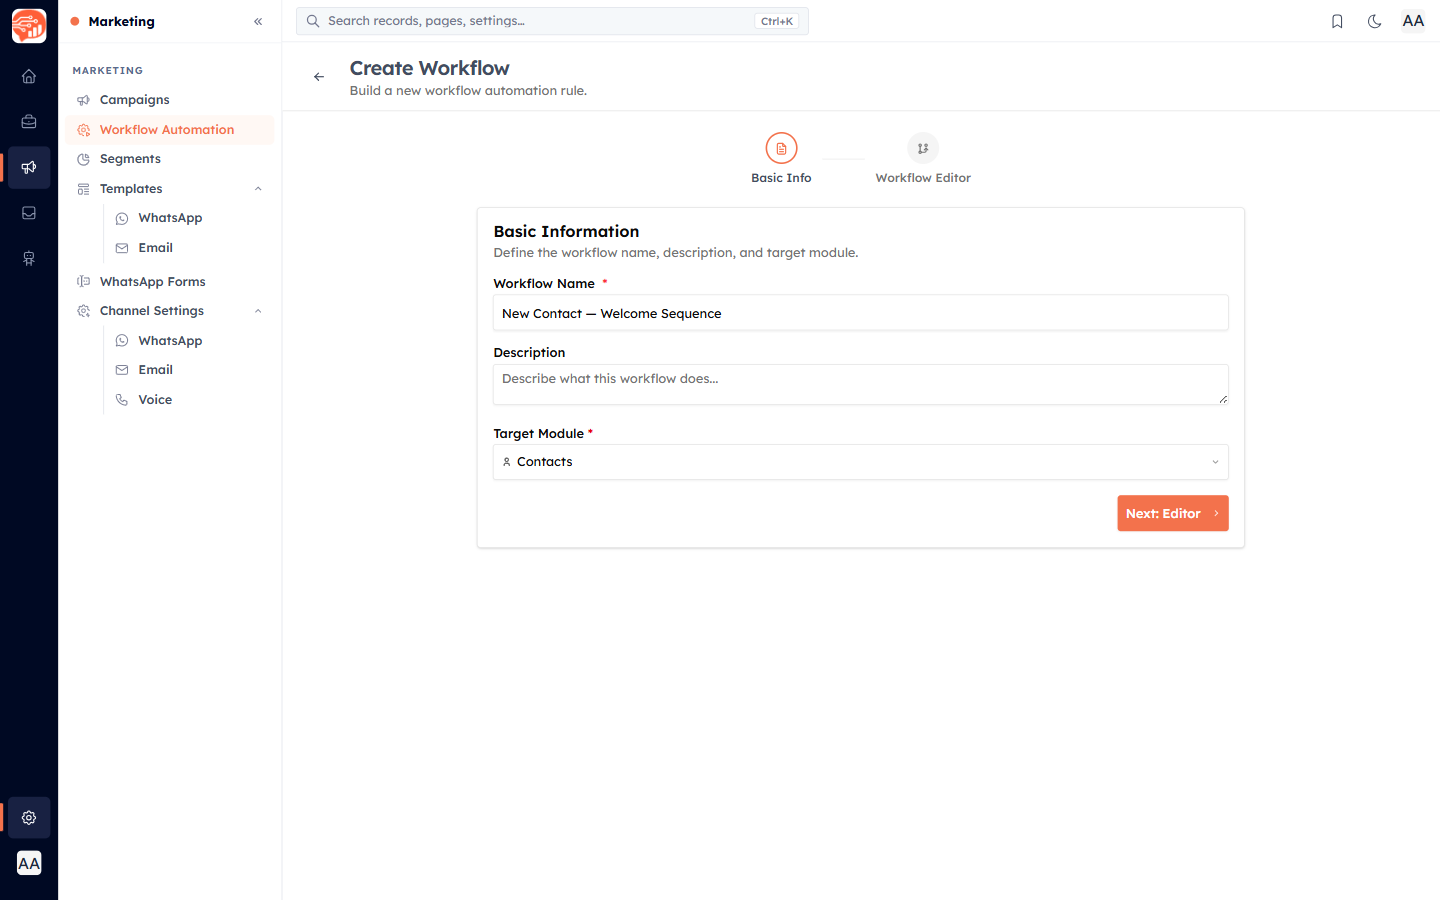
Click Next: Editor to open the visual builder.
💡
The target module is locked once the workflow is created. Changing it later would invalidate every node, so choose the right module now. (While still building, changing it clears the canvas after a confirmation.)
Step 2 — The Workflow Editor#
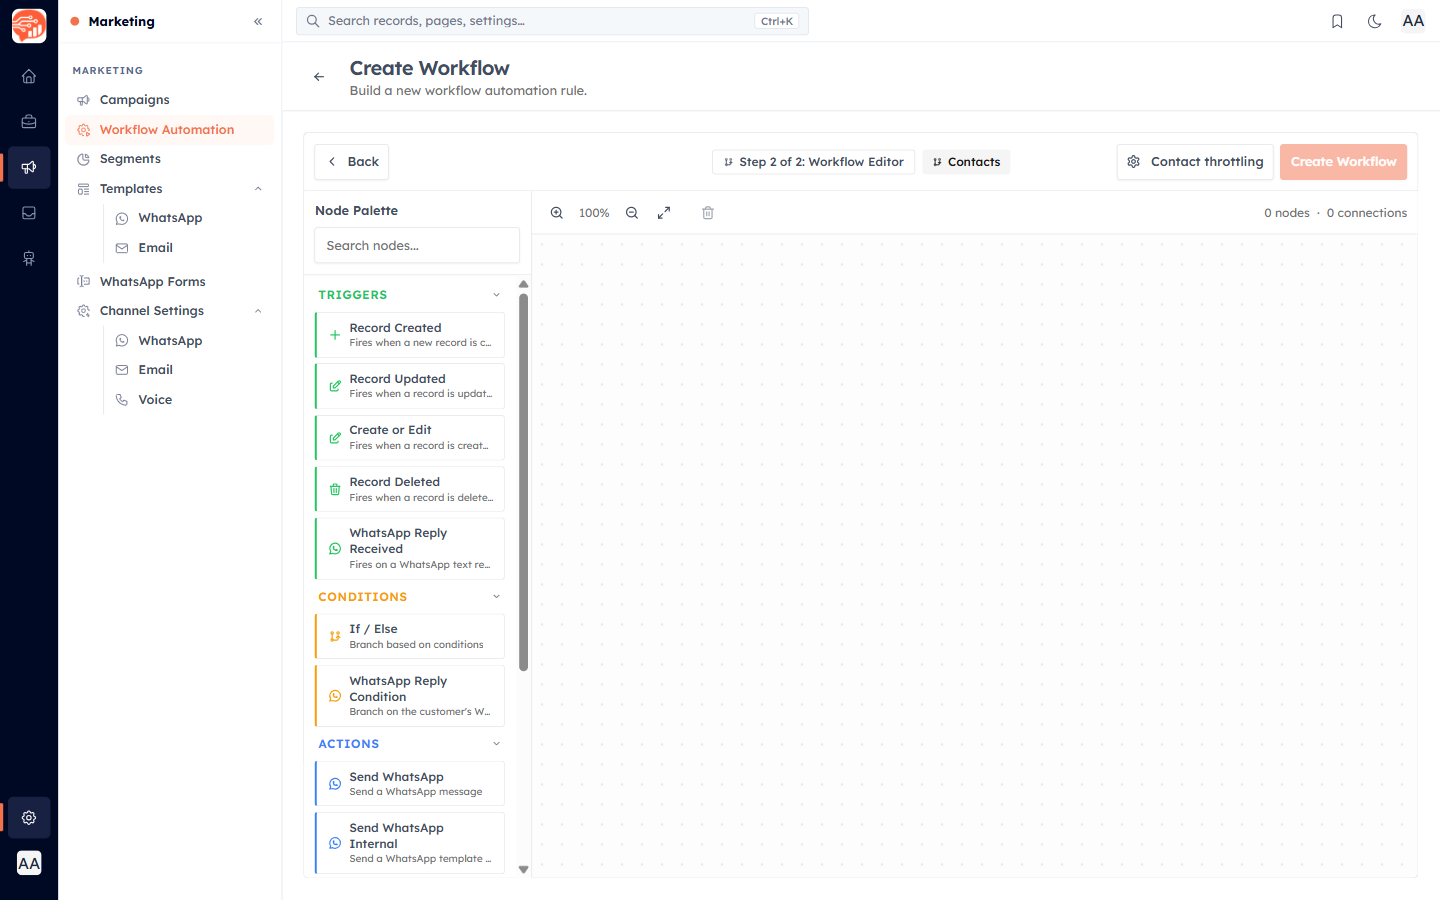
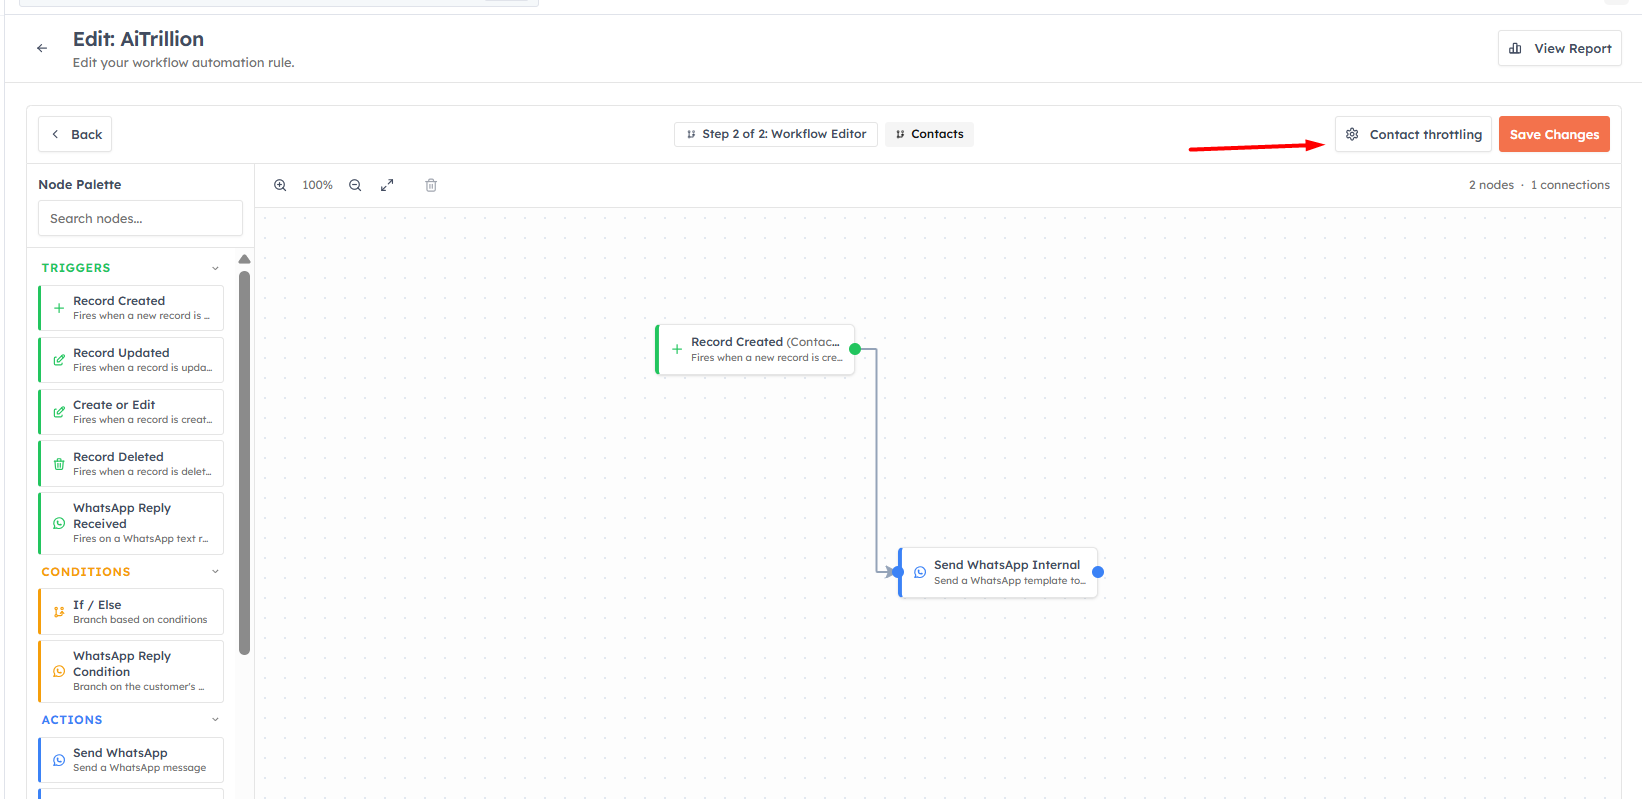
The editor is a visual canvas with three panels:
Node Palette (left) — the blocks you can add, grouped into Triggers, Conditions, Actions, and Timing. Search the palette to find a block quickly.
Canvas (centre) — where you place blocks and connect them together. The toolbar lets you zoom in/out and reset the view; a counter shows how many nodes and connections you have.
Configure Node panel (right) — opens when you select a block, so you can set it up (choose a template, set a field value, pick a user, etc.).
Building the flow#
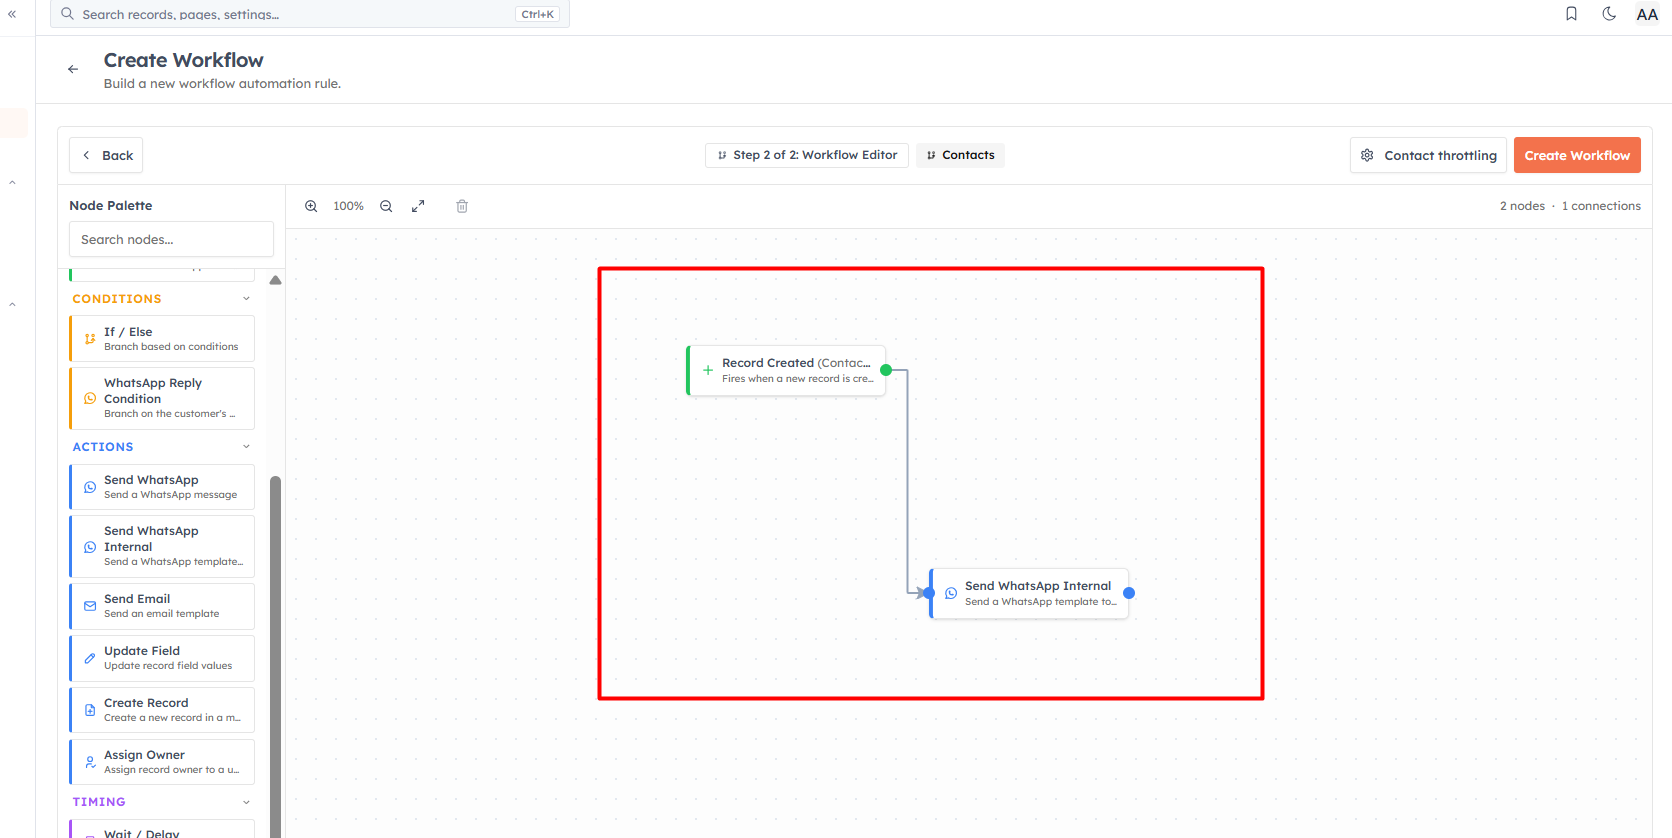
Add a trigger first — every workflow needs exactly one. Add it from the Triggers group in the palette.
Add actions, conditions, and waits from the palette and place them on the canvas.
Connect the blocks in order by dragging from one block's output to the next block's input. The flow runs top to bottom along these connections.
Configure each block by selecting it and filling in the Configure Node panel on the right.
💡
Only one trigger is allowed per workflow, and every block must be connected — the CRM will not let you save a workflow with loose, unconnected nodes.
💡
Before saving, you can also set Contact throttling from the editor toolbar — this controls how many times a contact can enter the workflow. See Contact Throttling & Enrollment.
Was this article helpful?
Ready to implement this?
OpenAI Engage and apply what you just learned to your own workspace.
Open AI Engage CRM