Loading…


KnowledgeBase
Set Up the Website Chat Widget for Support: Live Chat, AI Agent, Handoff & Install
What this article covers#
A chat widget is the chat bubble in the corner of your website. Visitors click it to ask a question; your AI agent can answer straight away, and when the visitor wants a person, the chat is handed to your team in the Team Inbox. Signed-in customers can also raise and follow tickets from the same widget.
Everything about a widget — how it looks, who answers, who receives chats, what visitors fill in first, and the code to add it to your site — is set on one page: Service & Support Settings → Chat Widget. This article walks you through that page from top to bottom, creating a widget called Website Support Chat.
| Part | You will… |
|---|---|
| 1 | Create a widget and understand its status (Draft, Active, Inactive). |
| 2 | Brand it: name, heading, button text, colours and welcome message. |
| 3 | Choose whether an AI agent answers first. |
| 4 | Route live chats to a team or to chosen agents, with online and offline messages. |
| 5 | Decide whether customers can raise tickets from the widget. |
| 6 | Add a pre-chat form. |
| 7 | Copy the install script onto your website. |
| 8 | Recognise signed-in customers (optional). |
| 9 | Activate and save. |
Before you begin#
Admin access to Service & Support Settings.
Live chat switched on — General Settings → Chat conversation is enabled. See Support General Settings.
An AI agent (optional), already built and active — see Build Your First AI Agent. Drafts cannot answer.
A team for routing (optional) — see Create Teams.
Access to your website’s code (or someone who has it), to paste the install script.
Part 1 — Create a widget#
Step 1: Open the Chat Widget tab#
Press Ctrl + K (Cmd + K on a Mac), type Support Email and open it, then click the Chat Widget tab.
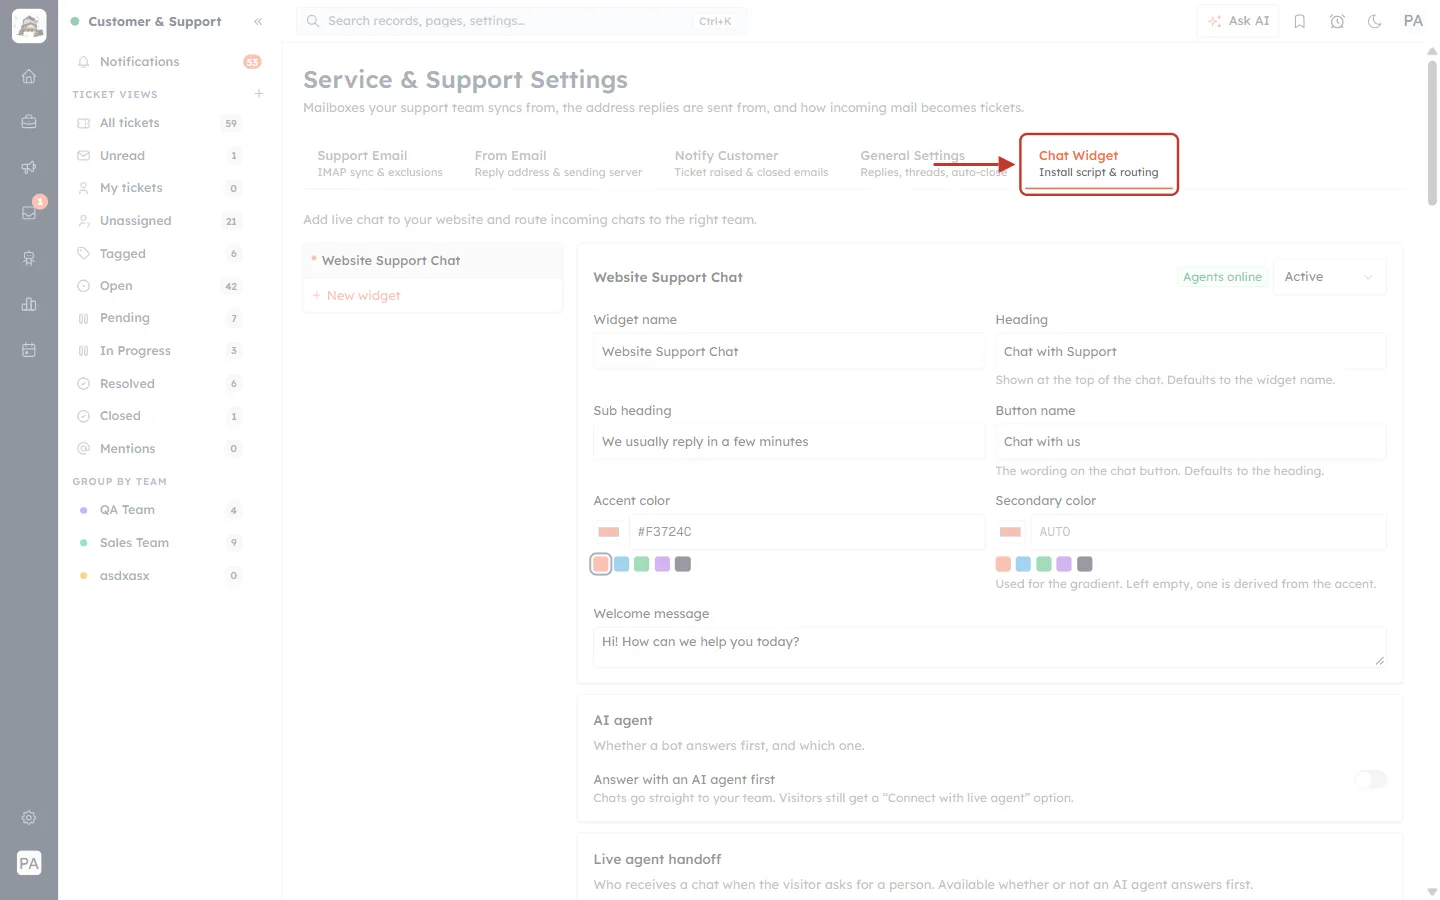
What this screenshot shows. Service & Support Settings with the Chat Widget — Install script & routing tab ringed.
The tab description reads: “Add live chat to your website and route incoming chats to the right team.”
Below it (faded): on the left, the list of your widgets; on the right, the settings of the selected widget.
Step 2: Click New widget#
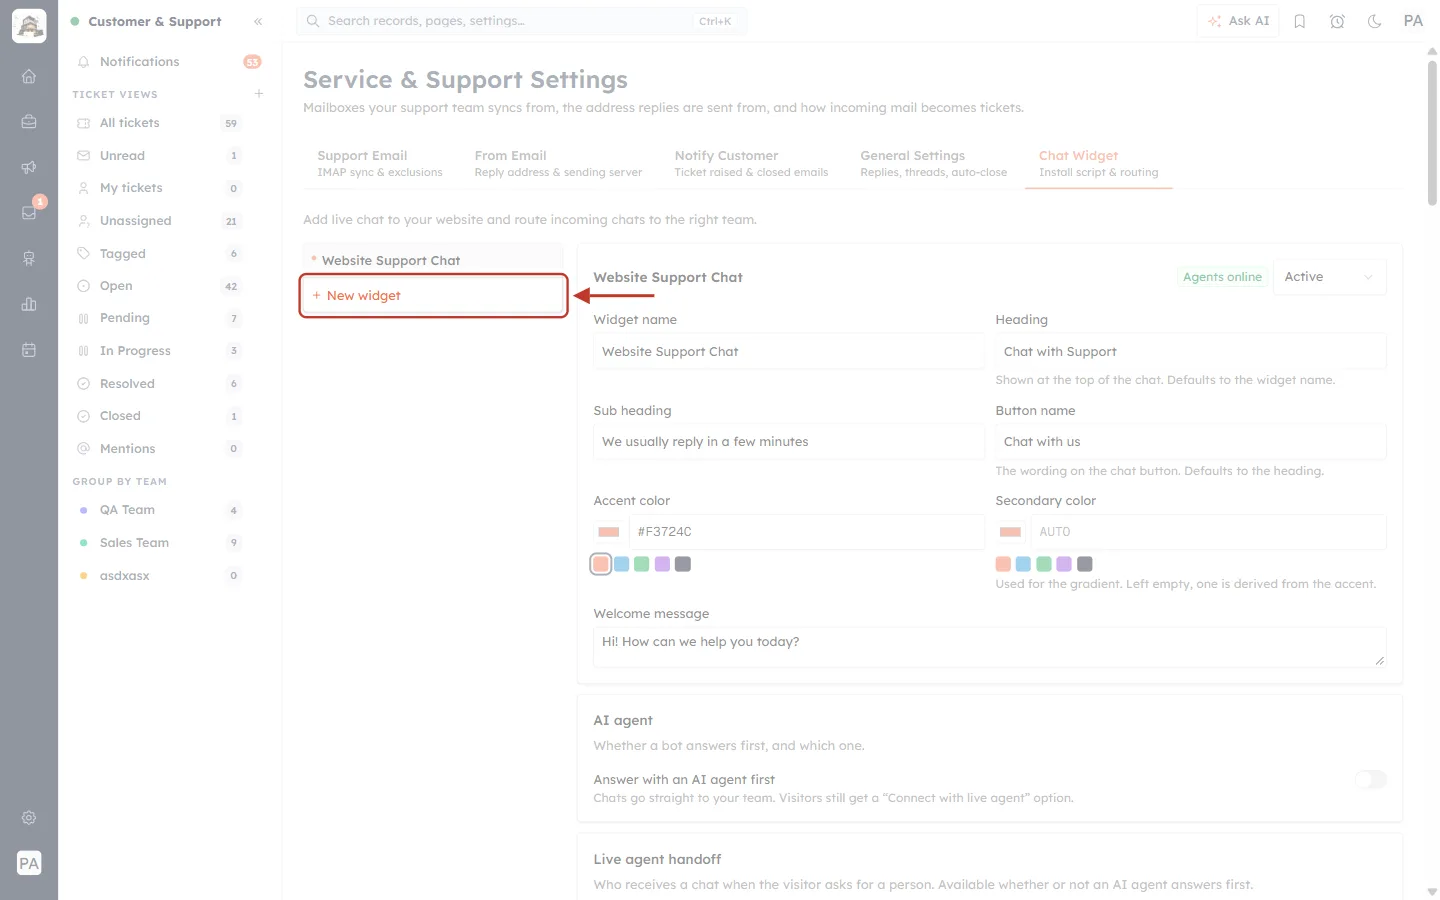
What this screenshot shows. The orange + New widget link at the bottom of the widget list is ringed.
Click it to create a widget. It is created straight away as a Draft called New Widget, with sensible defaults, and opens on the right.
Above it: your existing widgets (here Website Support Chat). Click any of them to edit it. You can have several widgets — for example one per website or brand.
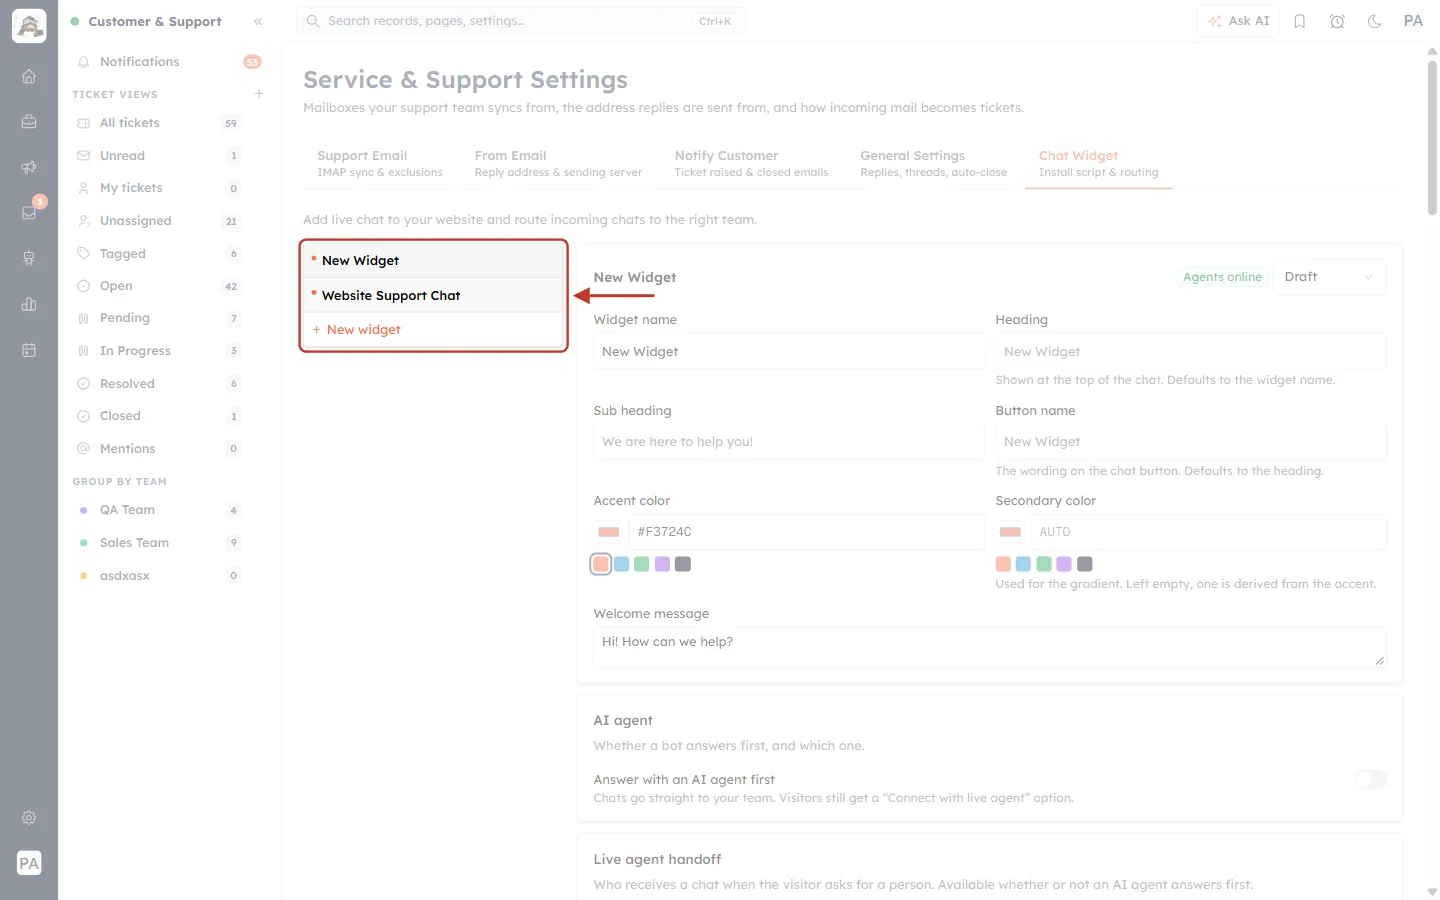
What this screenshot shows. The widget list is ringed. The new widget appears at the top.
New Widget — the widget you just created. Its name in the list changes after you rename it and save.
Website Support Chat — another widget.
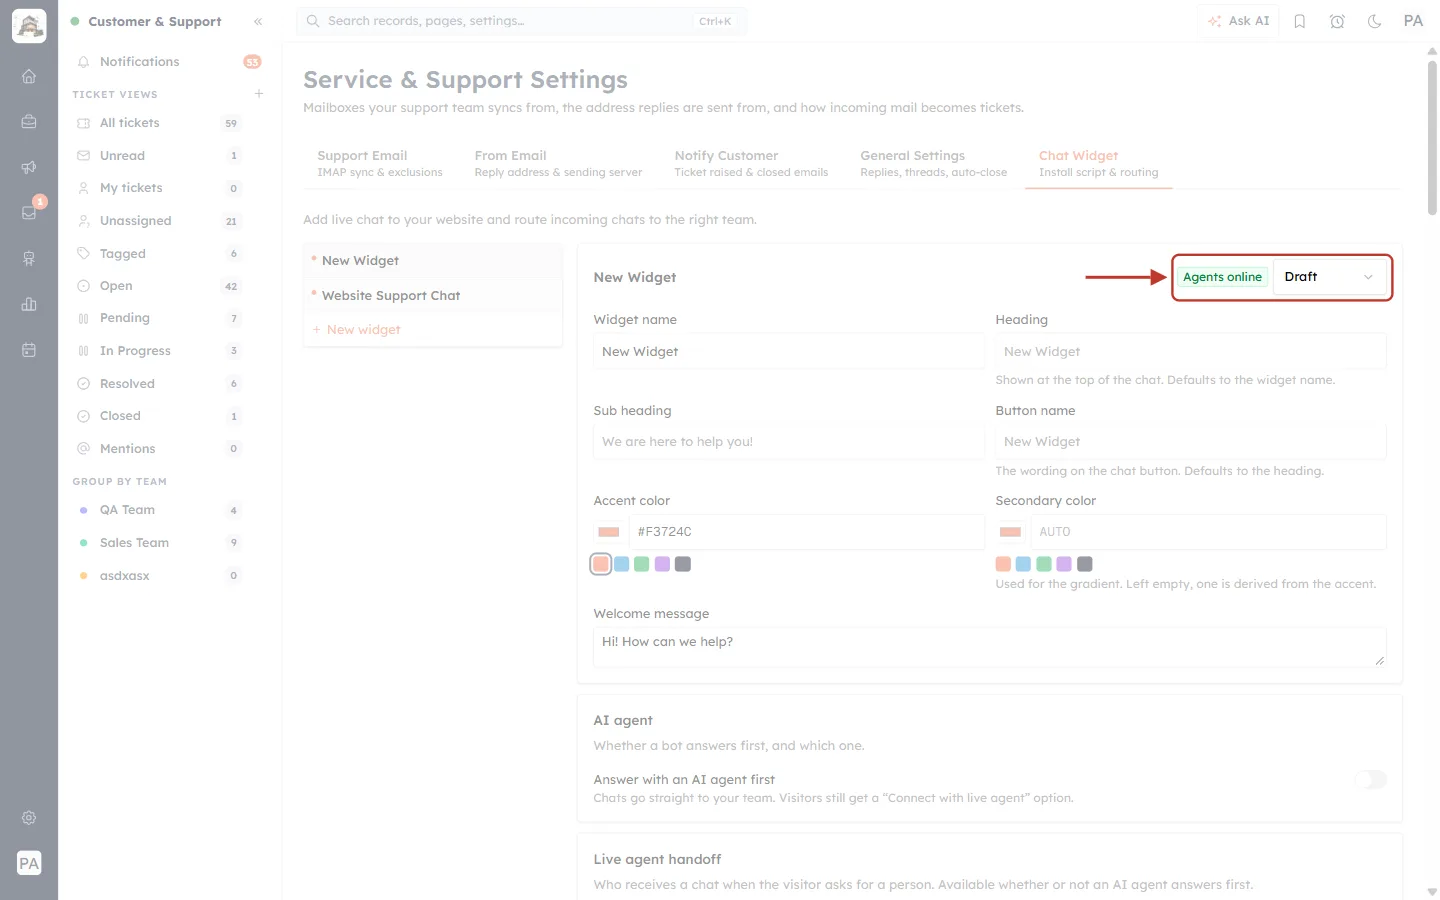
What this screenshot shows. The top-right corner of the widget settings is ringed.
Agents online (green) — at least one agent has their inbox open right now, so live chats will be answered.
Draft — the widget’s status. A draft widget is not shown to visitors: “This widget is draft. The script will load, but the widget stays hidden until you set it to Active.” You will activate it in Part 9.
Part 2 — Brand the widget#
Step 3: Name the widget and write its text#
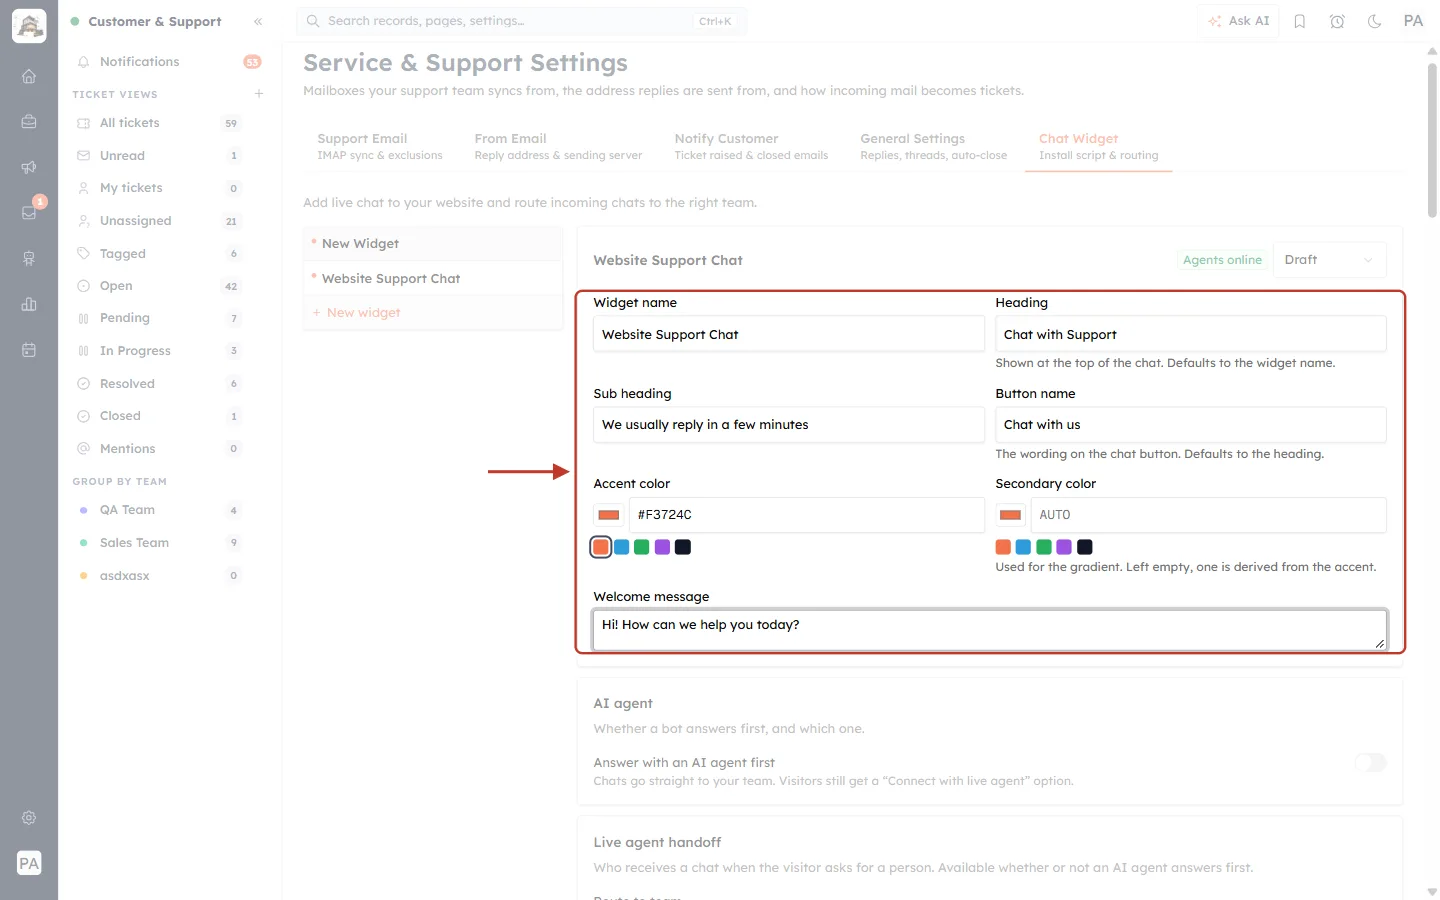
What this screenshot shows. The appearance settings, filled in, are ringed.
Widget name — Website Support Chat. Shown in the widget list; visitors do not see it unless you leave the heading empty.
Heading — Chat with Support. “Shown at the top of the chat. Defaults to the widget name.”
Sub heading — We usually reply in a few minutes. A short line under the heading; use it to set expectations.
Button name — Chat with us. “The wording on the chat button. Defaults to the heading.”
Welcome message — Hi! How can we help you today? The first message visitors see when they open the chat.
Step 4: Choose the colours#
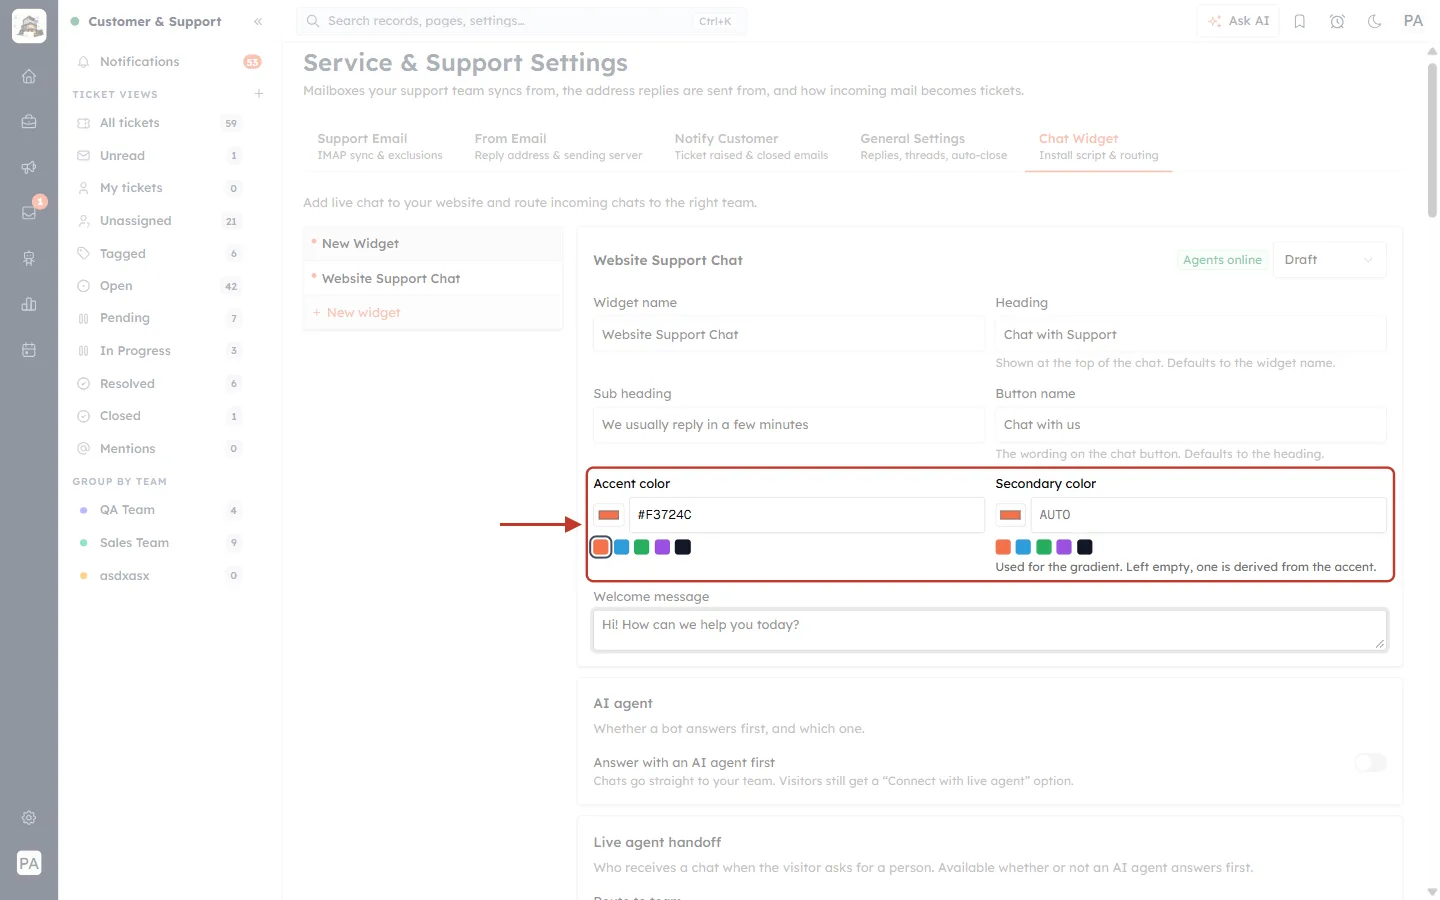
What this screenshot shows. The two colour settings are ringed.
Accent color — the main colour of the chat button and header, here
#F3724C. Type a hex code, click the swatch to pick one, or choose one of the five preset colours below.Secondary color — AUTO. “Used for the gradient. Left empty, one is derived from the accent.”
Use your brand colours so the widget looks like part of your website.
Part 3 — Let an AI agent answer first (optional)#
Step 5: Switch on Answer with an AI agent first#
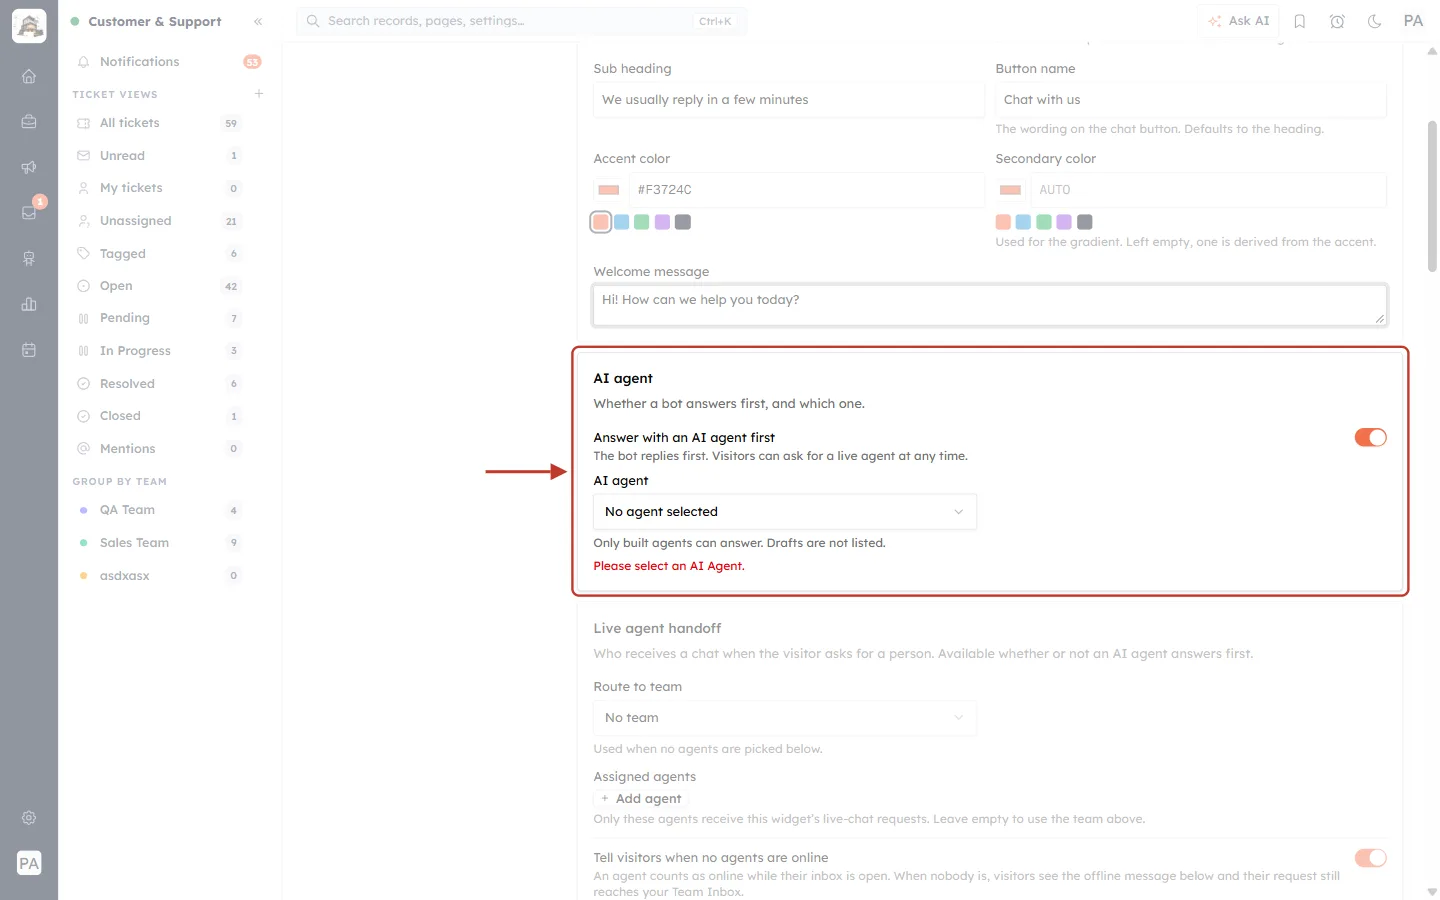
What this screenshot shows. The AI agent section — “Whether a bot answers first, and which one.” — is ringed.
Answer with an AI agent first (switch on) — “The bot replies first. Visitors can ask for a live agent at any time.”
AI agent — which agent answers. Here none is chosen yet, so the page warns “Please select an AI Agent.”
“Only built agents can answer. Drafts are not listed.”
Turn the switch off if you want every chat to go straight to your team.
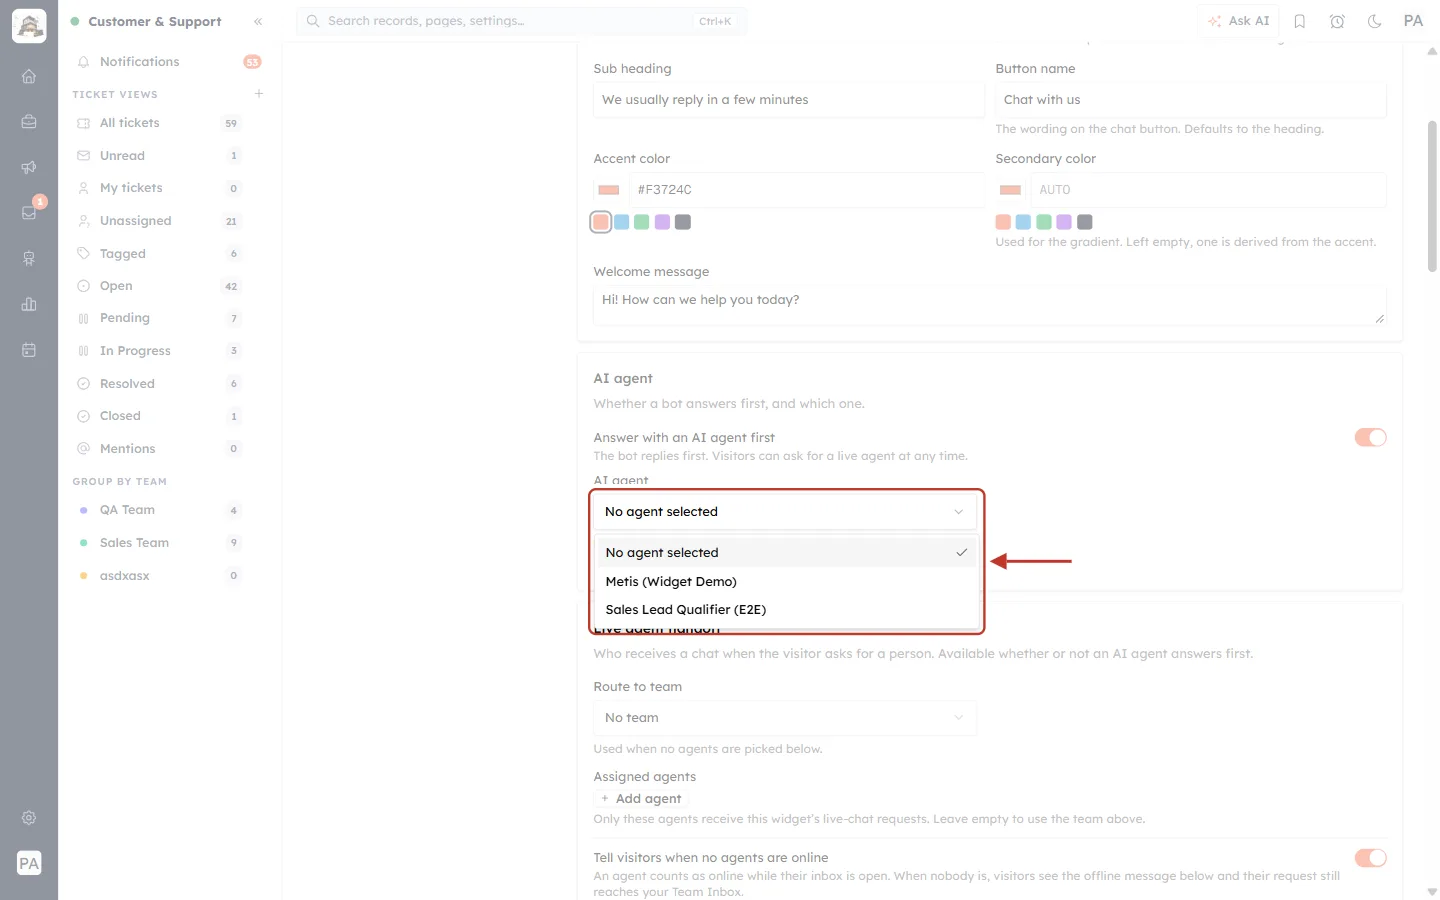
What this screenshot shows. The AI agent list is open and ringed.
No agent selected, followed by every active AI agent in your account. Pick the one trained on your support content.
If the agent you want is missing, it is still a draft — finish and publish it under AI Agents first.
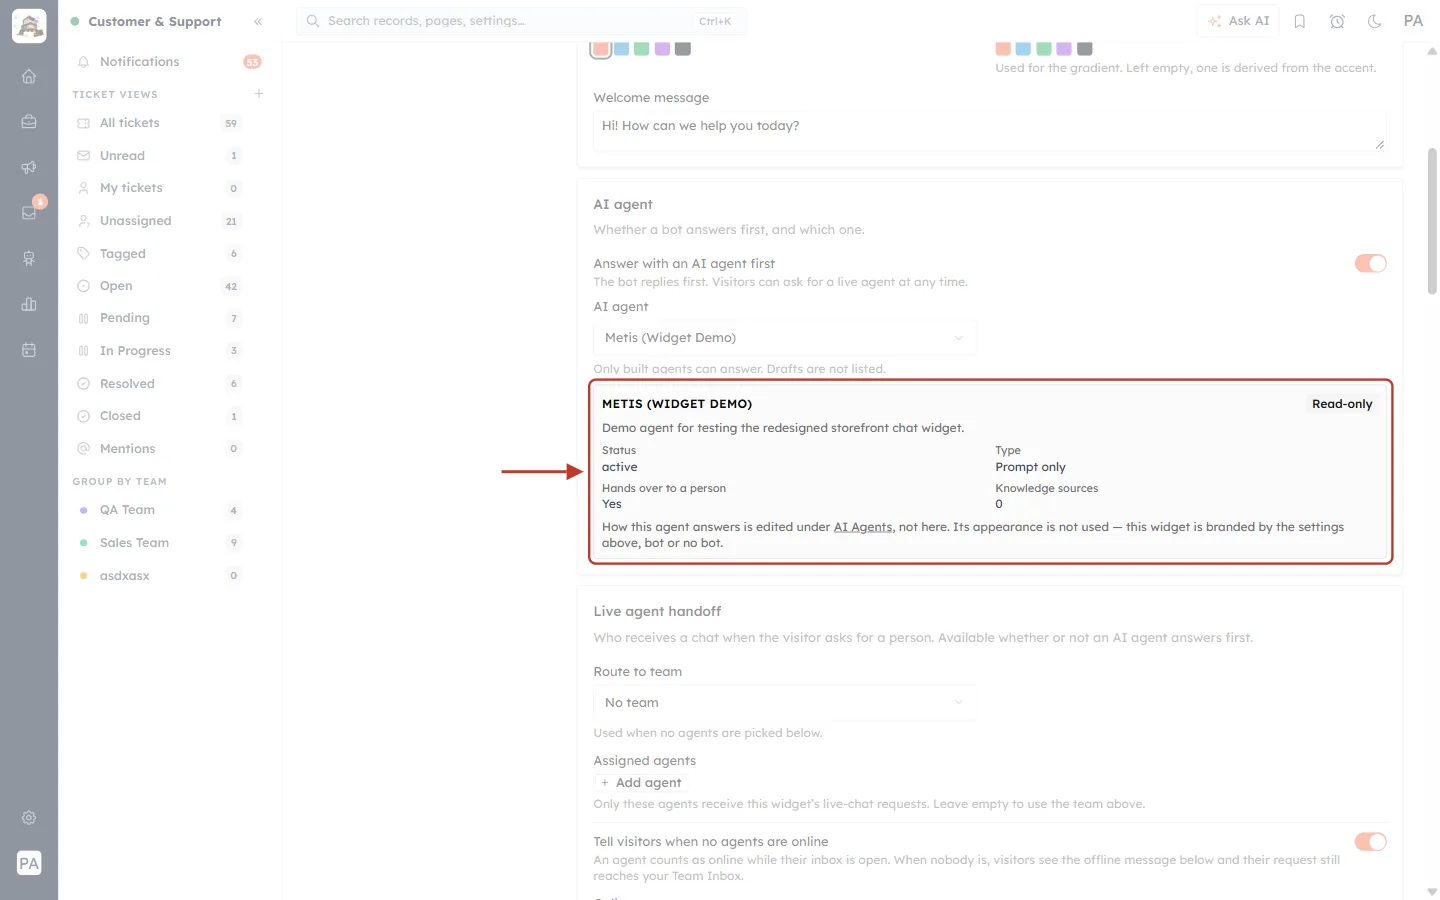
What this screenshot shows. Once an agent is chosen, a read-only summary of it appears. It is ringed.
The agent’s name and description, marked Read-only.
Status (active), Type (for example Prompt only), Hands over to a person (Yes or No — visitors stay with the bot) and Knowledge sources (how many it was trained on).
“How this agent answers is edited under AI Agents, not here. Its appearance is not used — this widget is branded by the settings above, bot or no bot.”
✅
Check Hands over to a person. If it says No, visitors stay with the bot. Turn on live agent handoff in the agent’s own settings if you want the bot to pass chats to your team — see Configure Your Agent.
Part 4 — Route live chats to your team#
Step 6: Choose who receives live chats#
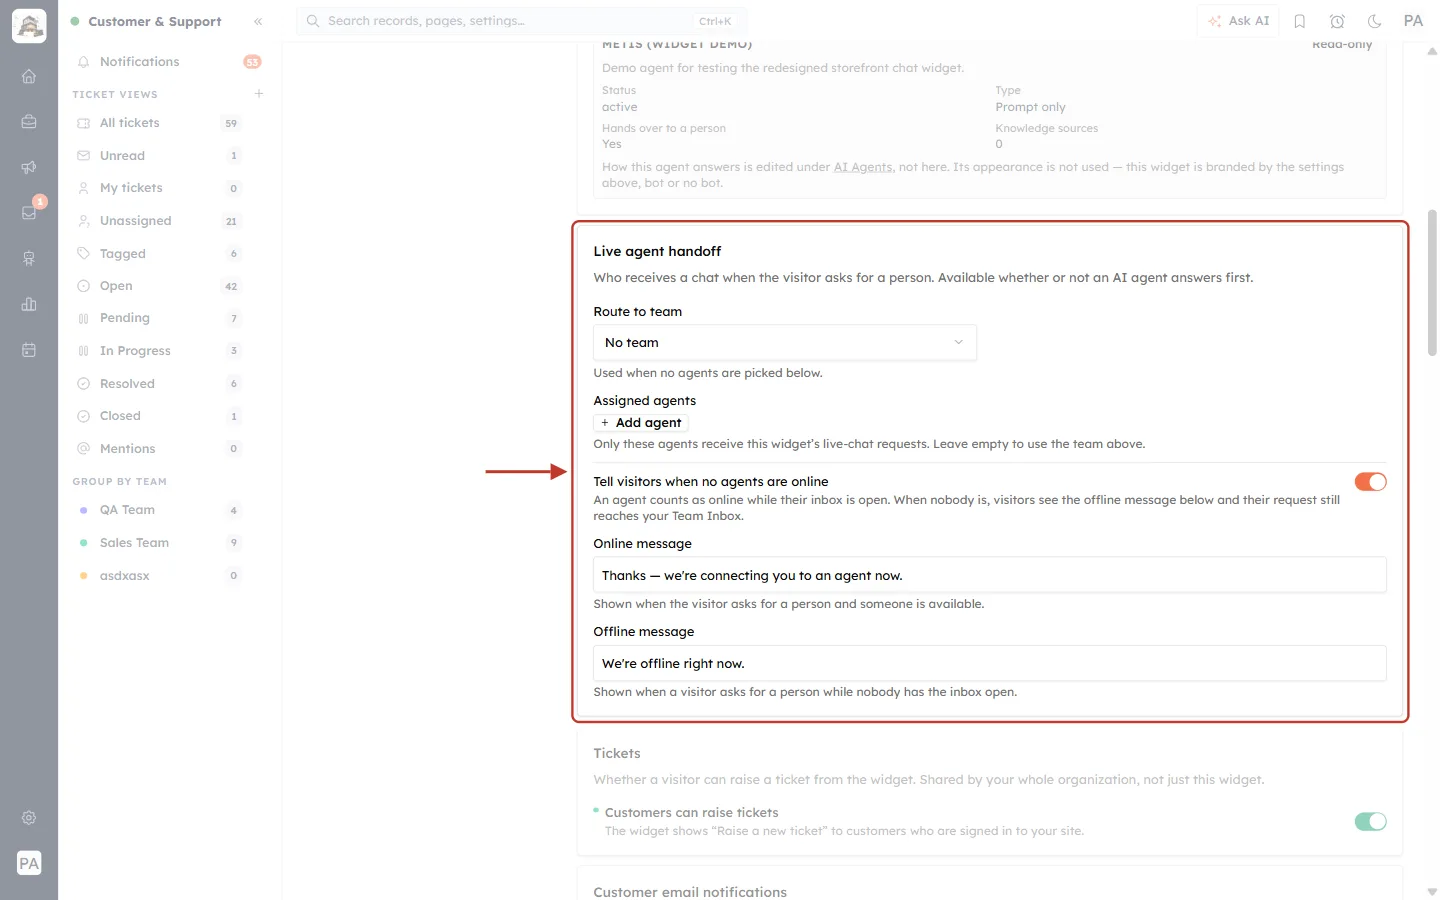
What this screenshot shows. The Live agent handoff section is ringed. “Who receives a chat when the visitor asks for a person. Available whether or not an AI agent answers first.”
Route to team — No team here. “Used when no agents are picked below.”
Assigned agents — + Add agent. “Only these agents receive this widget’s live-chat requests. Leave empty to use the team above.”
Tell visitors when no agents are online — switch on (Step 8).
Online message and Offline message — what visitors are told (Step 8).
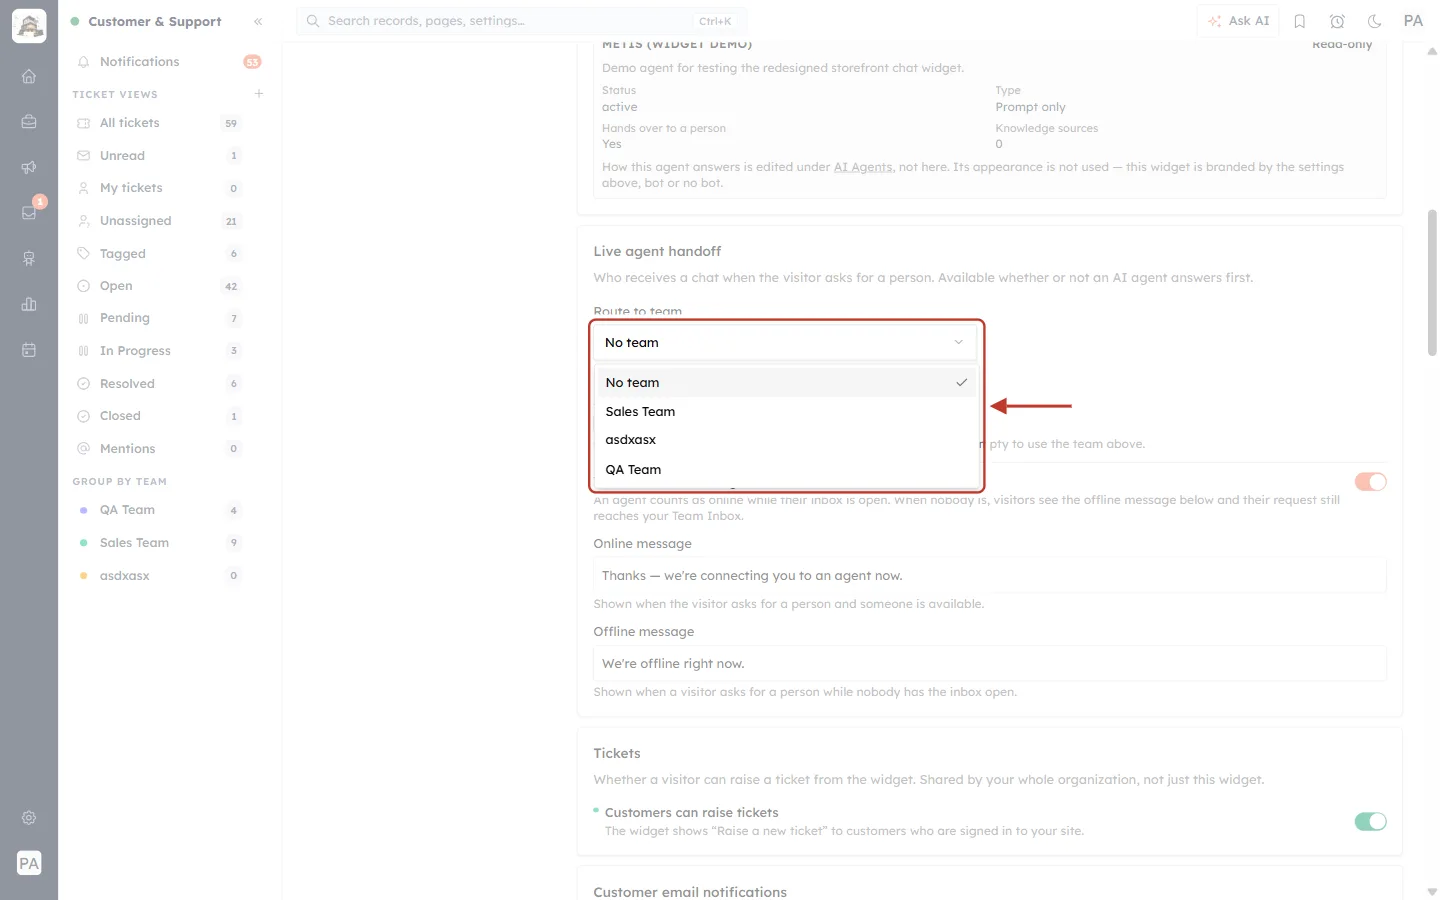
What this screenshot shows. The Route to team list is open and ringed.
No team, followed by your teams (for example Sales Team or QA Team).
Pick your support team to share chats among all its members.
Step 7: Or pick individual agents#
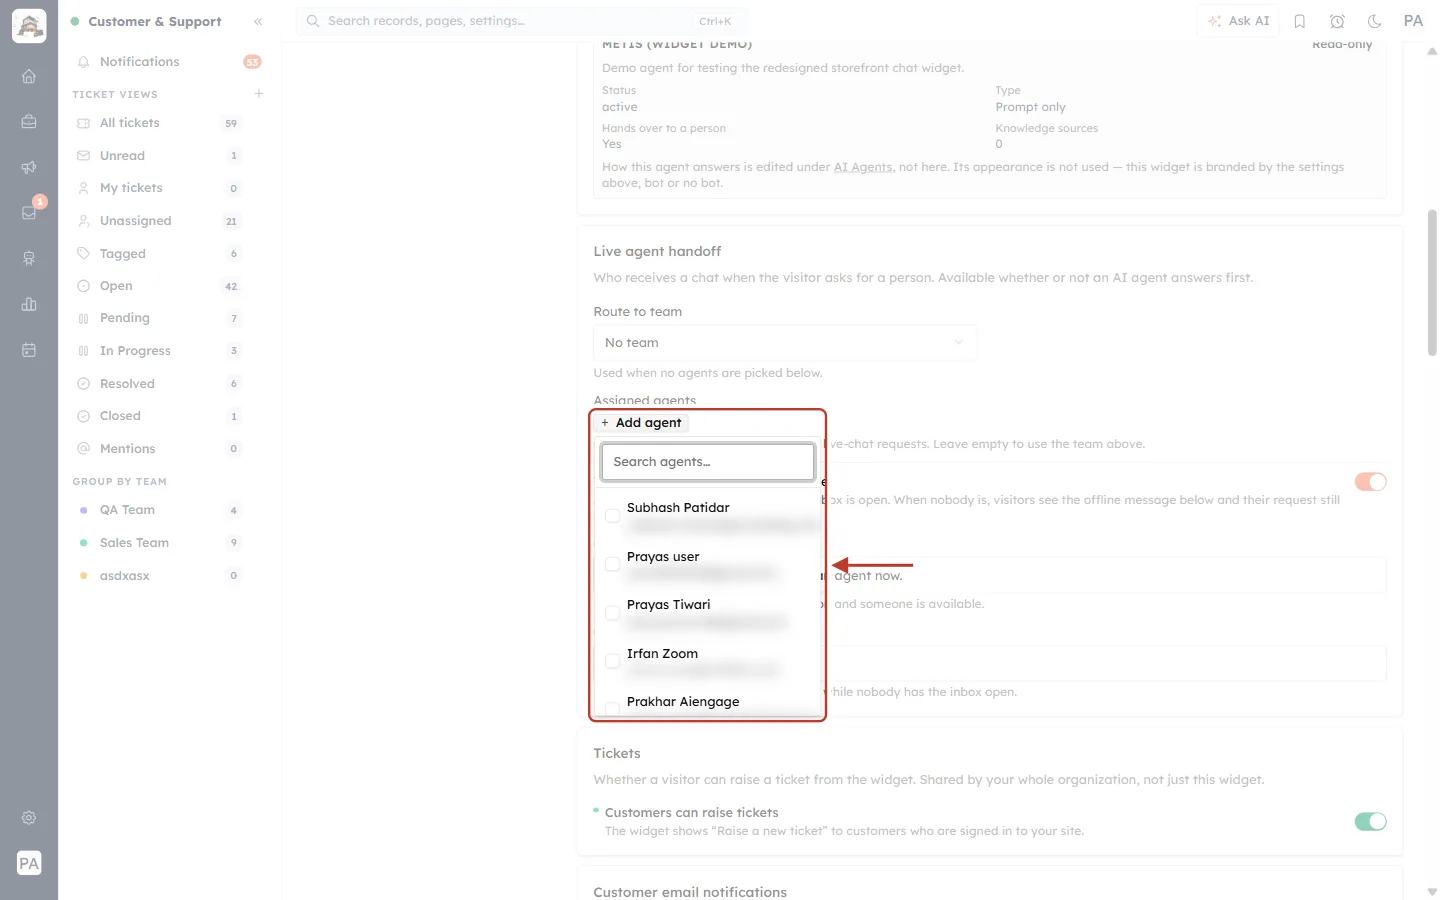
What this screenshot shows. The + Add agent picker is open and ringed.
Search agents… — type to find a teammate.
Tick each person who should receive this widget’s chats. Their email addresses are blurred in this screenshot.
If you pick agents, only they receive chats from this widget and the team above is ignored. Leave it empty to use the team.
Step 8: Set the online and offline messages#
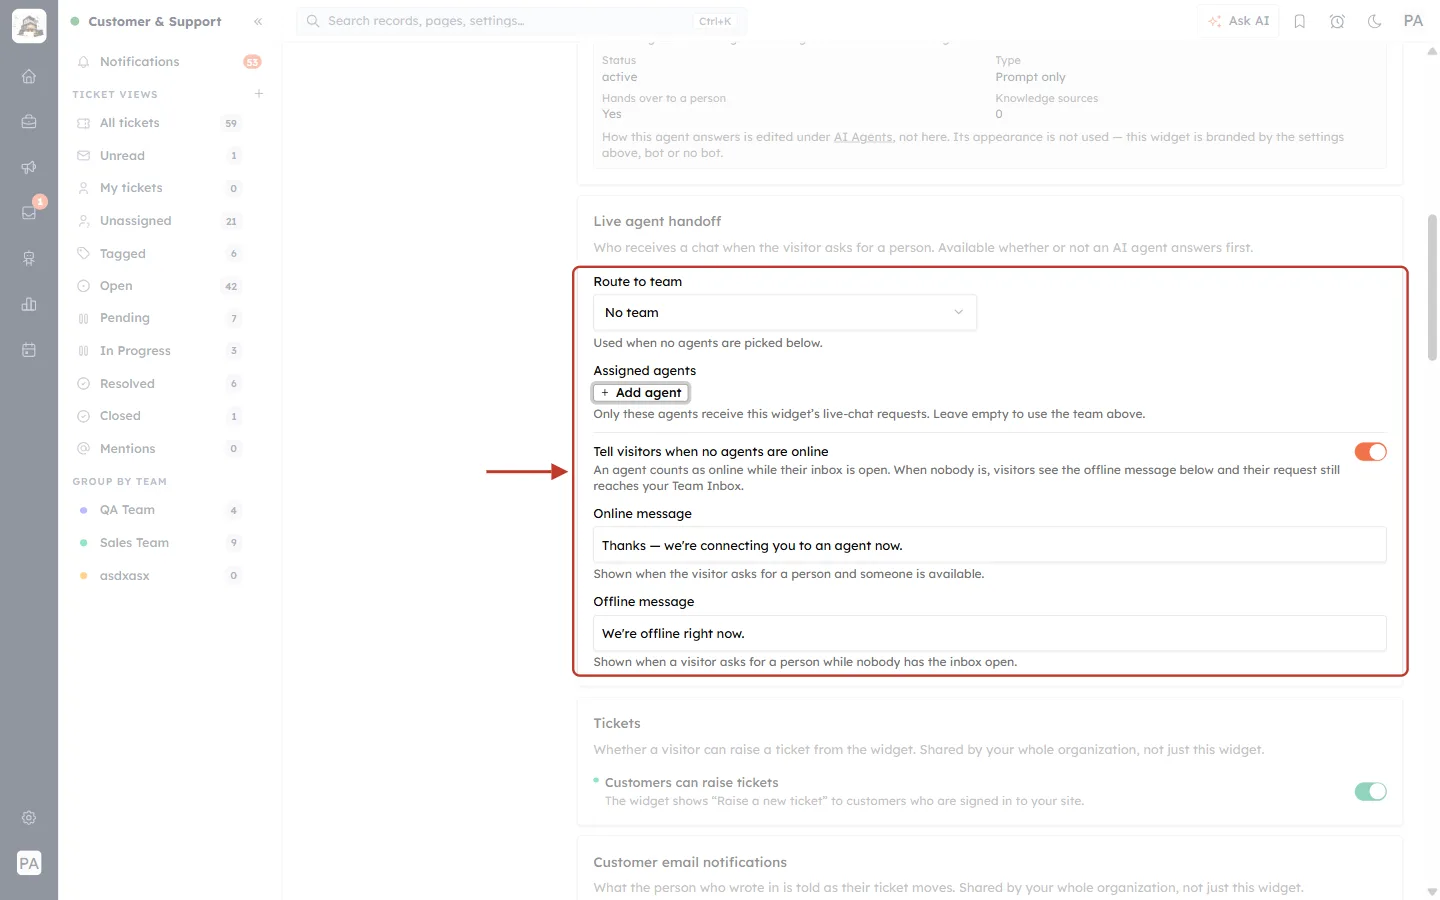
What this screenshot shows. The online/offline settings are ringed.
Tell visitors when no agents are online (on) — “An agent counts as online while their inbox is open. When nobody is, visitors see the offline message below and their request still reaches your Team Inbox.”
Online message — “Shown when the visitor asks for a person and someone is available”, for example Thanks — we’re connecting you to an agent now.
Offline message — “Shown when a visitor asks for a person while nobody has the inbox open”, for example We’re offline right now. Tell visitors when you will reply.
Part 5 — Tickets and emails#
Step 9: Let customers raise tickets from the widget#
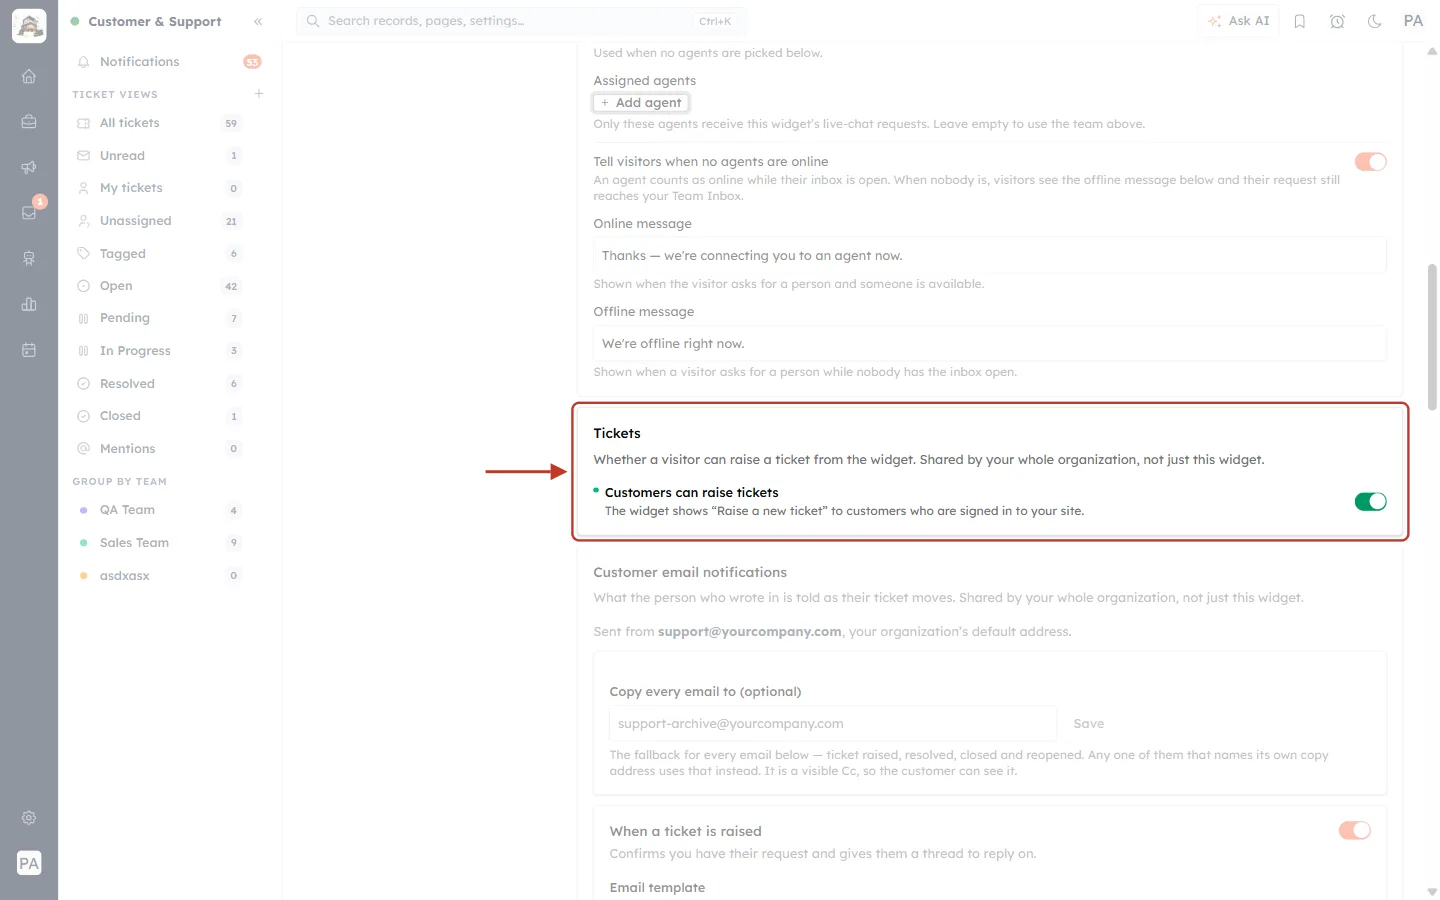
What this screenshot shows. The Tickets section is ringed. “Whether a visitor can raise a ticket from the widget. Shared by your whole organization, not just this widget.”
Customers can raise tickets (switch on) — “The widget shows ‘Raise a new ticket’ to customers who are signed in to your site.”
Because it is shared, turning it off here turns it off for every widget. It saves as soon as you click (“Customers can raise tickets from the chat widget”), without Save changes.
Signed-in visitors are explained in Part 8.
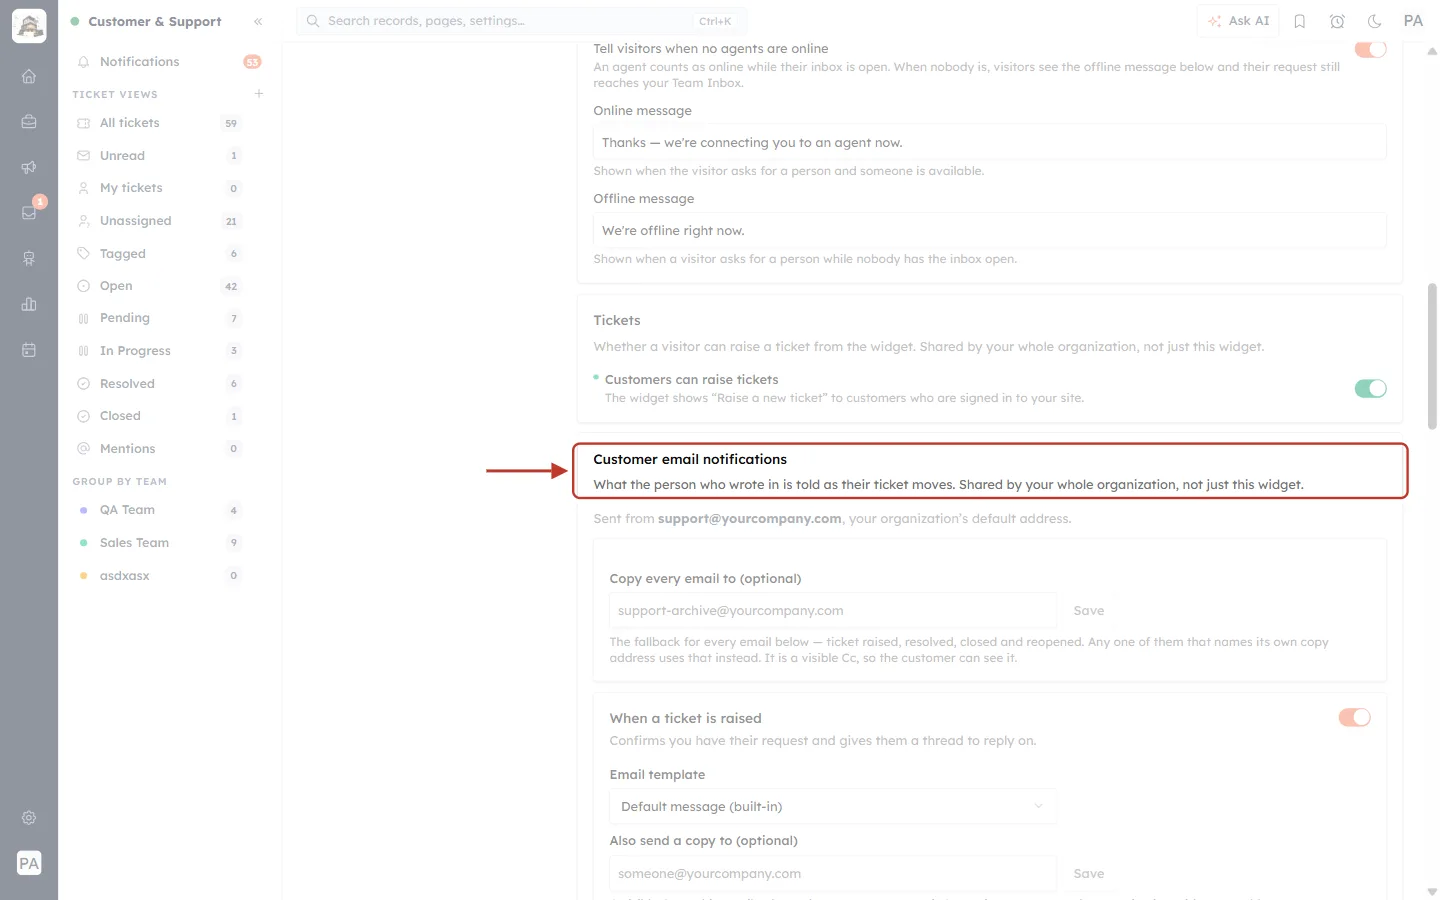
What this screenshot shows. The Customer email notifications heading is ringed. “What the person who wrote in is told as their ticket moves. Shared by your whole organization, not just this widget.”
Below it come the same settings as the Notify Customer tab — copy address, and the ticket raised, resolved, closed and reopened emails — followed by Agent email notifications.
They are shown here for convenience; changing them here changes them everywhere. See Automatic Customer Emails for every option.
Part 6 — Ask visitors for their details first#
Step 10: Turn on the pre-chat form#
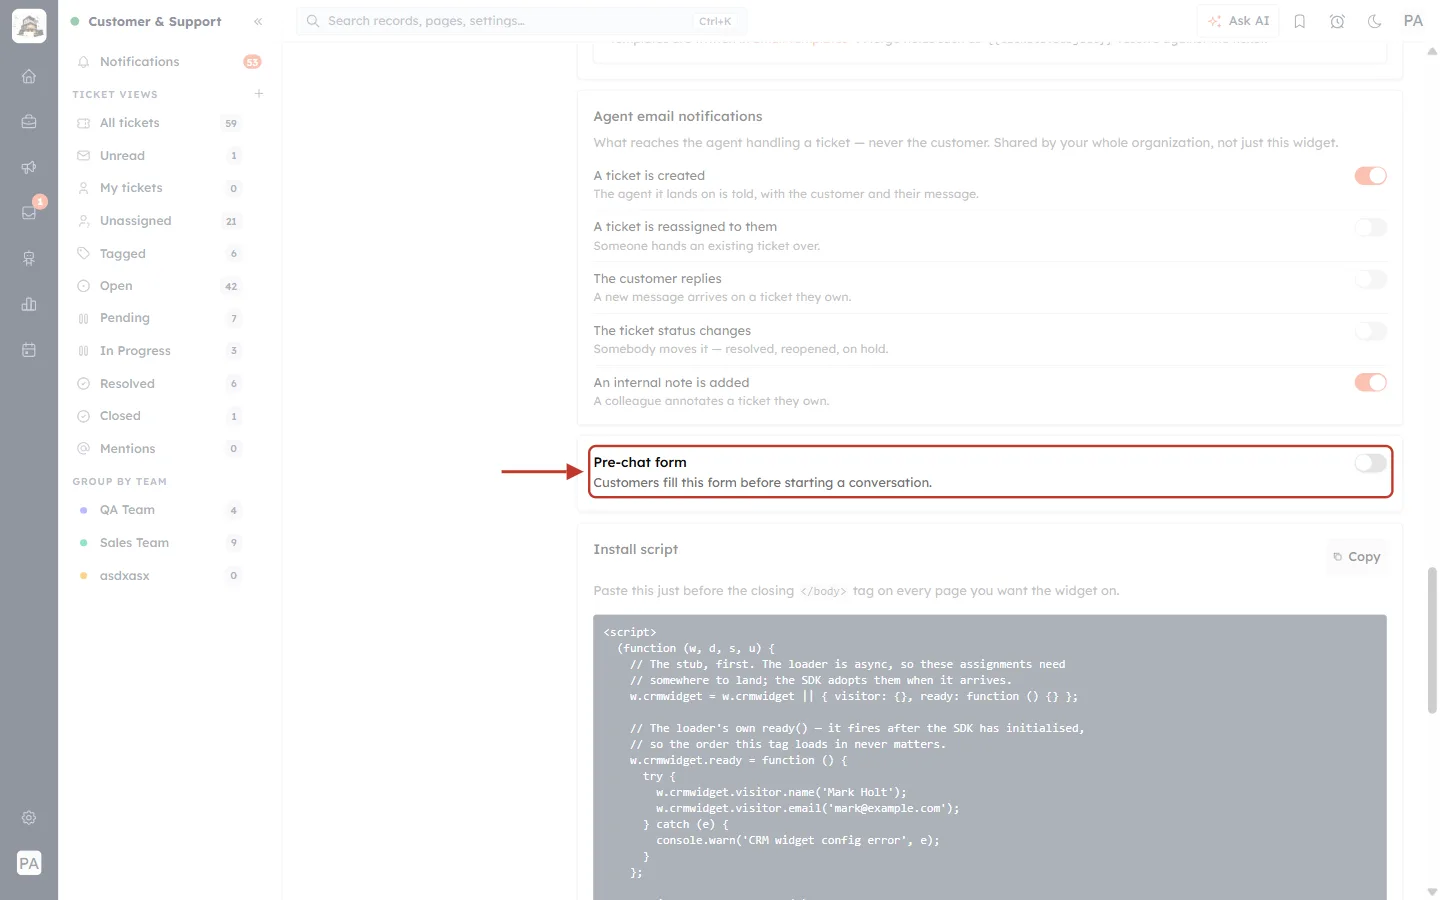
What this screenshot shows. The Pre-chat form card is ringed. “Customers fill this form before starting a conversation.” It starts switched off.
Click the switch to turn it on. Its options then appear (next figure).
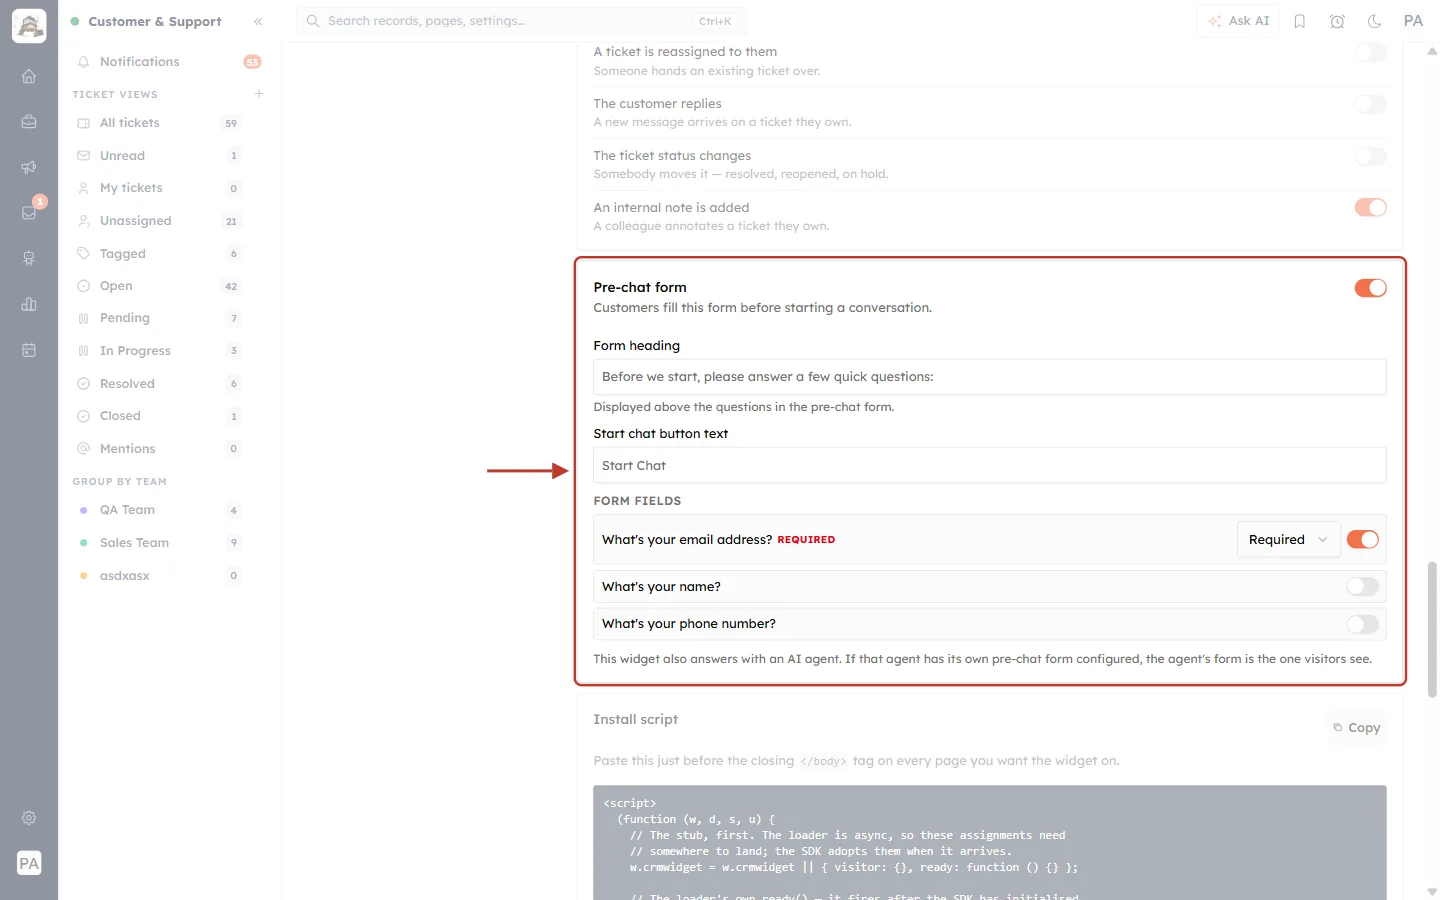
What this screenshot shows. The pre-chat form, switched on, is ringed.
Form heading — “Displayed above the questions in the pre-chat form”, for example Before we start, please answer a few quick questions:
Start chat button text — for example Start Chat.
FORM FIELDS: What’s your email address? — marked REQUIRED, so you can always reply by email; What’s your name? and What’s your phone number? — switch each on to ask for it, and choose whether it is Required or Optional.
“This widget also answers with an AI agent. If that agent has its own pre-chat form configured, the agent’s form is the one visitors see.”
✅
Keep the form short. Email (required) and name are usually enough; every extra question makes fewer visitors start a chat.
Part 7 — Install the widget on your website#
Step 11: Copy the install script#
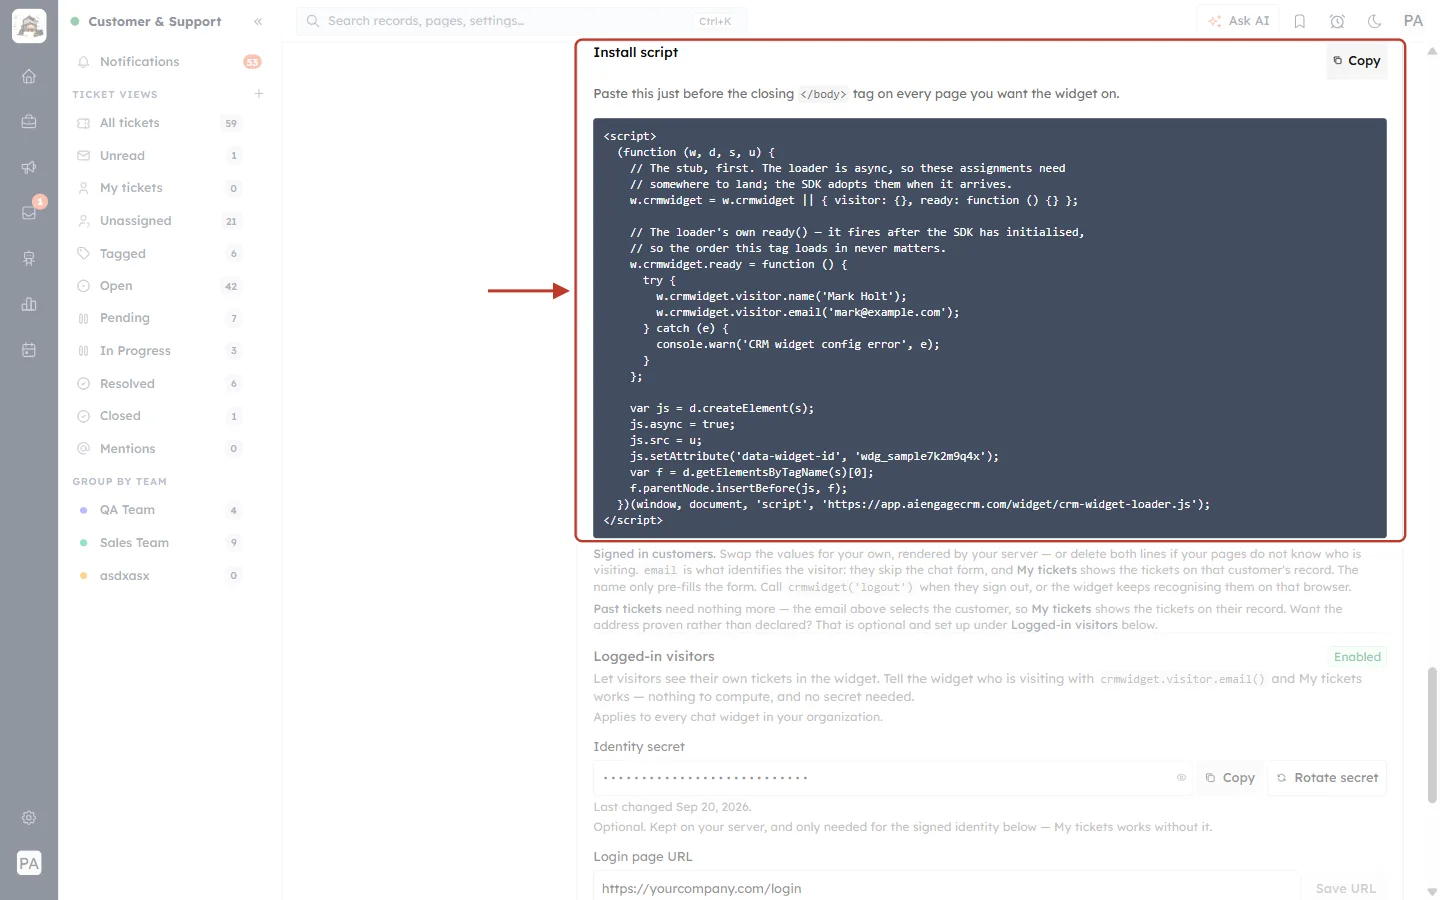
What this screenshot shows. The Install script section and the start of the script are ringed.
Copy (top right) — copies the whole script.
“Paste this just before the closing
</body>tag on every page you want the widget on.”The script contains your widget’s own ID (
data-widget-id), so each widget has its own script.Two lines set
visitor.nameandvisitor.emailwith example values (Mark Holt, mark@example.com). Replace them with the signed-in customer’s details from your website — or delete both lines if your pages do not know who is visiting (Part 8).
Paste the script into your website’s HTML just before </body>. On most website builders (WordPress, Shopify, Wix and others) there is a “footer code” or “custom code” setting that adds it to every page. A minimal version looks like this:
<script src="https://app.aiengagecrm.com/widget/crm-widget-loader.js"
        data-widget-id="YOUR-WIDGET-ID" async></script>
ℹ️
Use the script from your Chat Widget page — it contains your real widget ID. The snippet above only shows its shape.
For step-by-step help with WordPress, Shopify, Wix and other website builders, and for filling in signed-in customers, see Install the Chat Widget on Your Website.
Part 8 — Recognise signed-in customers (optional)#
Step 12: Review Logged-in visitors#
If customers sign in to your website, the widget can recognise them. They skip the pre-chat form, and a My tickets view shows the tickets on their CRM record.
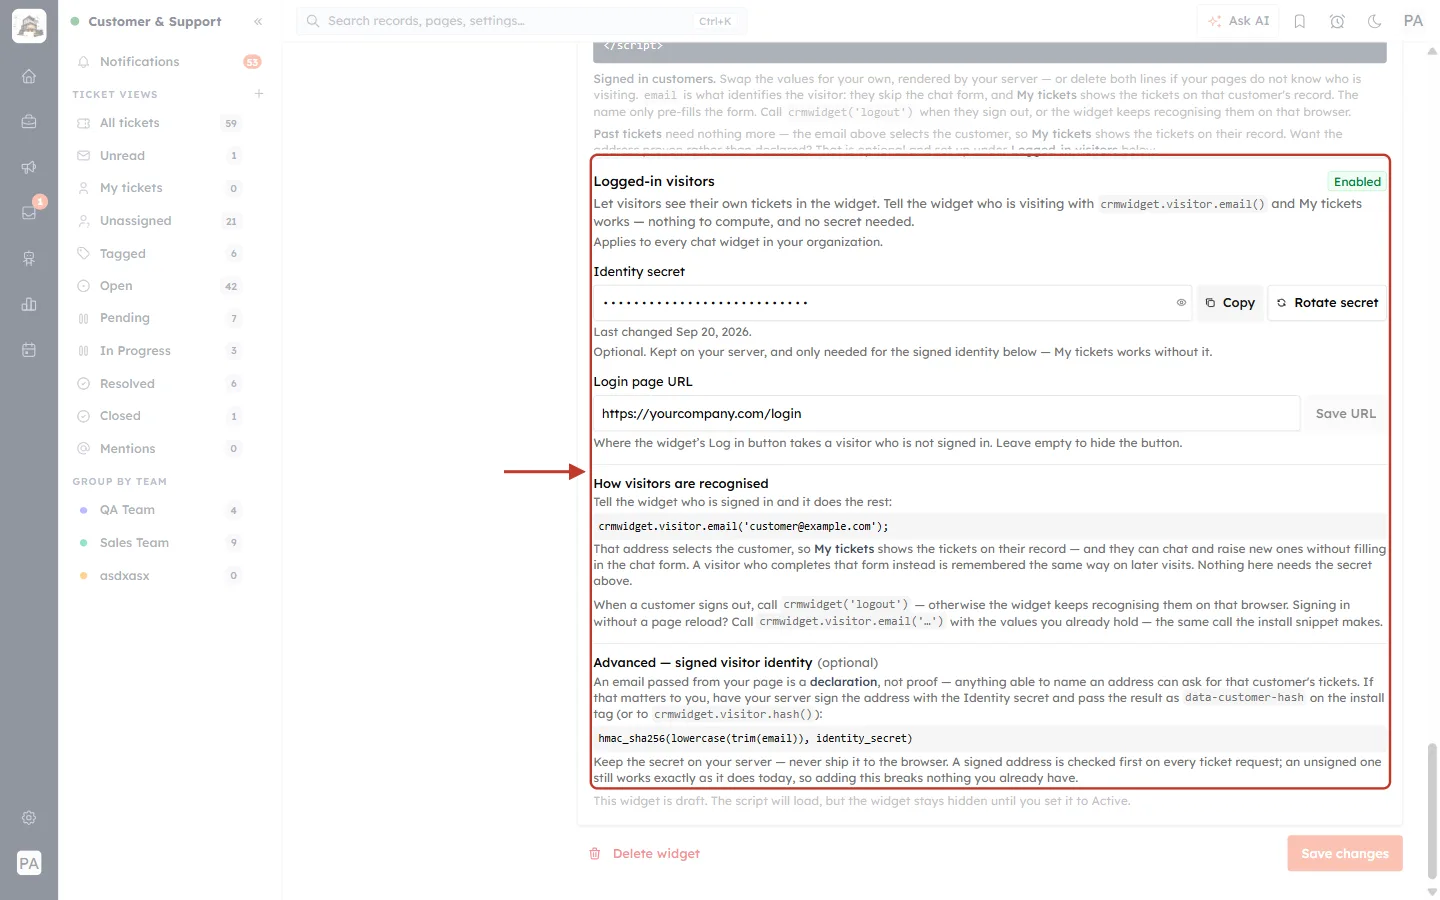
What this screenshot shows. The Logged-in visitors section is ringed. It is Enabled and “Applies to every chat widget in your organization.”
“Let visitors see their own tickets in the widget. Tell the widget who is visiting with
crmwidget.visitor.email()and My tickets works — nothing to compute, and no secret needed.”Identity secret — hidden behind dots, with Copy and Rotate secret. “Optional. Kept on your server, and only needed for the signed identity below.”
Login page URL — https://yourcompany.com/login, with Save URL. “Where the widget’s Log in button takes a visitor who is not signed in. Leave empty to hide the button.”
How visitors are recognised — call
crmwidget.visitor.email('customer@example.com')with the signed-in customer’s address. When they sign out, callcrmwidget('logout'), otherwise the widget keeps recognising them on that browser.Advanced — signed visitor identity (optional) — for extra security, your server signs the address with the identity secret (
hmac_sha256(lowercase(trim(email)), identity_secret)) and passes it asdata-customer-hash.
⚠️
Never put the identity secret in your web page. “Keep the secret on your server — never ship it to the browser.” If it is ever exposed, click Rotate secret.
Part 9 — Activate and save#
Step 13: Set the widget to Active#
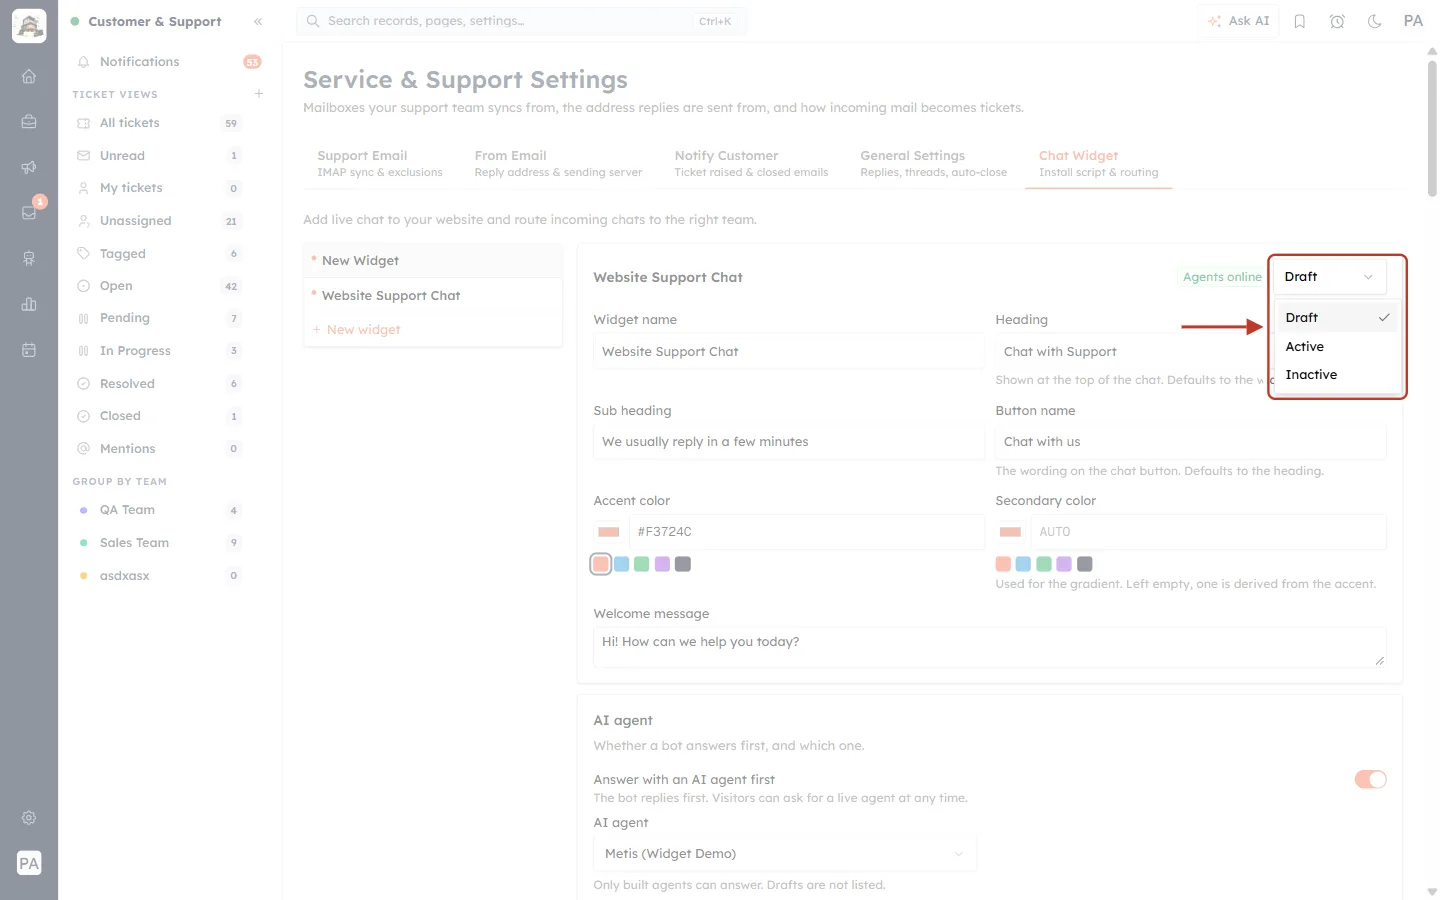
What this screenshot shows. The status list at the top right of the widget is open and ringed.
Draft — being set up; the script loads but the widget stays hidden.
Active — live: visitors see the chat button on every page with the script.
Inactive — switched off, for example while you pause chat on that site.
Choose Active when you are ready to go live.
Step 14: Save your changes#
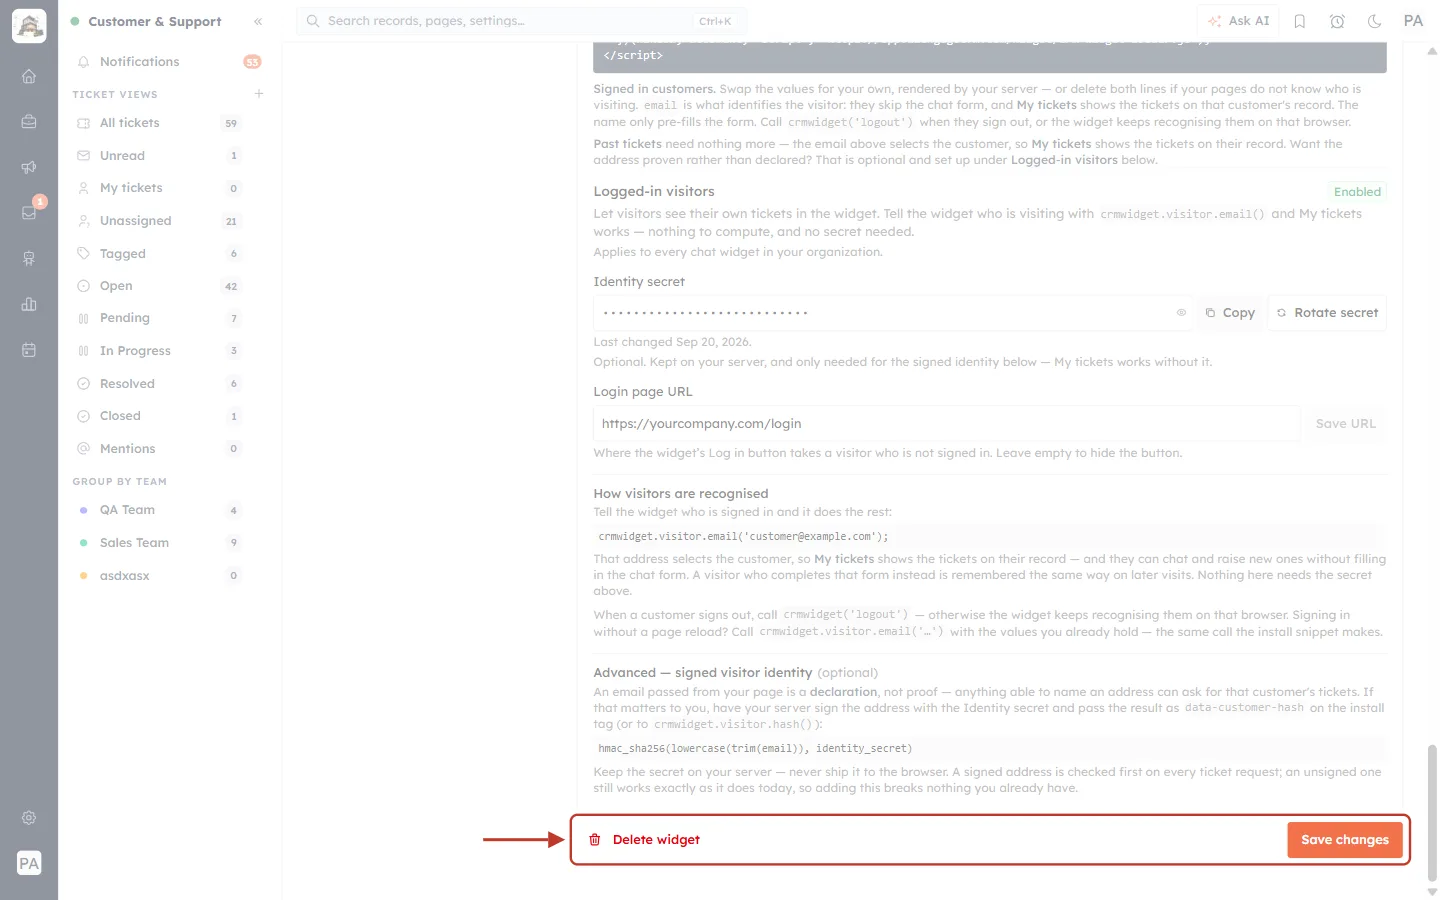
What this screenshot shows. The bottom of the page, with Delete widget and Save changes ringed.
Save changes (orange) — saves everything you changed on this widget. Nothing above is stored until you click it.
Delete widget (red, left) — removes the widget. Take the script off your website first.
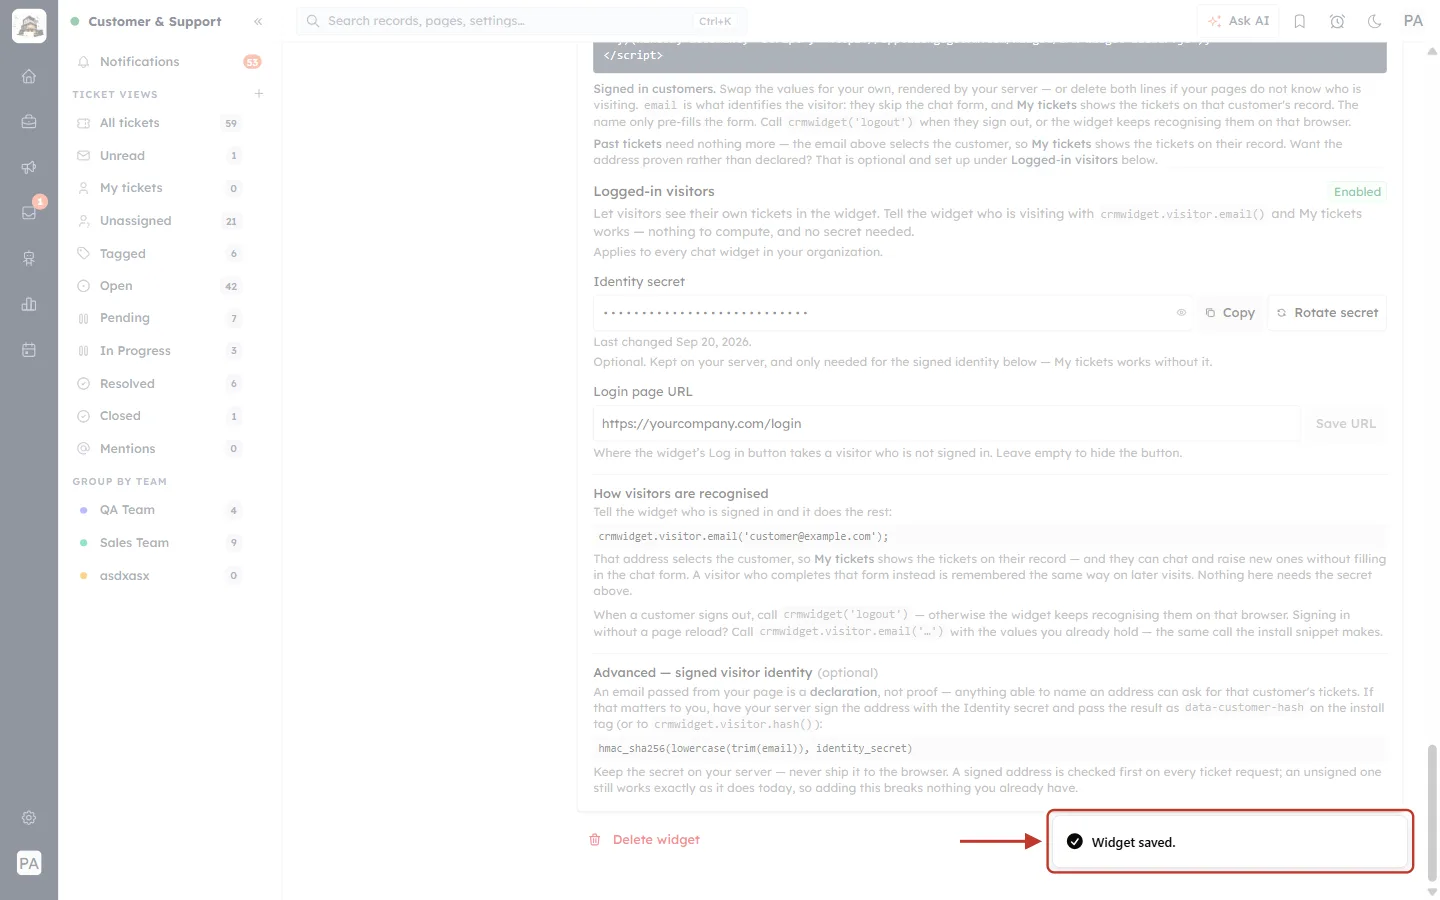
What this screenshot shows. The confirmation in the bottom-right corner is ringed: ✓ Widget saved.
Open your website in a new tab (refresh it) — the chat button should appear in the corner. Send yourself a test message.
✅
Test it end to end: open your site in a private window, start a chat, ask for a person, and check that it arrives in the Team Inbox. Then sign in as a customer and check Raise a new ticket and My tickets.
Troubleshooting#
The chat button does not appear on my site. Check the widget is Active (a Draft stays hidden), that you clicked Save changes, and that the script is on that page, just before </body>. Clear your browser cache and reload.
“Please select an AI Agent.” Answer with an AI agent first is on but no agent is chosen. Pick one, or switch the option off.
My AI agent is not in the list. Only built, active agents are listed. Finish and publish the agent under AI Agents.
Visitors always see the offline message. An agent only counts as online while their inbox is open. Ask your agents to keep the Team Inbox open, and check that the right team or agents are chosen in Live agent handoff.
Visitors cannot start a chat at all. Chat may be switched off for the organisation — check General Settings → Chat conversation is enabled.
Customers do not see “Raise a new ticket”. It is only shown to signed-in customers, and only when Customers can raise tickets is on. Make sure your site calls crmwidget.visitor.email().
A customer still appears signed in after logging out. Call crmwidget('logout') when they sign out of your website.
Previous and next#
Previous: Support General Settings: Live Chat, Reply Display, Reopen on Reply & Auto-Close Resolved Tickets
Related#
Was this article helpful?
Ready to implement this?
OpenAI Engage and apply what you just learned to your own workspace.
Open AI Engage CRM