Loading…


KnowledgeBase
Install the Chat Widget on Your Website: Copy the Script, Paste It Before the Closing Body Tag & Go Live
What this article covers#
Once your chat widget is set up in AiEngage CRM, one short piece of code — the install script — puts it on your website. Paste it once, and the chat button appears on every page that has it. Changes you make later in the CRM (colours, messages, AI agent, routing) appear on your site automatically; you never need to paste the script again.
This article shows you, step by step:
Where to find and copy the install script (Part 1).
What the lines in the script mean, and which ones to change (Part 2).
Where to paste it on your website — in the HTML, or in your website builder (Part 3).
How to make the widget live and check it works (Part 4).
Before you begin#
A chat widget set up in the CRM — see Set Up the Website Chat Widget for Support.
Access to your website’s code or its builder settings (WordPress, Shopify, Wix, Squarespace, Webflow…) — or someone who has it, such as your web developer.
About 10 minutes.
Part 1 — Copy the install script#
Step 1: Open the Chat Widget tab#
Press Ctrl + K (Cmd + K on a Mac), type Support Email and open it, then click the Chat Widget tab.
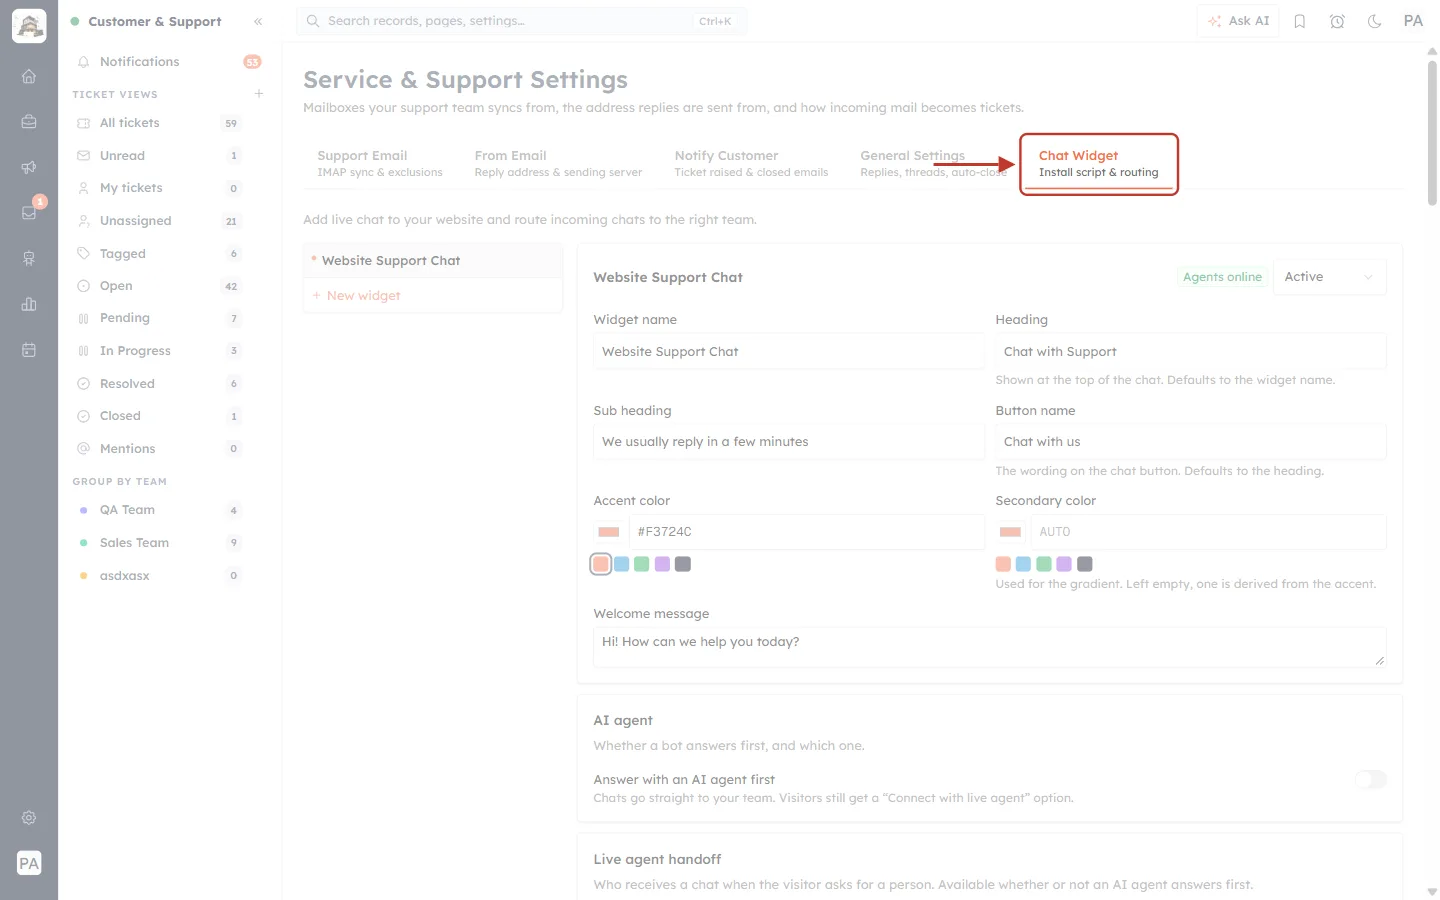
What this screenshot shows. Service & Support Settings, with the Chat Widget — Install script & routing tab ringed.
The install script for each widget is on this tab, near the bottom of the widget’s settings.
Step 2: Select the widget you want to install#
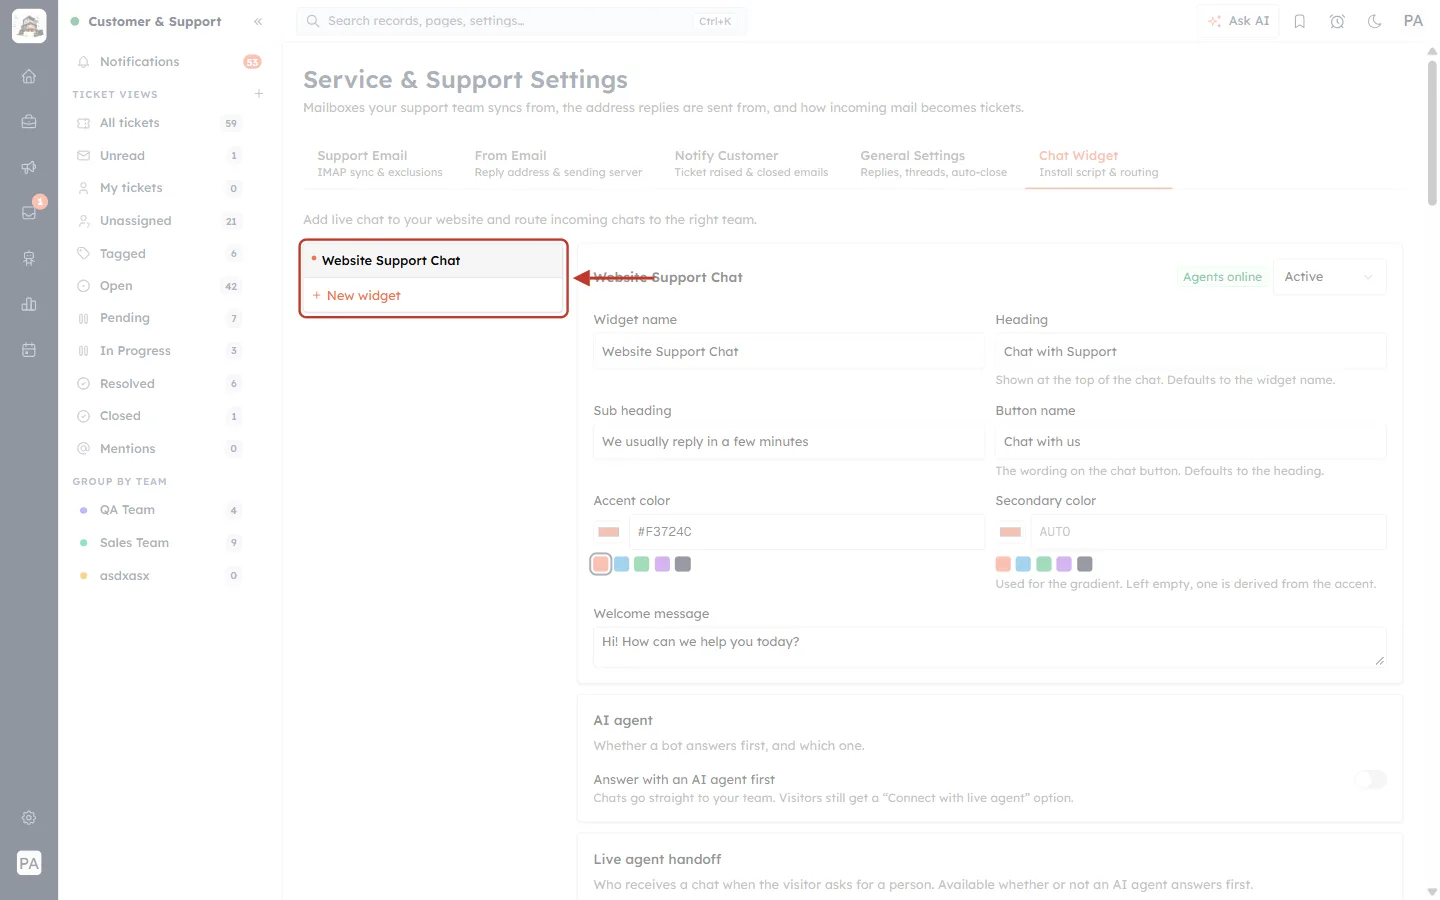
What this screenshot shows. The widget list on the left is ringed. Website Support Chat is selected.
Each widget has its own install script. If you have several (for example one per website), select the right one first.
+ New widget — creates another widget.
Step 3: Scroll to Install script#
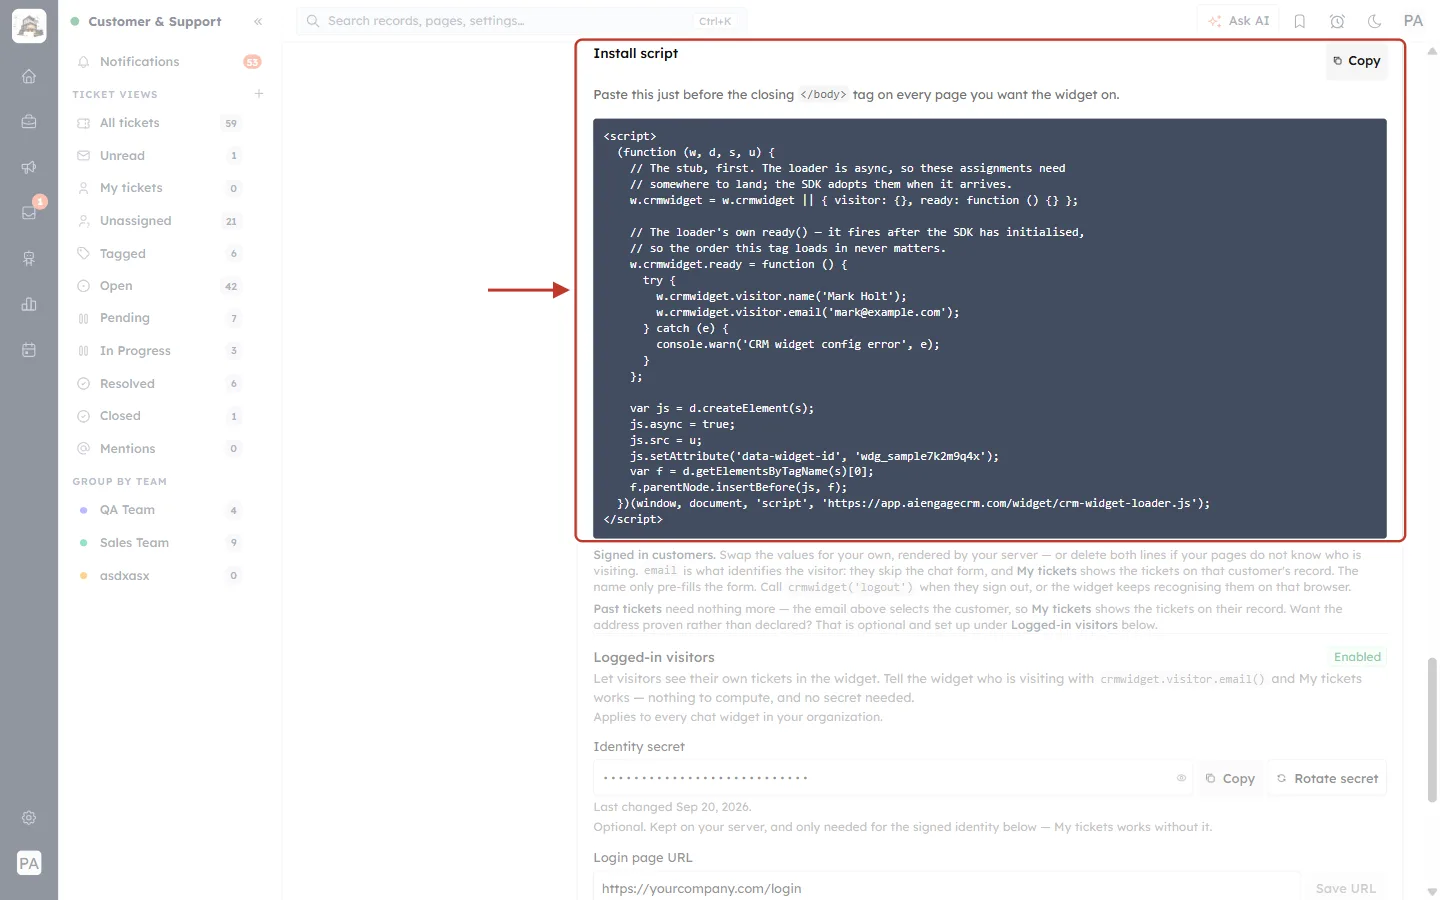
What this screenshot shows. The Install script section and its code are ringed.
“Paste this just before the closing
</body>tag on every page you want the widget on.”Copy (top right) — copies the whole script for you.
The grey box is the script itself. You do not need to understand it — but Part 2 explains the two parts worth knowing.
Step 4: Click Copy#
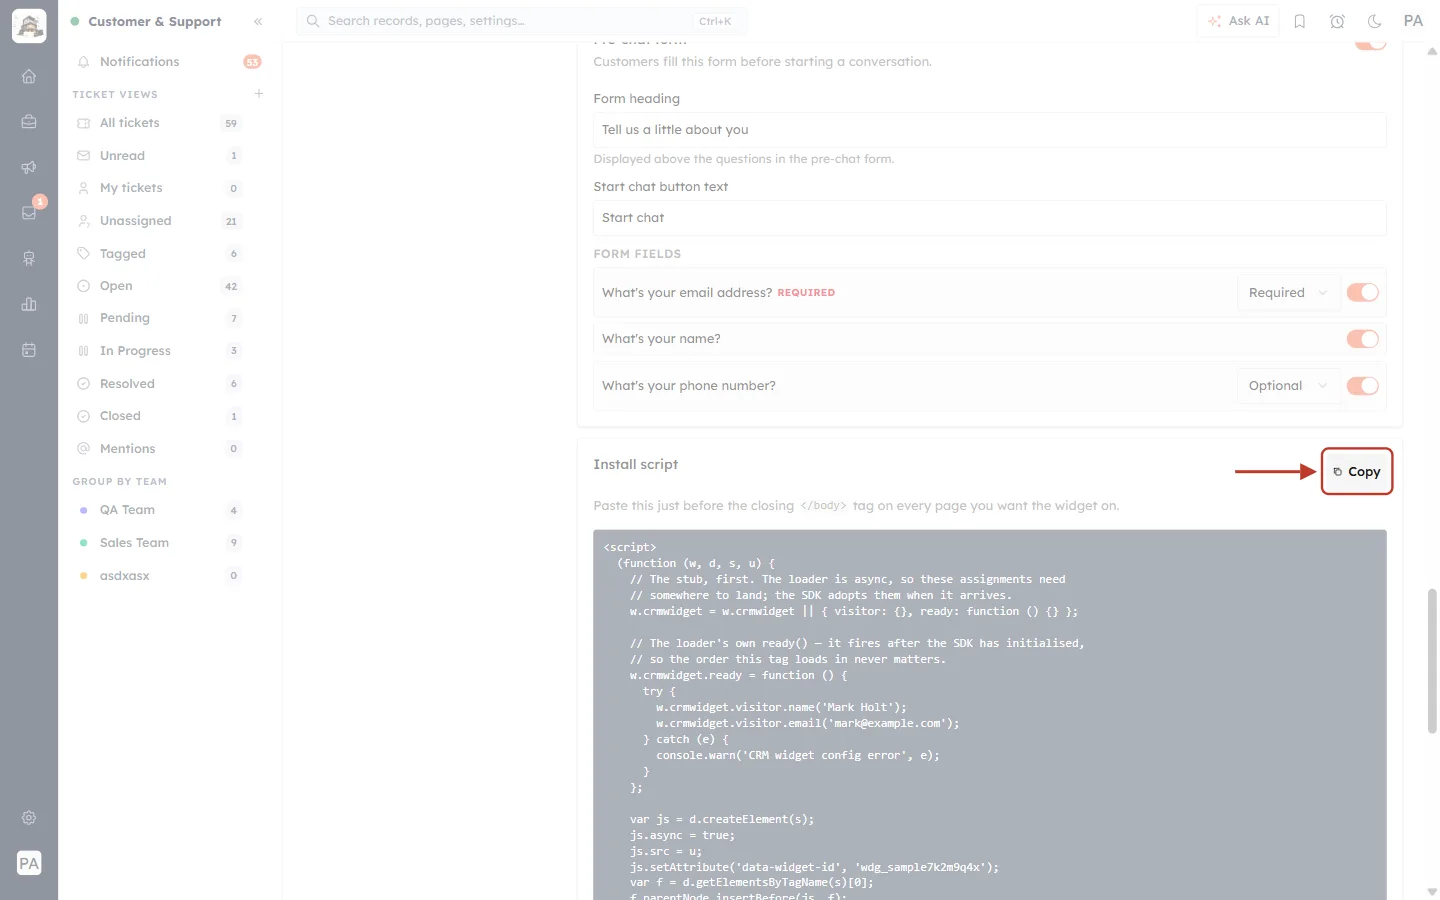
What this screenshot shows. The Copy button is ringed.
Click it to copy the complete script to your clipboard. Copying by hand risks missing a character.
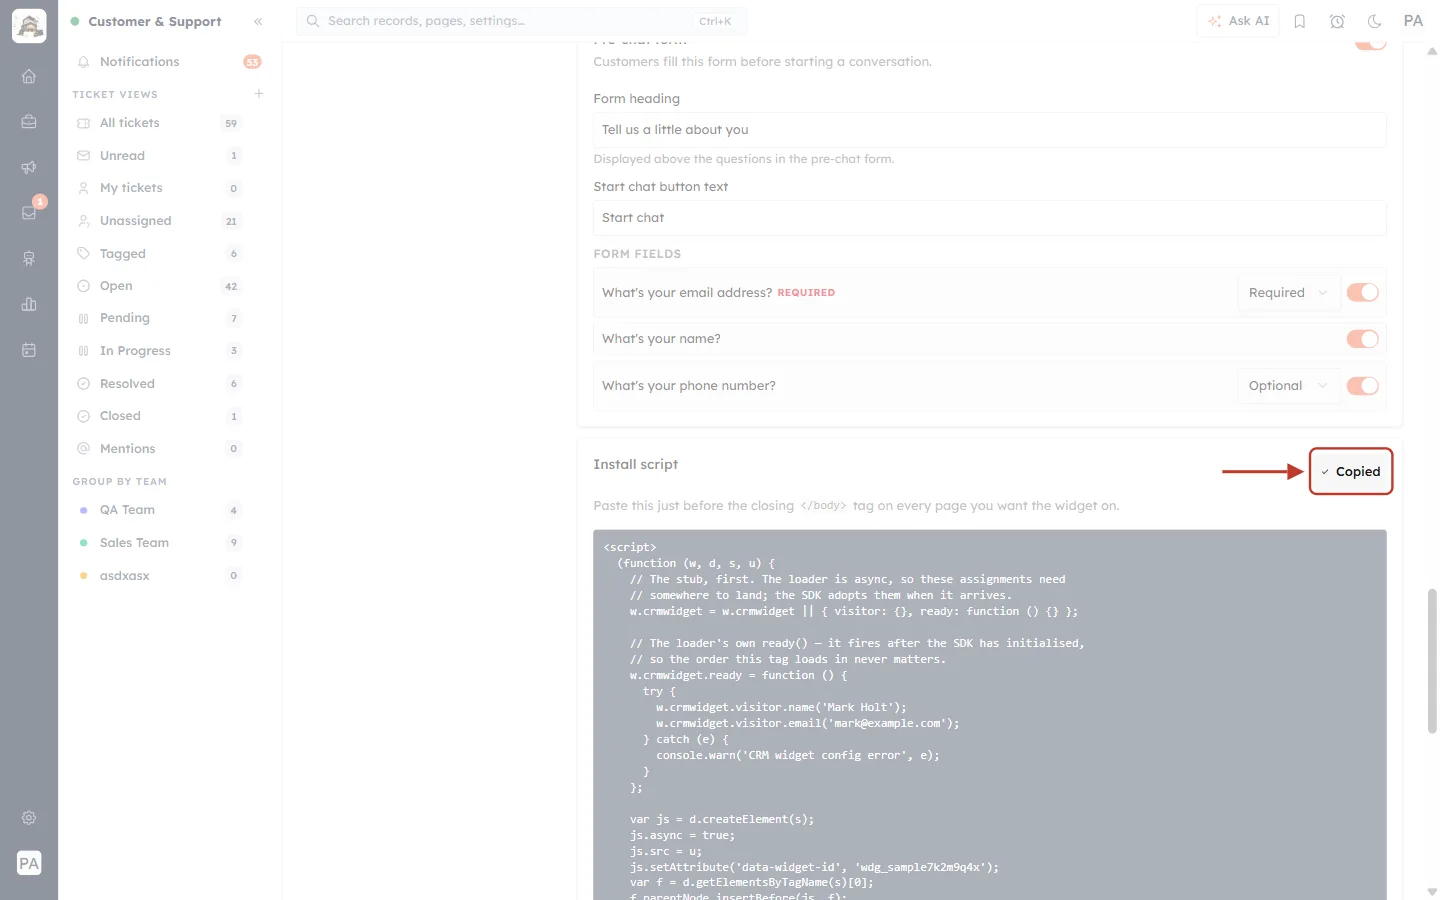
What this screenshot shows. Straight after clicking, the button changes to ✓ Copied for two seconds.
The script is now on your clipboard, ready to paste.
If copying is blocked by your browser you will see “Could not copy. Select the snippet and copy it manually.” — select the whole grey box and press Ctrl + C.
Part 2 — Understand the script#
Step 5: The widget ID#
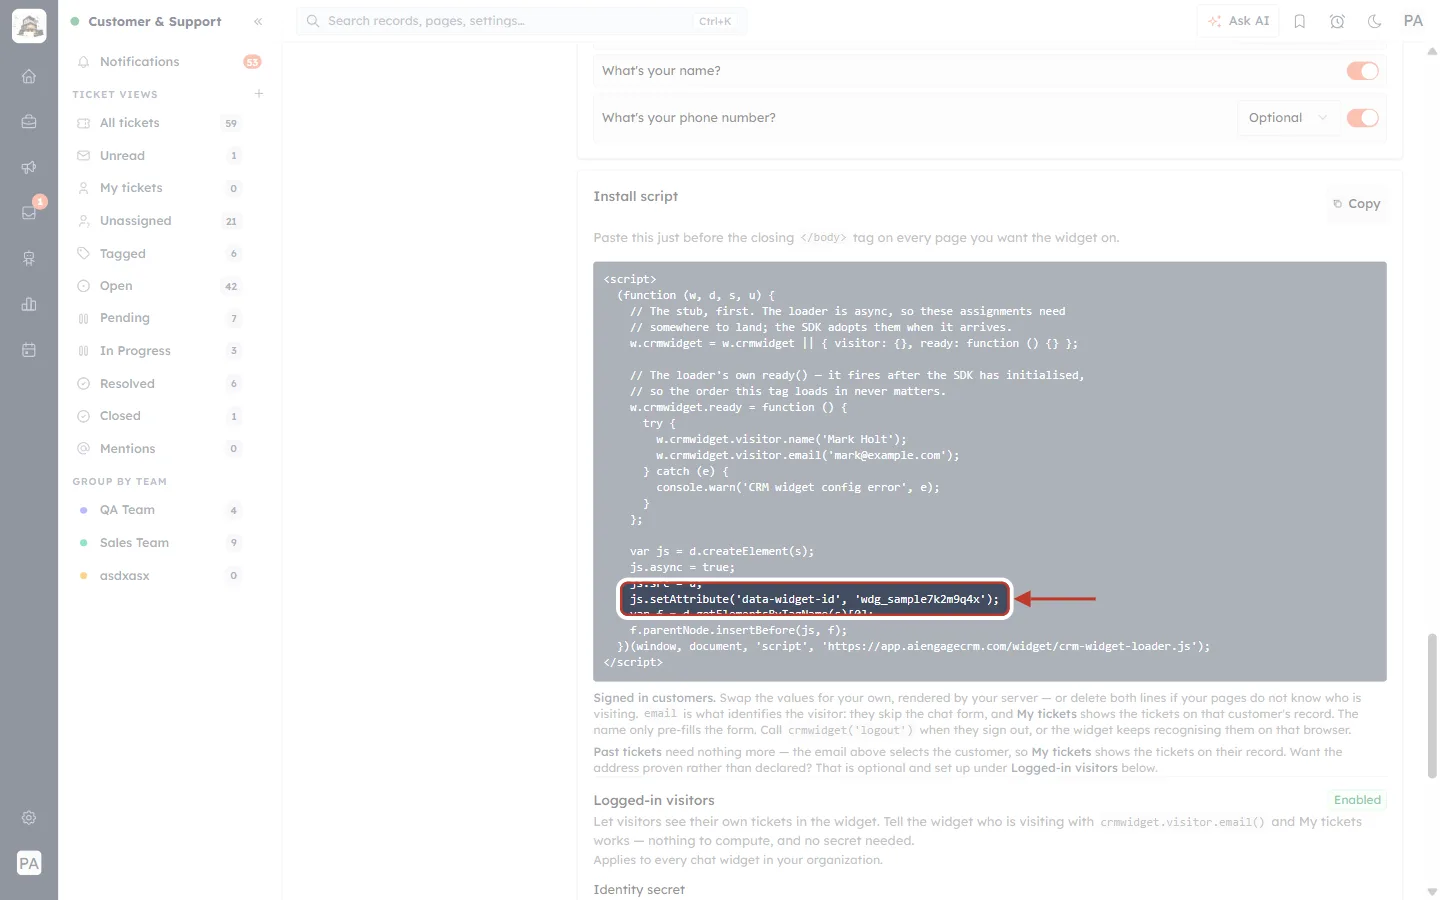
What this screenshot shows. The line that sets data-widget-id is ringed.
js.setAttribute('data-widget-id', '…')— tells the script which widget to load. Here it is a sample ID; yours is filled in for you.Never change this value. If you have several widgets, use each widget’s own script.
The last lines load the widget from AiEngage’s servers, so updates arrive without you touching the code.
Step 6: The two visitor lines#
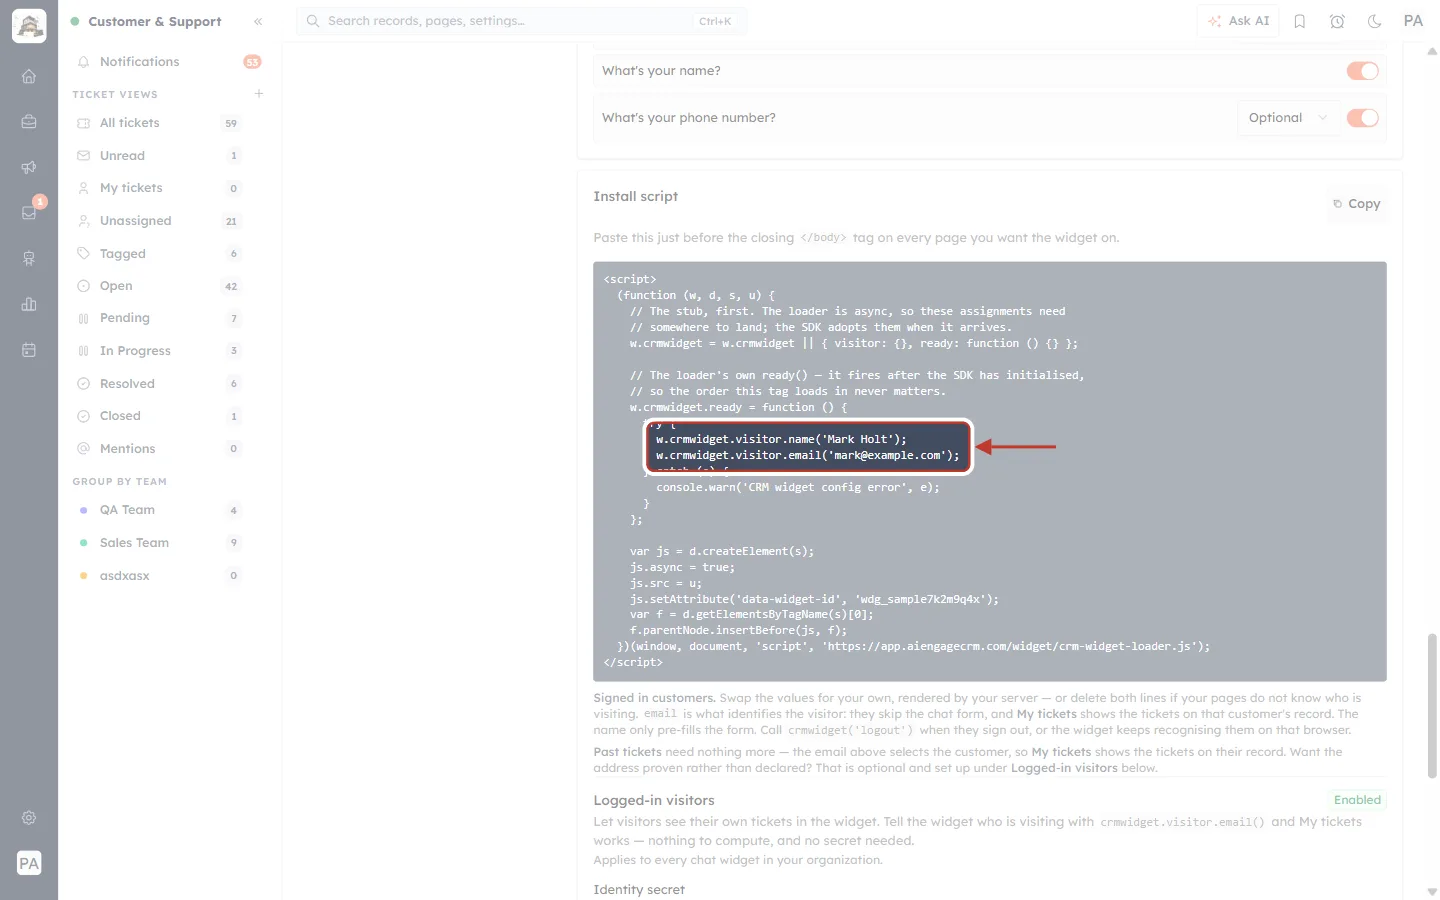
What this screenshot shows. The two lines that set the visitor’s name and email are ringed.
w.crmwidget.visitor.name('Mark Holt');andw.crmwidget.visitor.email('mark@example.com');— example values. Do not leave them as they are.If your website has customer accounts, replace them with the signed-in customer’s real name and email (Step 7).
If your website does not know who is visiting, delete both lines. Visitors then fill in the pre-chat form instead.
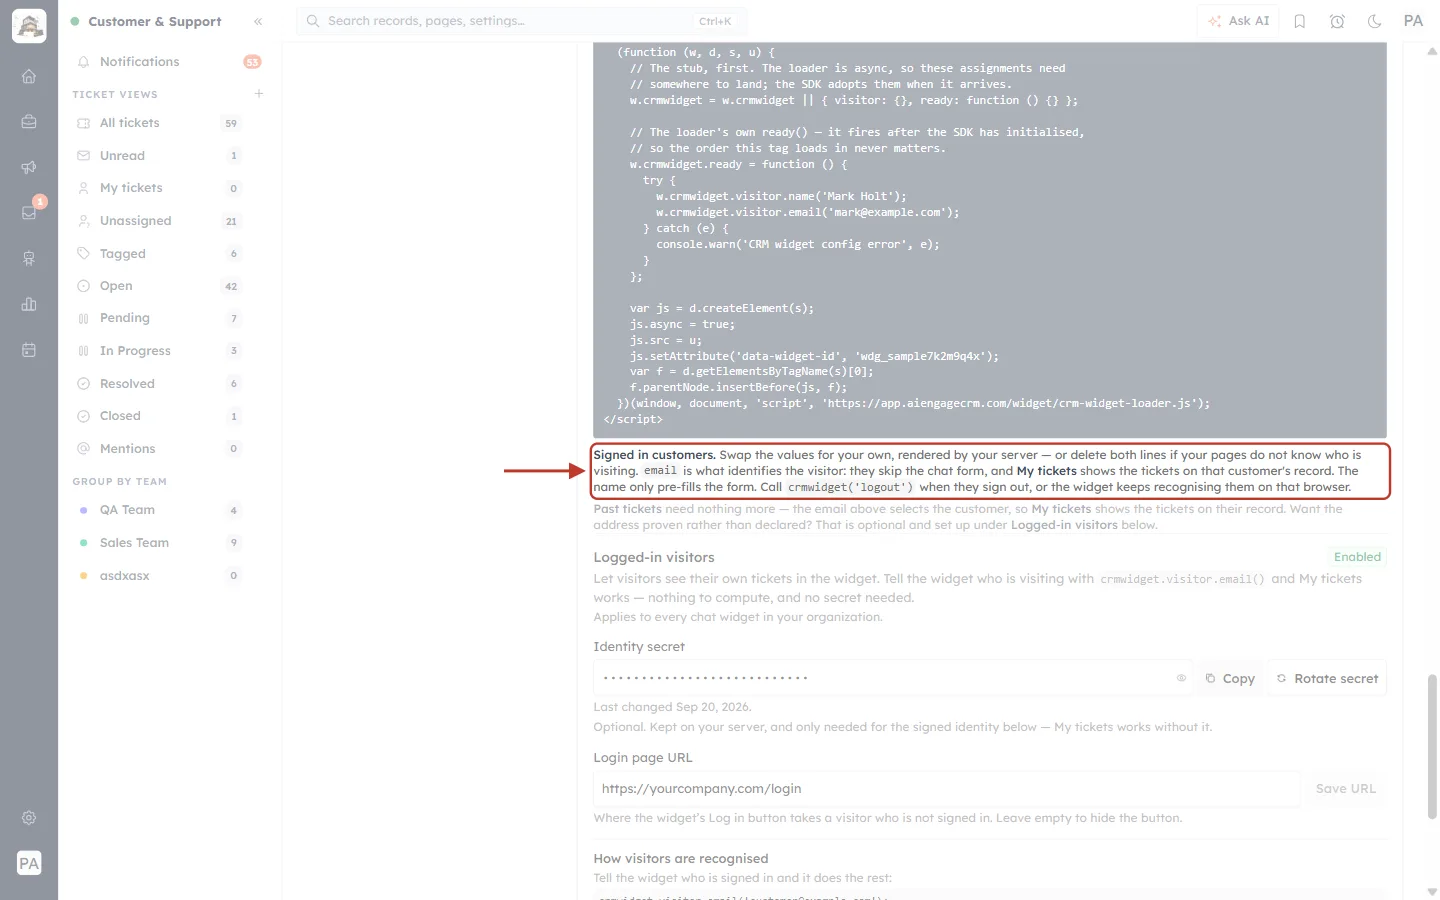
What this screenshot shows. The note directly under the script is ringed.
“Signed in customers. Swap the values for your own, rendered by your server — or delete both lines if your pages do not know who is visiting.”
“email is what identifies the visitor: they skip the chat form, and My tickets shows the tickets on that customer’s record. The name only pre-fills the form.”
“Call
crmwidget('logout')when they sign out, or the widget keeps recognising them on that browser.”
Step 7: Fill in the signed-in customer (if you have customer accounts)#
Ask your developer to replace the two example values with the customer’s details, written into the page by your website’s server. In most website platforms this uses a template tag; it looks something like this (the exact tag depends on your platform):
w.crmwidget.visitor.name('{{ customer.name }}');
w.crmwidget.visitor.email('{{ customer.email }}');
And when the customer signs out:
// when the customer signs out of your website
crmwidget('logout');
⚠️
Only put the details of the signed-in customer in the page — never a fixed address. Every visitor using the same email would see that customer’s tickets. For extra protection, use the optional signed identity described in Set Up the Website Chat Widget, Part 8.
Part 3 — Paste the script into your website#
Step 8: Paste it just before </body>#
The script must sit just before the closing </body> tag of your pages. Put it in the part of your site that appears on every page — the footer or main layout template — so you only have to add it once.
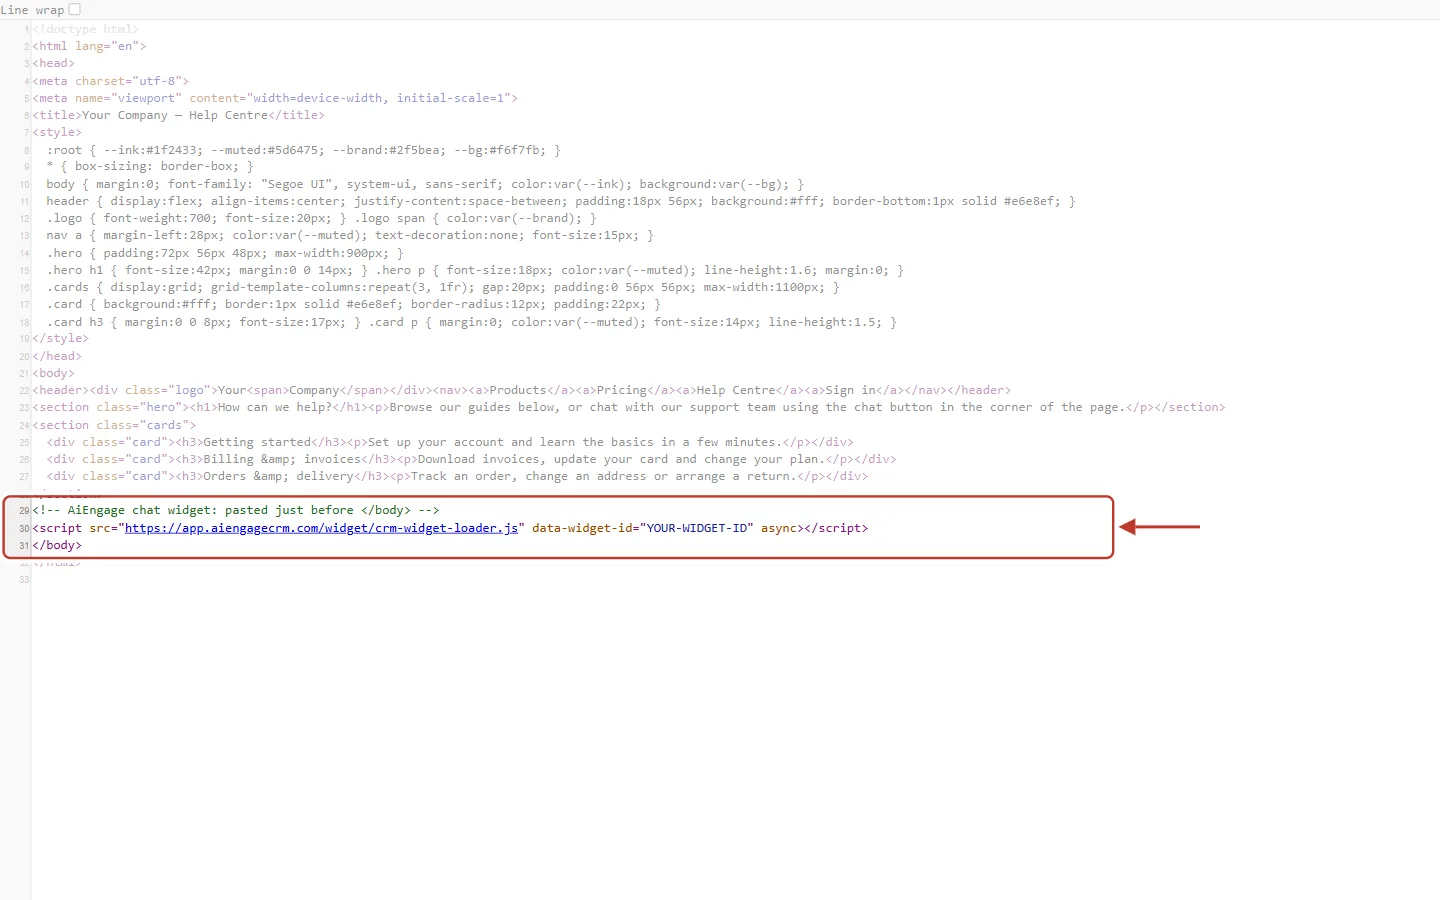
What this screenshot shows. The source code of a sample website (in the browser: right-click → View page source). The ringed lines are the chat widget.
Line 29 — a comment,
<!-- AiEngage chat widget -->, so your developers know what the code is for. Optional but helpful.Line 30 — the script, loading
crm-widget-loader.jswith yourdata-widget-id. (Here a placeholder, YOUR-WIDGET-ID.)Line 31 —
</body>. The script comes directly before it.Everything above (faded) is the website’s own content and styles — leave it as it is.
You can use this same View page source check on your live site afterwards to confirm the script is there.
In its shortest form, the end of your page looks like this:
<!-- AiEngage chat widget -->
<script src="https://app.aiengagecrm.com/widget/crm-widget-loader.js"
        data-widget-id="YOUR-WIDGET-ID" async></script>
</body>
Step 9: Using a website builder?#
Most builders have a place for “custom code” that is added to every page. Paste the script there. Common places to look:
| Platform | Where to paste the script |
|---|---|
| WordPress | Your theme’s footer (footer.php, before </body>), or a “header & footer scripts” plugin — paste into the footer box. |
| Shopify | Online Store → Themes → Edit code → theme.liquid, just before </body>. |
| Wix | Settings → Custom code → Add custom code → Body – end, on all pages. |
| Squarespace | Settings → Advanced → Code injection → Footer. |
| Webflow | Site settings → Custom code → Footer code, then publish. |
| Google Tag Manager | A Custom HTML tag with the script, firing on All Pages. |
ℹ️
Menu names change from time to time. If you cannot find the option, search your builder’s help for “add custom code to footer” or “before body end”.
✅
Save and publish your site after pasting — many builders only apply custom code to the published version.
Part 4 — Go live and test#
Step 10: Make sure the widget is Active#
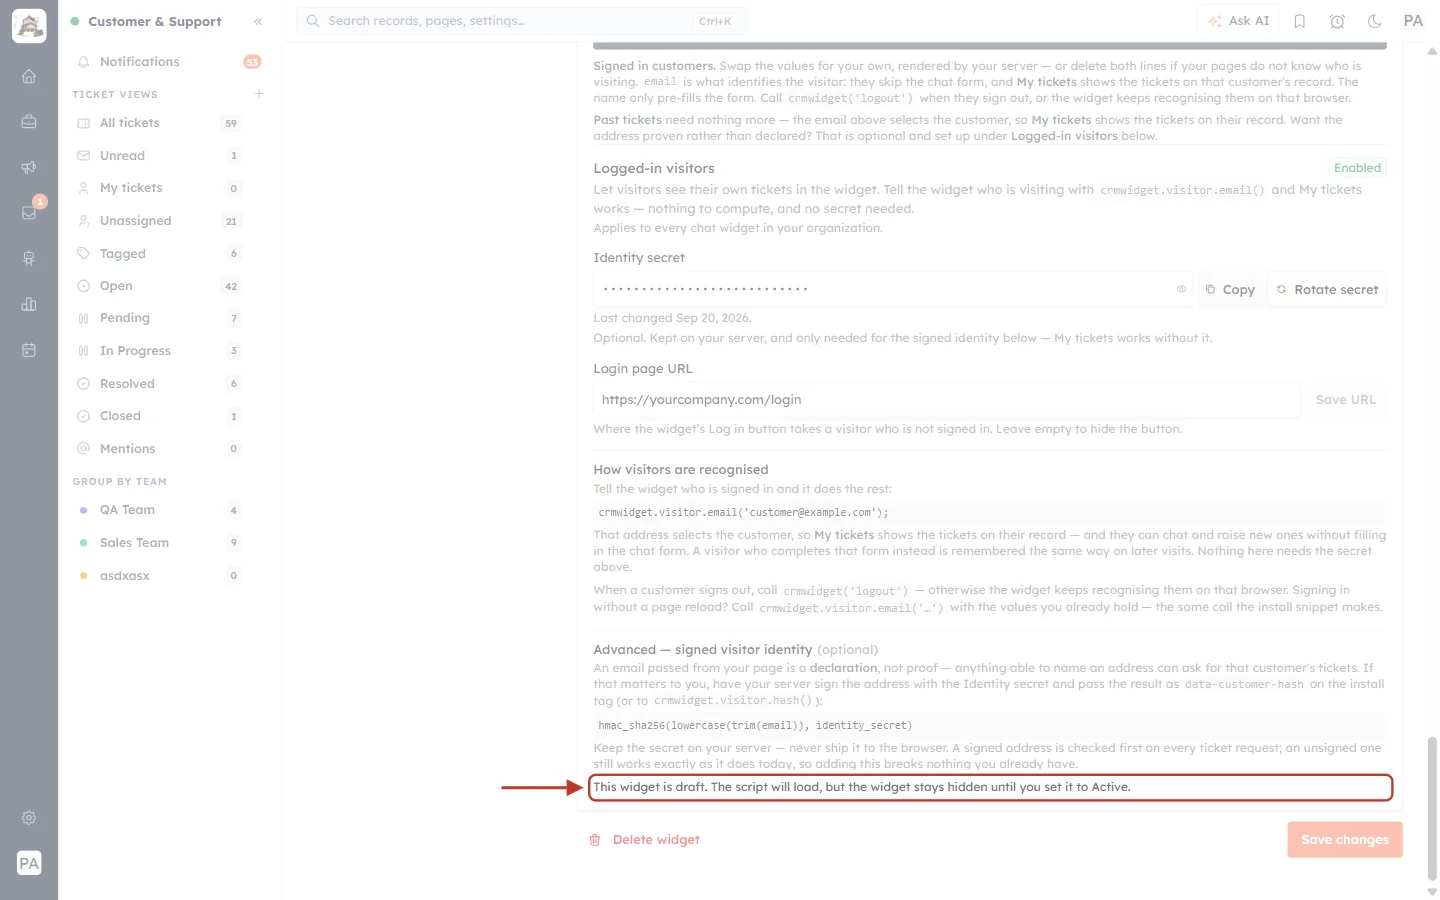
What this screenshot shows. A note near the bottom of a Draft widget is ringed.
“This widget is draft. The script will load, but the widget stays hidden until you set it to Active.”
This is useful: you can install the script first, and nothing appears to visitors until you are ready.
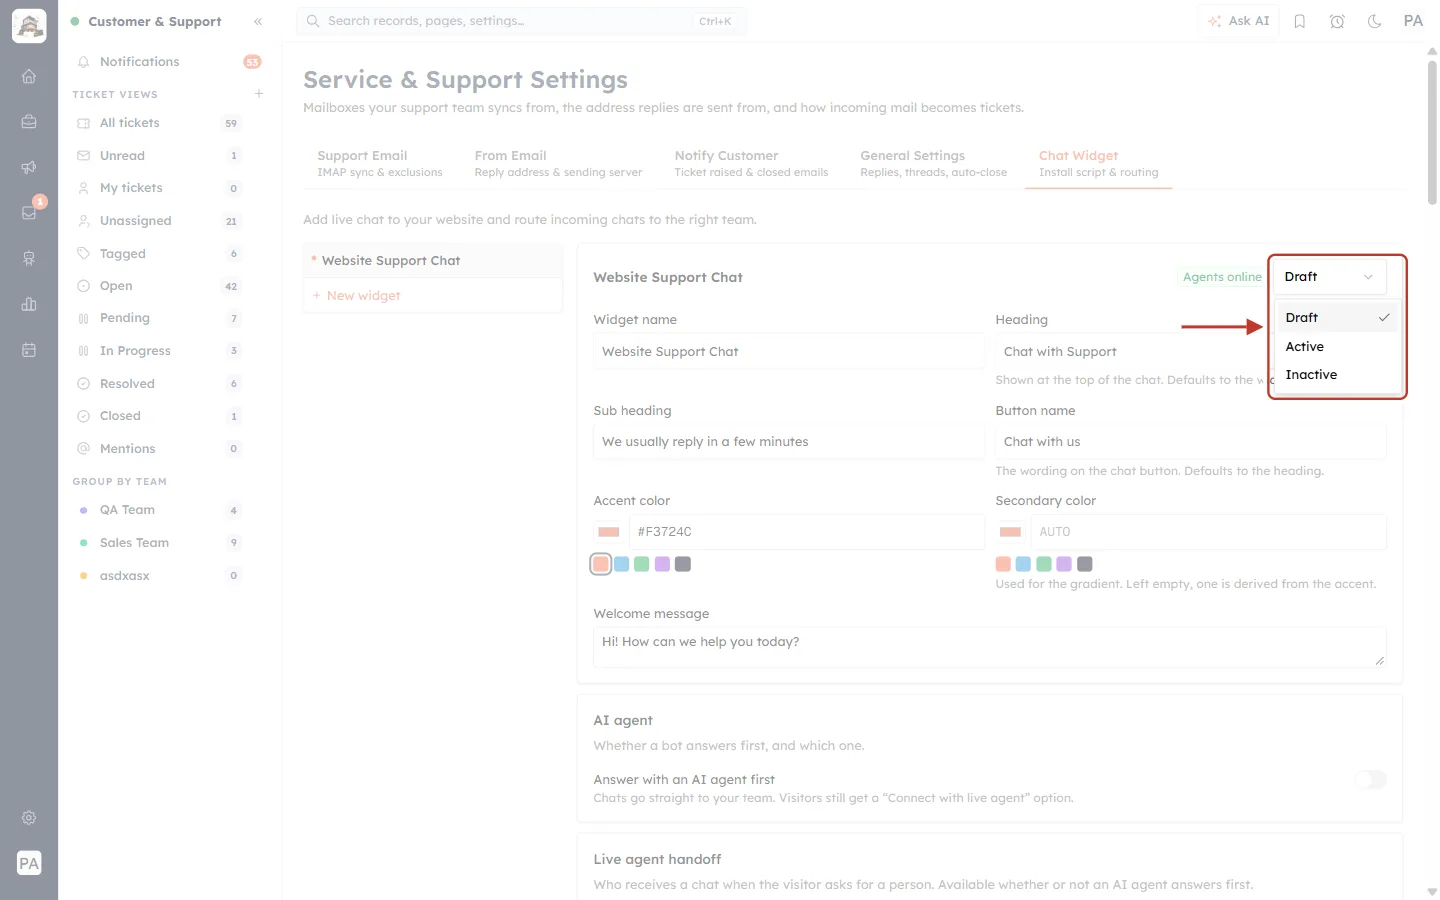
What this screenshot shows. The status list at the top right of the widget is open and ringed.
Choose Active to show the chat button on your website, then click Save changes at the bottom of the page.
Inactive hides it again later, without removing the script from your site.
Step 11: Check it on your website#
Open your website in a new browser tab (or a private window) and reload the page.
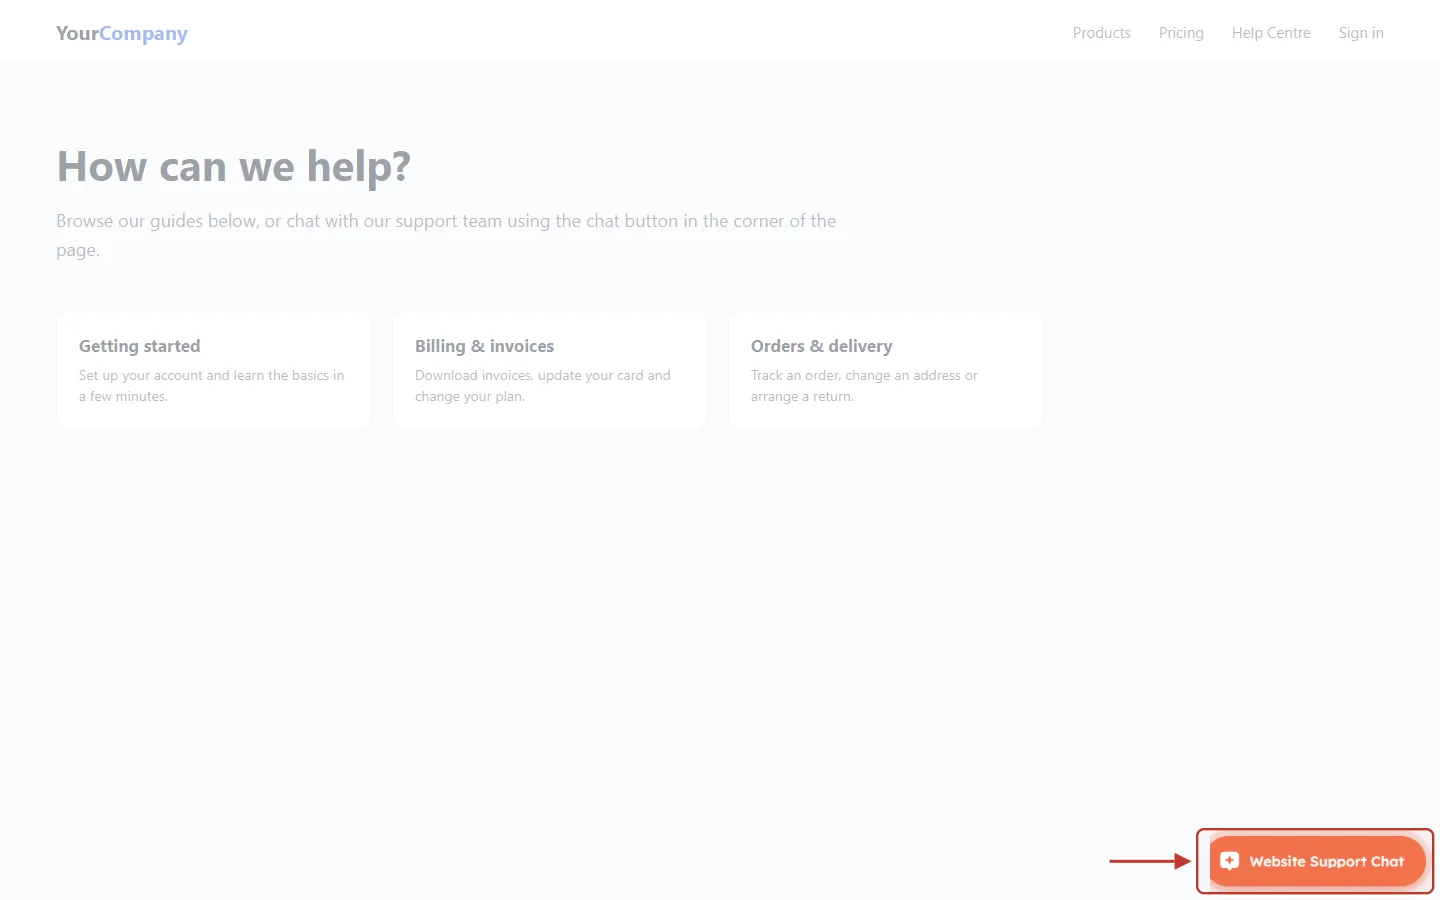
What this screenshot shows. A sample website with the chat widget installed. The chat button in the bottom-right corner is ringed.
Website Support Chat — the chat button, showing your widget’s button text and accent colour.
It appears on every page that has the script, floating above your content.
The rest of the page (faded) is the website itself — the widget does not change it.
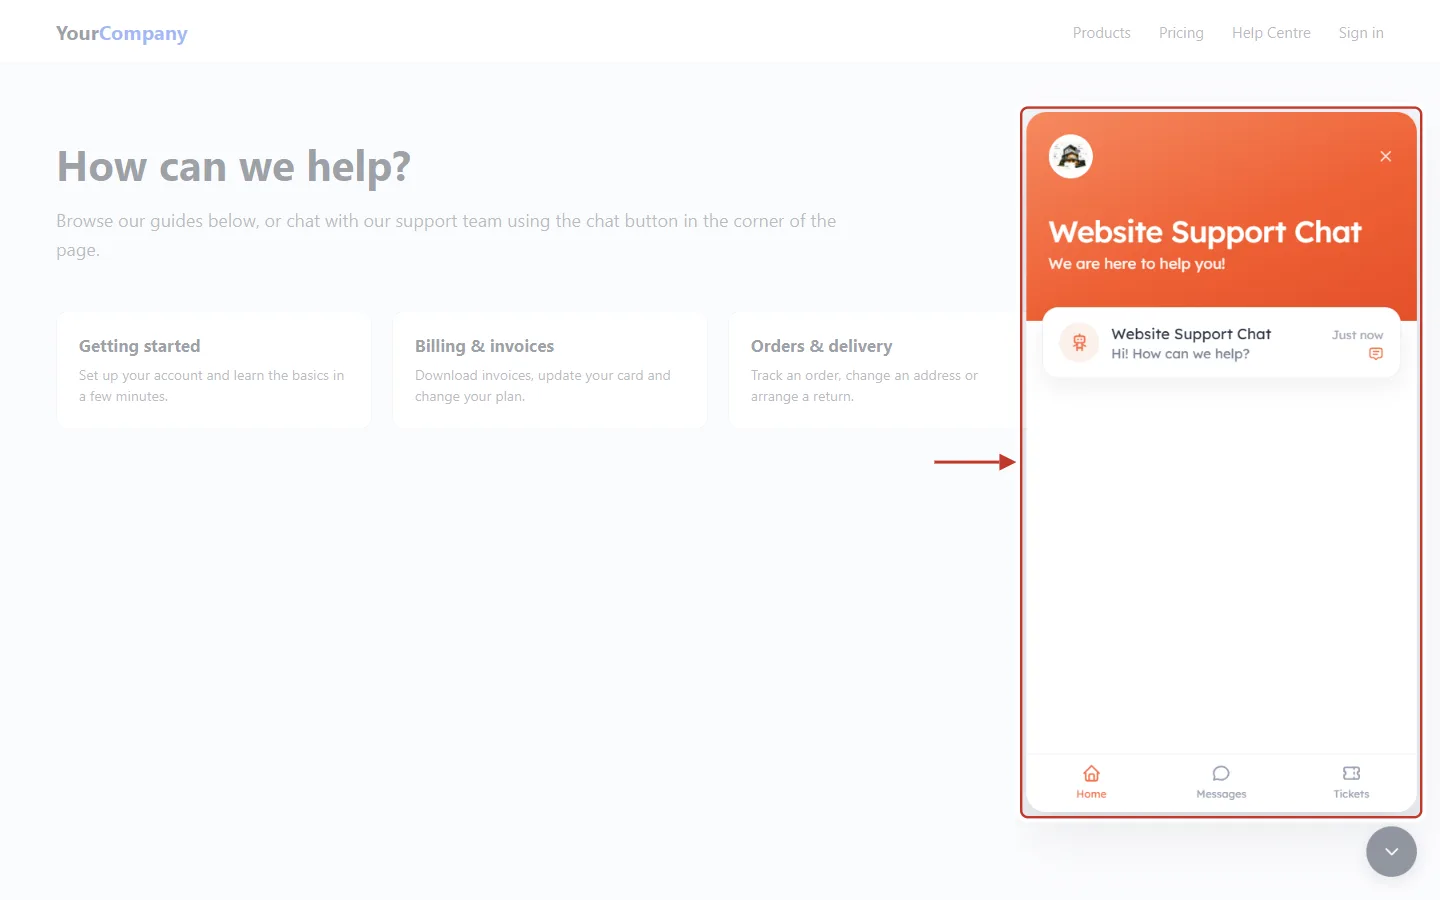
What this screenshot shows. The chat button has been clicked; the open chat panel is ringed.
The header — your widget’s heading (Website Support Chat) and sub heading, in your colours, with ✕ to close.
The conversation card — the welcome message (Hi! How can we help?). Click it to start chatting.
Home, Messages and Tickets — the tabs at the bottom. Tickets appears because customers are allowed to raise tickets from the widget.
The round button below — the chat button turns into a down arrow while the chat is open; click it to close.
✅
Run a full test: send a message, ask for a person, and check the chat arrives in your Team Inbox. If your site has customer accounts, sign in as a test customer and check that the chat form is skipped and My tickets shows their tickets.
Troubleshooting#
The chat button does not appear. Check, in order: the widget is Active and saved; the script is on the page (View page source and search for crm-widget-loader); it sits before </body>; your site was published; you reloaded without cache (Ctrl + Shift + R).
It appears on some pages but not others. The script is only on those pages. Move it to the shared footer or layout template.
Every visitor is shown as “Mark Holt”. The example visitor lines were left in. Replace them with the signed-in customer’s details, or delete them.
The wrong widget shows. The script belongs to a different widget. Copy the script from the widget you want (Step 2).
A customer still appears signed in after logging out. Call crmwidget('logout') when they sign out.
The button covers something on my site. On desktop, visitors can drag it to another place on the edge of the screen.
Changes in the CRM do not show. Click Save changes on the widget, then reload your site. You never need to paste the script again.
Previous and next#
Previous: Set Up the Website Chat Widget for Support: Live Chat, AI Agent, Handoff & Install
Next: Find the Right Tickets Fast: Ticket Views, Team Groups & Notifications in Customer & Support
Related#
Was this article helpful?
Ready to implement this?
OpenAI Engage and apply what you just learned to your own workspace.
Open AI Engage CRM