Loading…


KnowledgeBase
Turn Customer Support On or Off: Enable or Disable the Ticket System for Your Workspace (Step-by-Step)
Introduction#
Customer Support (also called the Ticket System) is AiEngage CRM’s helpdesk: the shared place where your team handles customer emails, live chats and WhatsApp messages as tickets. It has one on/off switch for your whole workspace:
On: the Customer Support menu (the headset icon in the left bar) opens Tickets, Chats and Settings for everyone whose profile allows it.
Off: those menus are locked. Anyone who opens Customer Support sees an introduction page with an Enable Ticket System button instead.
Behind the scenes the switch is the Tickets module’s status. When Tickets is Active, Customer Support is on, and when it is Inactive, Customer Support is off. That’s why you can flip it from two places. Both do exactly the same thing.
Part | What you’ll learn |
|---|---|
Part 1 | Who can turn Customer Support on or off, and how to tell whether it’s on |
Part 2 | Turn Customer Support on from the activation page |
Part 3 | Turn Customer Support off from General Settings |
Part 4 | The other way: activate or deactivate the Tickets module in Modules and Fields |
Part 5 | What is kept, and what changes, when it’s off |
ℹ️
Turning it off never deletes anything. Your tickets, conversations, mailboxes, chat widgets and settings all stay exactly as they are. Turning it back on restores the menus with nothing lost.
Part 1: Before you start#
Who can change the switch#
Where | Who can use it |
|---|---|
Enable Ticket System button and Disable module button | Only the organization owner or an admin. Anyone else gets “Only the organization owner or an admin can turn the Ticket System on or off.” |
Modules and Fields → Tickets → Activate / Deactivate | Users whose profile can manage modules (usually admins). |
Everyone else sees the page, but instead of the button they see who to ask:
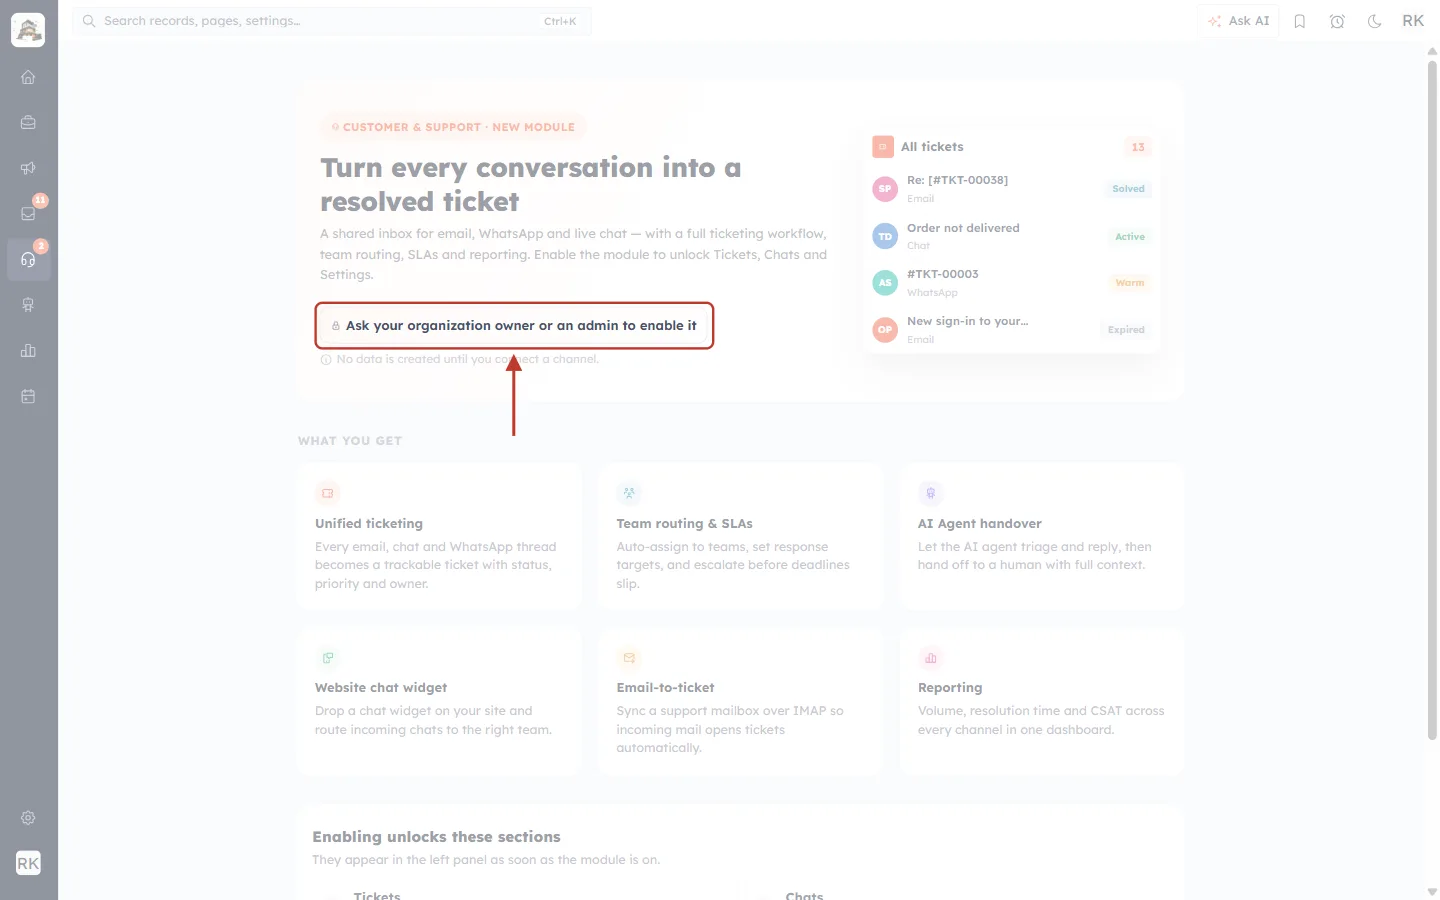
What this screenshot shows. The Customer Support introduction page as it appears to someone who isn’t an owner or admin. Where the Enable button would be, the ringed line reads “Ask your organization owner or an admin to enable it”.
If you see this, you can’t switch Customer Support on yourself. Ask your workspace owner or an admin.
How to tell whether Customer Support is on#
Click the headset icon in the dark icon bar on the left.
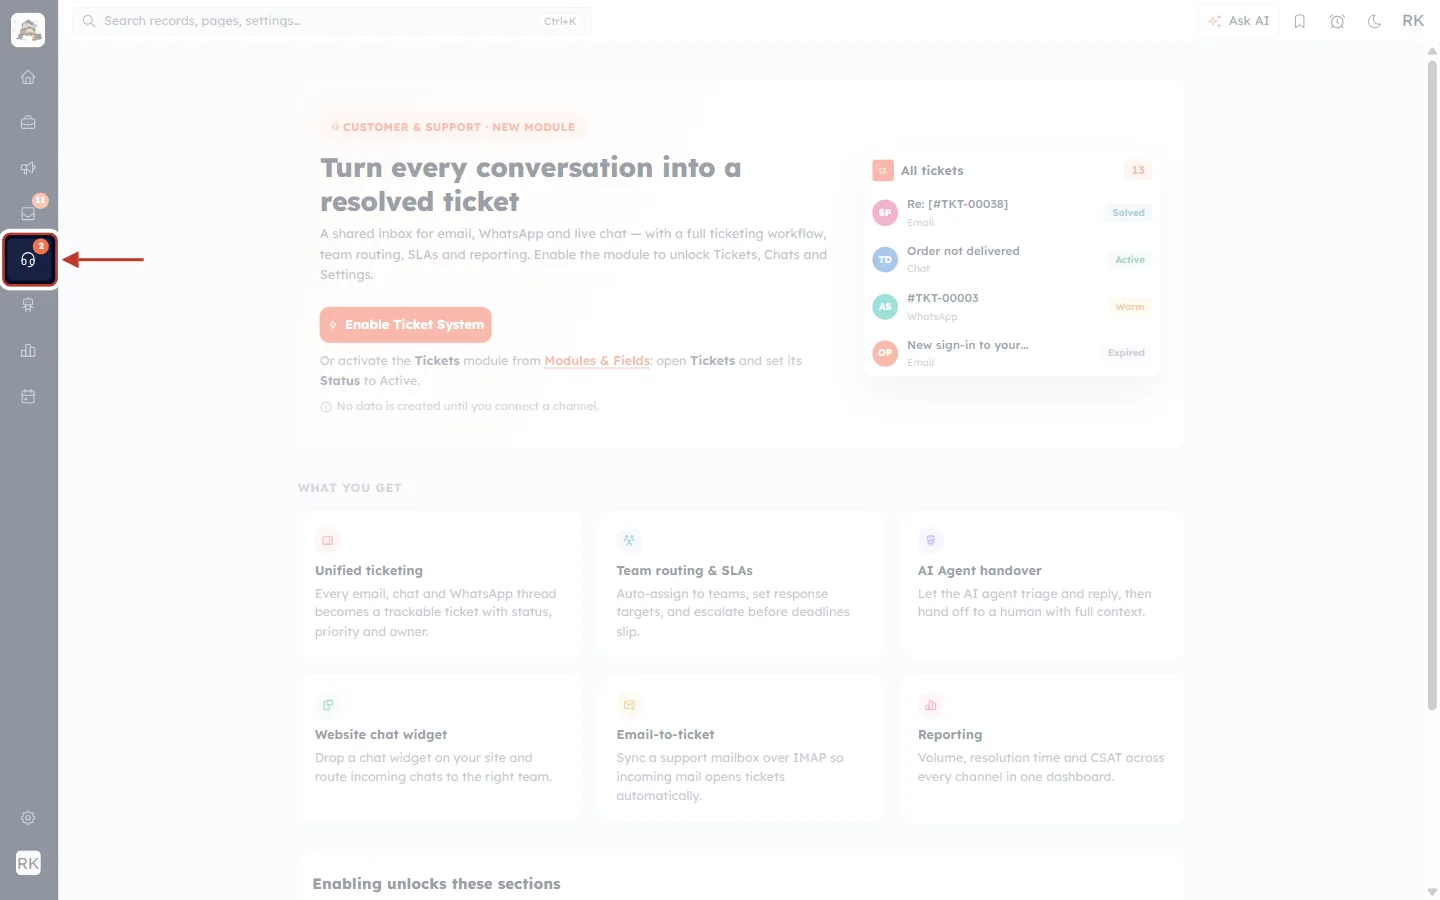
What this screenshot shows. The left icon bar with the Customer Support headset icon ringed and the red arrow pointing to it. Behind it is the introduction page, which means Customer Support is currently off.
If it’s on, clicking the icon opens the Customer Support side panel with Notifications, Channels, Ticket Views, Trash and Settings (see Part 2, Step 5).
If it’s off, you get the introduction page shown in this screenshot instead.
The small orange number on the icon counts unread Customer Support notifications.
Part 2: Turn Customer Support on#
Step 1: Open the activation page#
Click the headset icon in the left bar. While Customer Support is off, this always opens the activation page. You get the same page from any Customer Support link, for example a bookmarked ticket list or Setup → Customer Support.
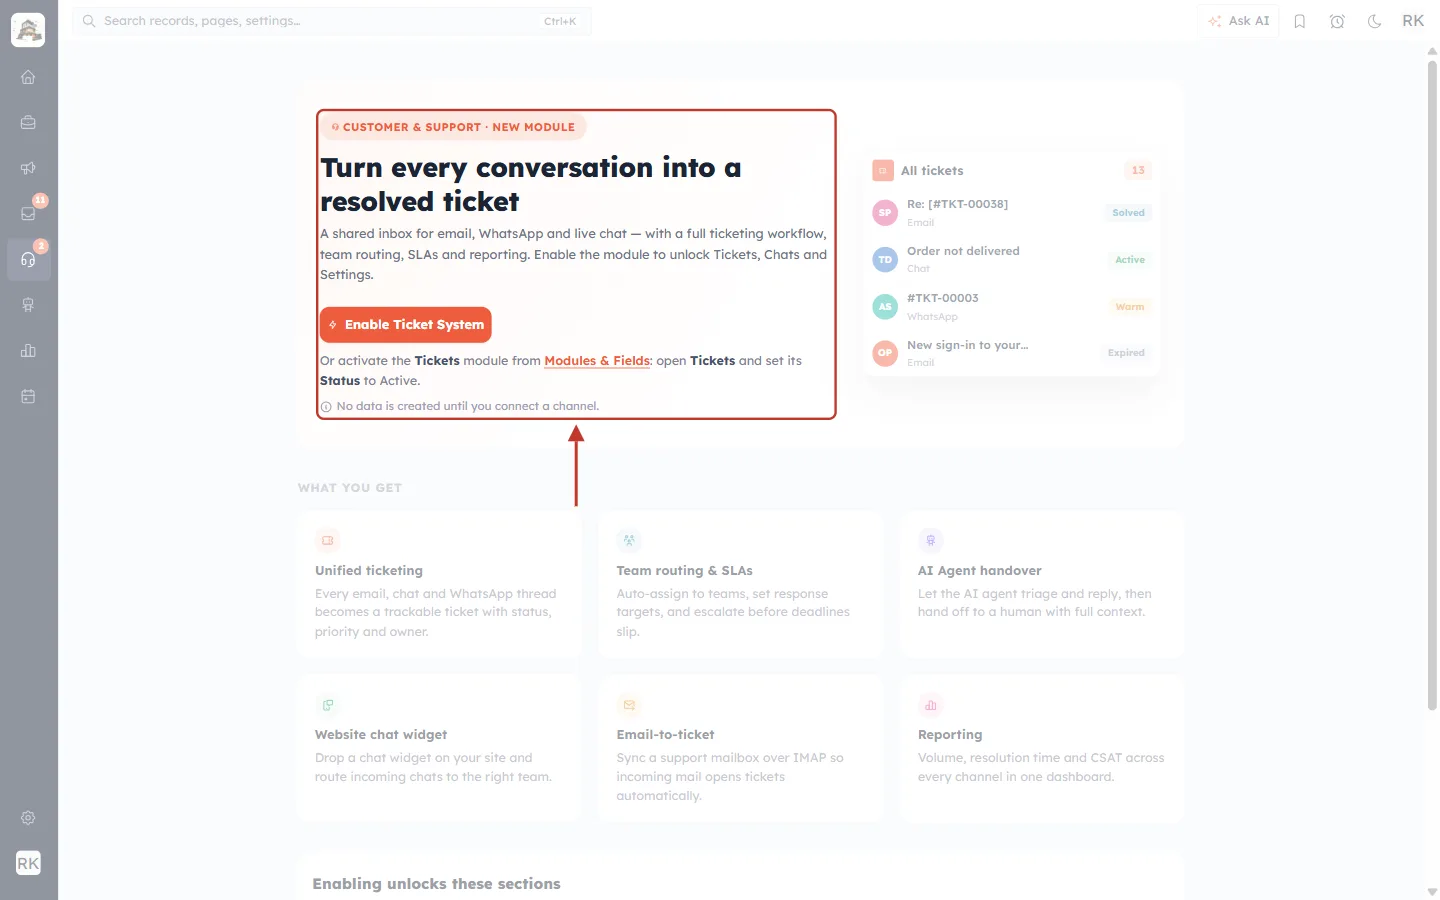
What this screenshot shows. The top of the activation page, ringed. On the left: the badge “CUSTOMER & SUPPORT · NEW MODULE”, the heading “Turn every conversation into a resolved ticket”, a short description, the orange Enable Ticket System button, a line about Modules & Fields and “No data is created until you connect a channel.” On the right: a small preview of a ticket list.
This page explains what Customer Support gives you and lets an owner or admin turn it on.
The ticket list on the right (All tickets 13, with sample rows such as “Order not delivered”) is an illustration, not your data.
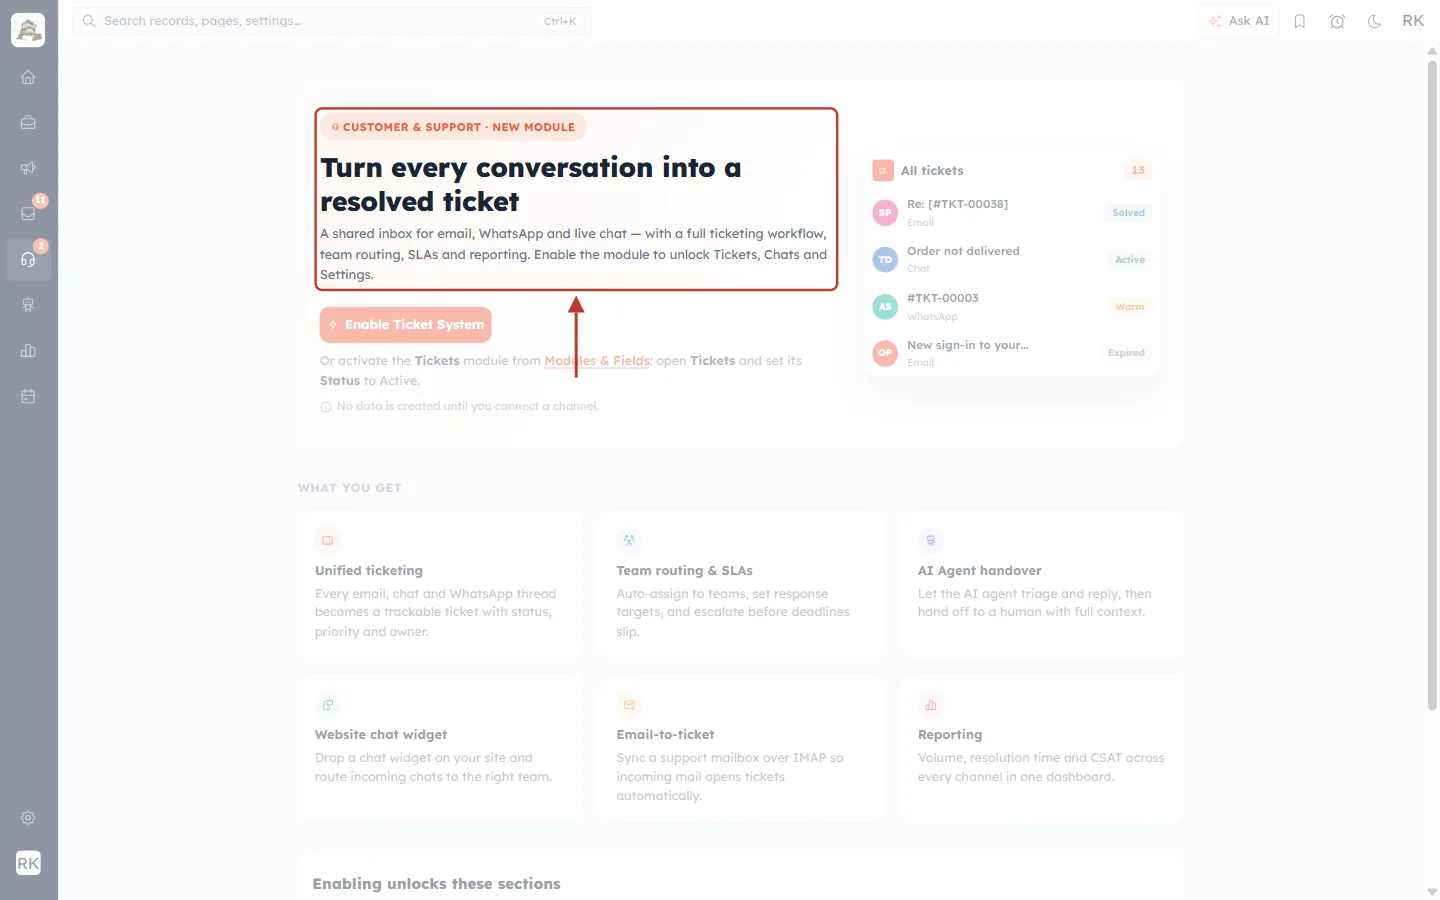
What this screenshot shows. The badge, heading and description, ringed: “A shared inbox for email, WhatsApp and live chat — with a full ticketing workflow, team routing, SLAs and reporting. Enable the module to unlock Tickets, Chats and Settings.”
It sums up the switch: turning it on unlocks Tickets, Chats and Settings.
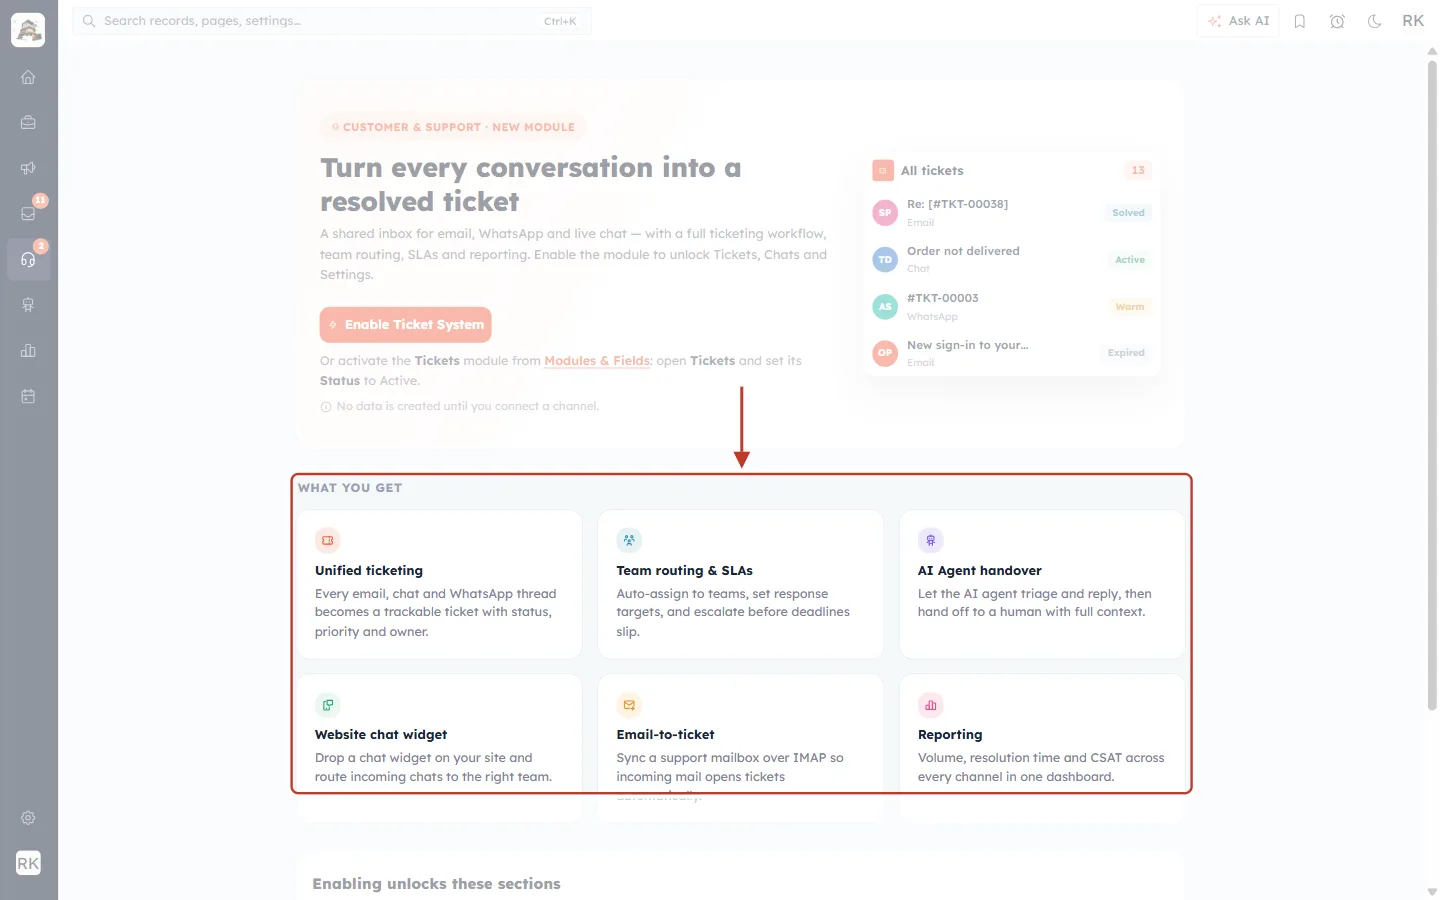
What this screenshot shows. Further down, the WHAT YOU GET section is ringed. It has six cards: Unified ticketing, Team routing & SLAs, AI Agent handover, Website chat widget, Email-to-ticket and Reporting.
Unified ticketing: every email, chat and WhatsApp thread becomes a ticket with a status, priority and owner.
Team routing & SLAs: tickets can be assigned to teams.
AI Agent handover: your AI agent can answer first and hand the chat to a person when needed.
Website chat widget: a chat box for your website, routed to your team.
Email-to-ticket: a connected support mailbox turns incoming emails into tickets.
Reporting: numbers on your support work.
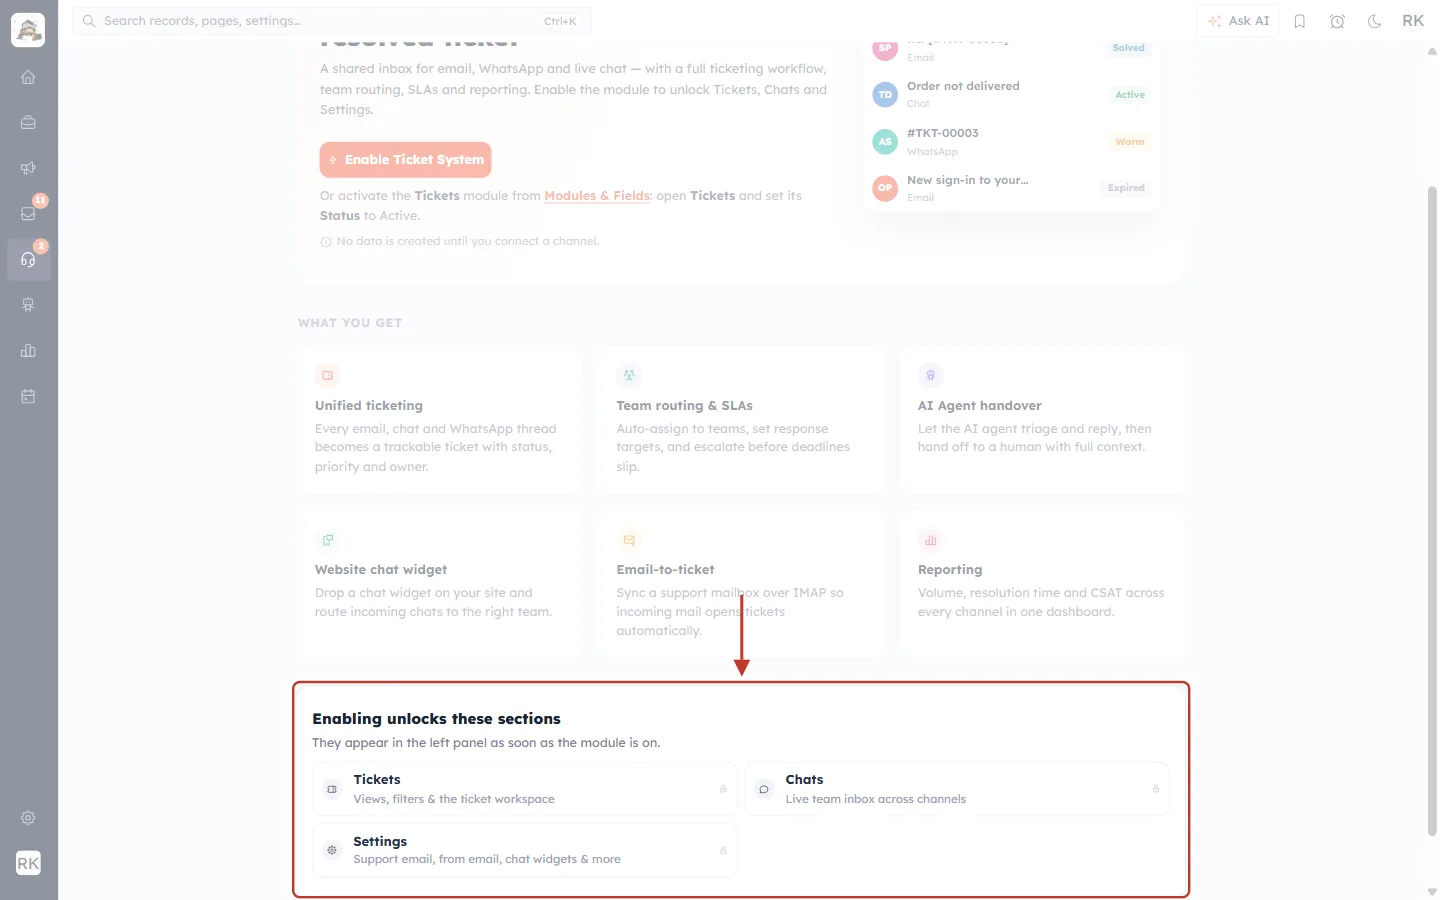
What this screenshot shows. The card “Enabling unlocks these sections — They appear in the left panel as soon as the module is on.” is ringed. It lists Tickets (Views, filters & the ticket workspace), Chats (Live team inbox across channels) and Settings (Support email, from email, chat widgets & more).
These are the three areas your team gets in the Customer Support side panel once you enable it.
Step 2: Click Enable Ticket System#
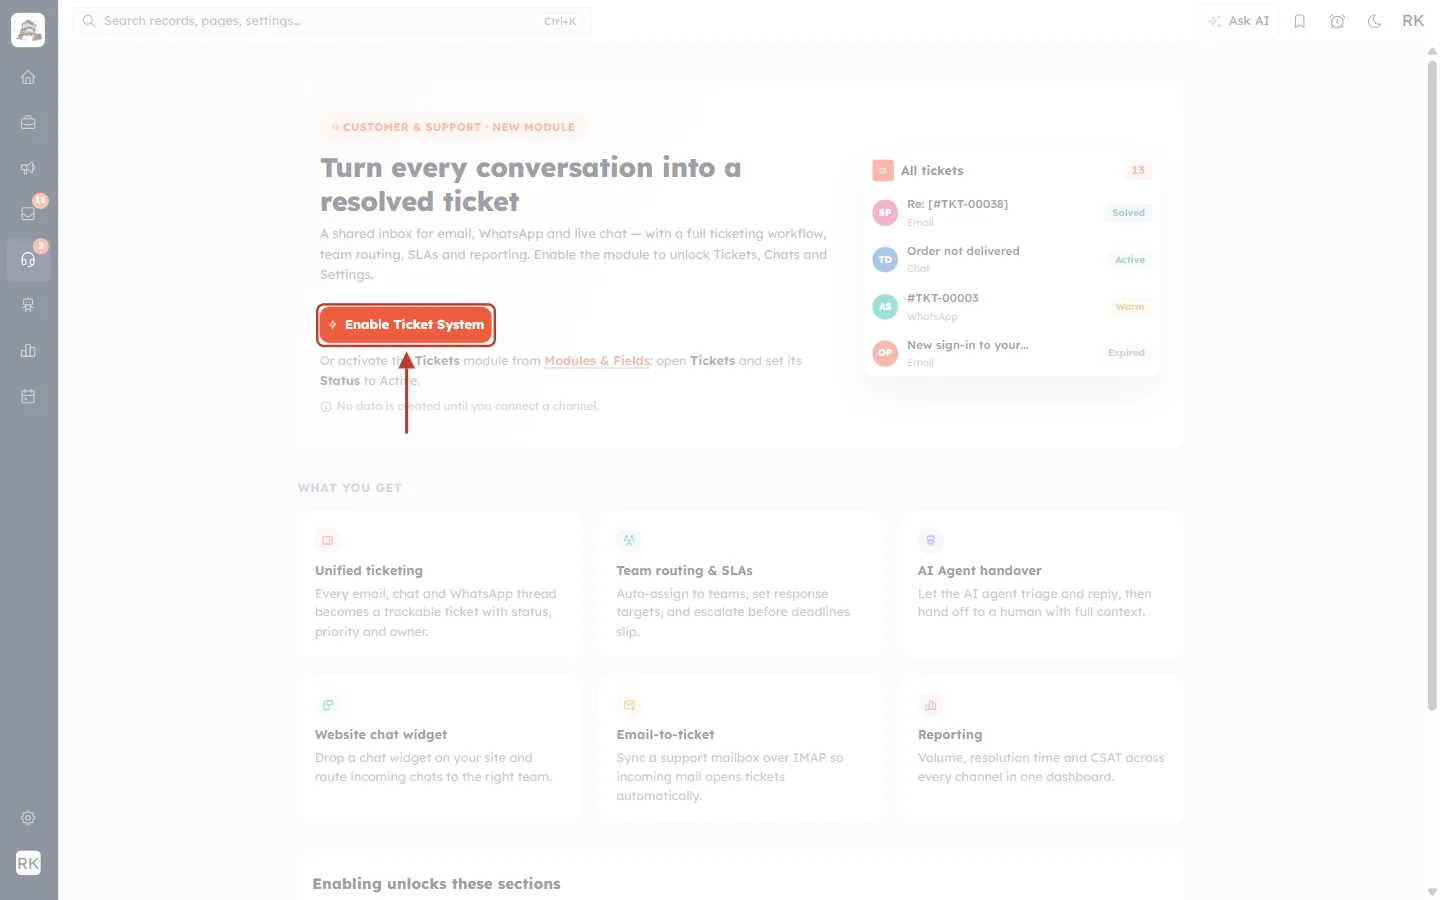
What this screenshot shows. The orange Enable Ticket System button, ringed, with the red arrow pointing to it.
Click it to start. Nothing is switched on yet: a confirmation box opens first.
Only owners and admins see this button (Part 1).
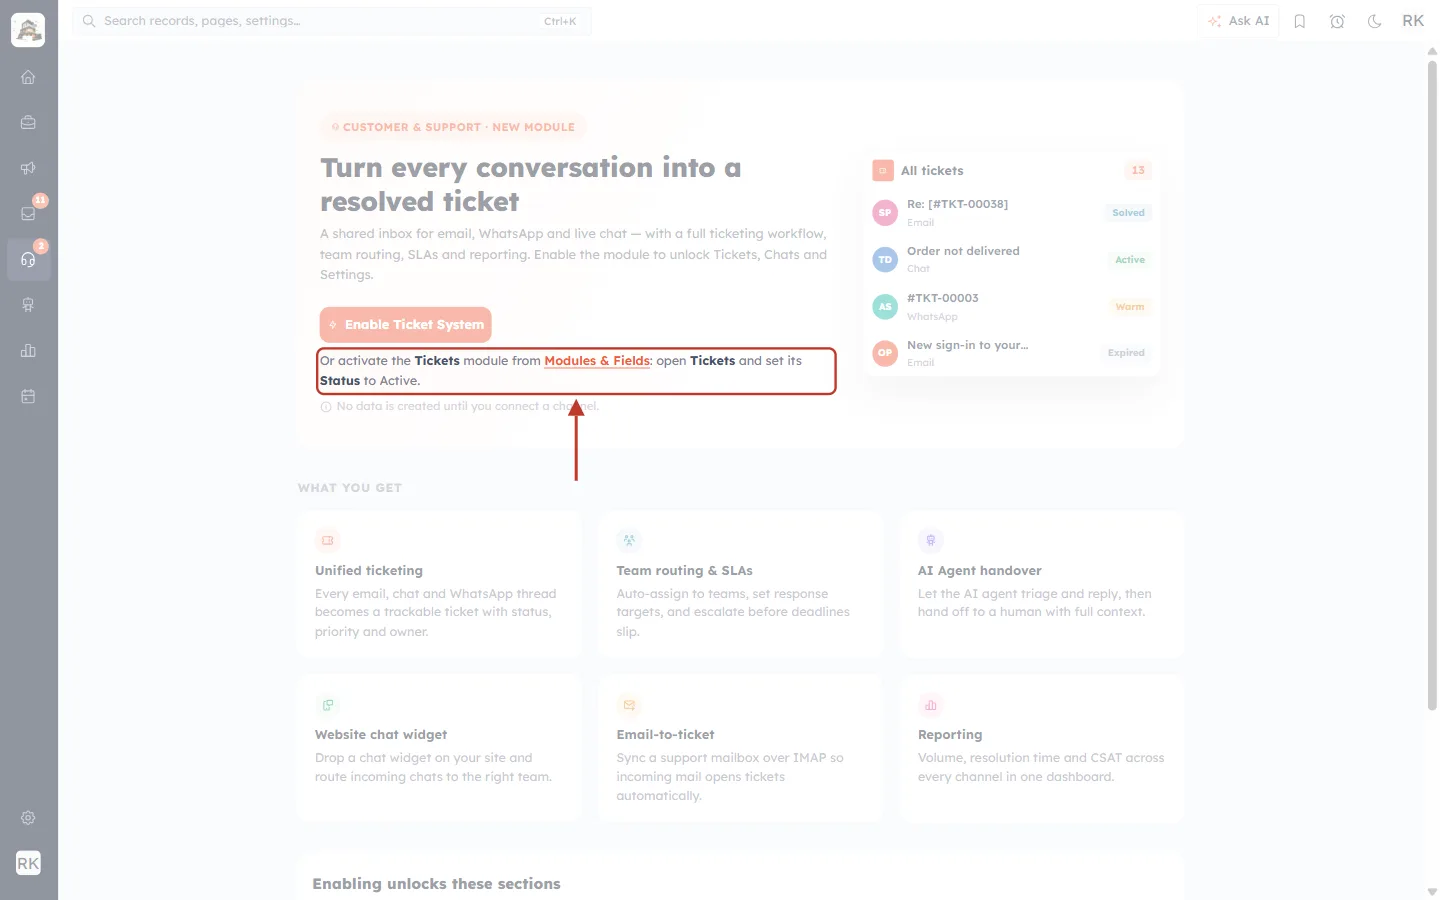
What this screenshot shows. The line under the button, ringed: “Or activate the Tickets module from Modules & Fields: open Tickets and set its Status to Active.”
This is the second way to switch it on, described in Part 4. Use it if the button isn’t available to you but you can manage modules.
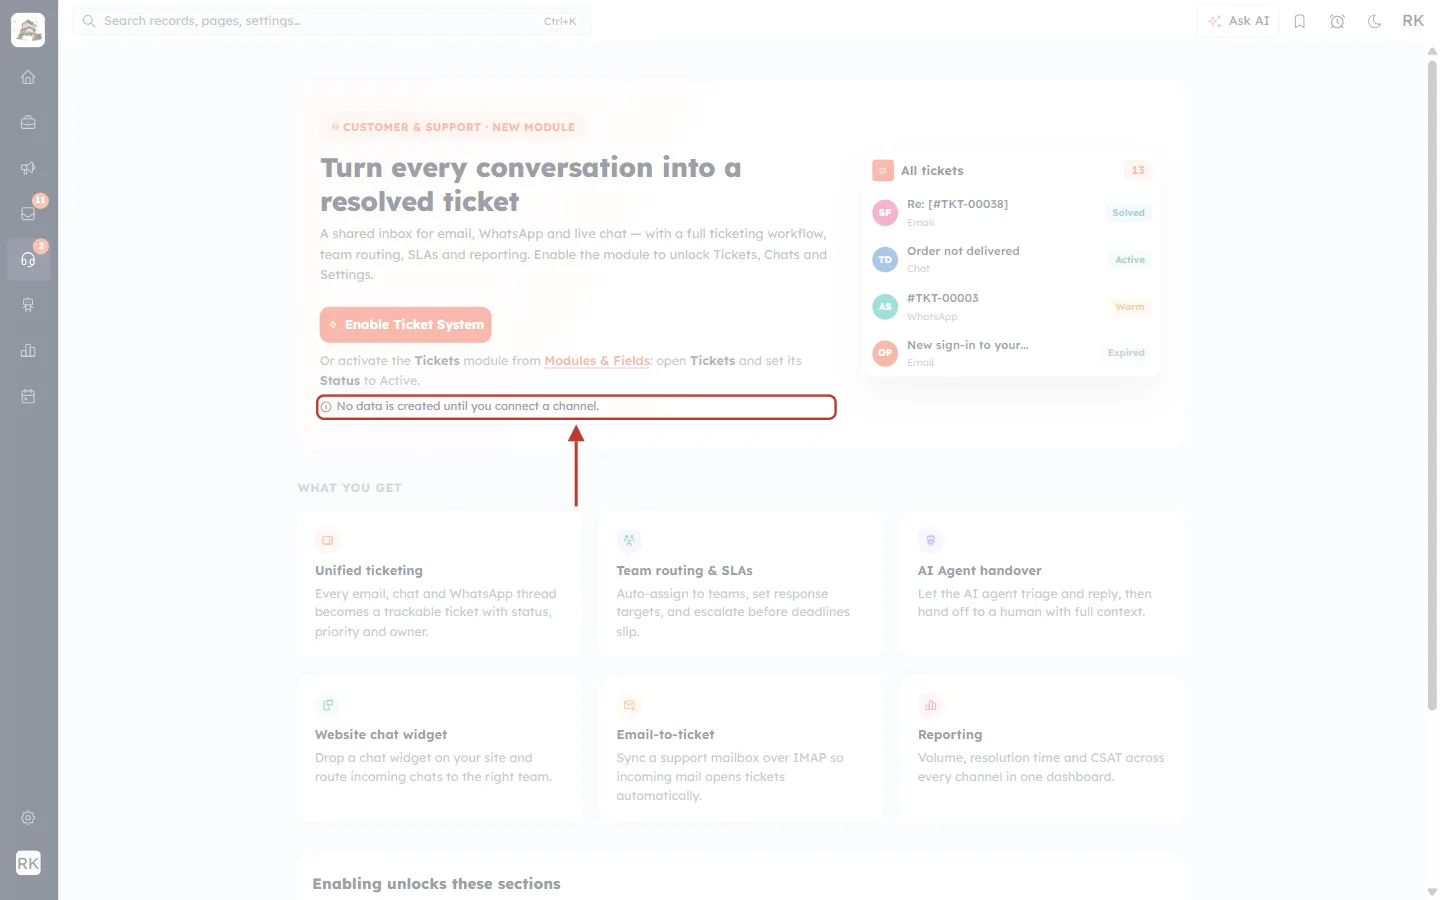
What this screenshot shows. The small grey line “No data is created until you connect a channel.” is ringed.
Turning Customer Support on doesn’t create any tickets or contacts by itself. Tickets only start arriving once you connect a channel, such as a support mailbox or the website chat widget.
Step 3: Confirm in the Enable Ticket System? box#
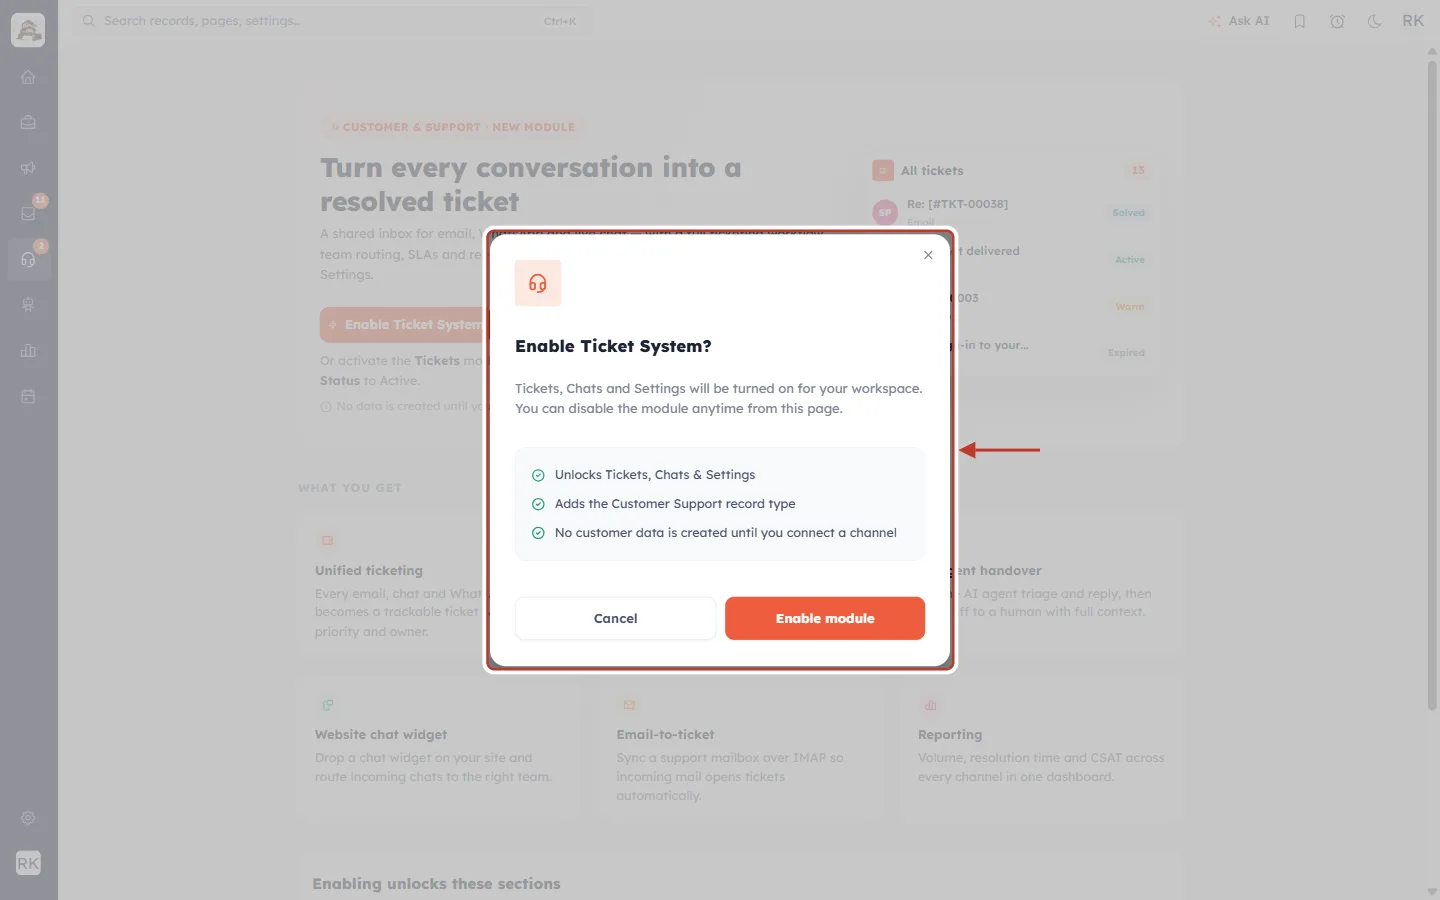
What this screenshot shows. The confirmation box, ringed. Under a headset icon it reads “Enable Ticket System? Tickets, Chats and Settings will be turned on for your workspace. You can disable the module anytime from this page.” A checklist follows, then Cancel and Enable module.
The change applies to your whole workspace, not just to you.
Cancel closes the box and leaves Customer Support off.
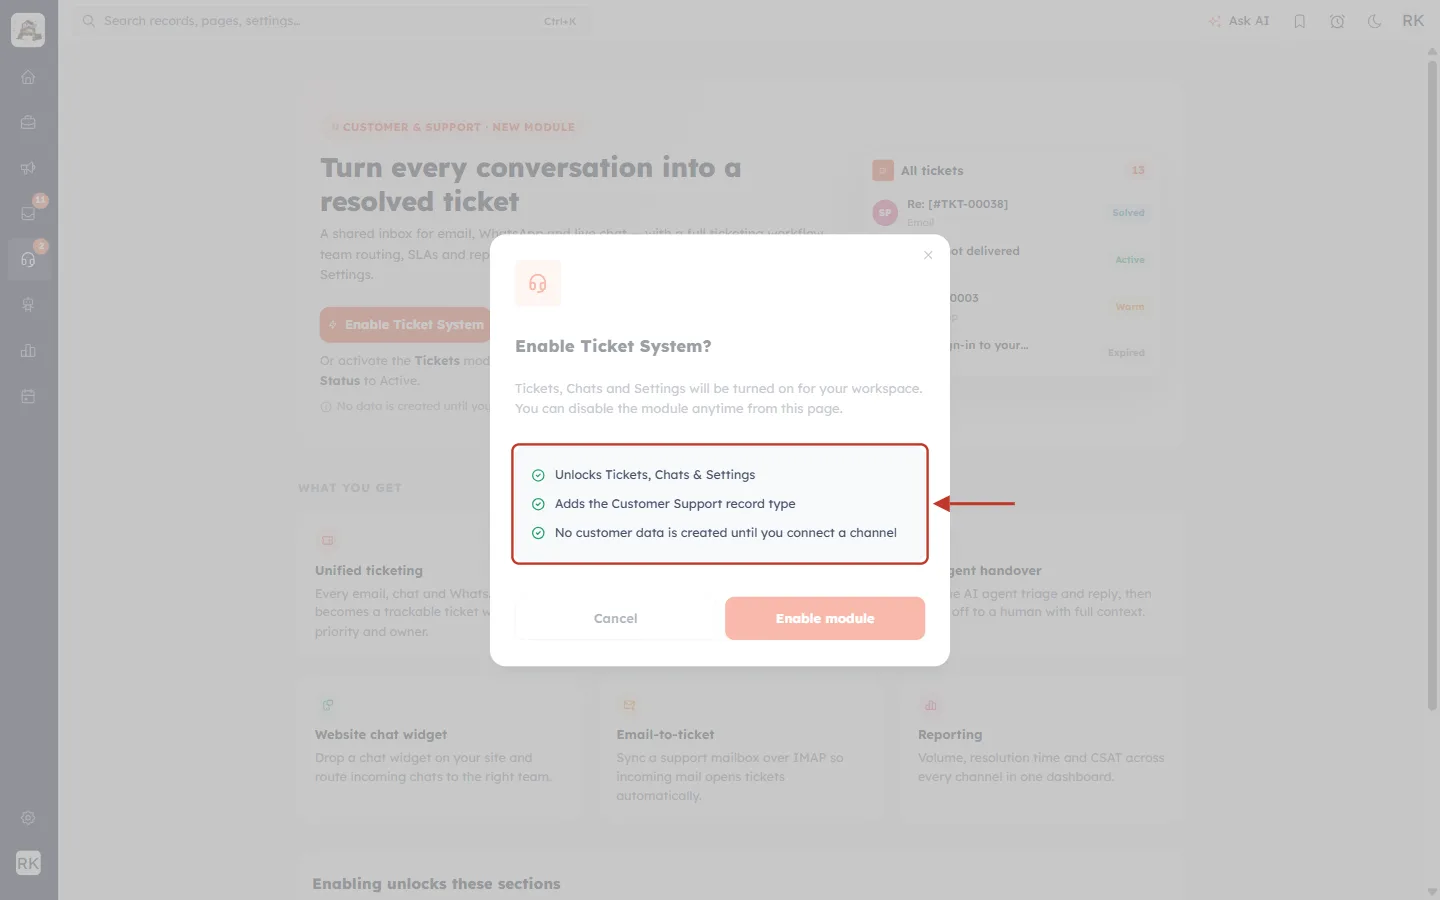
What this screenshot shows. The checklist, ringed, with three green ticks: “Unlocks Tickets, Chats & Settings”, “Adds the Customer Support record type” and “No customer data is created until you connect a channel”.
Unlocks Tickets, Chats & Settings: the menus appear for your team.
Adds the Customer Support record type: makes sure your workspace has the Tickets module that stores every ticket. The first time you enable it, AiEngage CRM also gives you default email templates for the automatic ticket emails (ticket raised, resolved and so on).
No customer data is created…: as in Step 2, nothing arrives until a channel is connected.
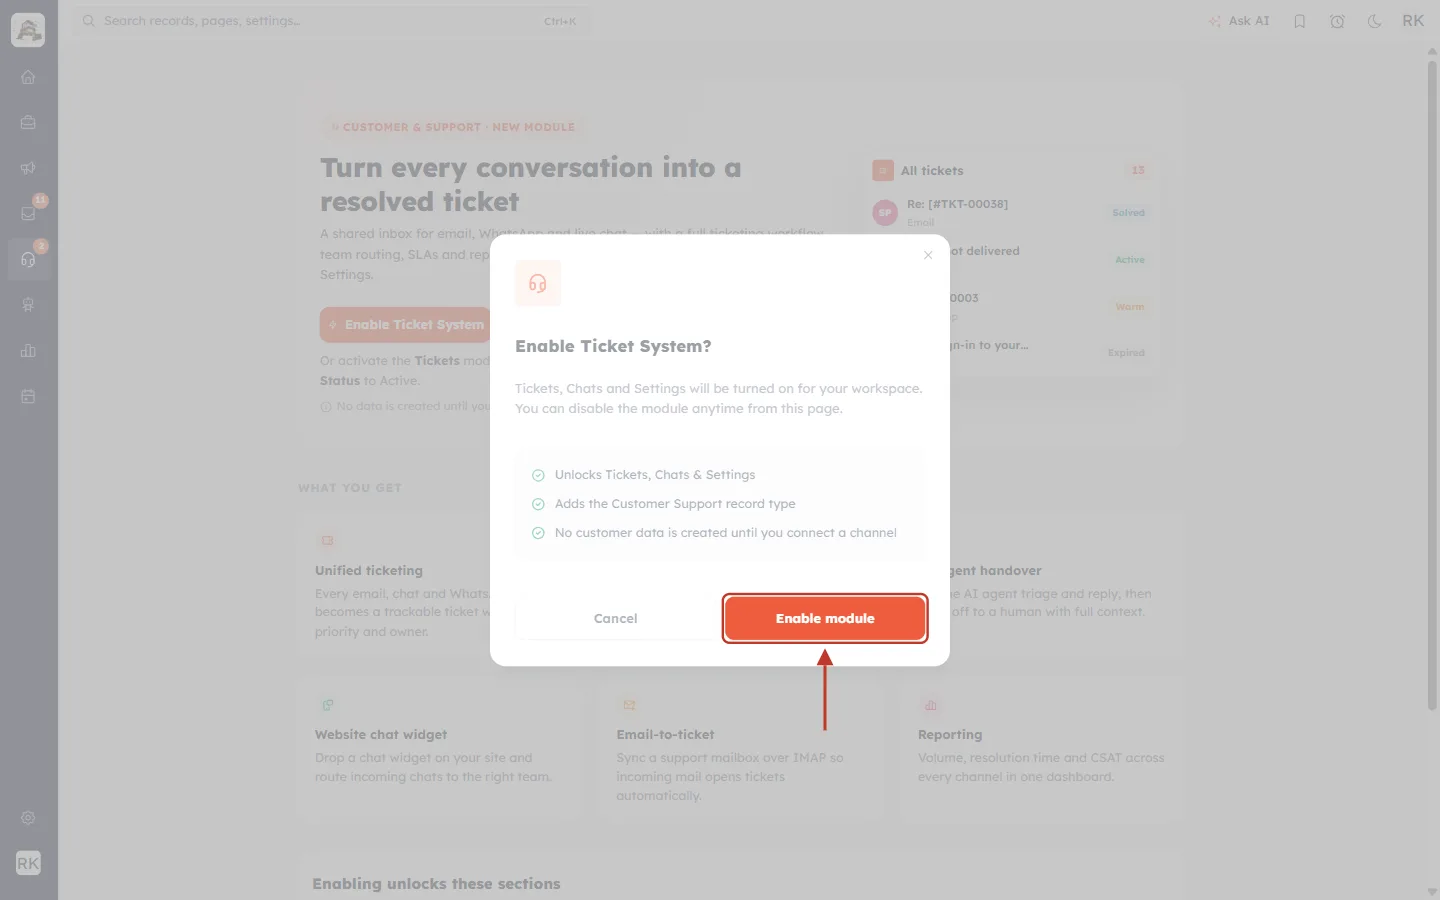
What this screenshot shows. The orange Enable module button at the bottom right of the box, ringed.
Click Enable module to switch Customer Support on.
Step 4: Read the confirmation#
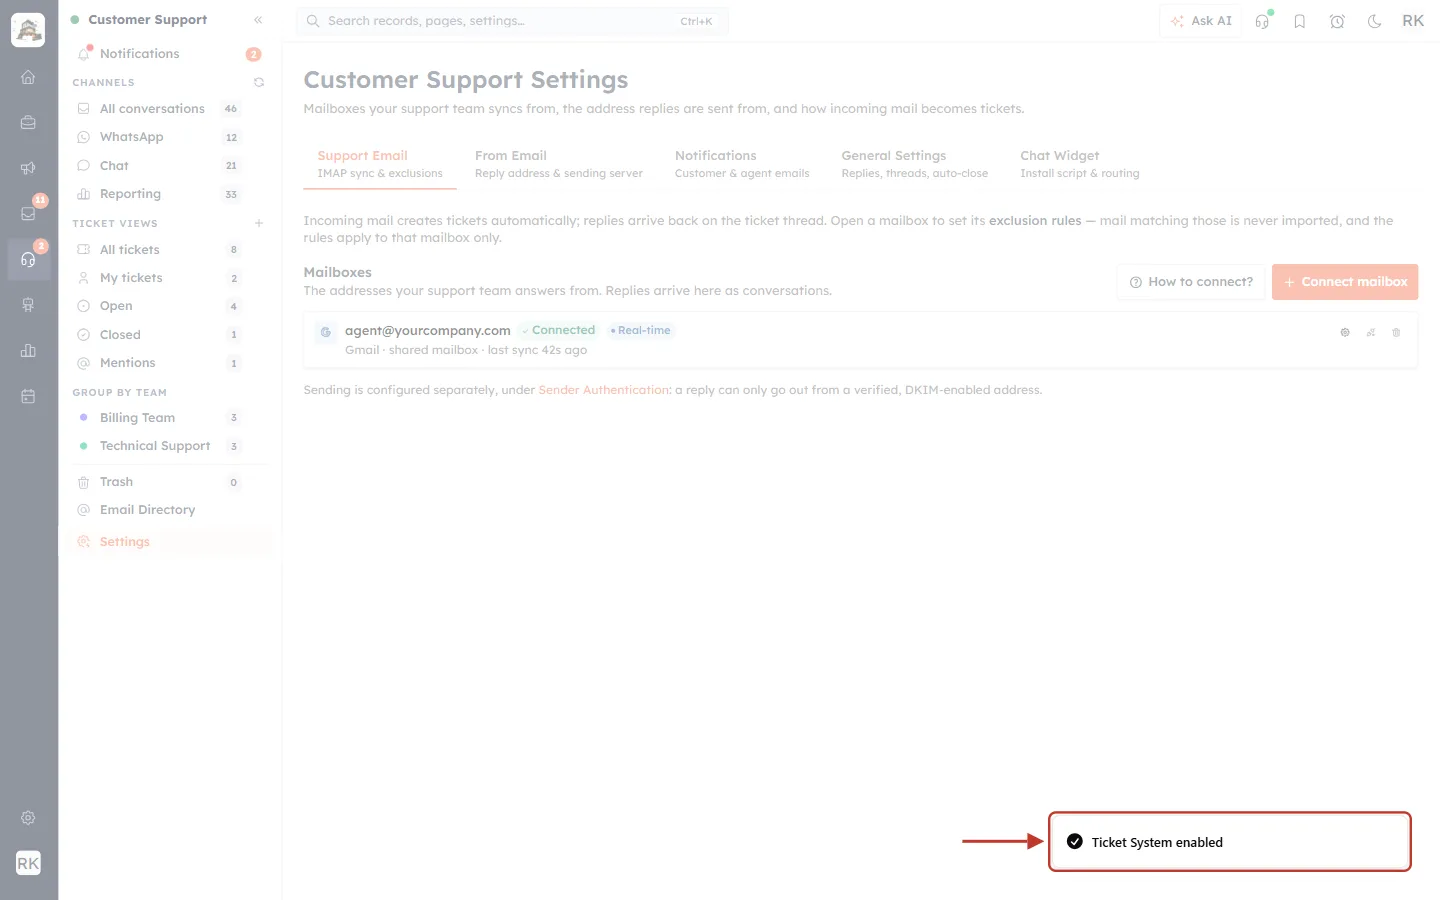
What this screenshot shows. The green confirmation message “Ticket System enabled” in the bottom-right corner, ringed.
Customer Support is now on for everyone in your workspace whose profile includes it.
Step 5: Find the unlocked menus#
Right after enabling, AiEngage CRM takes you to Customer Support Settings, and the Customer Support side panel appears.
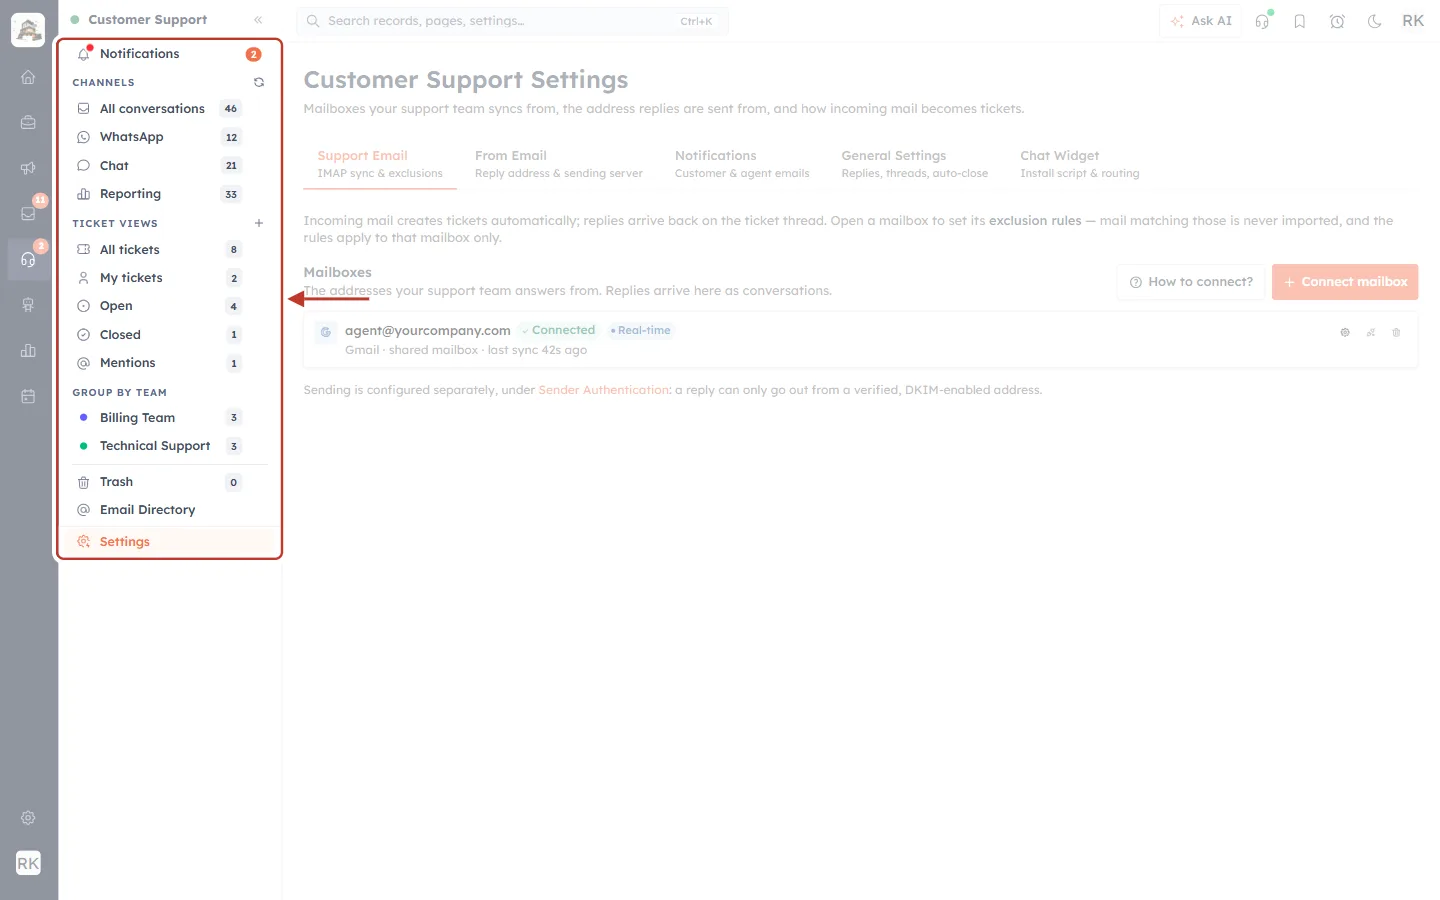
What this screenshot shows. The Customer Support side panel, ringed: Notifications, CHANNELS (All conversations, WhatsApp, Chat, Reporting), TICKET VIEWS (All tickets, My tickets, Open, Closed, Mentions), GROUP BY TEAM, Trash, Email Directory and Settings.
Channels are the live inboxes (Chats). Ticket views are lists of tickets.
The numbers next to each entry are counts (for example, how many tickets are in each view).
Settings (highlighted, because it’s the page open now) is where you connect channels.
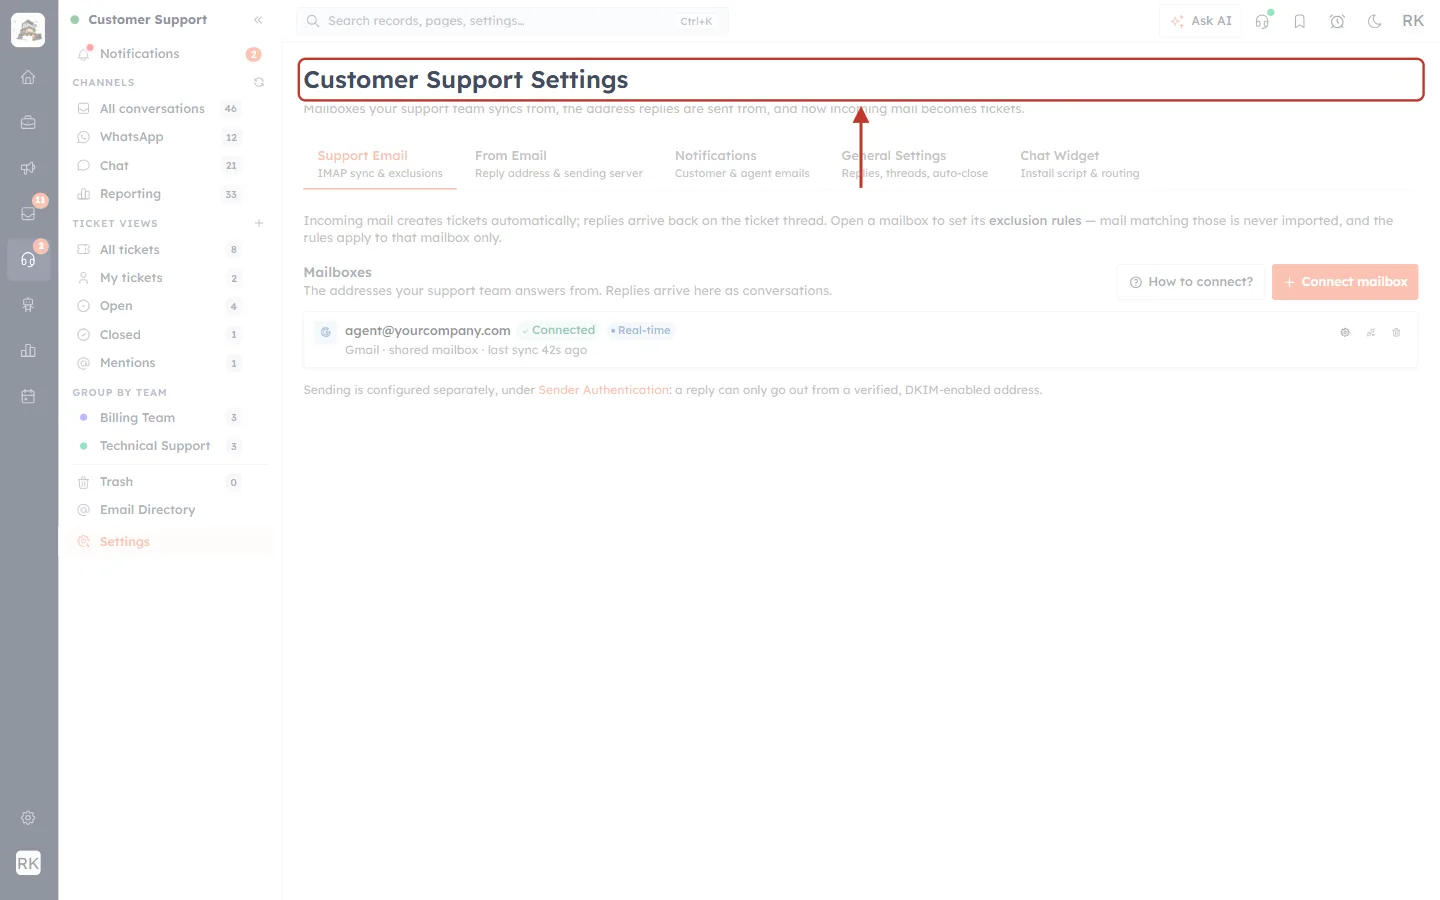
What this screenshot shows. The heading Customer Support Settings, ringed, with its tabs Support Email, From Email, Notifications, General Settings and Chat Widget beneath it.
Support Email: connect the mailbox your customers write to, so emails become tickets. See Connect a Support Mailbox (Email-to-Ticket).
Chat Widget: add live chat to your website. See Set Up the Website Chat Widget for Support.
Notifications: the automatic emails sent to customers and agents. See Automatic Customer Emails: Ticket Raised, Resolved, Closed & Reopened.
General Settings: organisation-wide rules, and the switch to turn Customer Support off again (Part 3).
✅
What next? Connect at least one channel (a support mailbox or the chat widget) so tickets start arriving, then check who can see tickets in Ticket Permissions: Set Who Can View, Edit, Delete and Reply to Support Tickets. To learn the ticket screens, continue with Customer & Support: Handle Customer Tickets from First Message to Resolution.
Part 3: Turn Customer Support off#
Step 1: Open General Settings#
Click the headset icon, then Settings at the bottom of the Customer Support panel, and open the General Settings tab.
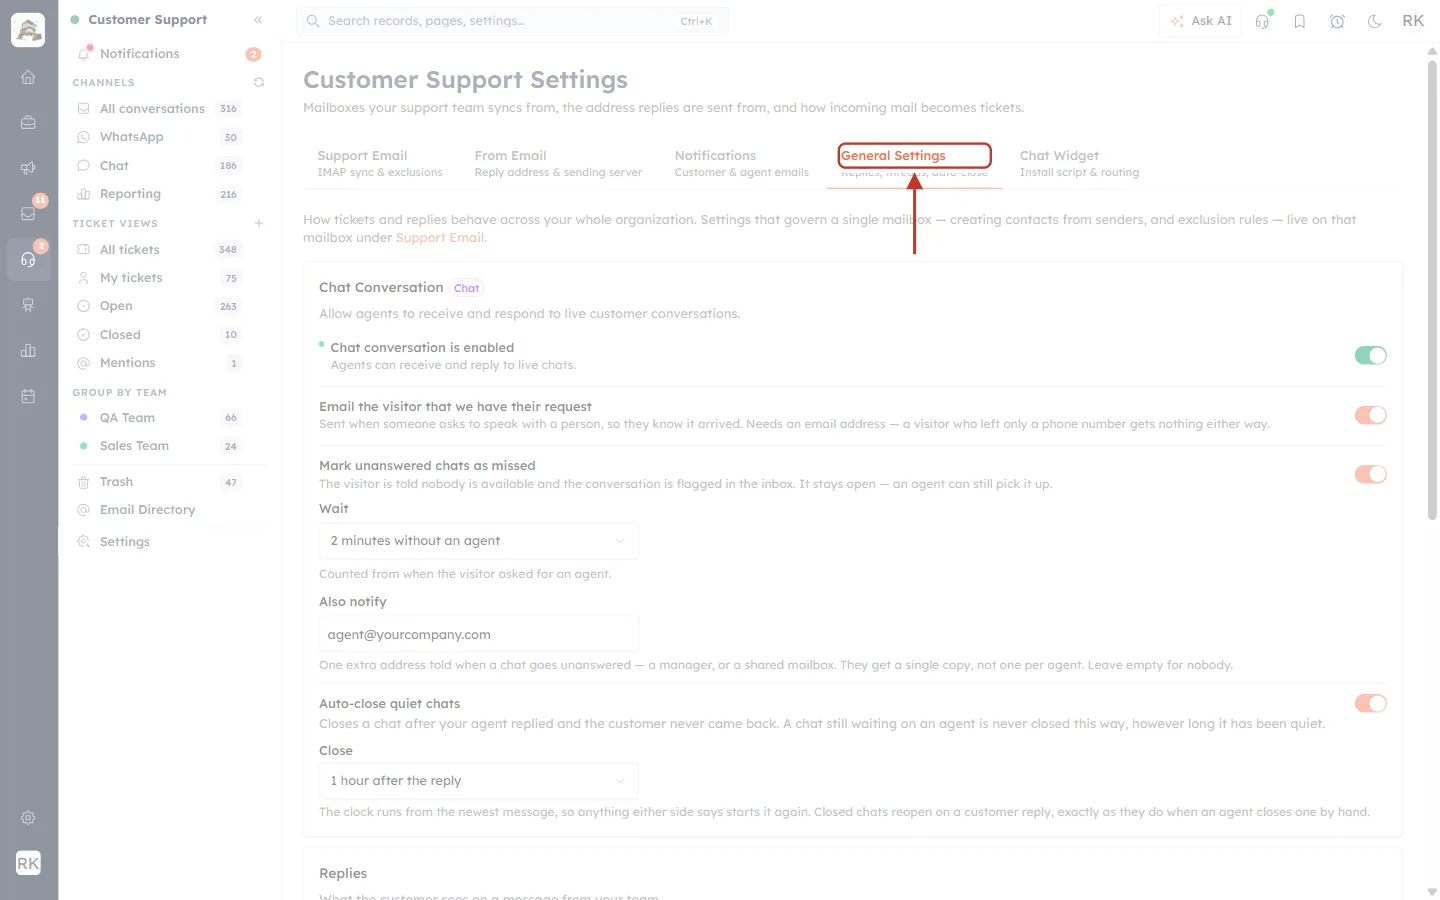
What this screenshot shows. The tabs of Customer Support Settings, with General Settings (Replies, threads, auto-close) ringed.
General Settings holds the rules that apply to your whole organization, such as chat, replies and auto-close.
Step 2: Scroll to the Ticket System card#
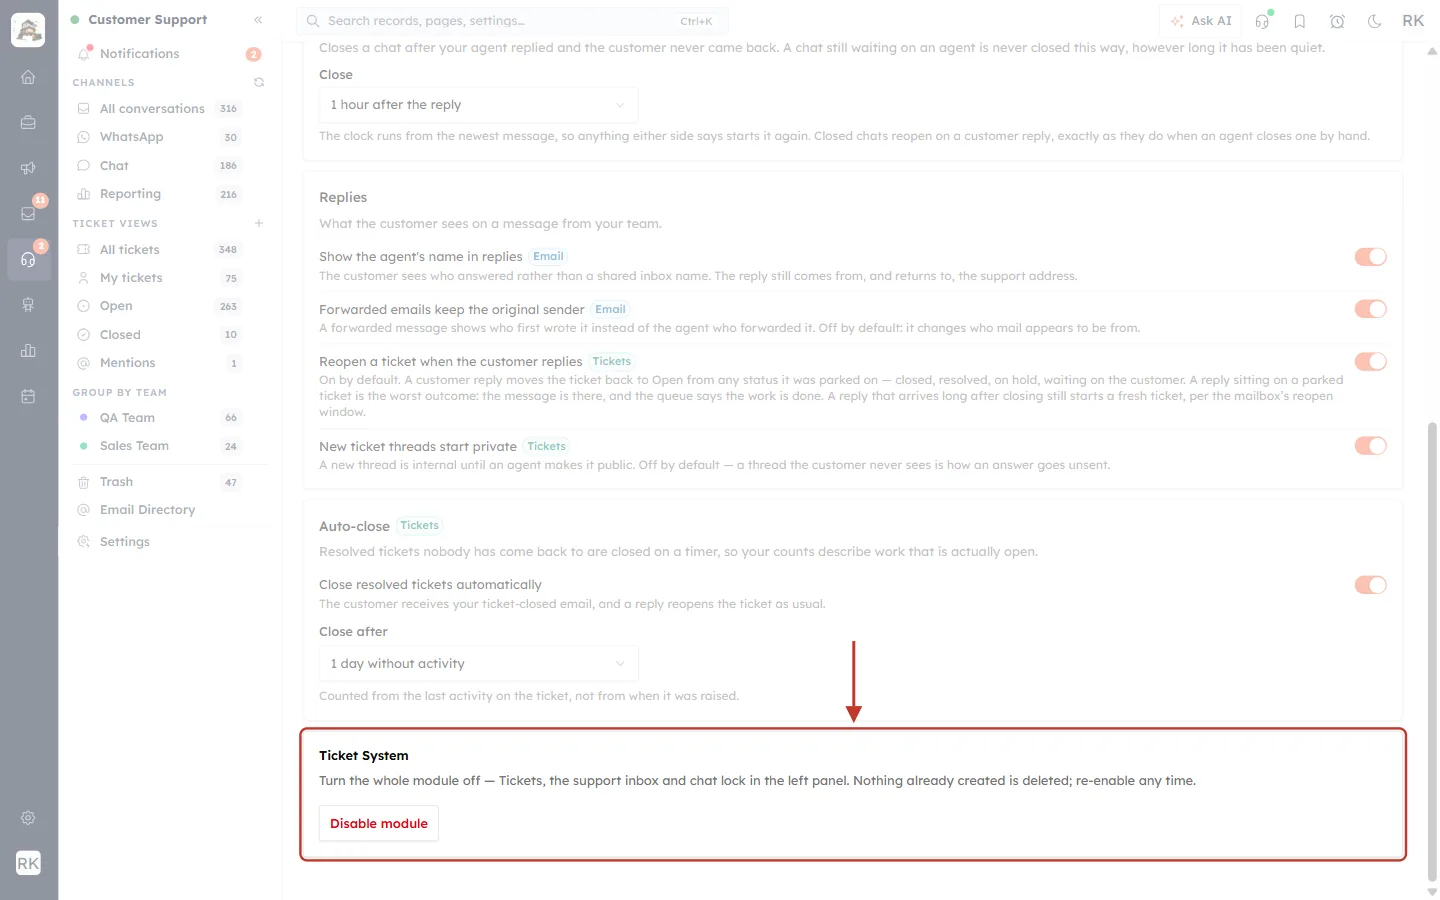
What this screenshot shows. At the very bottom of General Settings, below Auto-close, the Ticket System card is ringed: “Turn the whole module off — Tickets, the support inbox and chat lock in the left panel. Nothing already created is deleted; re-enable any time.” It has a red-text Disable module button.
The card only appears while Customer Support is on.
If you aren’t an owner or admin, the button is greyed out with the note “Only the organization owner or an admin can disable the module.”
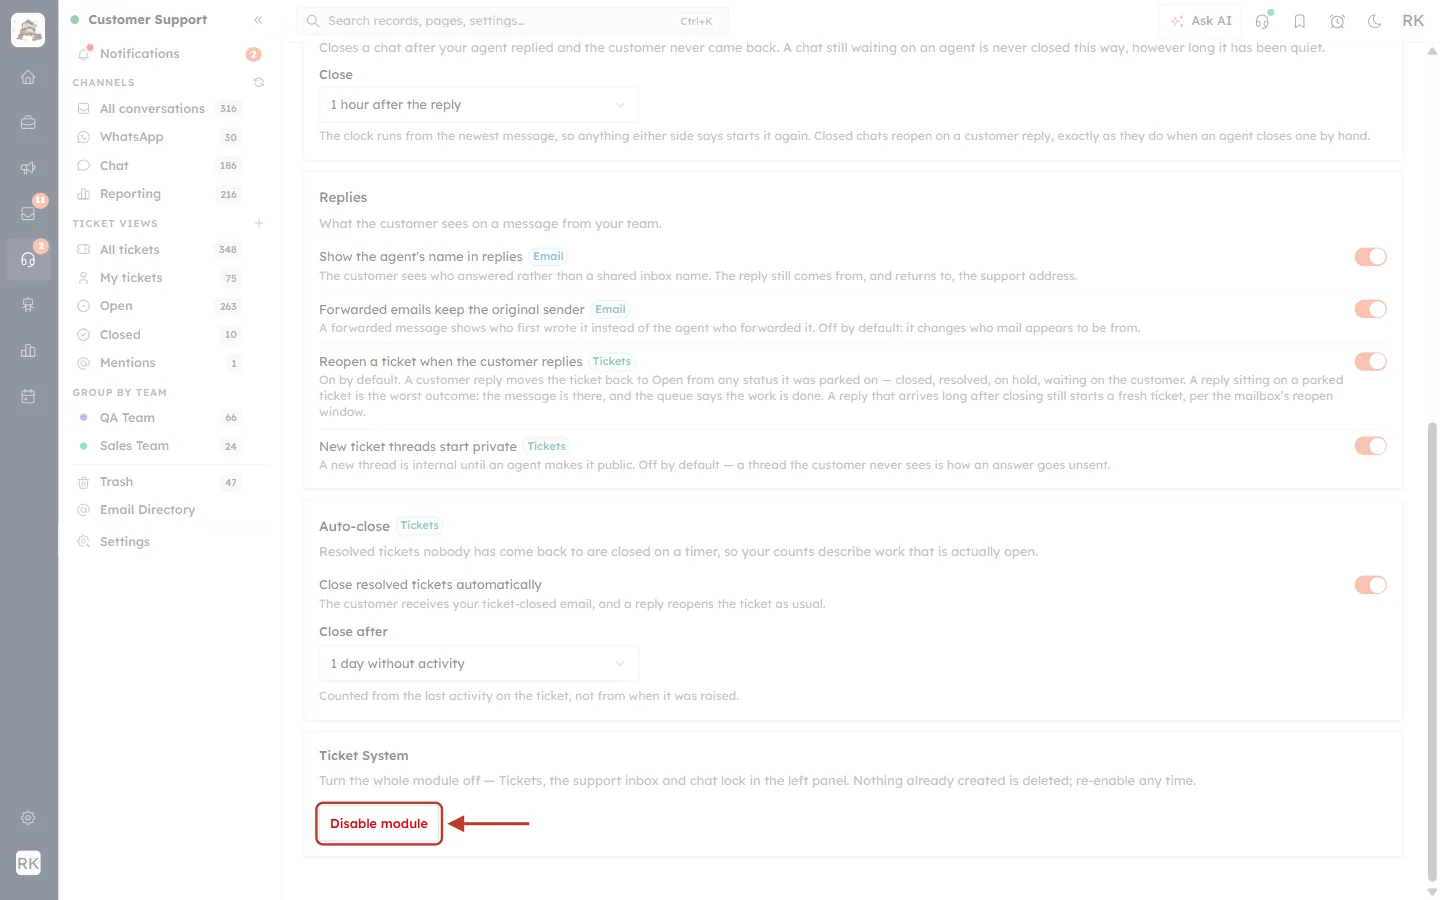
What this screenshot shows. The Disable module button, ringed, with the red arrow pointing to it.
Click it. A confirmation box opens first, so nothing changes yet.
Step 3: Confirm#
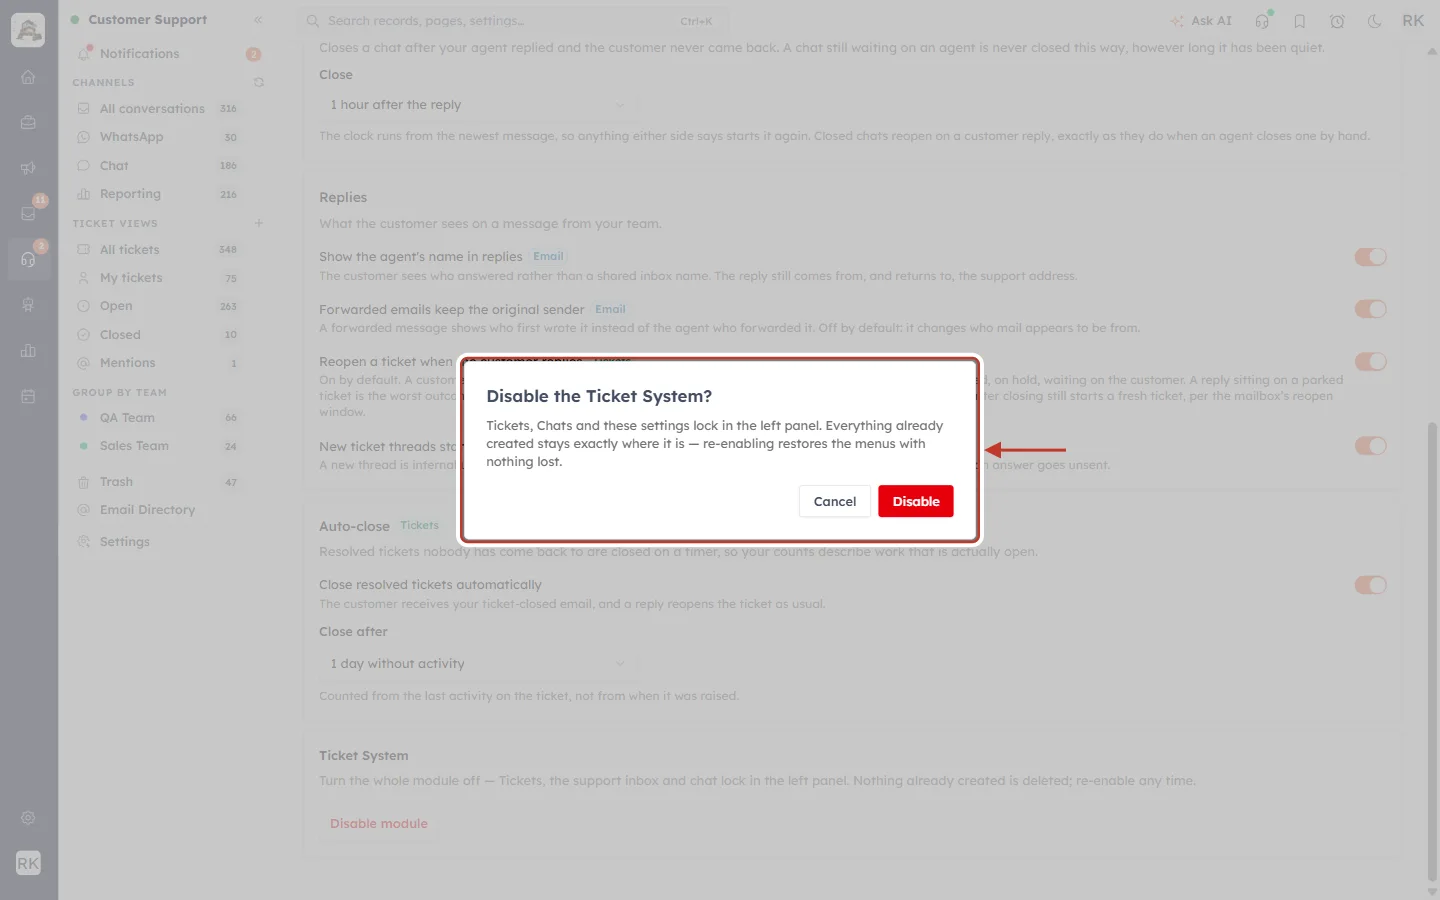
What this screenshot shows. The confirmation box, ringed: “Disable the Ticket System? Tickets, Chats and these settings lock in the left panel. Everything already created stays exactly where it is — re-enabling restores the menus with nothing lost.” Buttons: Cancel and a red Disable.
Lock in the left panel: your team can no longer open tickets, chats or these settings until it’s turned on again.
Stays exactly where it is: nothing is deleted.
Cancel keeps Customer Support on.
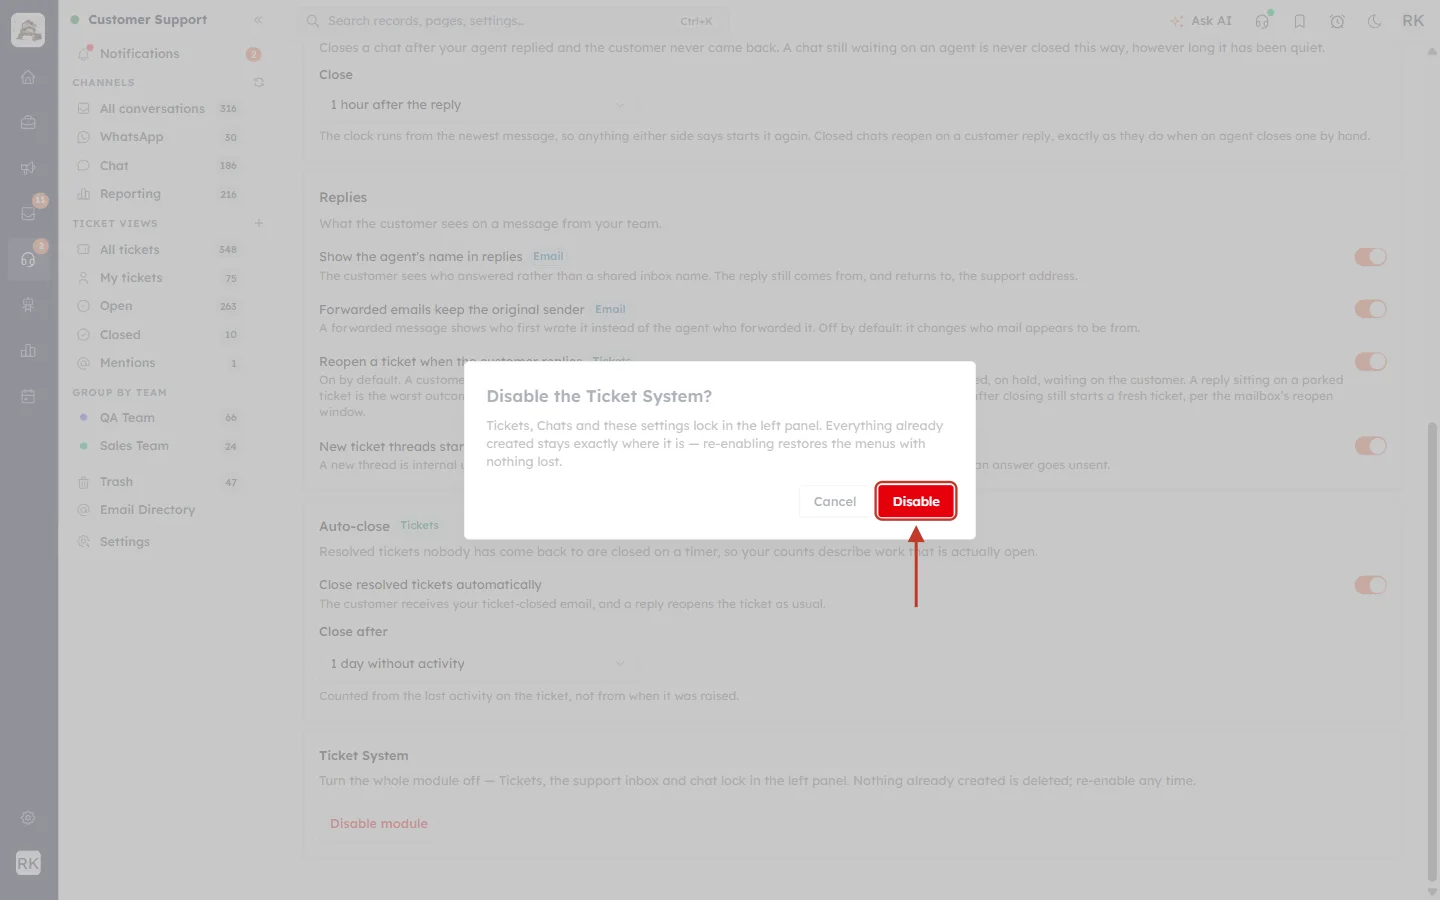
What this screenshot shows. The red Disable button, ringed.
Click Disable to turn Customer Support off for the whole workspace.
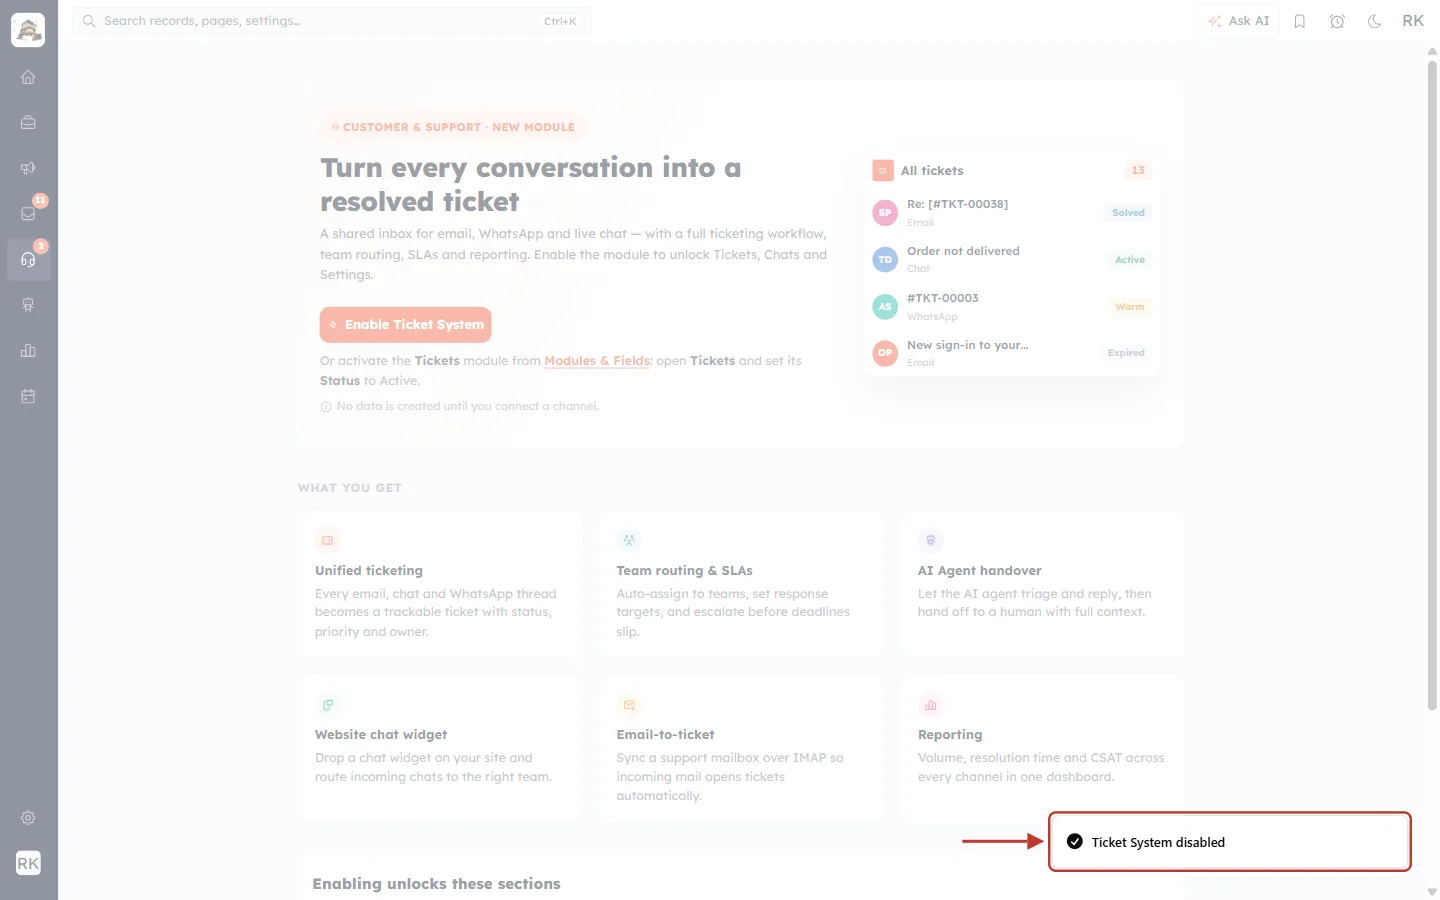
What this screenshot shows. The confirmation message “Ticket System disabled” in the bottom-right corner, ringed.
From now on, anyone who opens Customer Support sees the activation page.
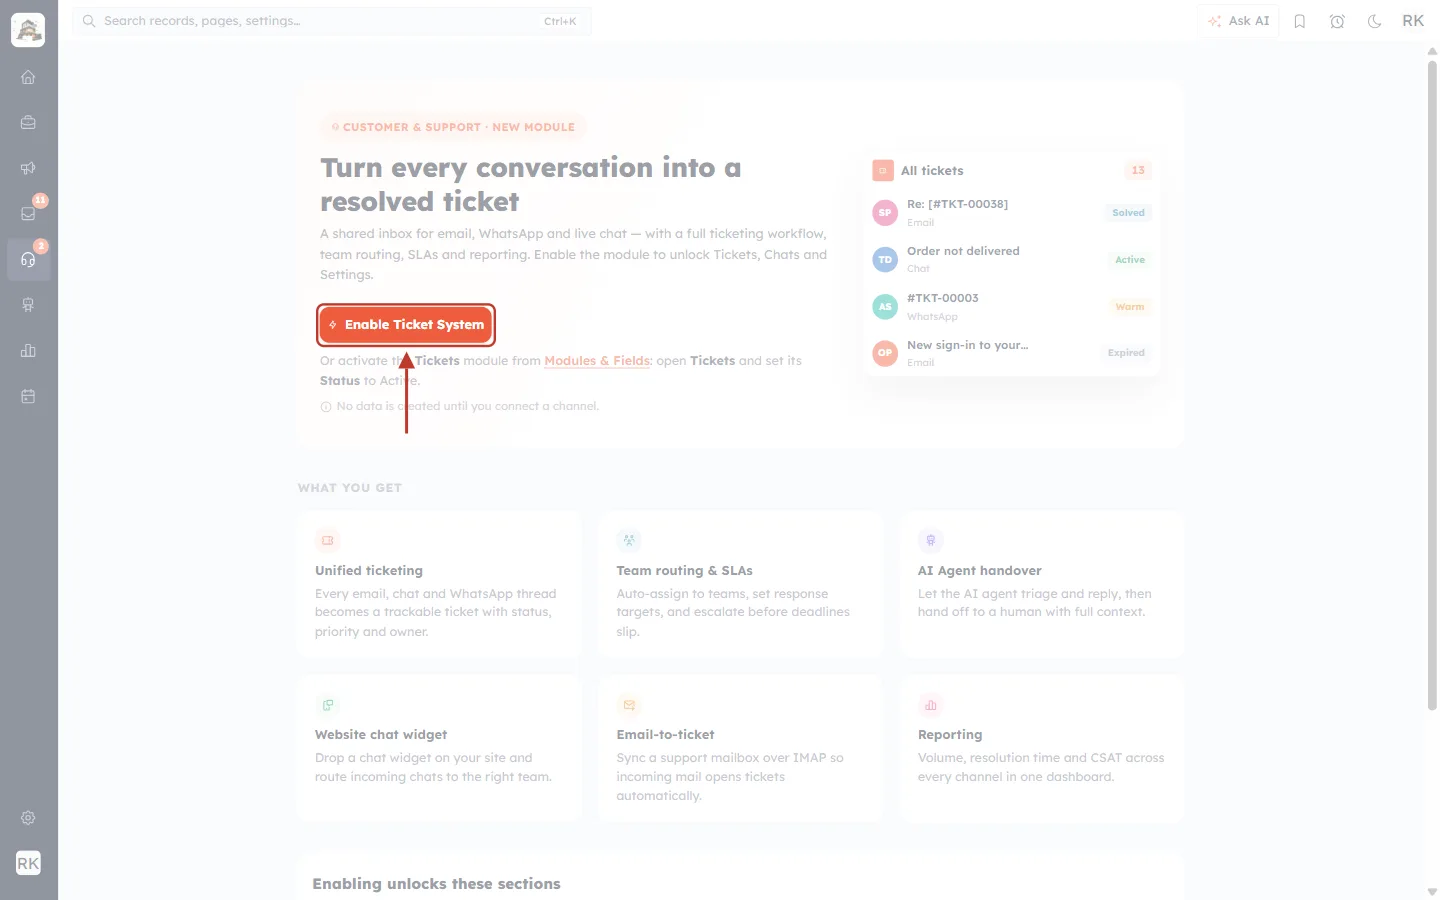
What this screenshot shows. Straight after disabling, the page switches to the activation page. The Enable Ticket System button is ringed.
To switch Customer Support back on, follow Part 2 again. Everything you had before comes back.
Part 4: The other way: Modules and Fields#
Because the switch is the Tickets module’s status, you can also turn Customer Support on or off from Setup → Modules and Fields. Use this if you manage modules but don’t see the Enable or Disable button.
Step 1: Open Setup → Modules and Fields#
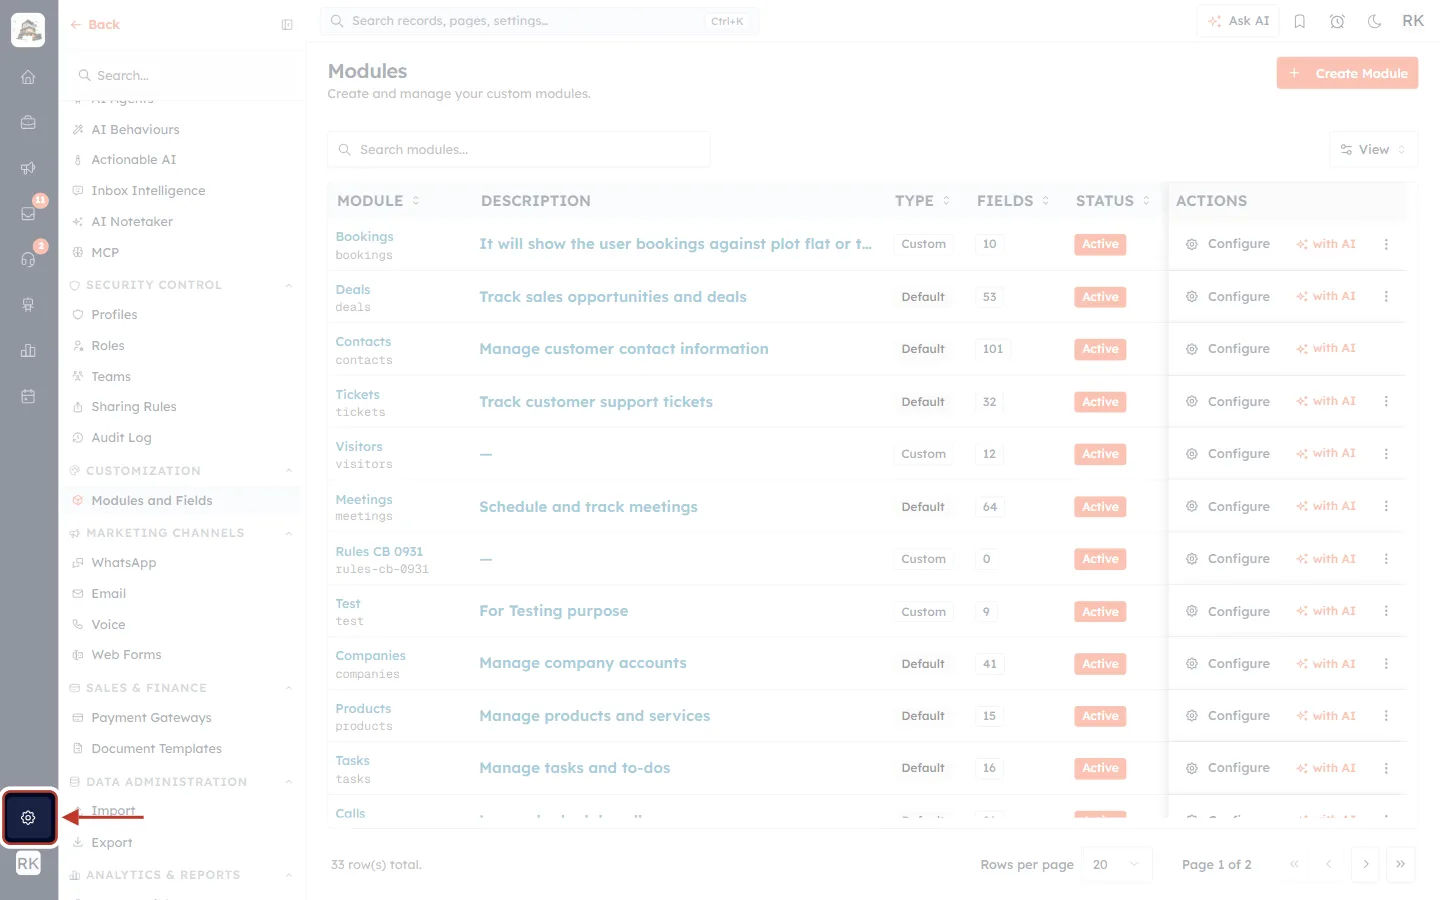
What this screenshot shows. The Setup gear icon near the bottom of the left icon bar, ringed.
Setup opens all your workspace settings, with their own menu on the left.
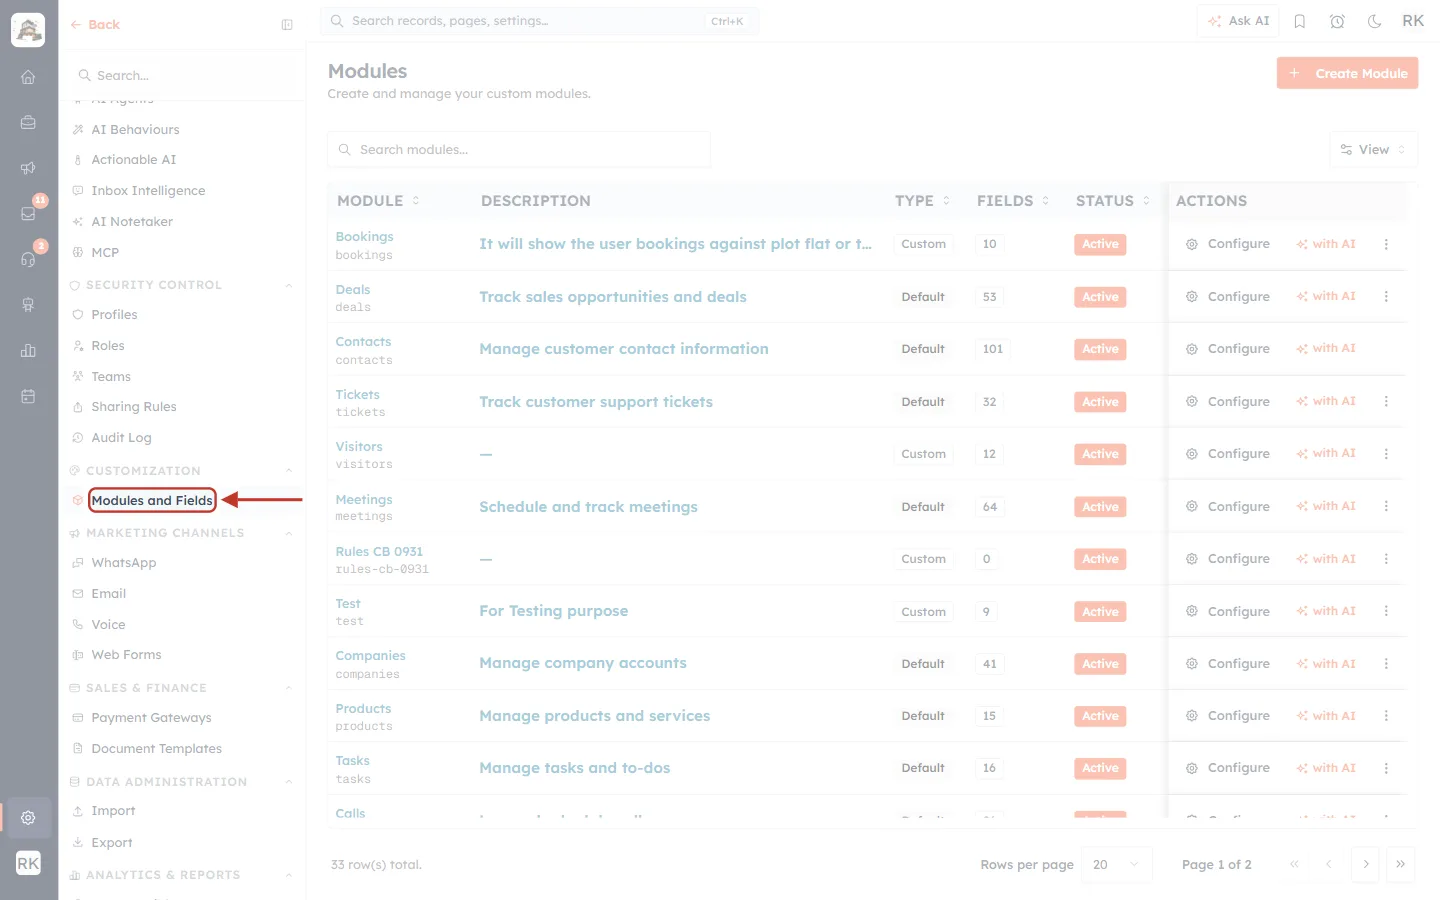
What this screenshot shows. The Setup menu with Modules and Fields (under CUSTOMIZATION) ringed. The Modules list is open on the right.
The Modules page lists every module in your CRM with its Type, Fields, Status and Actions.
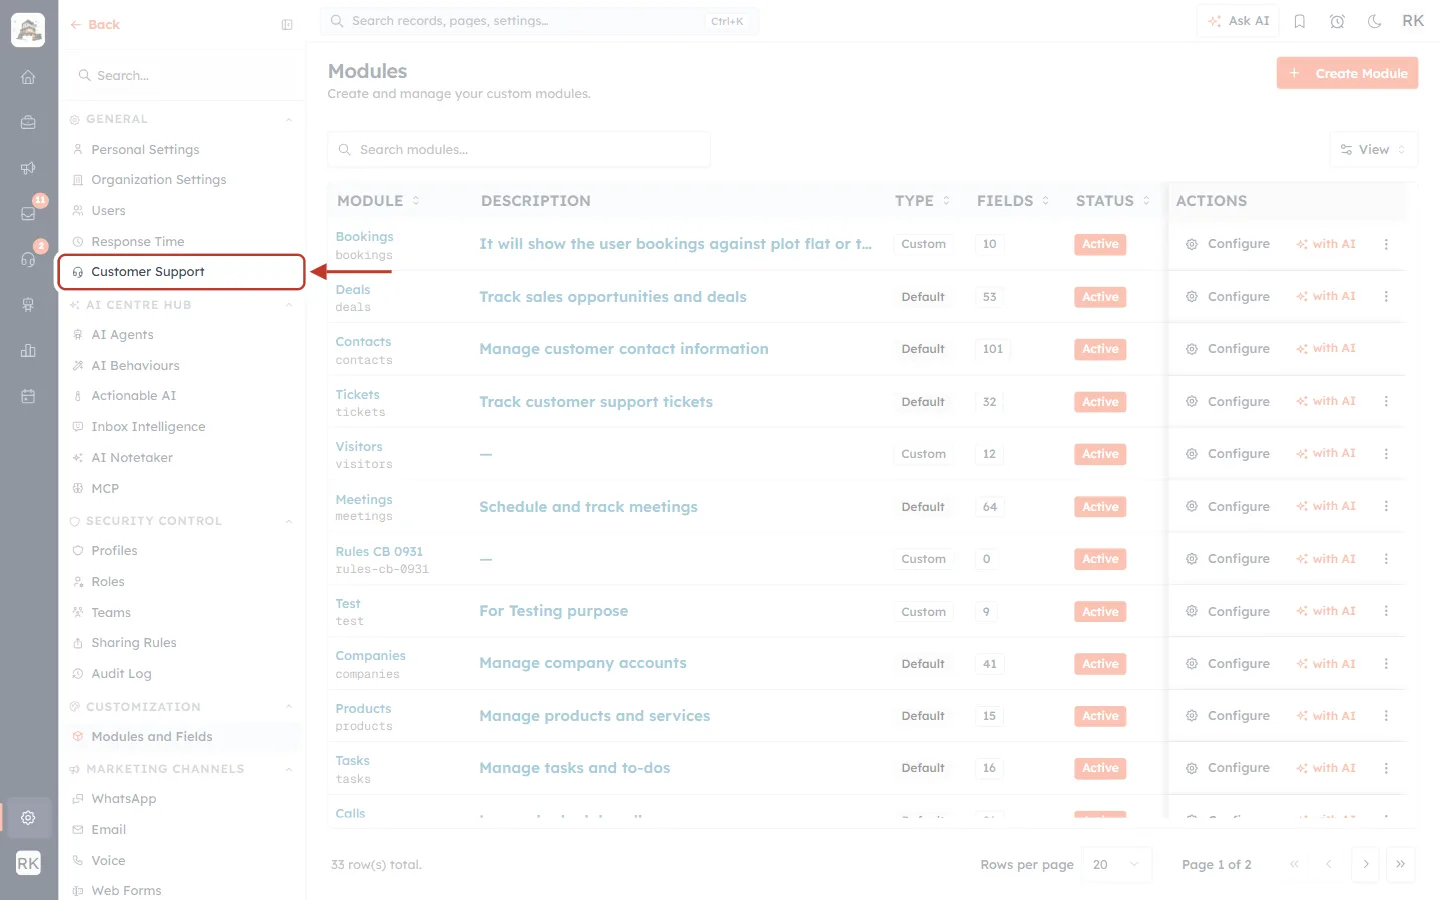
What this screenshot shows. The same Setup menu scrolled to the top, with Customer Support (under GENERAL) ringed.
This entry is a shortcut: it opens Customer Support Settings when Customer Support is on, or the activation page when it’s off.
Step 2: Find the Tickets row#
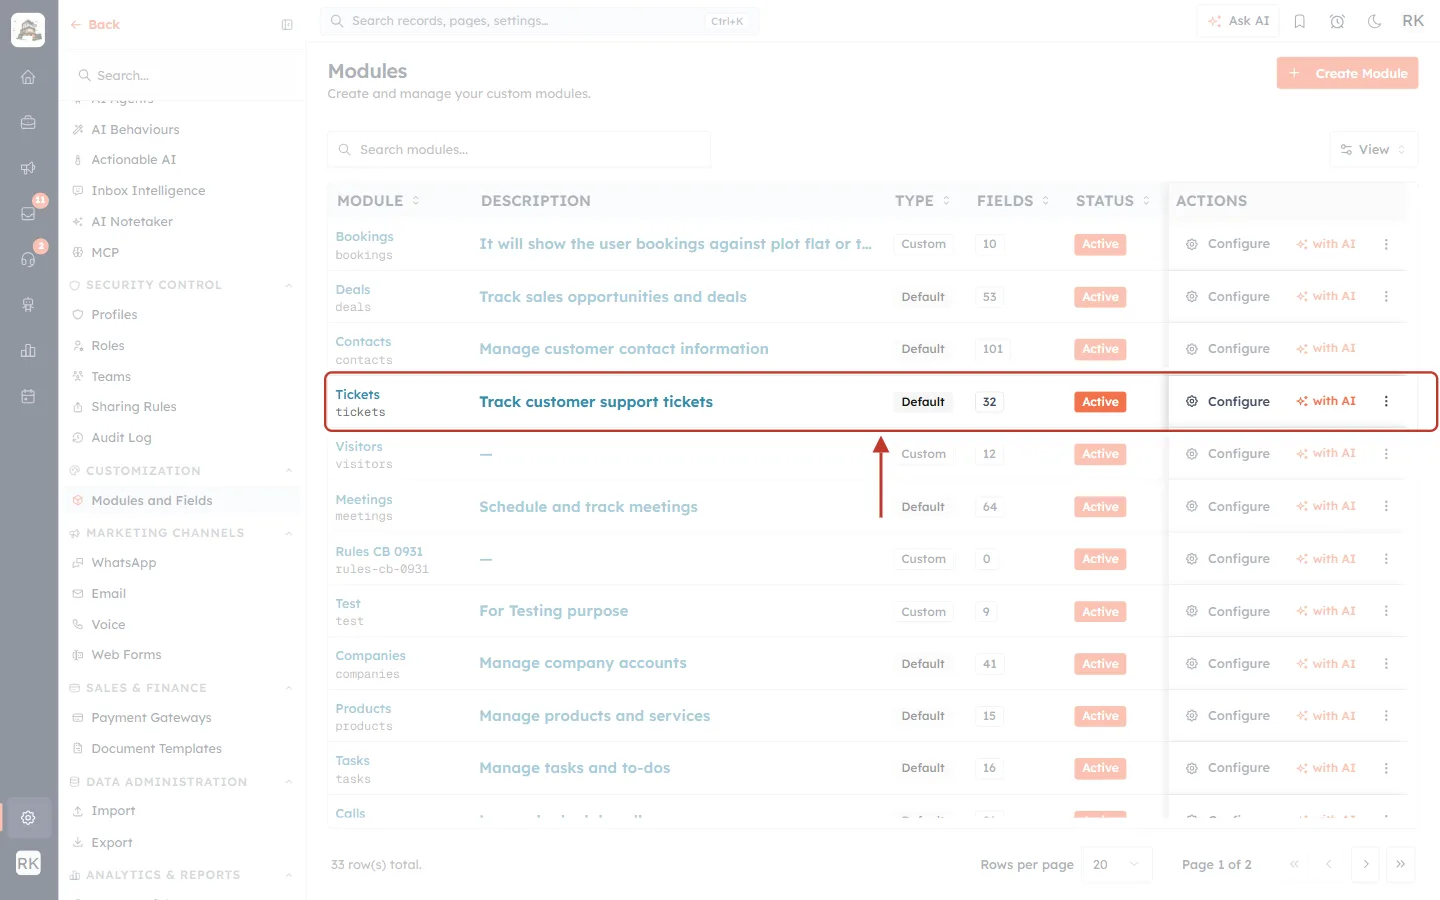
What this screenshot shows. The Tickets row of the Modules list, ringed: “Tickets · tickets · Track customer support tickets · Default · 32 · Active · Aug 25, 2026 · Nov 14, 2026”, with Configure, with AI and a ⋮ button at the end.
Status Active means Customer Support is on.
Default means it is a built-in module. You can hide it, but you can’t delete it.
The ⋮ button at the end of the row opens its actions.
Step 3: Deactivate (turn off)#
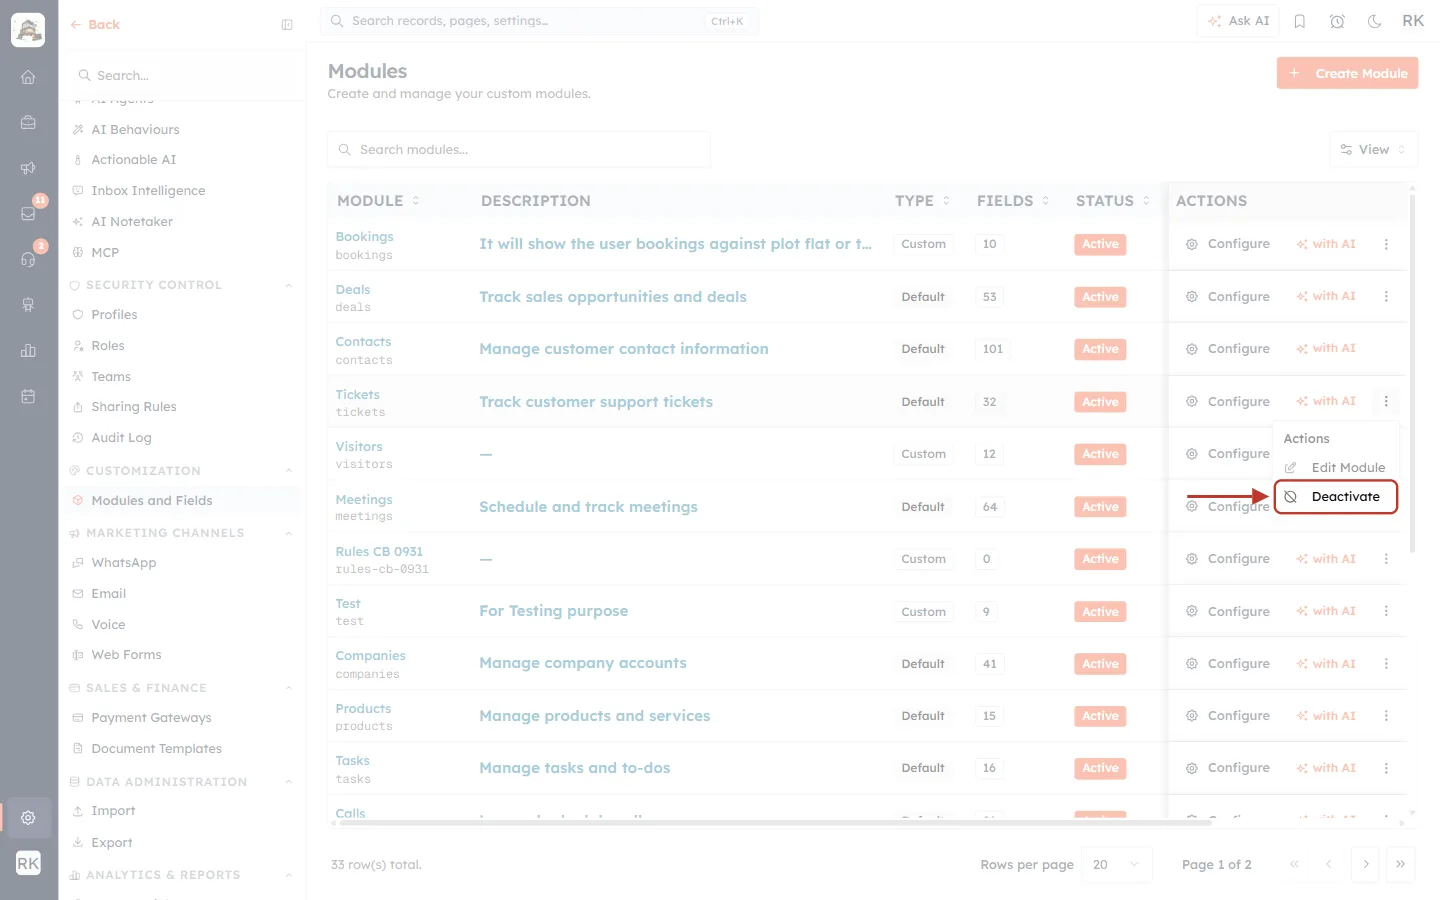
What this screenshot shows. The ⋮ menu of the Tickets row is open (Actions: Edit Module, Deactivate), with Deactivate ringed.
Click Deactivate to turn Customer Support off this way.
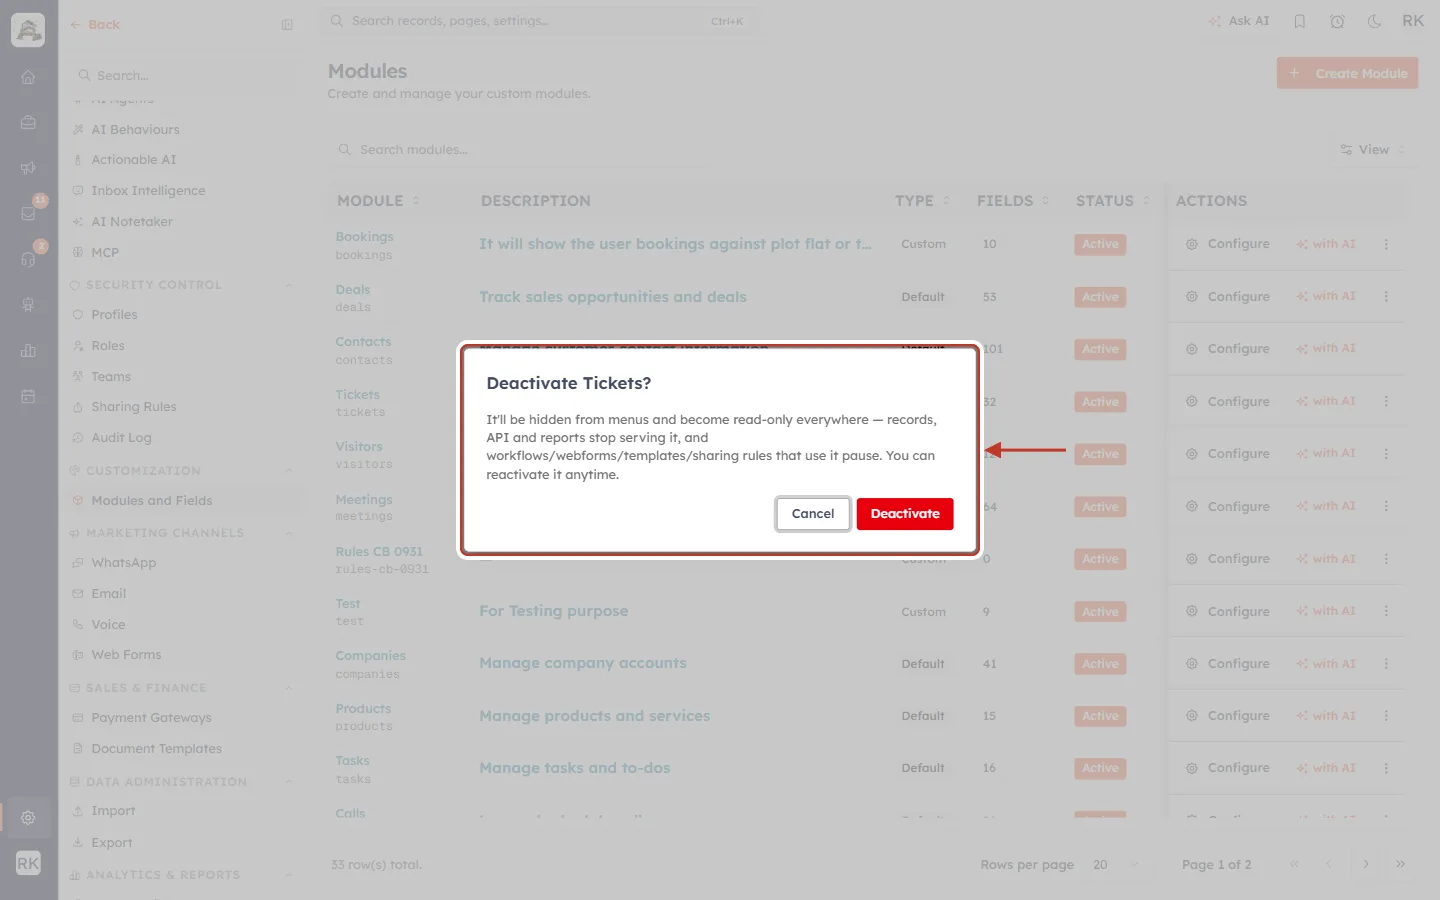
What this screenshot shows. The confirmation box, ringed: “Deactivate Tickets? It’ll be hidden from menus and become read-only everywhere — records, API and reports stop serving it, and workflows/webforms/templates/sharing rules that use it pause. You can reactivate it anytime.” Buttons: Cancel and Deactivate.
This is the general message for deactivating any module. For Tickets, it also locks Customer Support, exactly like Disable module in Part 3.
Workflows, web forms, templates and sharing rules that use tickets pause until you reactivate.
In this guide we clicked Cancel. Click Deactivate only if you really want to turn Customer Support off.
Step 4: Activate (turn on)#
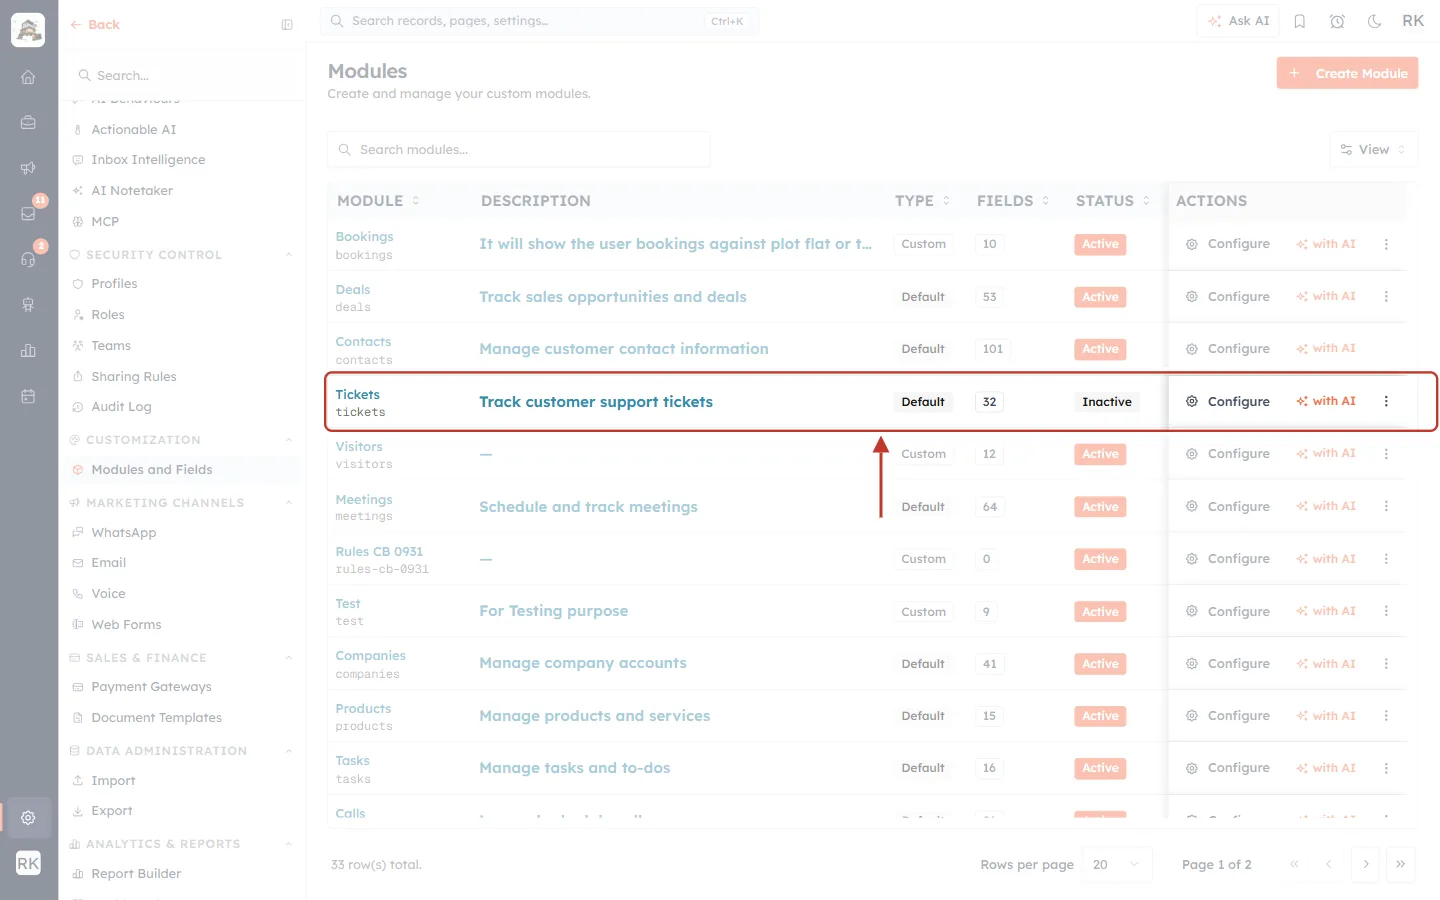
What this screenshot shows. The Tickets row when Customer Support is off, ringed. Its Status now reads Inactive.
Inactive means Customer Support is off.
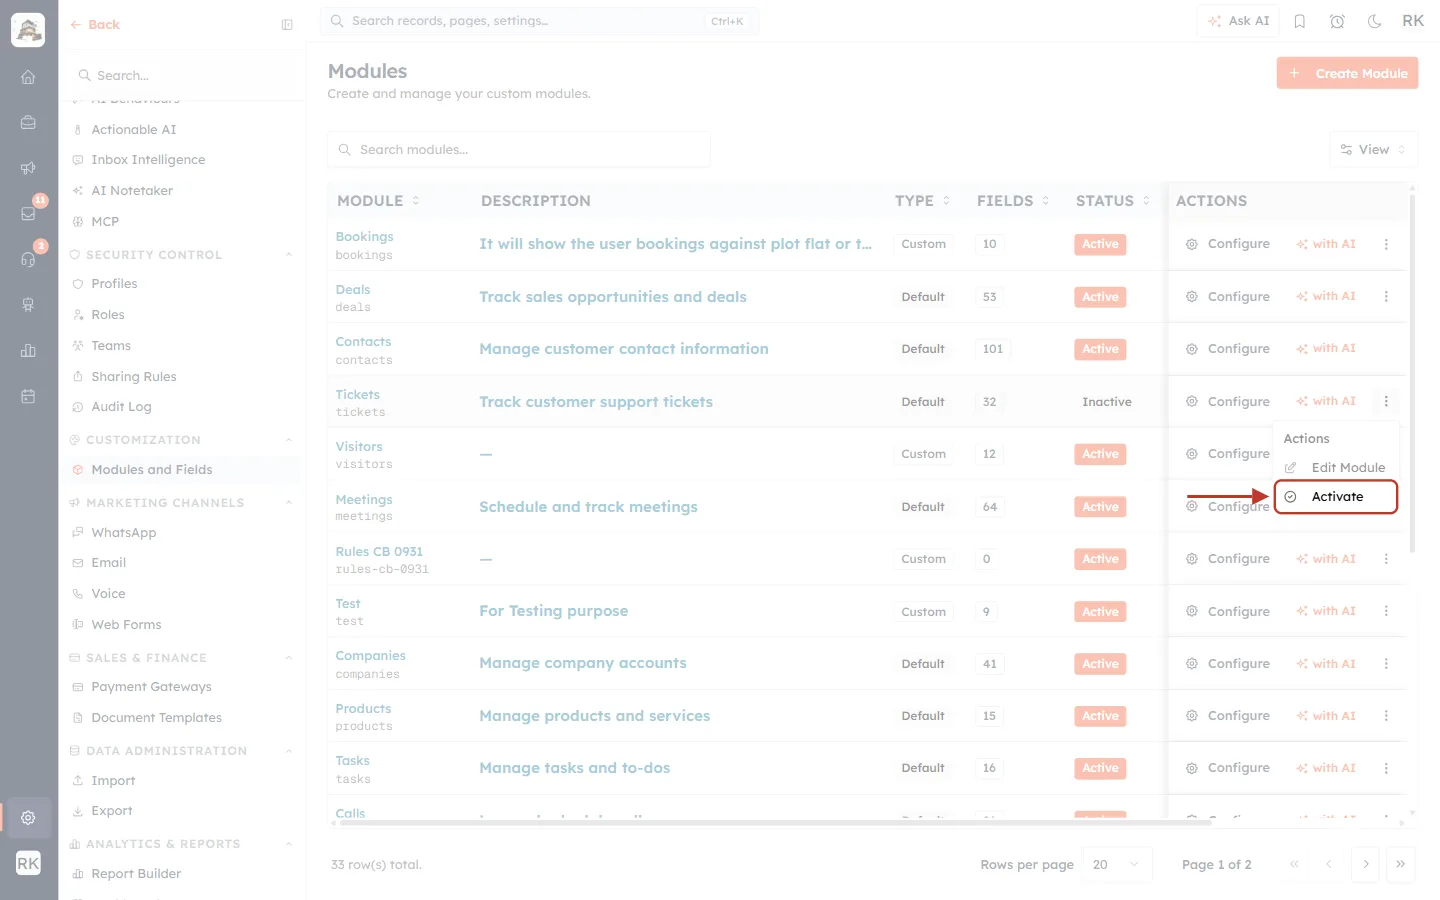
What this screenshot shows. The ⋮ menu of the inactive Tickets row with Activate ringed.
Click Activate to turn Customer Support on this way.
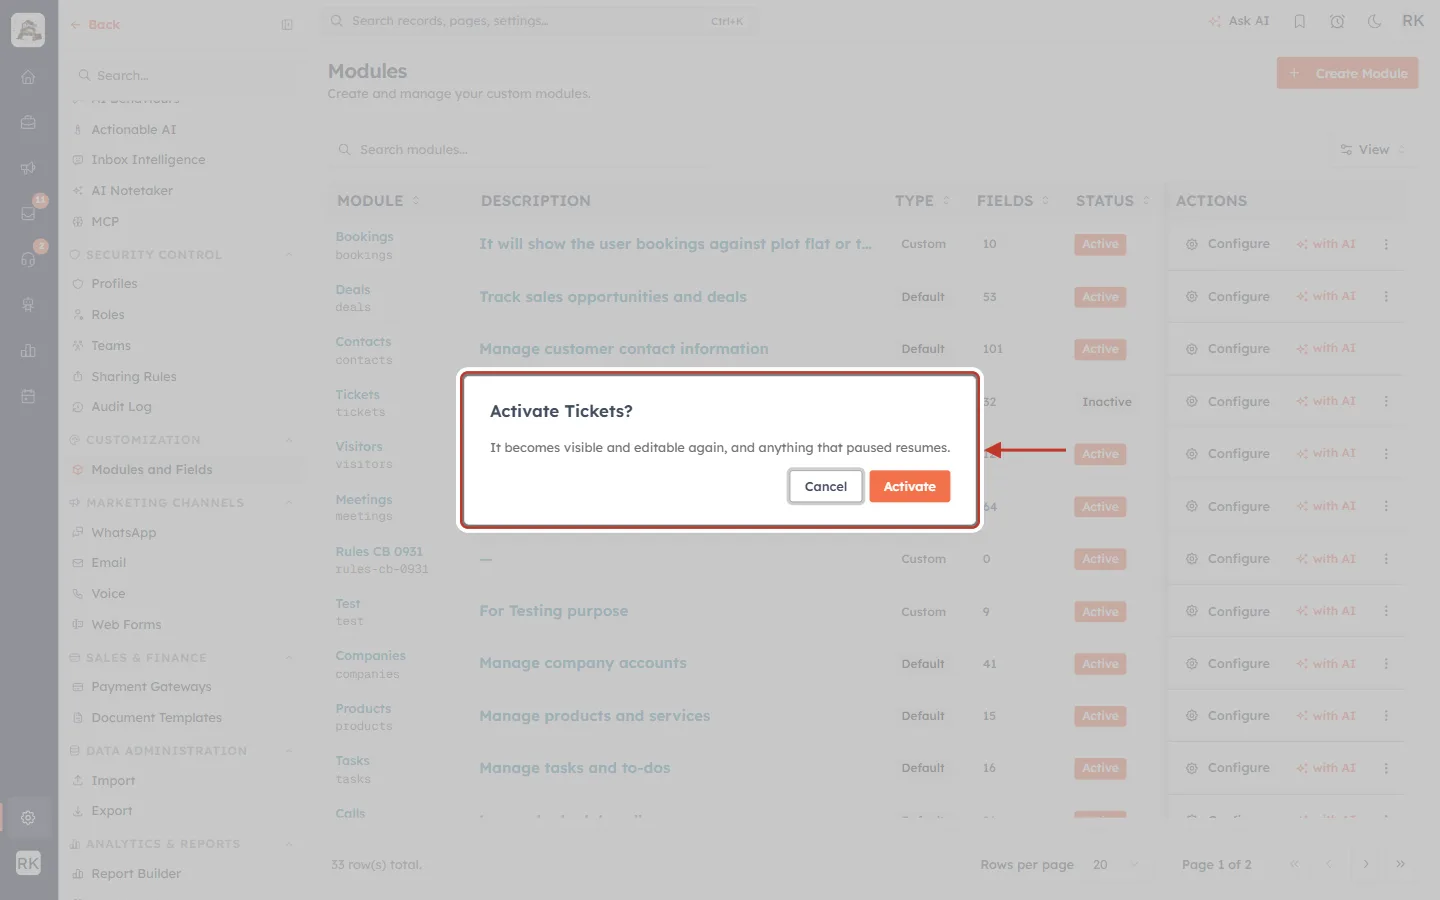
What this screenshot shows. The confirmation box, ringed: “Activate Tickets? It becomes visible and editable again, and anything that paused resumes.” Buttons: Cancel and Activate.
Click Activate. Customer Support’s menus unlock straight away, just as with Enable Ticket System.
Part 5: What happens when Customer Support is off#
While Customer Support is off | |
|---|---|
Customer Support menus | Tickets, Chats and Customer Support Settings are locked. Opening any of them shows the activation page. |
Existing tickets and conversations | Kept, untouched. They are all there again when you turn it back on. |
Support mailboxes, chat widgets and settings | Kept as they are. You don’t need to set anything up again. |
New emails and chats | Still recorded in the background, so you can work on them once Customer Support is back on. |
Workflows, web forms, templates and sharing rules that use tickets | Paused until the Tickets module is active again. |
⚠️
Tell your team before you switch it off. The switch applies to everyone in your workspace at once. Agents in the middle of a reply lose access to their tickets and chats until it is switched back on.
Common questions#
Question | Answer |
|---|---|
I don’t see the headset icon at all. | Your profile may not include Customer Support. Ask your admin to check your profile’s permissions. |
I see the activation page but no Enable button. | Only the organization owner or an admin can enable it. Ask one of them, or someone who manages modules (Part 4). |
Does turning it on create tickets from my old emails? | No. Turning Customer Support on creates nothing by itself. Tickets only start once you connect a channel, such as a support mailbox or the chat widget. |
Is “Disable module” the same as deactivating Tickets in Modules and Fields? | Yes. Both switch the Tickets module to Inactive, which turns Customer Support off. |
Will my automatic ticket emails be reset when I turn it on again? | No. Default email templates are only created the first time. Your own changes are kept. |
Previous and next#
Previous: Introduction to Customer & Support
Next: Customer & Support: Handle Customer Tickets from First Message to Resolution
Related articles#
Was this article helpful?
Ready to implement this?
OpenAI Engage and apply what you just learned to your own workspace.
Open AI Engage CRM