Loading…


KnowledgeBase
Automatic Customer Emails: Notify Customers When a Ticket Is Raised, Resolved, Closed or Reopened
What this article covers#
A customer who writes to you wants to know three things: did they get my message?, is it fixed? and what happens if it isn’t? AiEngage CRM can answer all three automatically. Every time a ticket reaches an important moment, the customer can receive a short email — without an agent having to write it.
There are four of these automatic customer emails:
| Sent when | Default subject | On by default? | |
|---|---|---|---|
| Ticket raised | A new ticket is created for the customer. | We have received your request | On |
| Ticket resolved | An agent marks the ticket as resolved. | Your ticket has been resolved | On |
| Ticket closed | The ticket is closed (by an agent or by auto-close). | Your ticket has been closed | Off |
| Ticket reopened | A finished ticket becomes active again, however it reopened. | Your ticket has been reopened | On |
On the same page you can also choose which events send a notification to the agent who owns the ticket. This article explains every setting on the page, one step at a time.
ℹ️
Each of these emails is logged on the ticket “like any other reply”, so anyone opening the ticket can see exactly what the customer was told and when.
Before you begin#
Admin access to Service & Support Settings.
A sending address. These emails go out from your organisation’s default address — set it first in Set the From and Reply-To Address for Support Emails. Its domain must be verified (Email Deliverability: Set Up DKIM and Domain Authentication).
Optional: your own email templates, if you want to replace the built-in wording — see Create and Manage Email Templates for Your Team.
Part 1 — Open Notify Customer and check the sender#
Step 1: Open the Notify Customer tab#
Press Ctrl + K (Cmd + K on a Mac), type Support Email and open it, then click the Notify Customer tab.
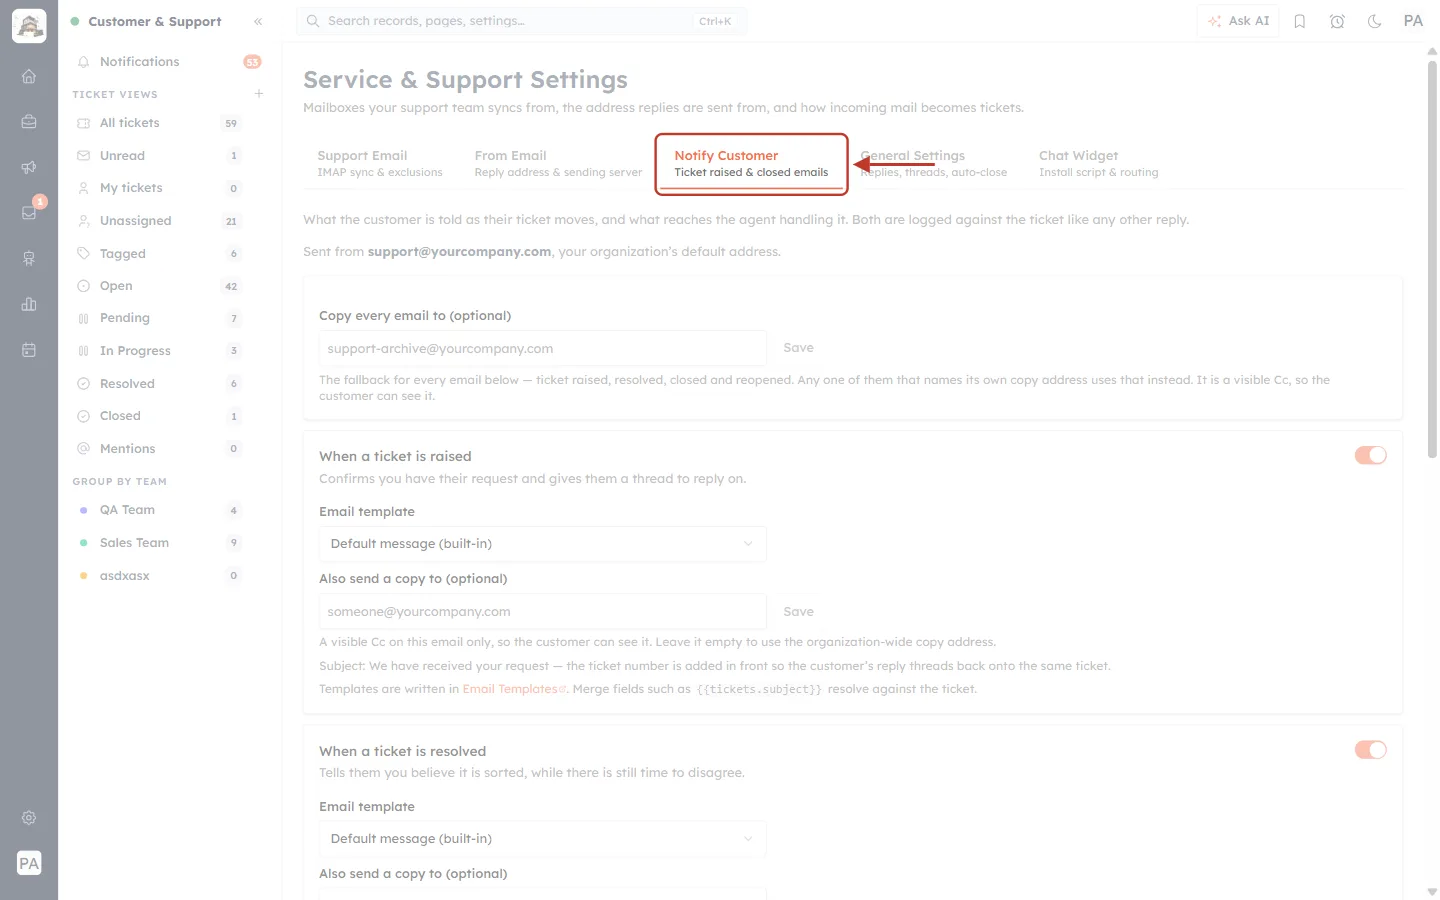
What this screenshot shows. Service & Support Settings, with the Notify Customer tab ringed.
Notify Customer — Ticket raised & closed emails — the tab this article is about (orange when selected).
The other tabs (faded): Support Email, From Email, General Settings and Chat Widget.
Below the tabs (faded): the copy-address box, then one card per email, then the agent notifications.
Step 2: Check which address the emails come from#
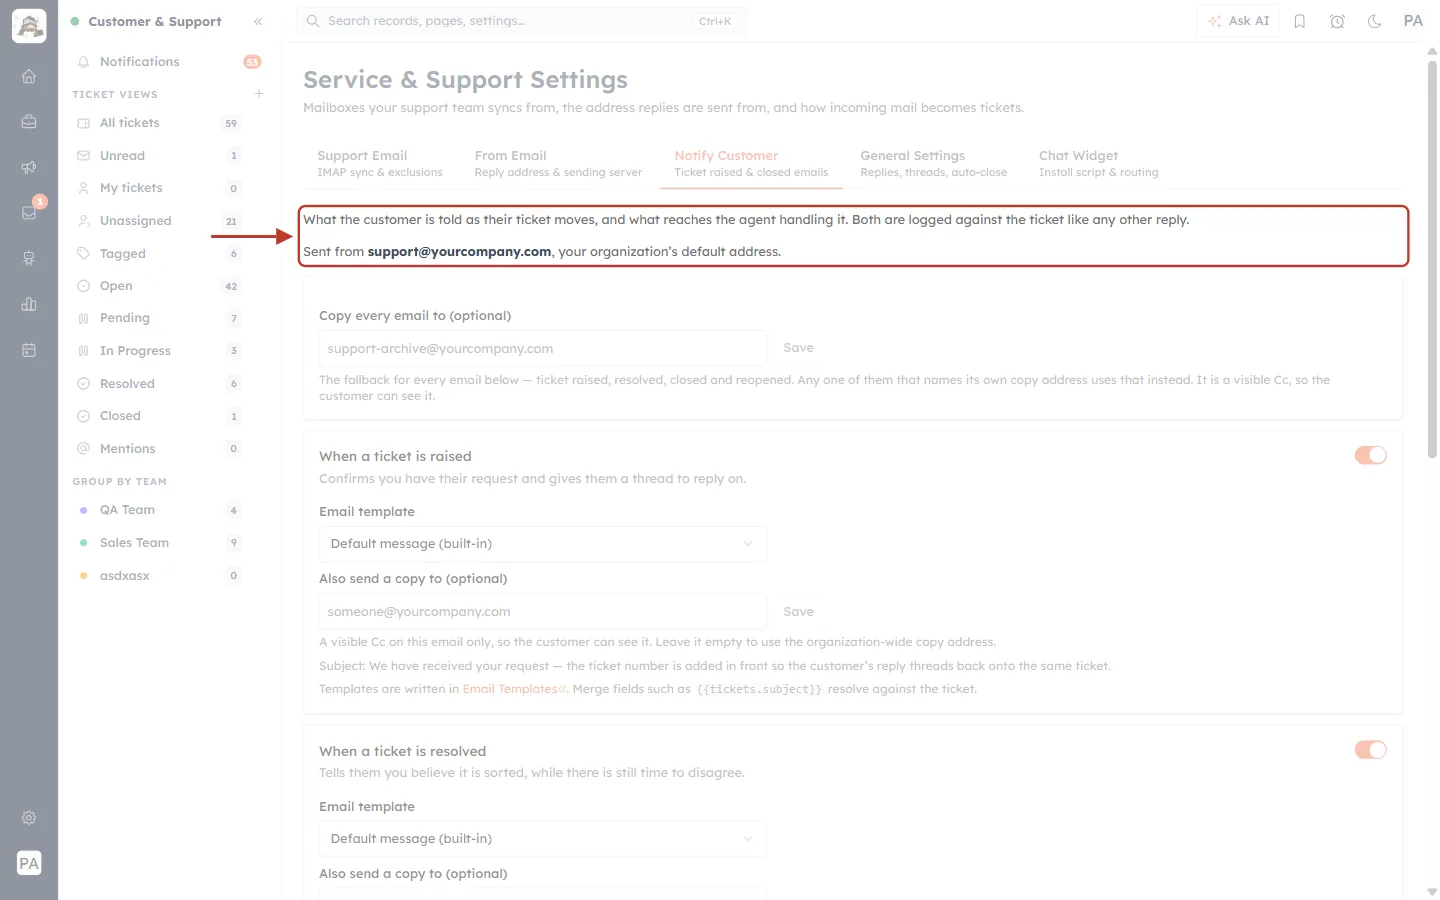
What this screenshot shows. The two lines at the top of the tab are ringed.
“What the customer is told as their ticket moves, and what reaches the agent handling it. Both are logged against the ticket like any other reply.”
Sent from support@yourcompany.com, your organization’s default address. — every customer email on this page is sent from this address. To change it, choose a different Default from address on the From Email tab.
⚠️
If the sender’s domain is not verified, a red warning appears here instead (see Troubleshooting) and the emails are refused when they are sent. If there is no sending address at all, the page says “These emails have no address to send from… until then nothing below is sent.”
Part 2 — Send a copy of every email (optional)#
Step 3: Add an organisation-wide copy address#
If a manager or an archive mailbox should receive a copy of every automatic email, add its address here.
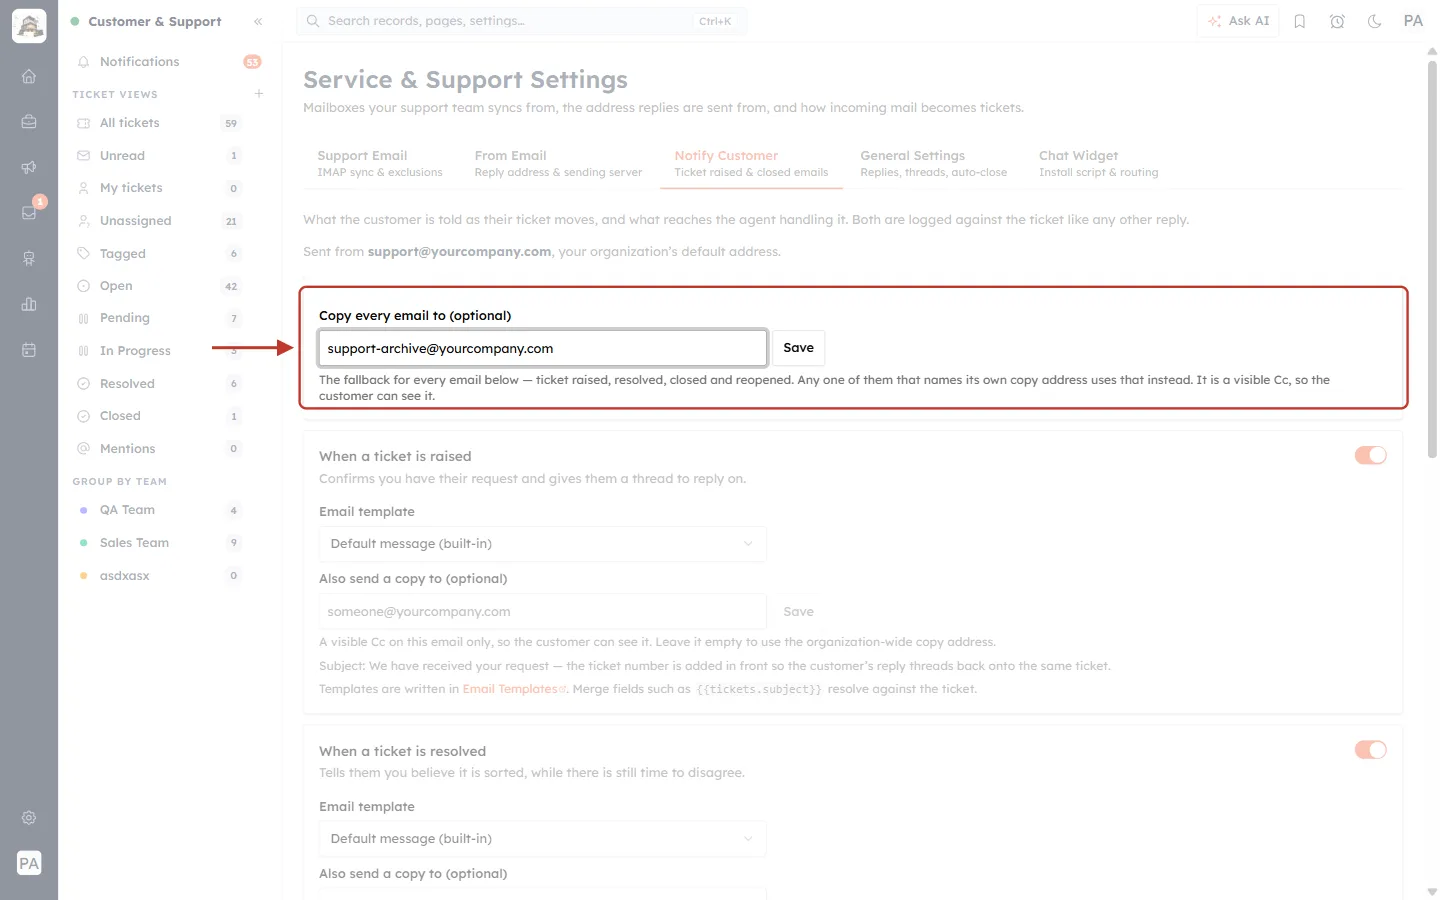
What this screenshot shows. The Copy every email to (optional) card is ringed, with support-archive@yourcompany.com typed in.
Type the address that should receive the copies, then click Save.
“The fallback for every email below — ticket raised, resolved, closed and reopened. Any one of them that names its own copy address uses that instead.”
“It is a visible Cc, so the customer can see it.” Use an address you are happy for customers to see.
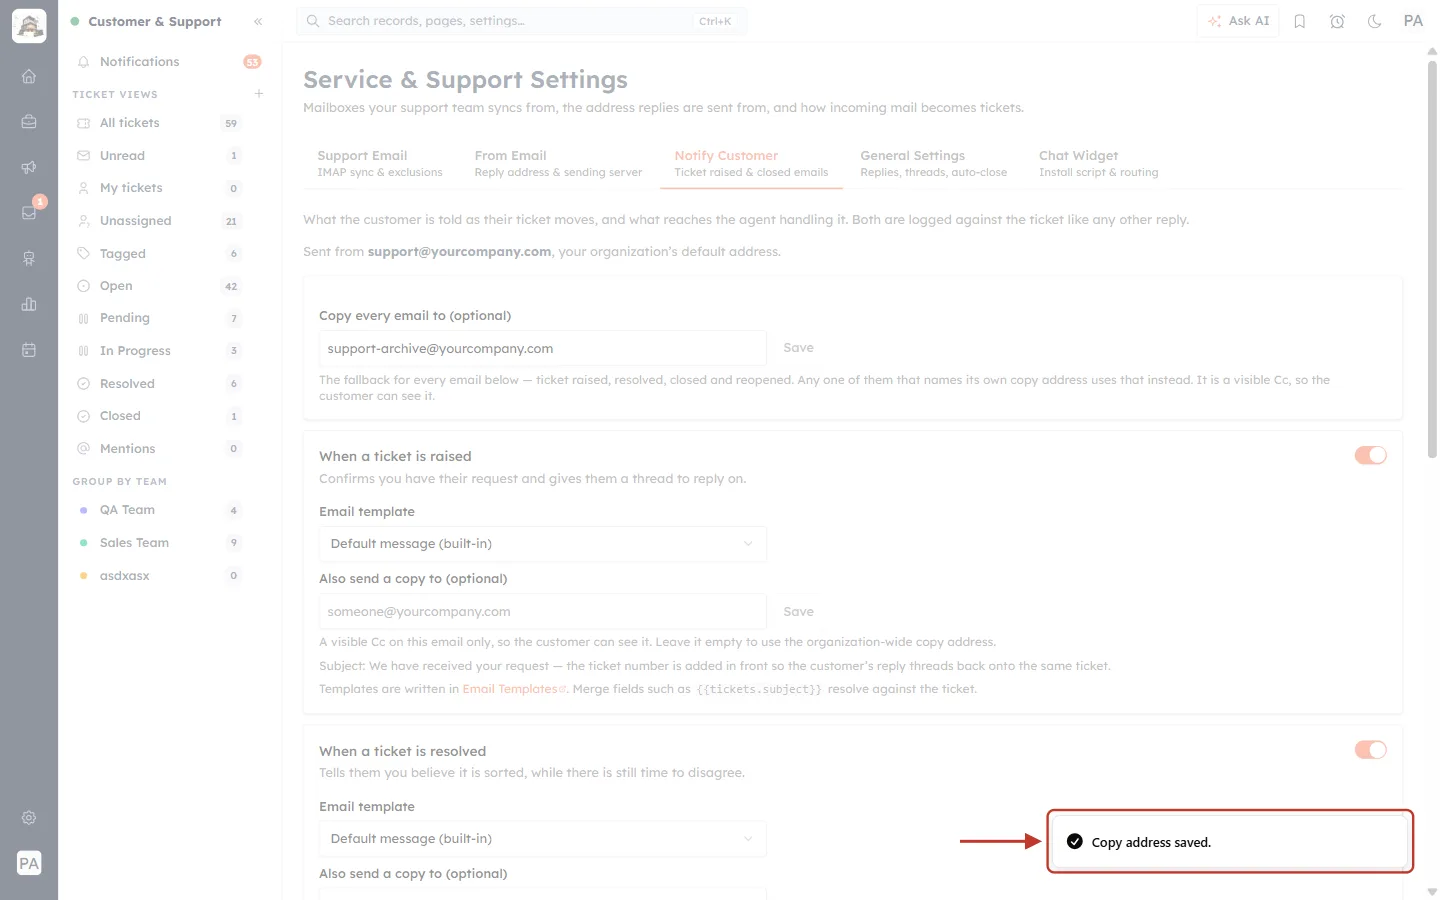
What this screenshot shows. The confirmation in the bottom-right corner is ringed: ✓ Copy address saved.
From now on, every automatic customer email is copied to this address.
To stop copying, clear the box and click Save — you will see “Copy address removed.”
Part 3 — Set up each customer email#
Each email has its own card with the same parts: an on/off switch, an email template, an optional copy address, and a note about the subject. The steps below use the first card; the others work the same way.
Step 4: Ticket raised — confirm you have their request#
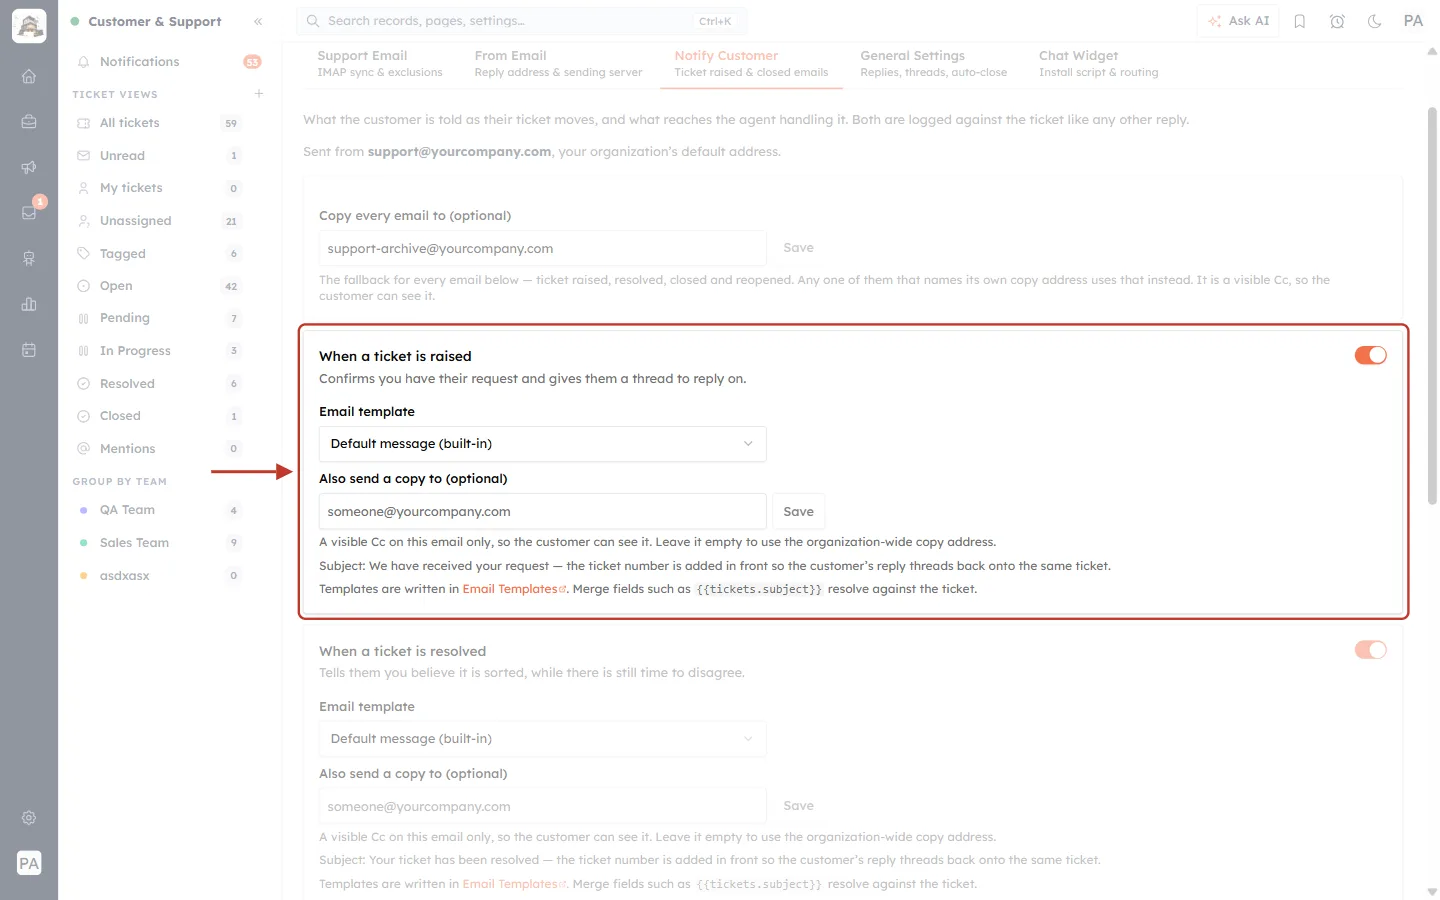
What this screenshot shows. The When a ticket is raised card is ringed. “Confirms you have their request and gives them a thread to reply on.”
The switch (top right, orange = on) — turns this email on or off. The change saves as soon as you click.
Email template — Default message (built-in), or one of your own templates (Step 5).
Also send a copy to (optional) — a copy address for this email only, with its own Save. “Leave it empty to use the organization-wide copy address.”
Subject and Templates notes at the bottom (Step 6).
✅
Keep the ticket raised email on. It reassures the customer straight away, and it gives them an email thread to reply on — their reply lands back on the same ticket.
Step 5: Choose an email template#
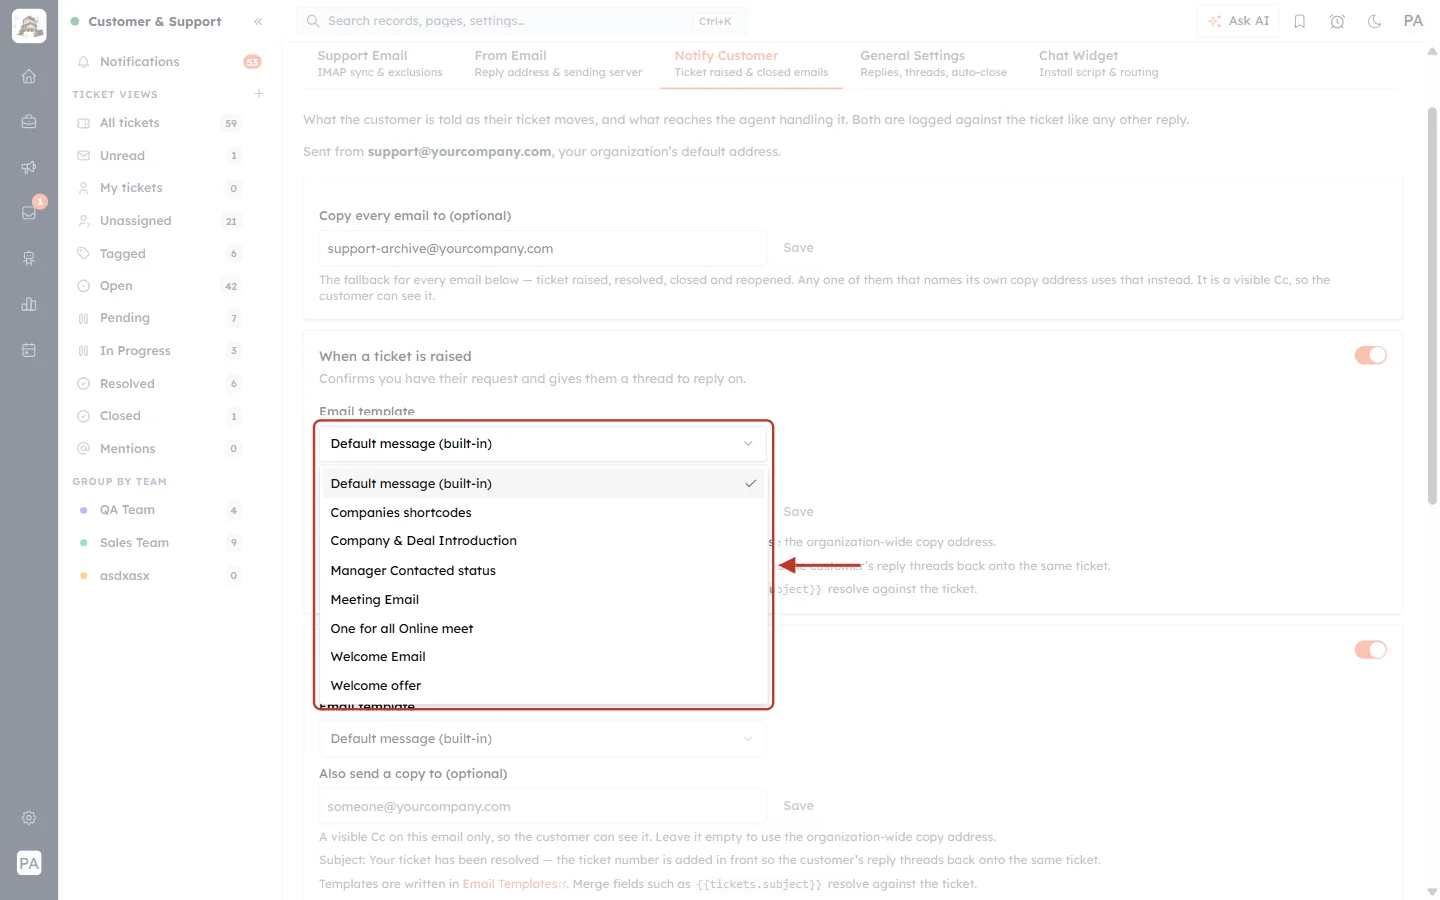
What this screenshot shows. The Email template list is open and ringed.
Default message (built-in) (ticked) — a ready-made message written for this event. You do not need to create anything to use it.
Below it: the email templates your team has created, such as Welcome Email or Meeting Email. Pick one to use your own wording and branding instead.
Create a template specially for each event — for example “Ticket received” — rather than reusing a sales template.
Step 6: Understand the subject and merge fields#
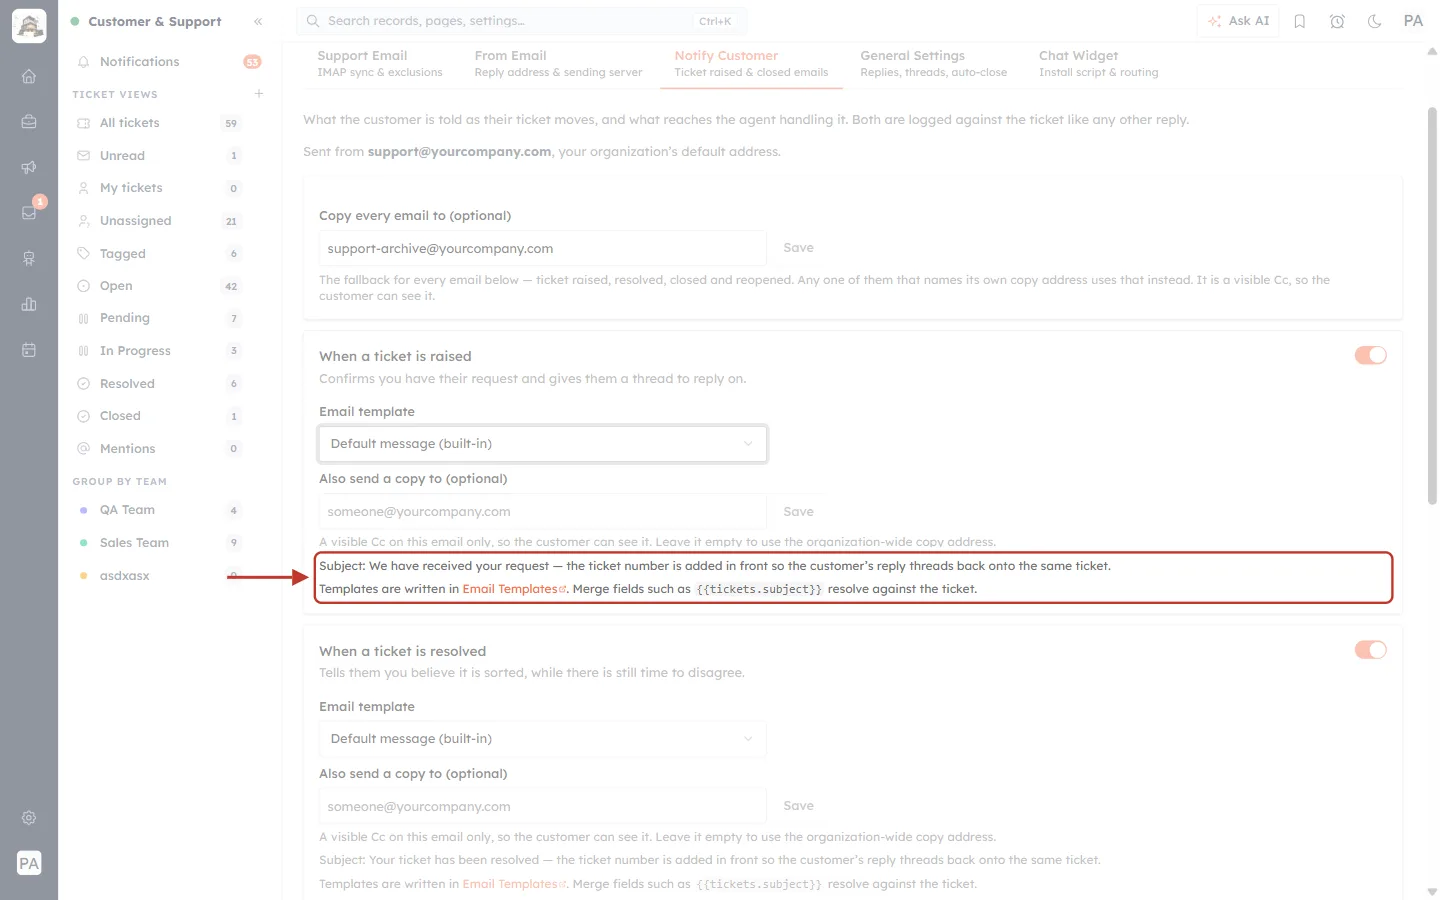
What this screenshot shows. The two notes at the bottom of the card are ringed.
Subject: We have received your request — “the ticket number is added in front so the customer’s reply threads back onto the same ticket.” The customer sees the ticket number (such as TKT-00105) at the start of the subject, followed by We have received your request.
Templates are written in Email Templates — the link opens the template editor.
Merge fields such as
{{tickets.subject}}resolve against the ticket — put ticket details into your own template, such as the ticket’s subject. See Personalize Emails with Merge Tags.
Step 7: What happens when an email is switched off#
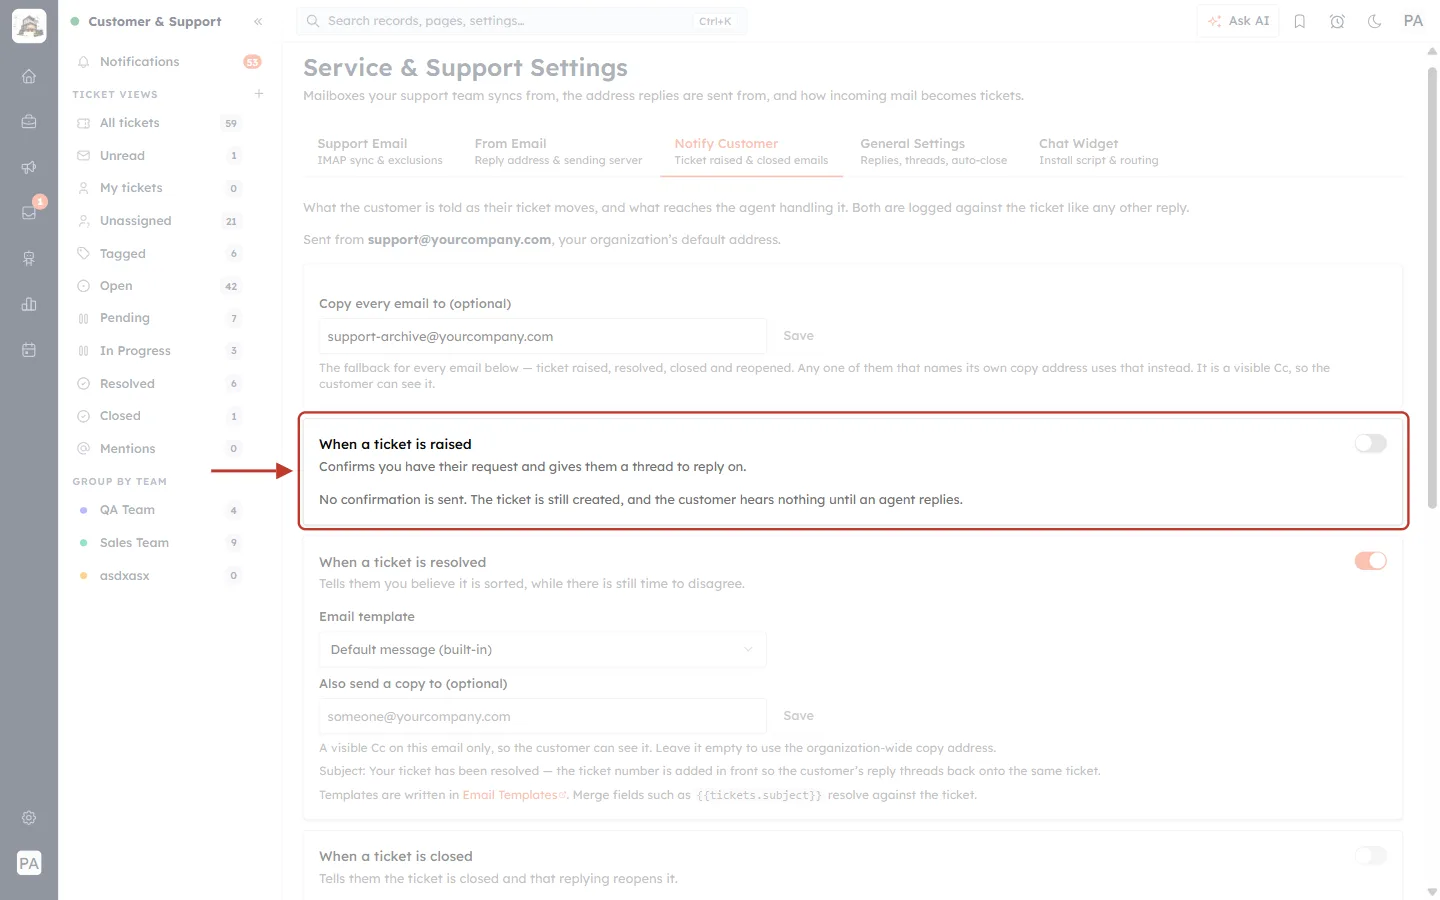
What this screenshot shows. The same card with its switch turned off (grey). The template and copy settings are hidden, and an explanation takes their place.
“No confirmation is sent. The ticket is still created, and the customer hears nothing until an agent replies.”
Switching an email off never stops the ticket itself — it only stops the automatic message.
Switch it back on at any time; your template and copy address are kept.
Step 8: Ticket resolved — tell them it is sorted#
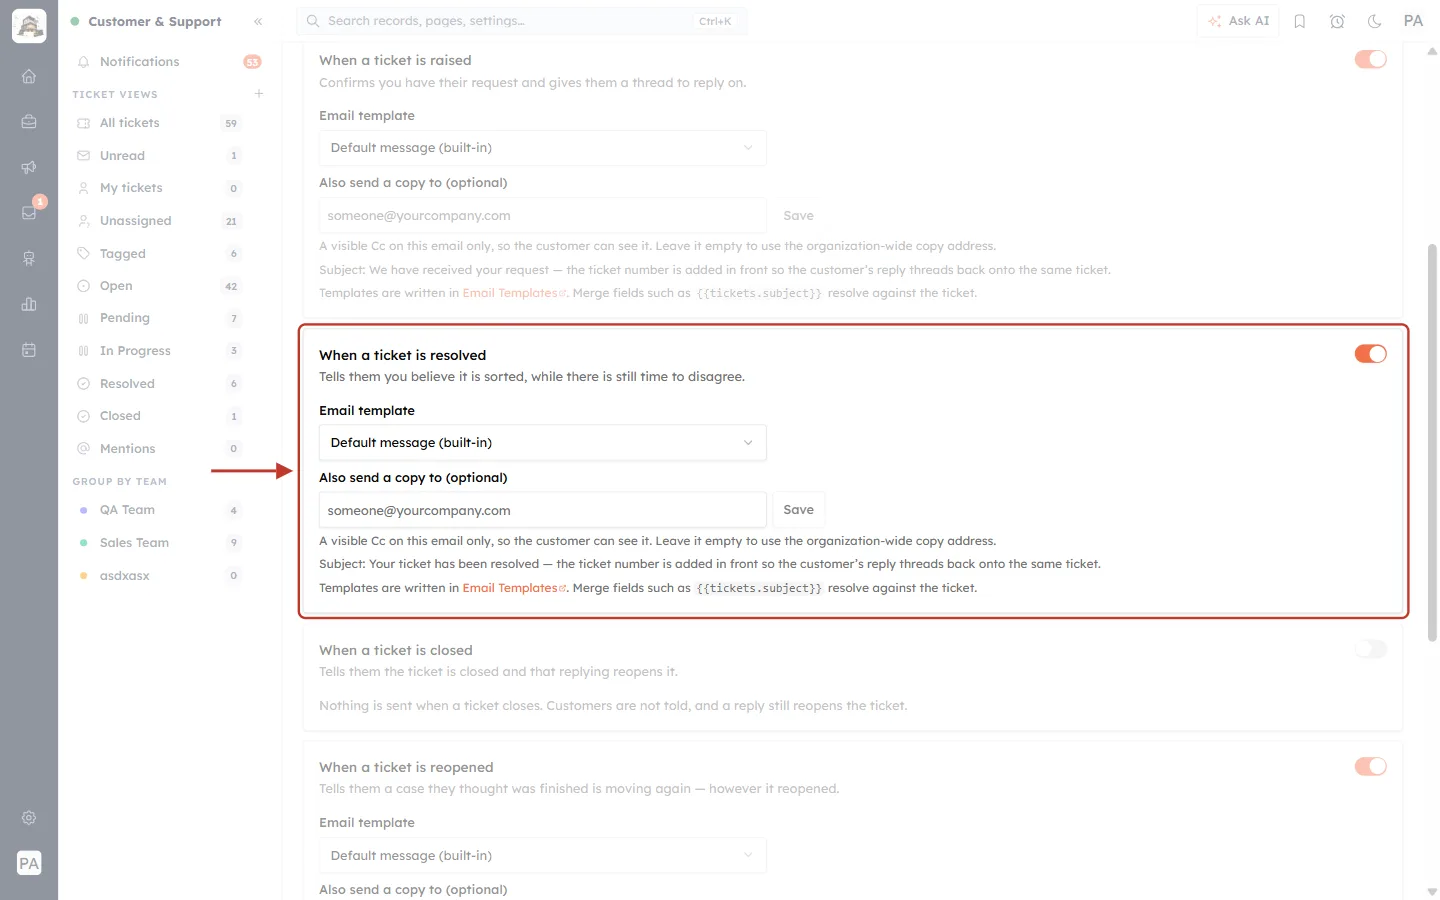
What this screenshot shows. The When a ticket is resolved card is ringed. “Tells them you believe it is sorted, while there is still time to disagree.”
Switch — on.
Email template and Also send a copy to — as in Steps 4–5.
Subject: Your ticket has been resolved, with the ticket number in front.
If this email is off: “Nothing is sent when a ticket is resolved. The customer hears nothing until it closes, if that email is on.”
Step 9: Ticket closed — tell them it is finished (off by default)#
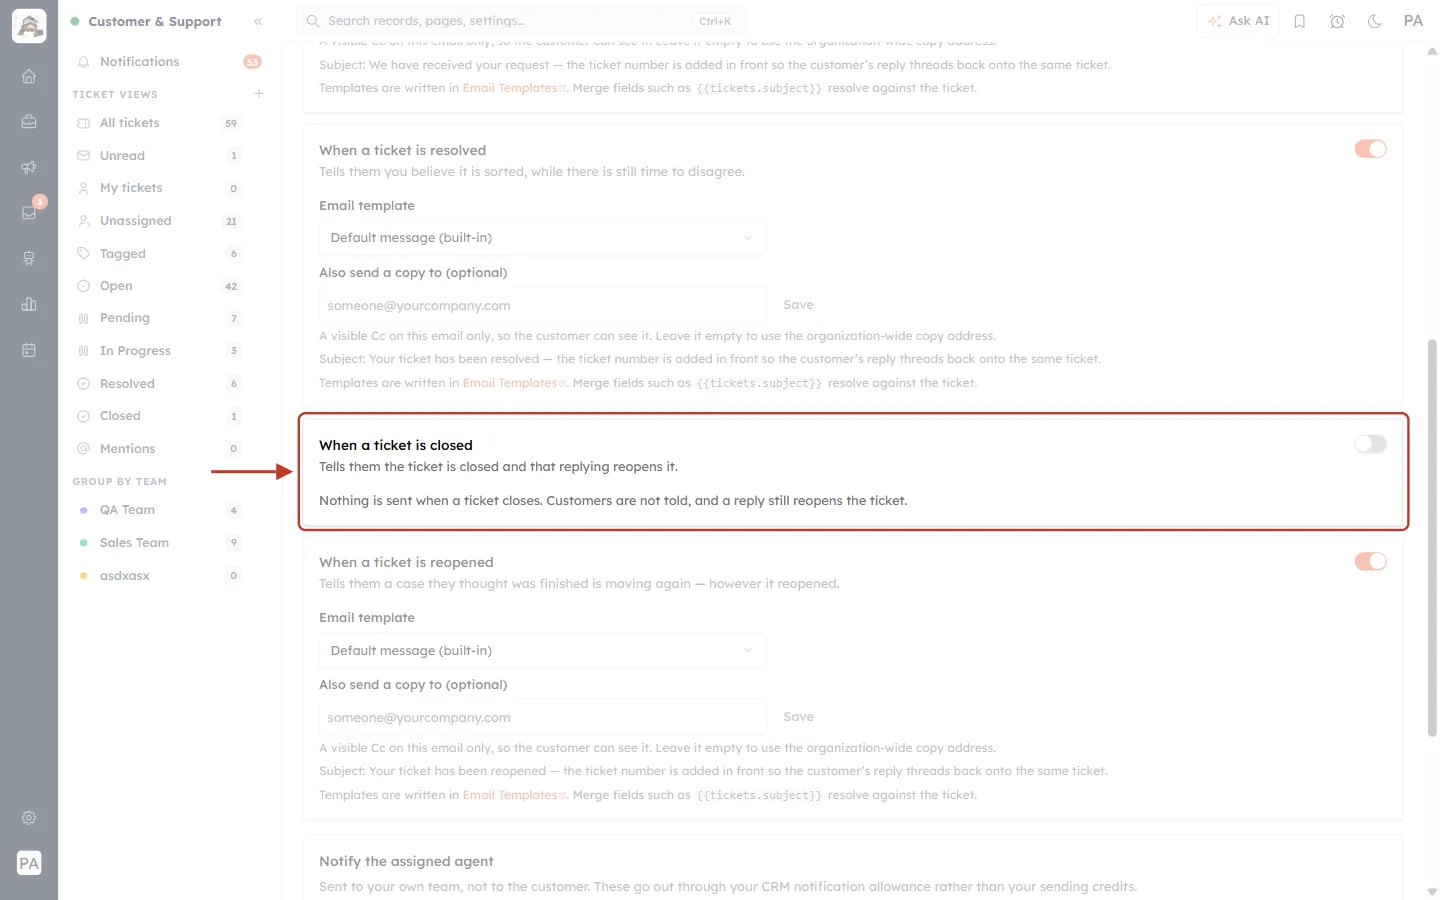
What this screenshot shows. The When a ticket is closed card is ringed. This email starts switched off.
“Tells them the ticket is closed and that replying reopens it.”
While it is off: “Nothing is sent when a ticket closes. Customers are not told, and a reply still reopens the ticket.”
Click the switch to turn it on.
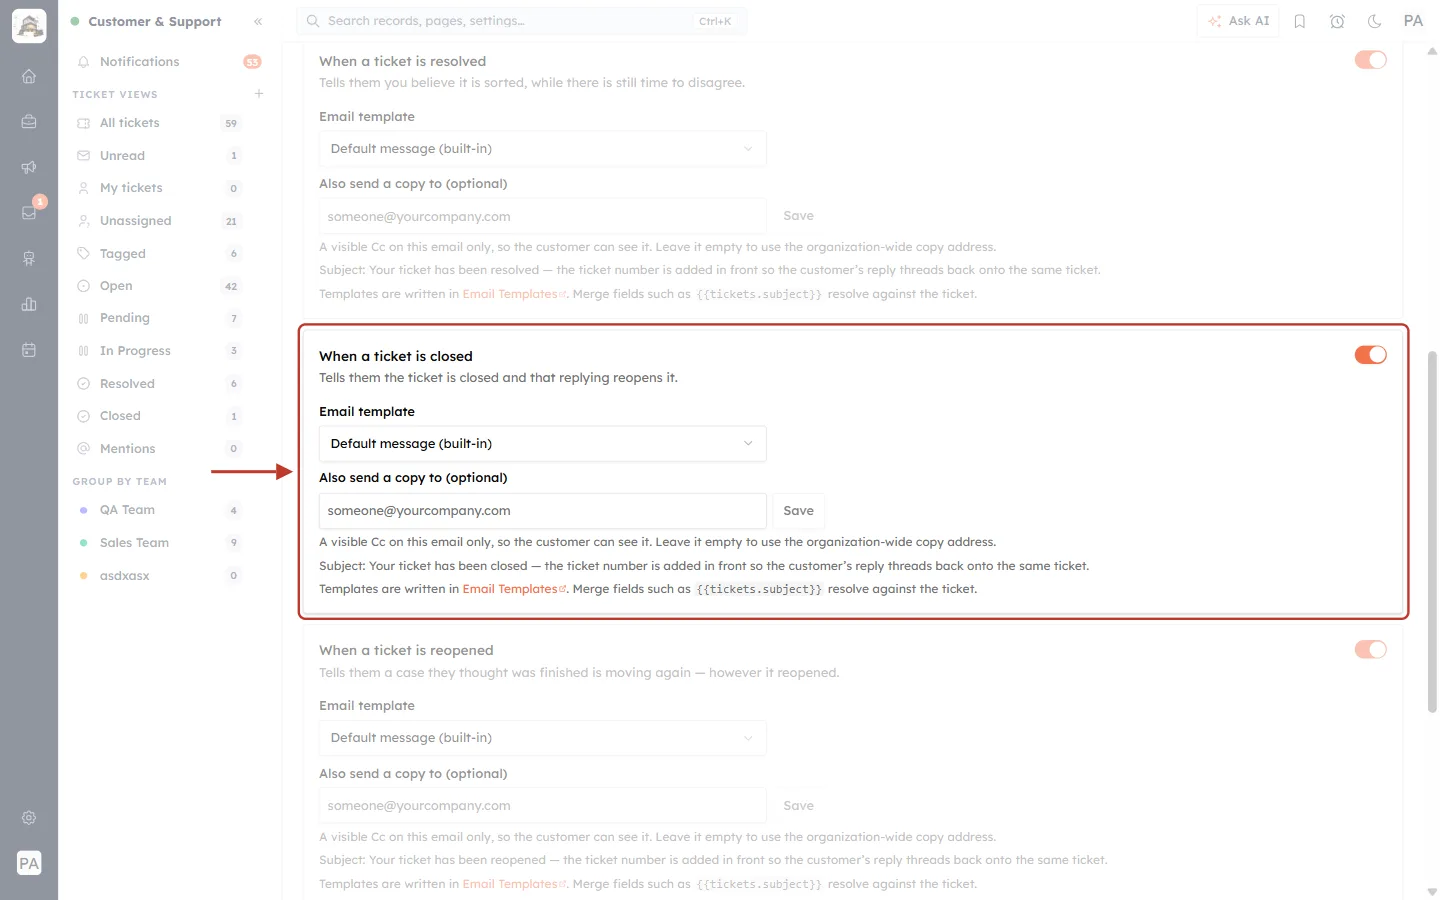
What this screenshot shows. The same card after switching it on. Its template and copy settings now appear.
Email template — Default message (built-in) or your own.
Also send a copy to (optional) — a copy address for this email only.
Subject: Your ticket has been closed, with the ticket number in front.
ℹ️
Resolved and closed together. If you use auto-close (General Settings → Auto-close), a resolved ticket is closed automatically after a set number of days. With both emails on, the customer gets one email when it is resolved and another when it closes. Many teams keep only the resolved email on, to avoid sending two.
Step 10: Ticket reopened — tell them work has started again#
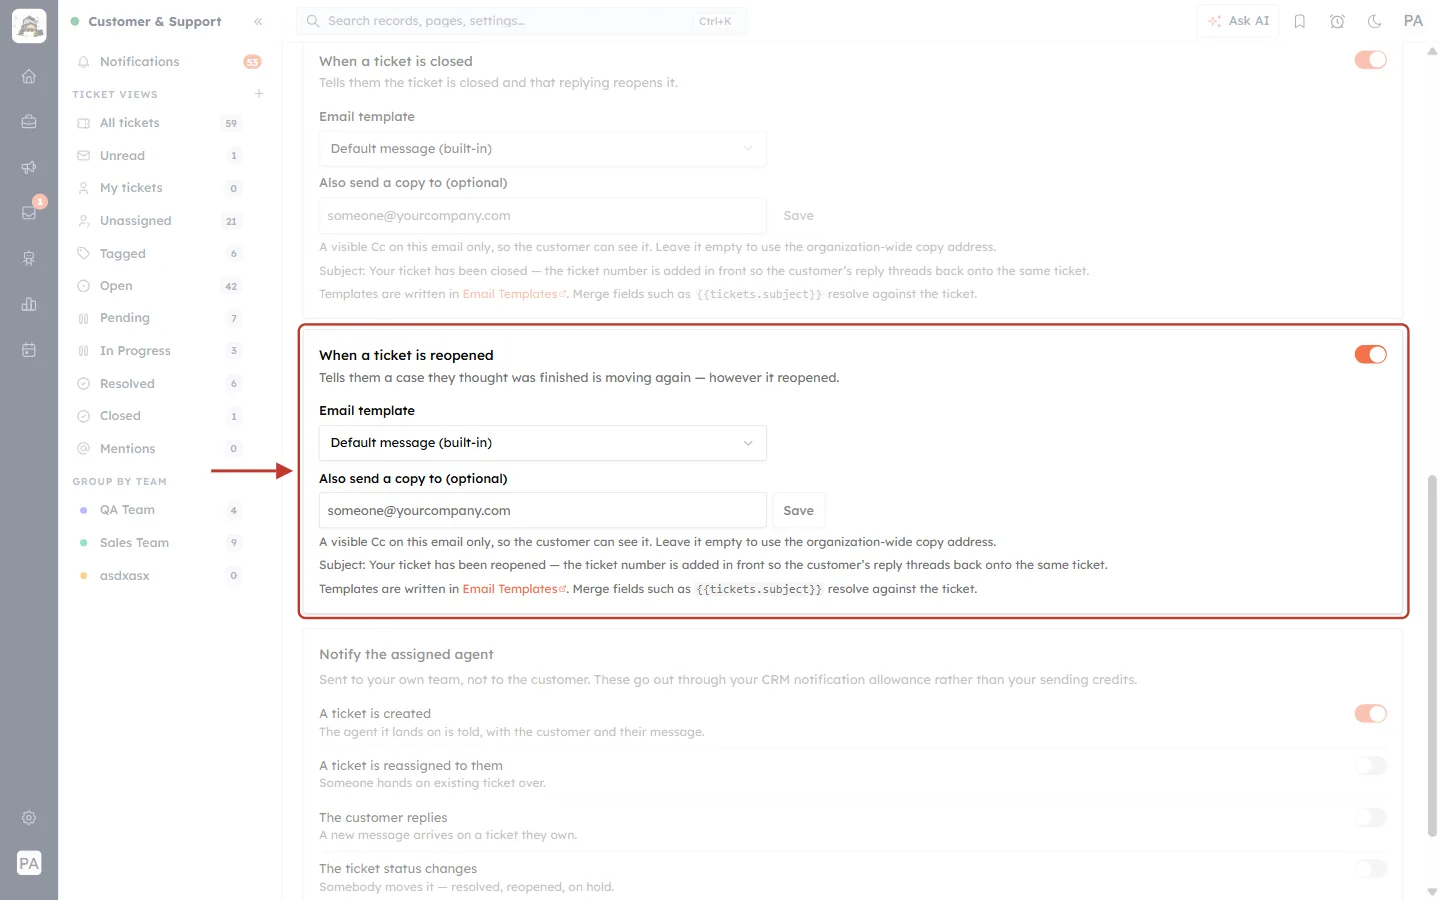
What this screenshot shows. The When a ticket is reopened card is ringed. “Tells them a case they thought was finished is moving again — however it reopened.”
It is sent whether an agent clicked Reopen or the customer’s reply reopened a closed ticket.
Subject: Your ticket has been reopened, with the ticket number in front.
If this email is off: “Nothing is sent when a ticket reopens. A customer who replied to a closed ticket sees no acknowledgement until an agent answers.”
Part 4 — Notify the assigned agent#
Step 11: Choose which events alert the agent#
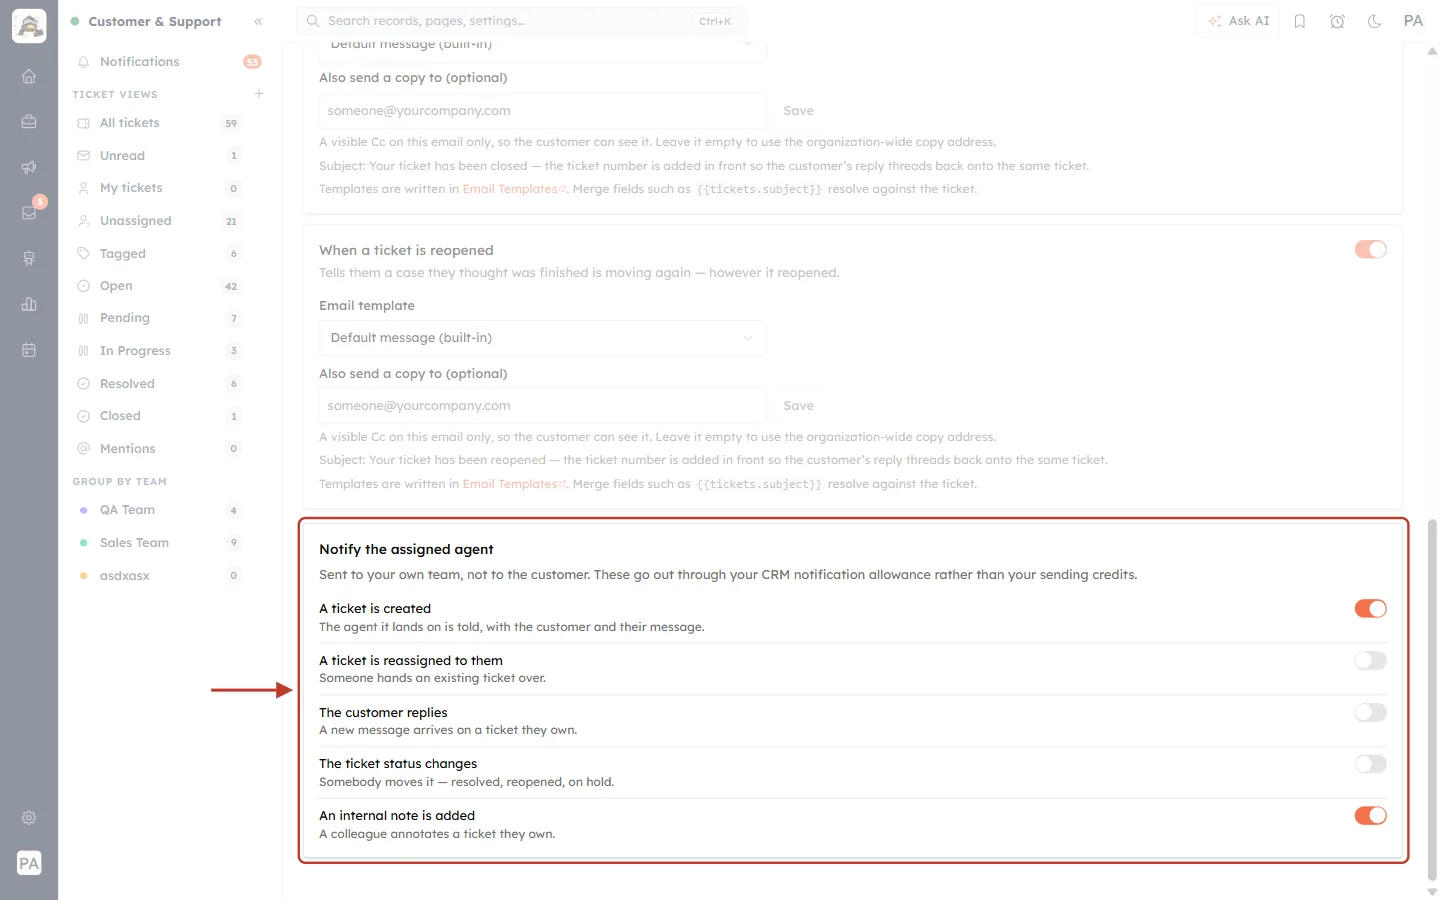
What this screenshot shows. The Notify the assigned agent section at the bottom of the page is ringed. “Sent to your own team, not to the customer.”
A ticket is created (on) — “The agent it lands on is told, with the customer and their message.”
A ticket is reassigned to them (off) — “Someone hands an existing ticket over.”
The customer replies (off) — “A new message arrives on a ticket they own.”
The ticket status changes (off) — “Somebody moves it — resolved, reopened, on hold.”
An internal note is added (on) — “A colleague annotates a ticket they own.”
Each switch saves as soon as you click it. “These go out through your CRM notification allowance rather than your sending credits.”
✅
A good starting point: switch on A ticket is reassigned to them and The customer replies as well, so agents never miss a ticket handed to them or a customer waiting for an answer.
Troubleshooting#
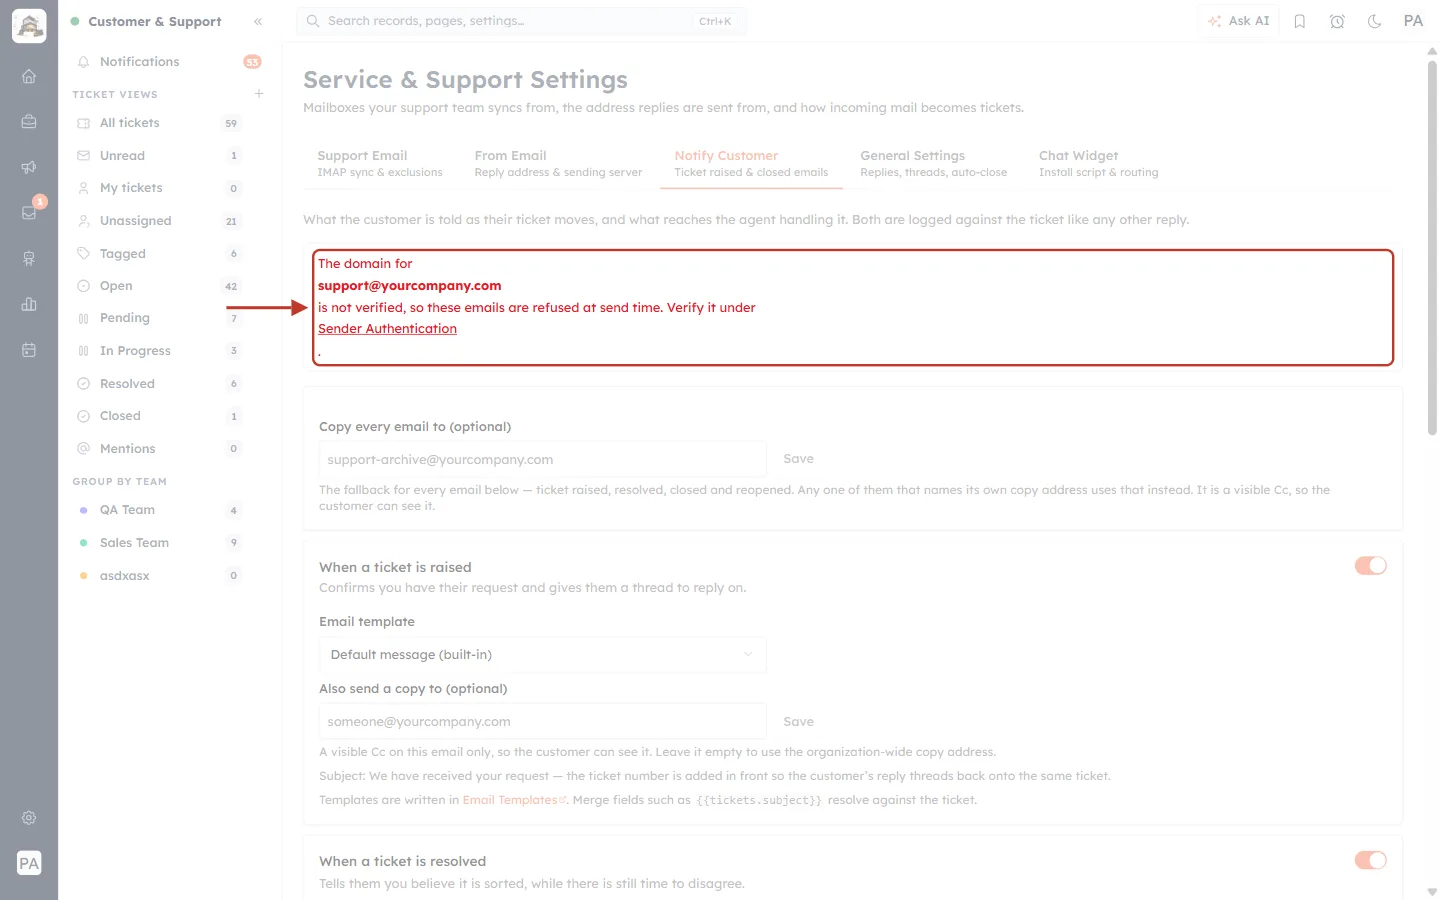
What this screenshot shows. A red warning at the top of the tab is ringed.
“The domain for support@yourcompany.com is not verified, so these emails are refused at send time.”
Click Sender Authentication and finish verifying the domain — see Email Deliverability: Set Up DKIM and Domain Authentication.
Until then, none of the customer emails on this page are delivered.
Customers are not receiving the emails. Check that the email’s switch is on, that the Sent from address is correct, and that no red warning shows at the top of the page. Also ask the customer to check their spam folder.
The customer’s reply created a new ticket. The ticket number must stay in the subject. If you use your own template, keep the subject line the CRM provides. A reply that arrives long after the ticket closed also starts a new ticket (see the reopen window in Connect a Support Mailbox).
Customers receive two emails at the end. Both the resolved and closed emails are on, and auto-close closes resolved tickets. Switch one of them off.
“Could not save that setting.” The change was not stored. Try again; if it keeps happening, check you have admin access to Service & Support Settings.
My template shows {{…}} text instead of ticket details. Check the merge field is spelled exactly, for example {{tickets.subject}}.
Recommended setup#
| Setting | Recommended | Why |
|---|---|---|
| Ticket raised | On | Instant reassurance, and a thread to reply on. |
| Ticket resolved | On | The customer can disagree before the ticket closes. |
| Ticket closed | Off (if auto-close is on) | Avoids a second email right after “resolved”. |
| Ticket reopened | On | The customer knows their follow-up was seen. |
| Copy every email to | Optional | Only if a visible Cc is acceptable to your customers. |
| Agent: created, reassigned, customer replies | On | Agents never miss new work or a waiting customer. |
Previous and next#
Previous: Set the From and Reply-To Address for Support Emails
Next: Support General Settings: Live Chat, Reply Display, Reopen on Reply & Auto-Close Resolved Tickets
Related#
Was this article helpful?
Ready to implement this?
OpenAI Engage and apply what you just learned to your own workspace.
Open AI Engage CRM