Loading…


KnowledgeBase
Find the Right Tickets Fast: Ticket Views, Team Groups & Notifications in Customer & Support
What this article covers#
As soon as tickets start arriving — from email, website chat, WhatsApp or your team — the question every agent asks is “what should I work on next?” The left-hand sidebar of the Customer & Support workspace answers it. It holds:
Ticket views — ready-made lists such as My tickets, Unassigned or Pending, each with a live count.
Team groups — one list per team, so each team sees only its own work.
Notifications — alerts about chats and tickets that need you.
This article explains every part of the sidebar and the tools above the ticket list (columns and search), one screenshot at a time, so you can find the right tickets in seconds.
Before you begin#
Access to Customer & Support — your profile needs permission to view tickets. See Introduction to Customer & Support.
Open the workspace at app.aiengagecrm.com/dashboard/tickets.
Part 1 — The sidebar at a glance#
Step 1: Look at the sidebar#
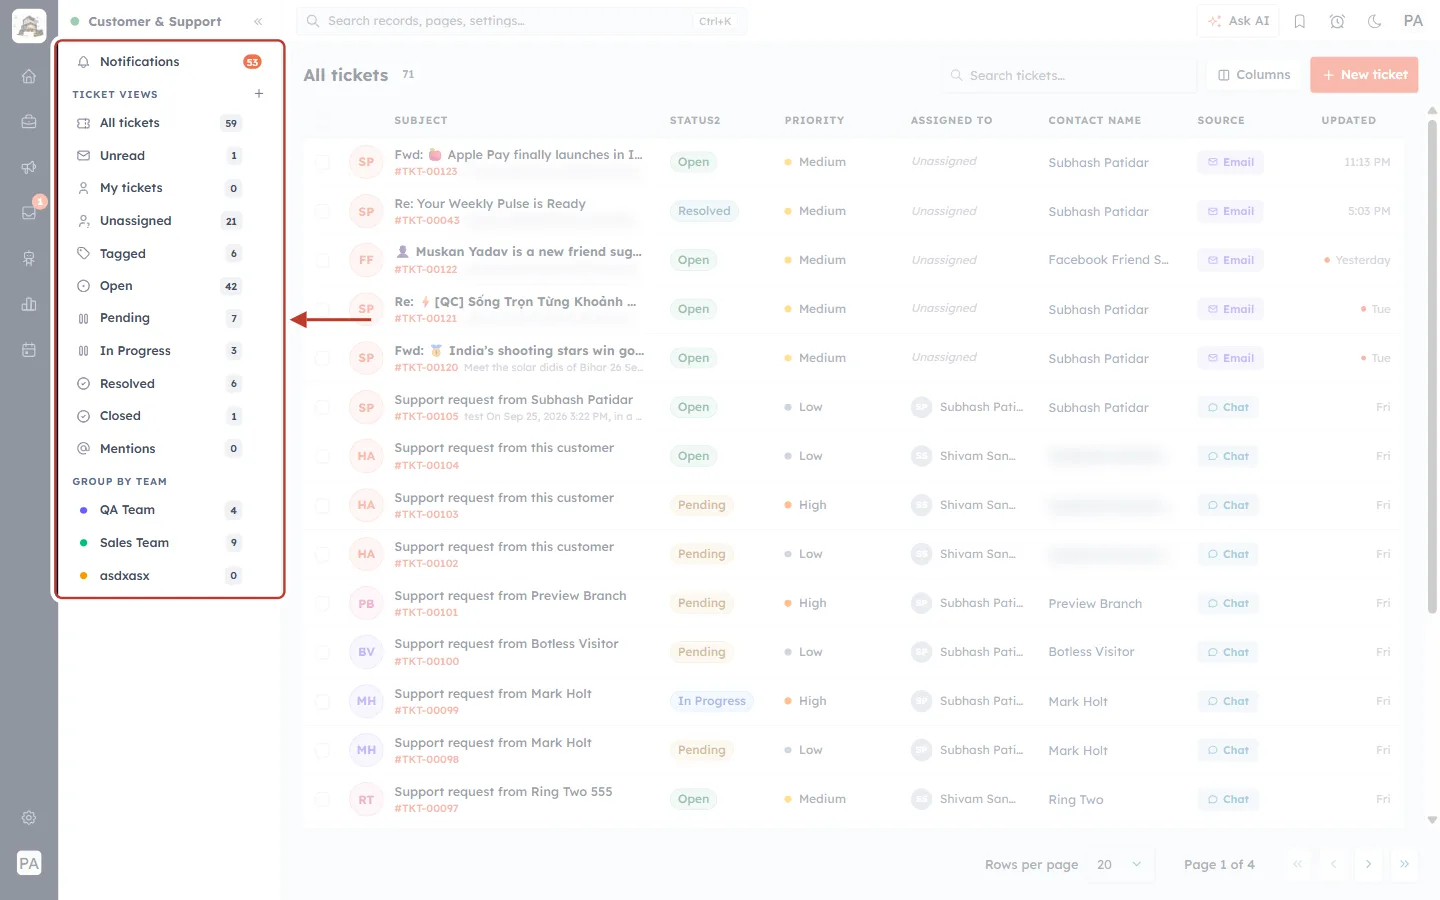
What this screenshot shows. The workspace’s left-hand sidebar is ringed. It has three areas, top to bottom.
● Customer & Support and Notifications (with an orange count) — at the top.
TICKET VIEWS — the built-in lists, from All tickets to Mentions.
GROUP BY TEAM — one entry per team.
The grey number on the right of each entry is how many tickets it holds.
The view you are looking at is highlighted in orange.
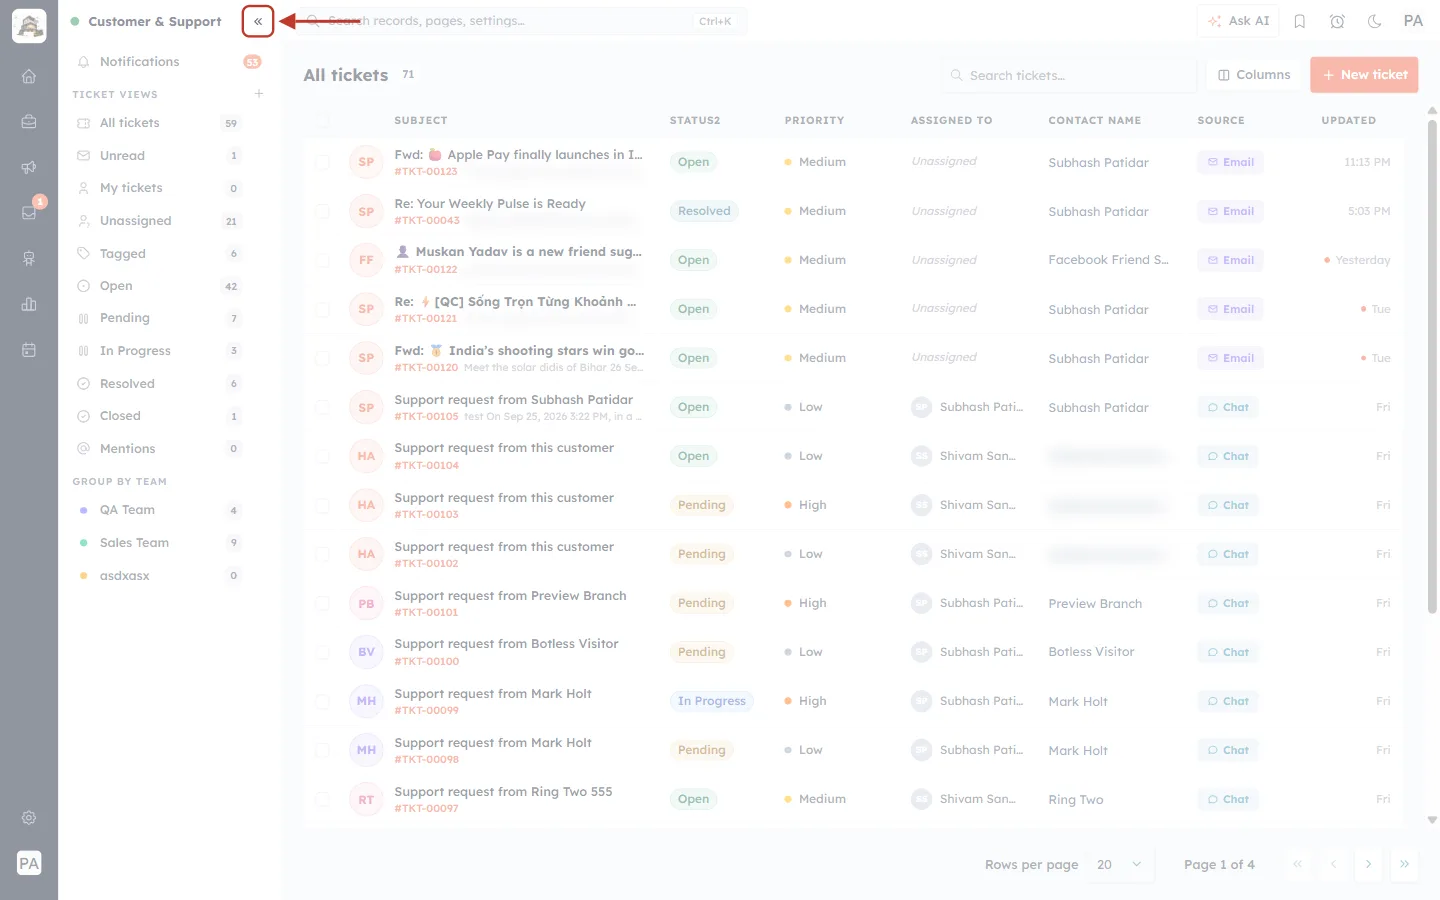
What this screenshot shows. The « button at the top right of the sidebar is ringed.
Click it to minimise the sidebar and give the ticket list more room — useful on a small screen.
Click again to expand it.
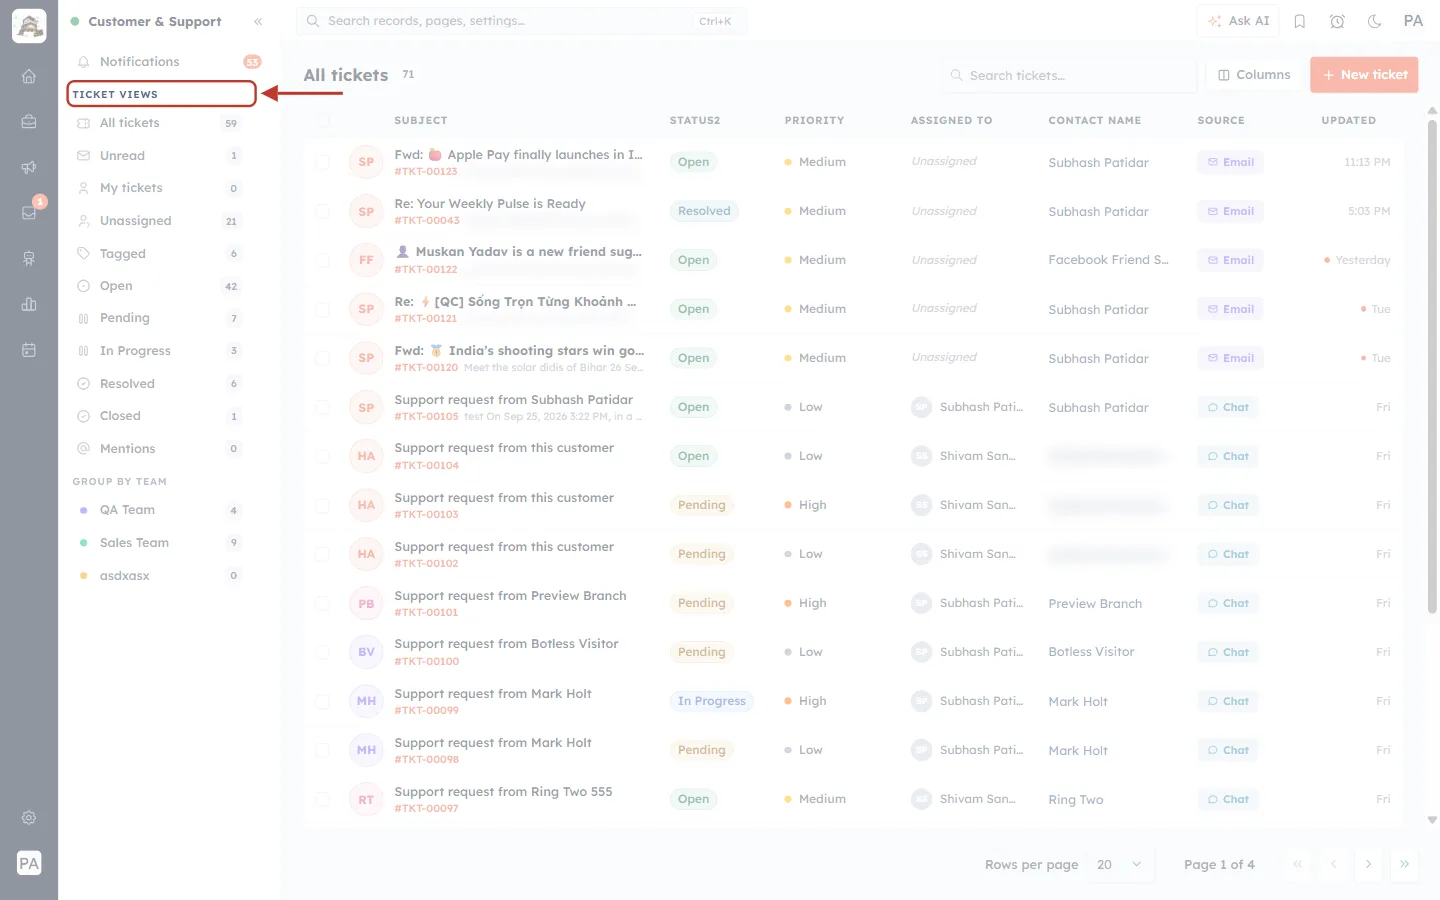
What this screenshot shows. The TICKET VIEWS heading is ringed.
+ (on the right of the heading) — creates your own view (Part 5).
Next to the heading you may also see a small refresh icon, Refresh counts, which updates the numbers beside each view.
ℹ️
Why does the count beside a view sometimes differ from the list? The sidebar counts can lag behind the list, which always shows the latest tickets. If they disagree — for example the sidebar says 59 and the list header says 71 — use Refresh counts or reload the page.
Part 2 — The built-in ticket views#
Step 2: Know what each view shows#
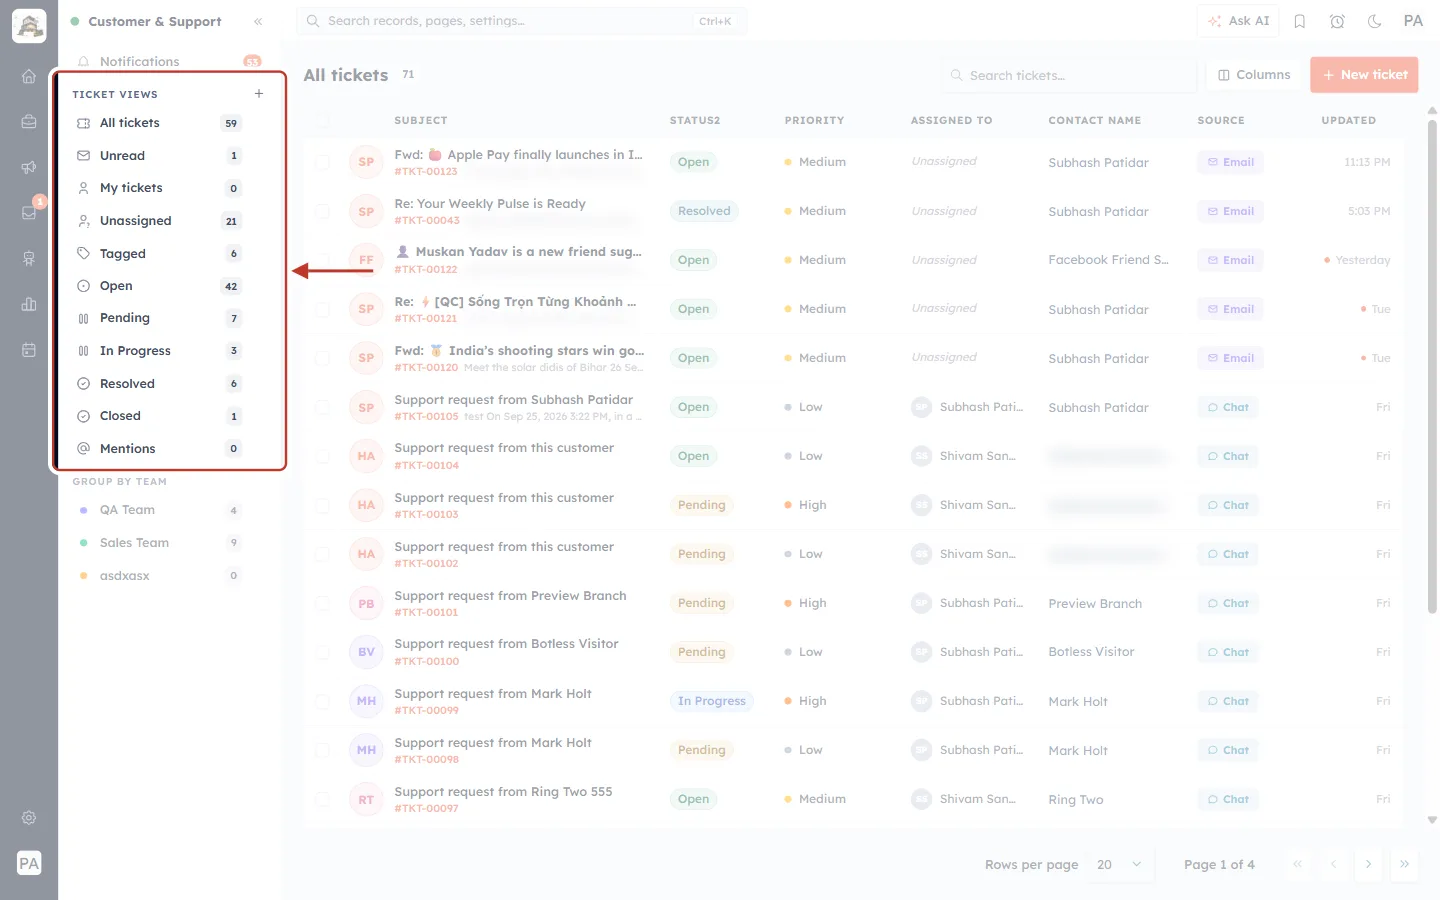
What this screenshot shows. The full list of built-in ticket views is ringed. Click any view to show its tickets on the right.
All tickets, Unread, My tickets, Unassigned, Tagged.
Open, Pending, In Progress, Resolved, Closed — one per status.
Mentions — notes where you were @mentioned.
| View | Shows | Typical use |
|---|---|---|
| All tickets | Every ticket you are allowed to see. | Searching, or a quick overview. |
| Unread | Tickets with new activity you have not opened. | Catching up after a break. |
| My tickets | Tickets assigned to you. | An agent’s daily to-do list. |
| Unassigned | Tickets nobody owns yet. | A team lead hands these out. |
| Tagged | Tickets with at least one tag. | Reviewing labelled work (refunds, bugs…). |
| Open … Closed | Tickets in that status. | Checking each stage of the lifecycle. |
| Mentions | Internal notes that @mention you. | Answering colleagues who need you. |
Step 3: All tickets#
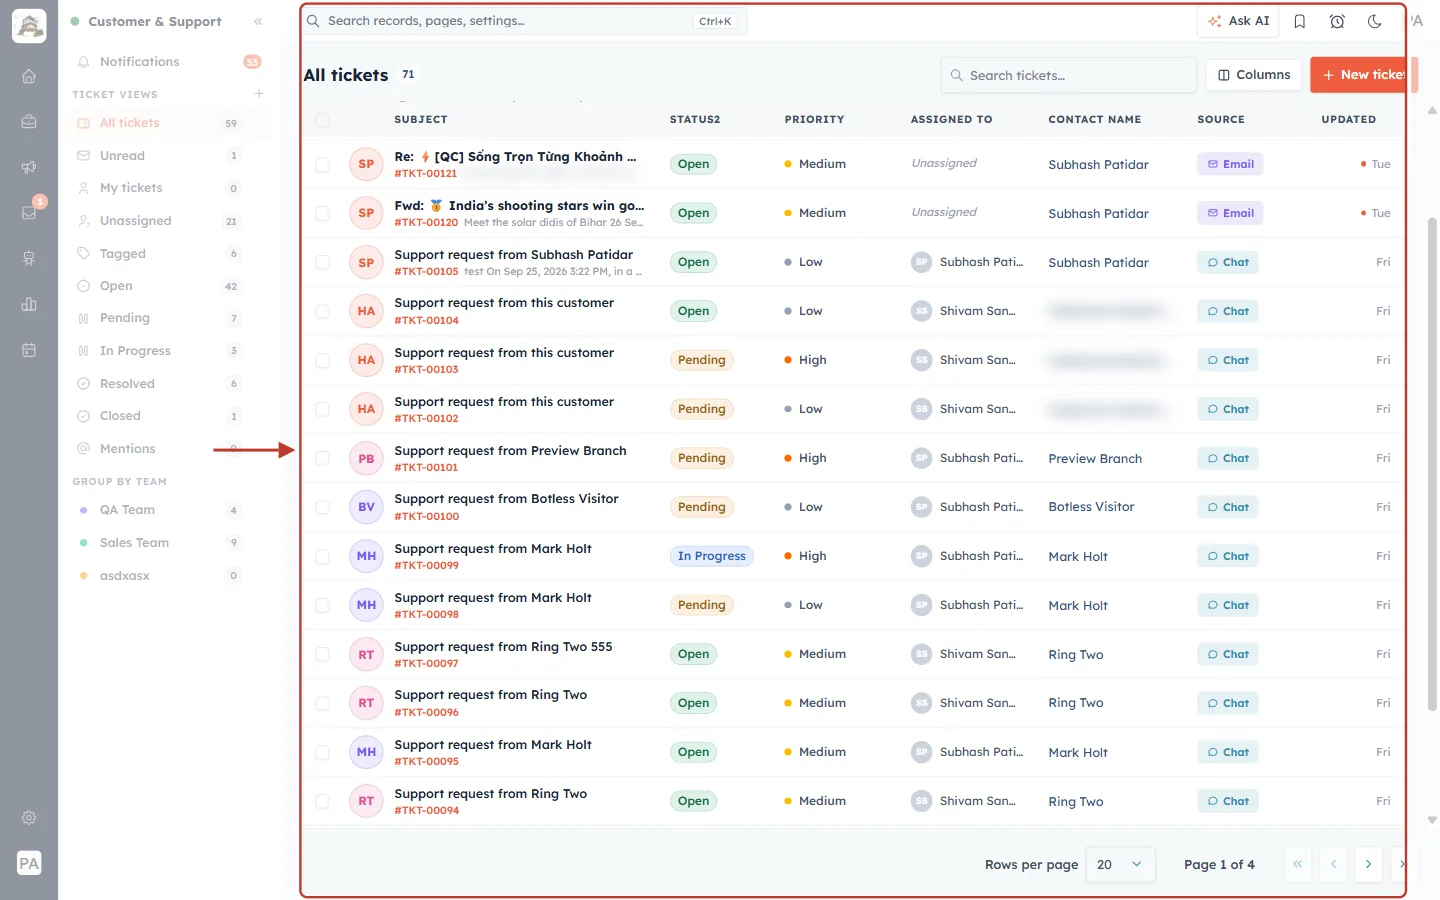
What this screenshot shows. The All tickets view. The list is ringed.
All tickets 71 — the view name and how many tickets it holds.
Each row: the contact’s initials, the subject with the ticket number in orange (#TKT-00123), status, priority, assigned to (Unassigned in grey if nobody), contact name, source (Email, Chat…) and when it was updated.
Rows per page and the page arrows at the bottom move through long lists.
Step 4: Unread#
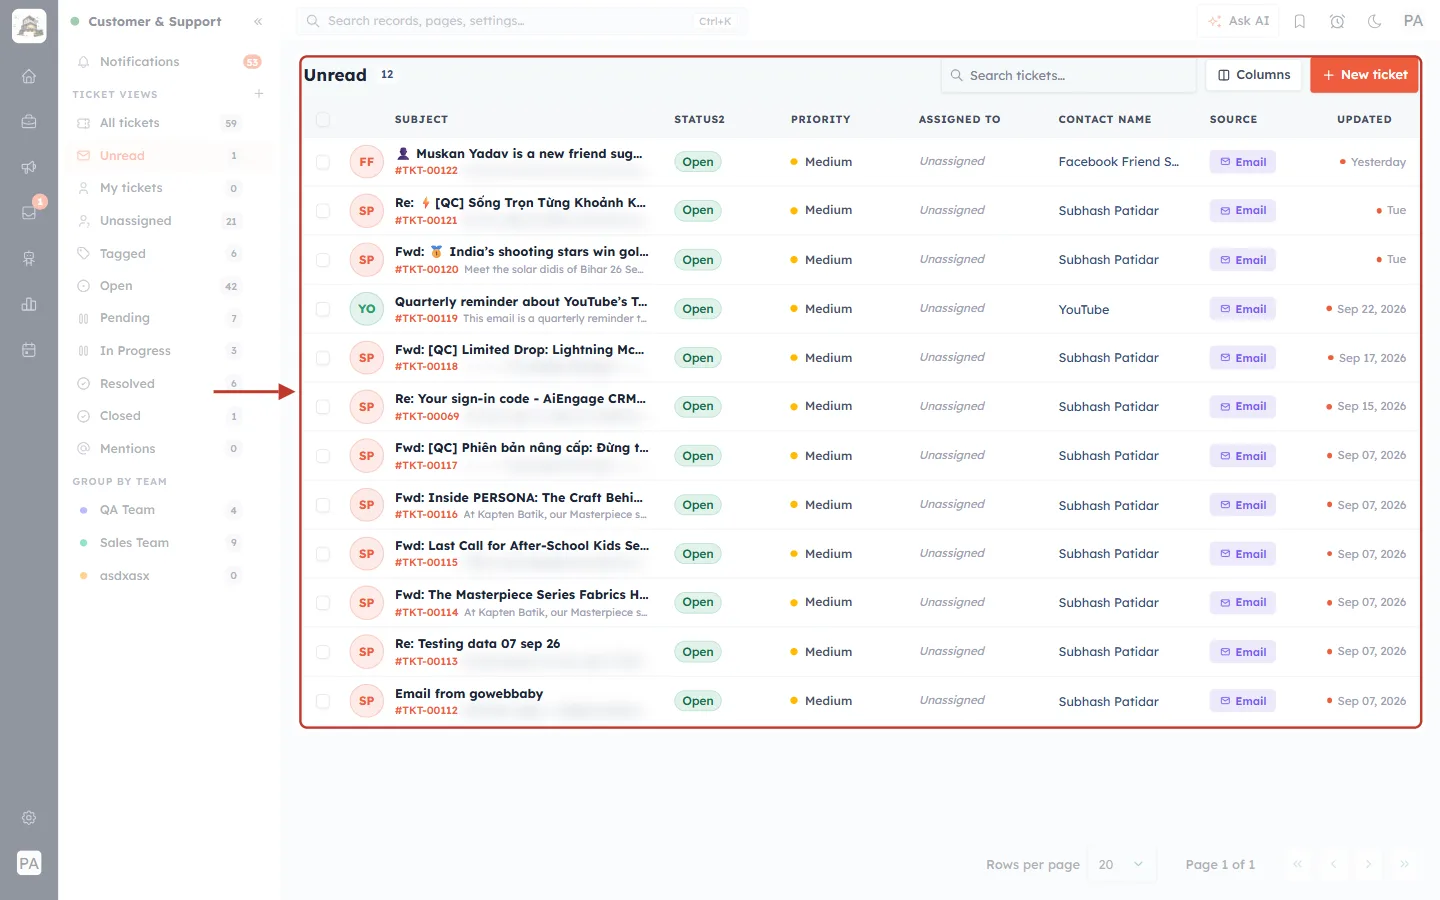
What this screenshot shows. The Unread view, with its list ringed.
Tickets with activity you have not opened yet — a new customer reply, a new ticket, a change by a colleague.
Open a ticket to read it; once it is read it no longer counts as unread.
Step 5: My tickets#
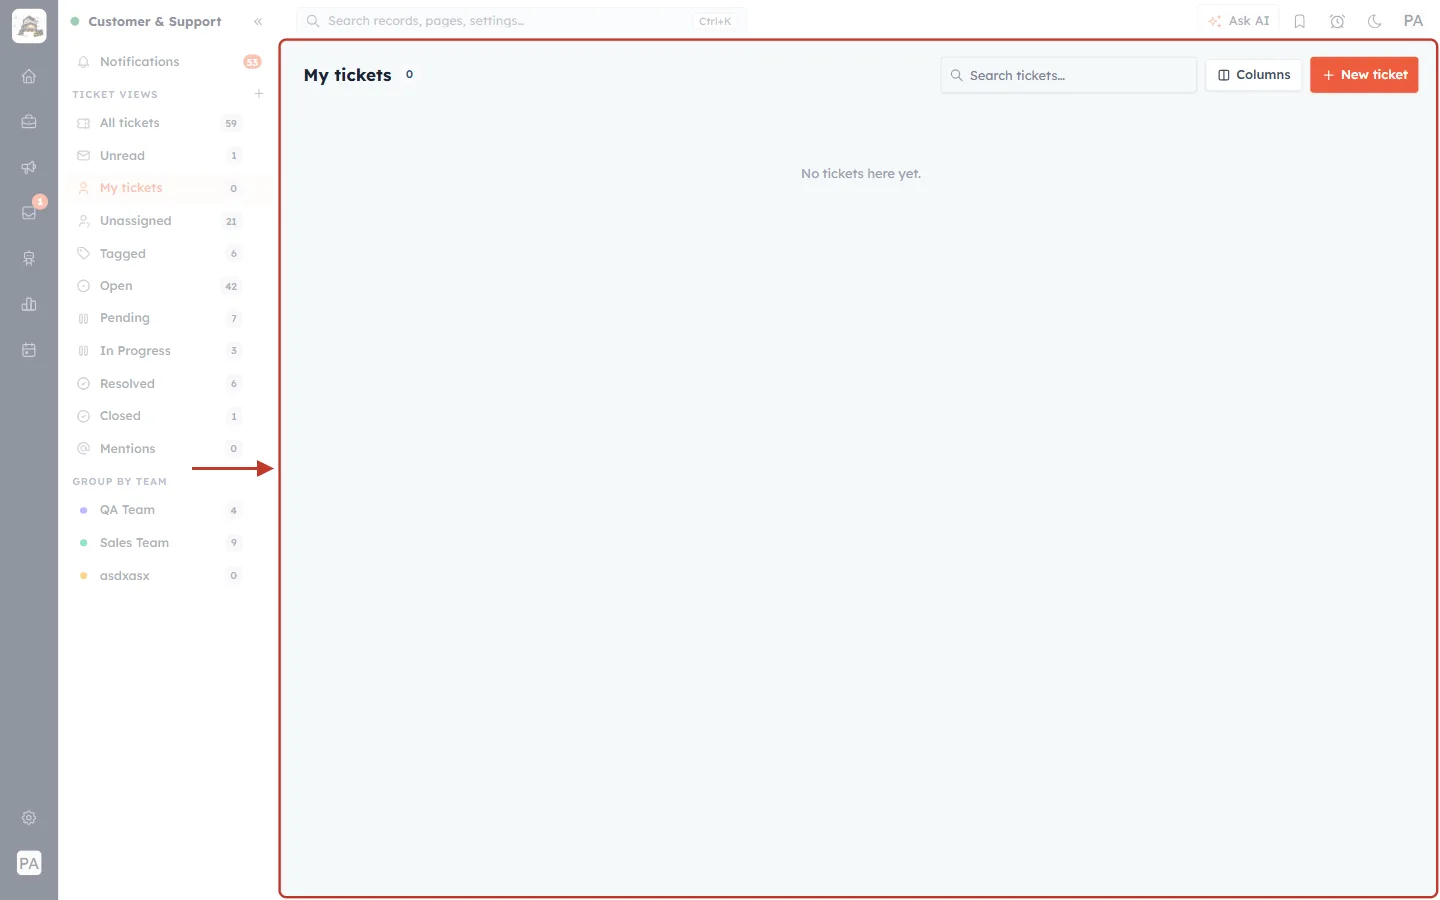
What this screenshot shows. The My tickets view, ringed. In this example nothing is assigned to the signed-in user, so it shows “No tickets here yet.”
Every ticket whose Assigned To is you appears here.
Start your day here, working from the highest priority down.
An empty list means nothing is waiting for you — check Unassigned for new work.
Step 6: Unassigned#
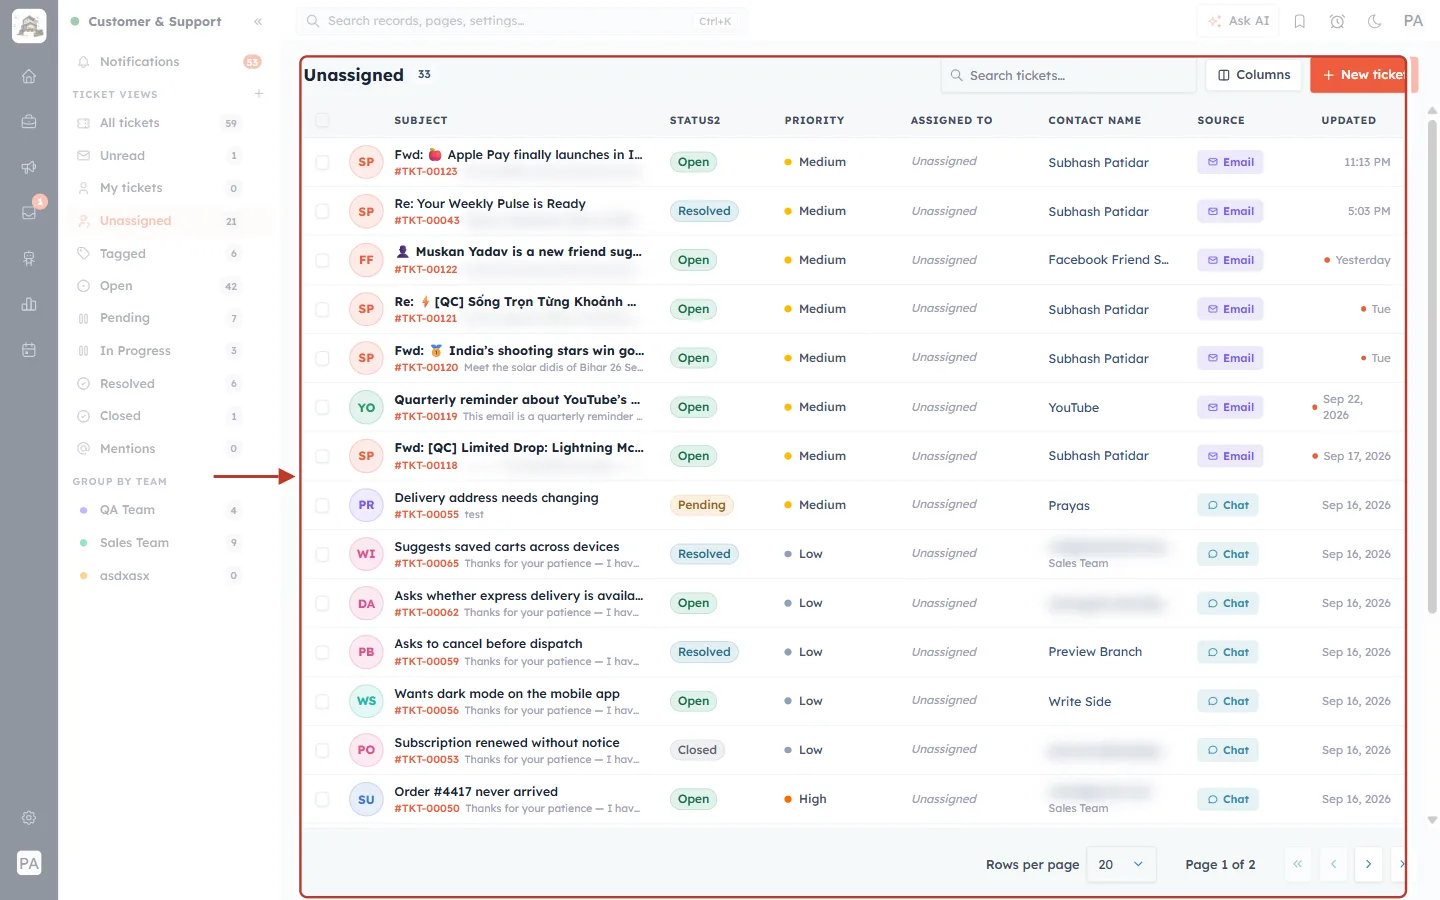
What this screenshot shows. The Unassigned view, with its list ringed.
Tickets nobody owns yet — the Assigned To column shows Unassigned.
A team lead (or the next free agent) should check this view often, open each ticket and assign it, so no customer is left waiting.
Step 7: Tagged#
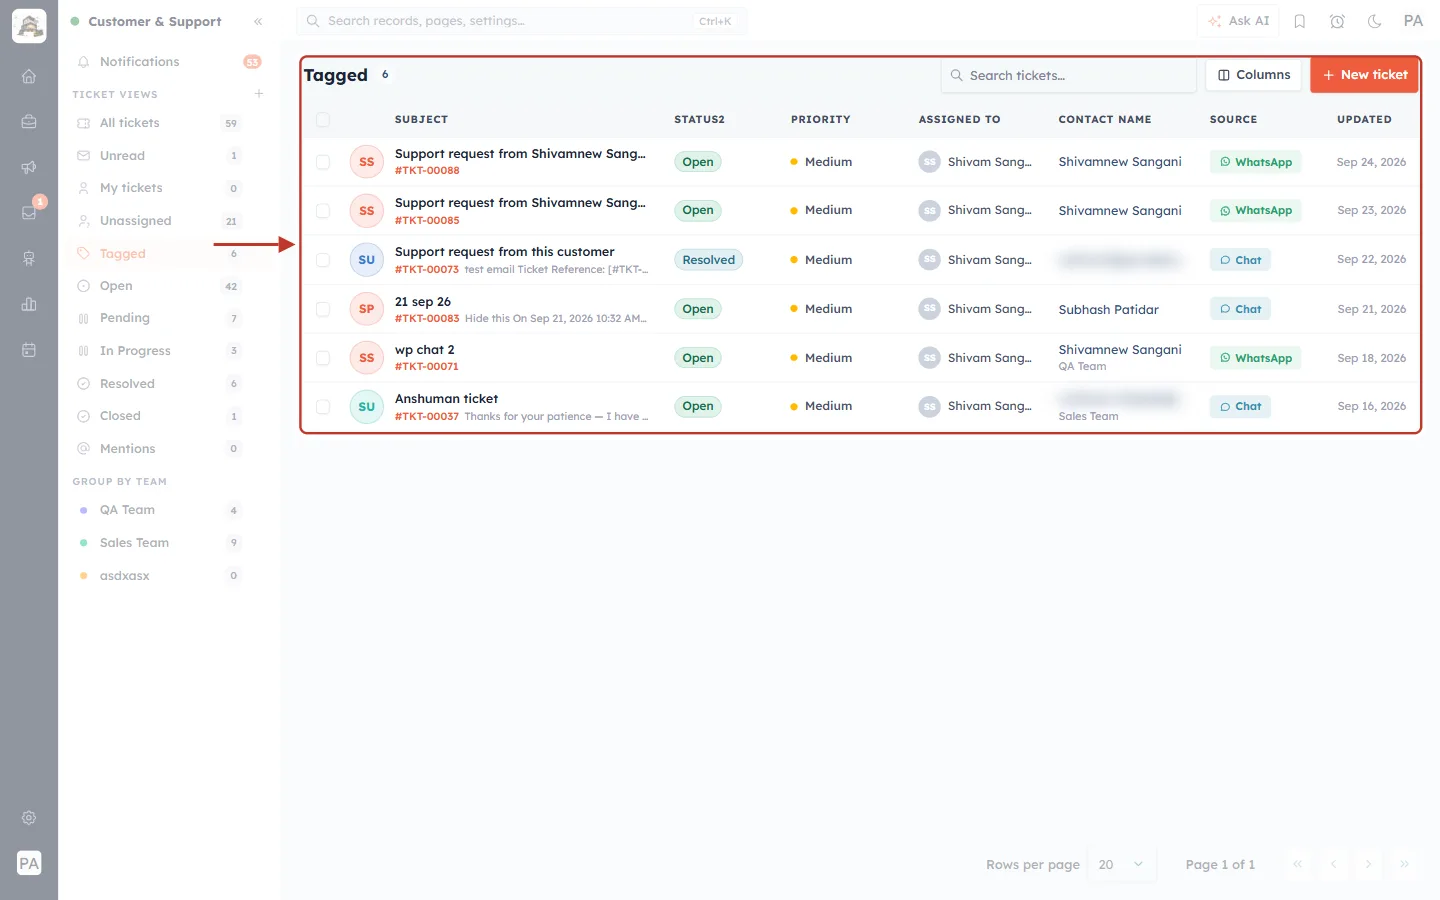
What this screenshot shows. The Tagged view, with its list ringed.
Tickets that carry at least one tag (tags are added in the ticket’s details panel).
Use tags for themes such as refund, bug or vip; build your own view to see a single tag (Part 5).
Step 8: The status views#
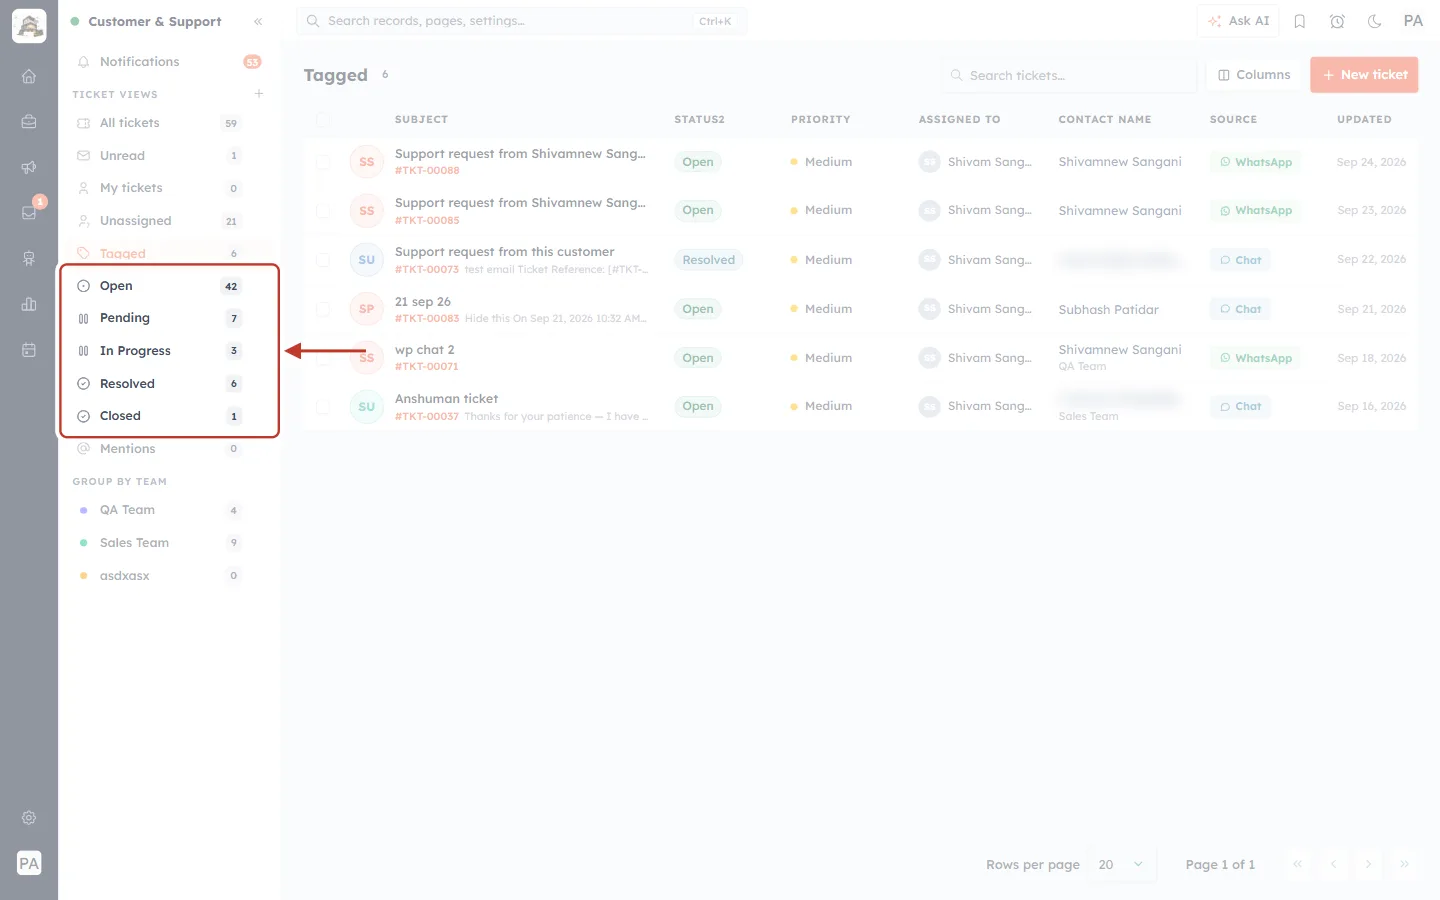
What this screenshot shows. The five status views are ringed: Open, Pending, In Progress, Resolved and Closed.
Each shows only the tickets in that status, with a count.
Read top to bottom they are the ticket lifecycle: a long Open list means new requests are waiting; a long Pending list means customers owe you a reply.
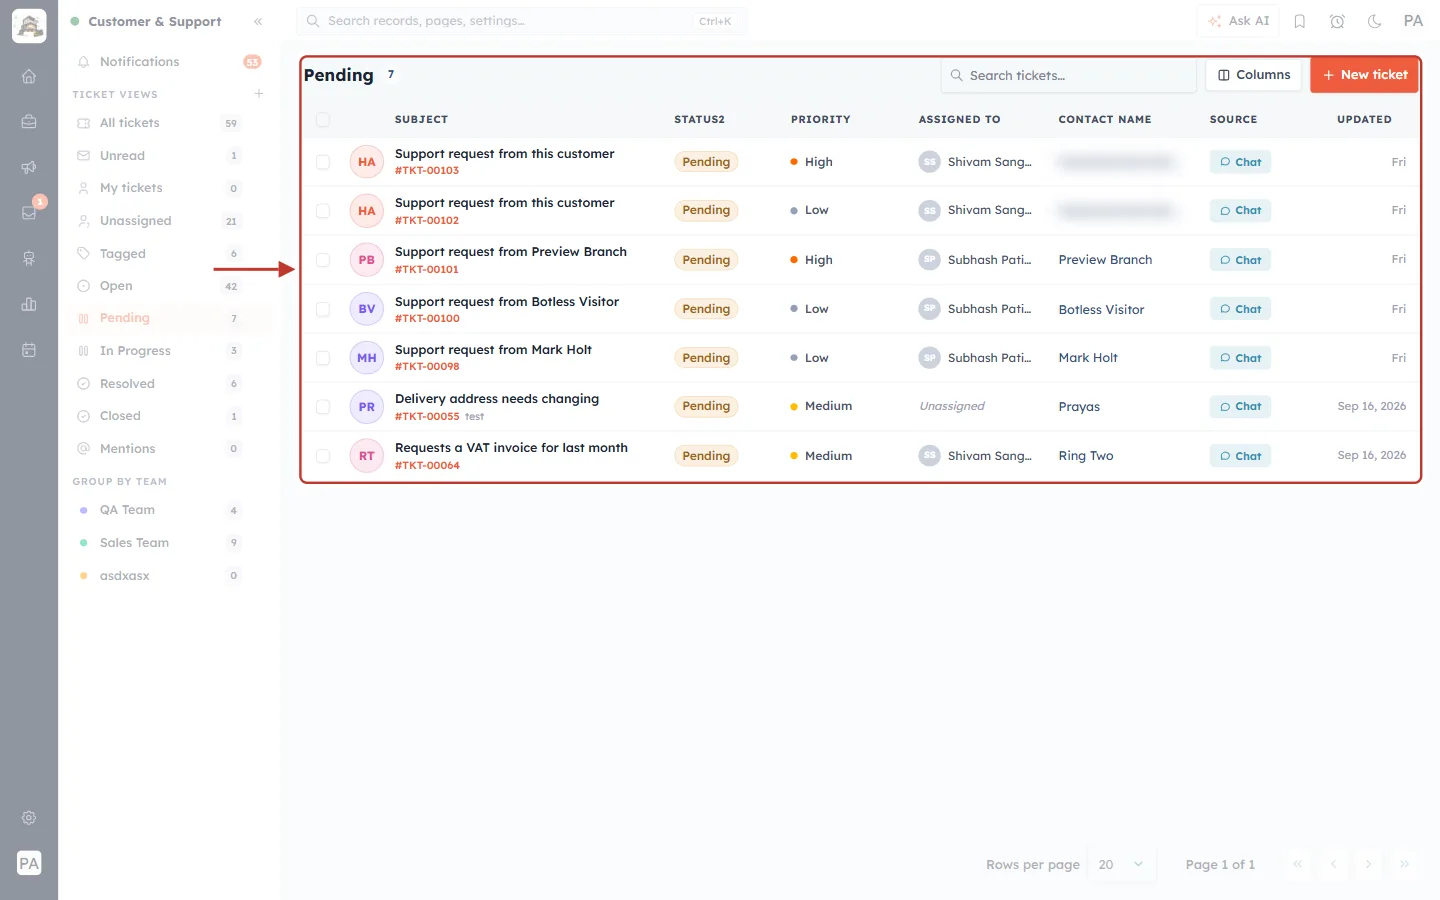
What this screenshot shows. The Pending view, with its list ringed. Every row has the amber Pending status.
Pending tickets are waiting — usually on the customer.
Check this view regularly: chase customers who have gone quiet, or resolve tickets that no longer need anything.
Step 9: Mentions#
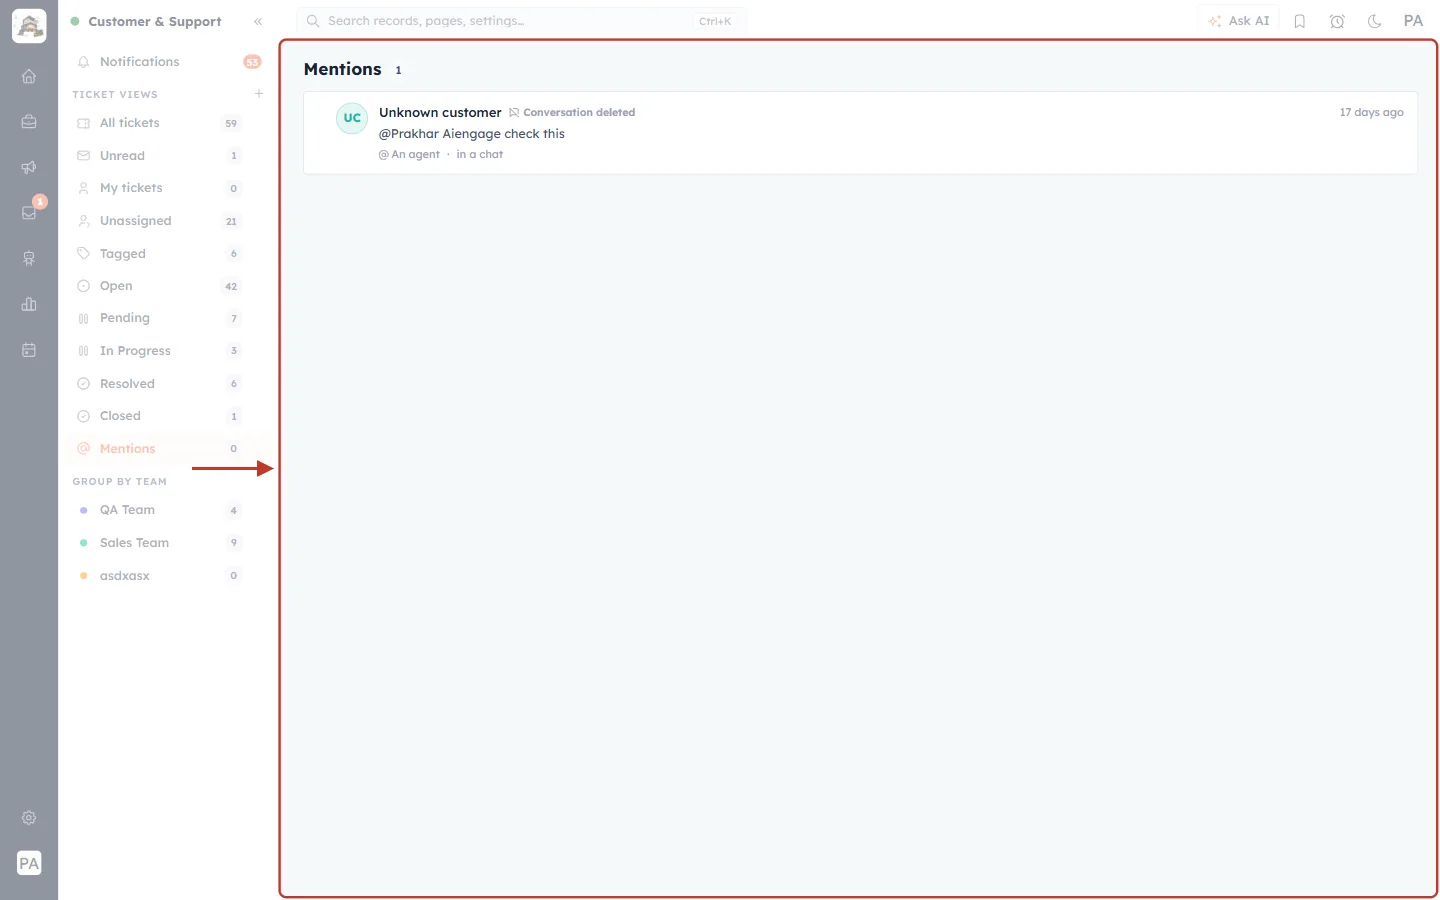
What this screenshot shows. The Mentions view, ringed. It lists notes where a colleague @mentioned you.
Each entry shows the customer (here Unknown customer), where it was (in a chat), who mentioned you, the note itself (@Prakhar Aiengage check this) and when.
Conversation deleted appears if the original conversation no longer exists.
Click an entry to open it and reply to your colleague.
Part 3 — Group by team#
Step 10: See each team’s tickets#
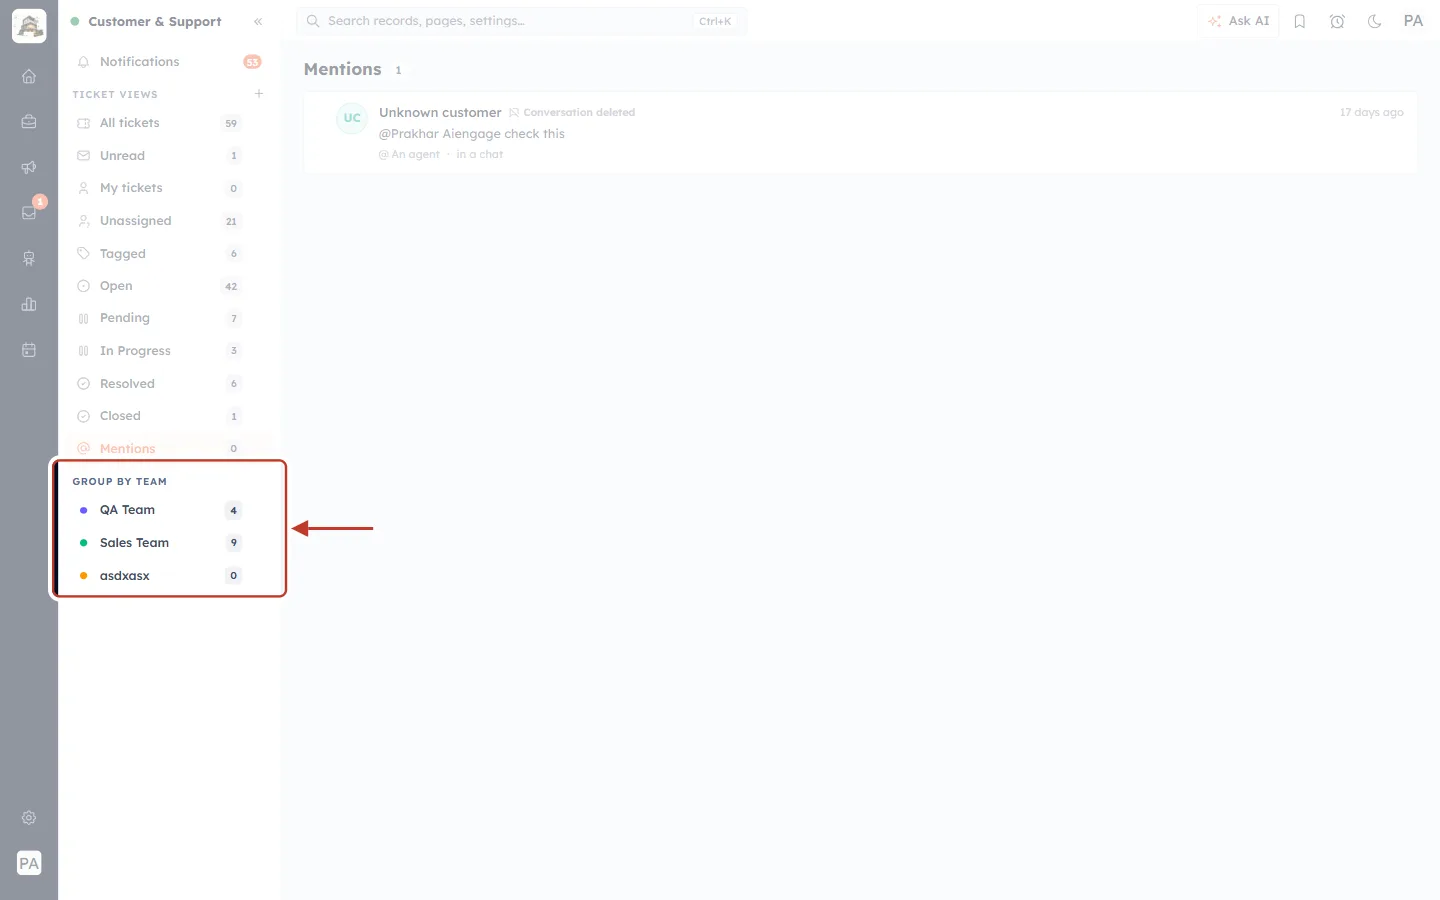
What this screenshot shows. The GROUP BY TEAM section of the sidebar is ringed.
One entry per team in your organisation — here QA Team, Sales Team and a third team — each with its colour dot and ticket count.
Teams are created under Settings → Teams — see Create Teams. Tickets belong to a team when they are routed or assigned to it.
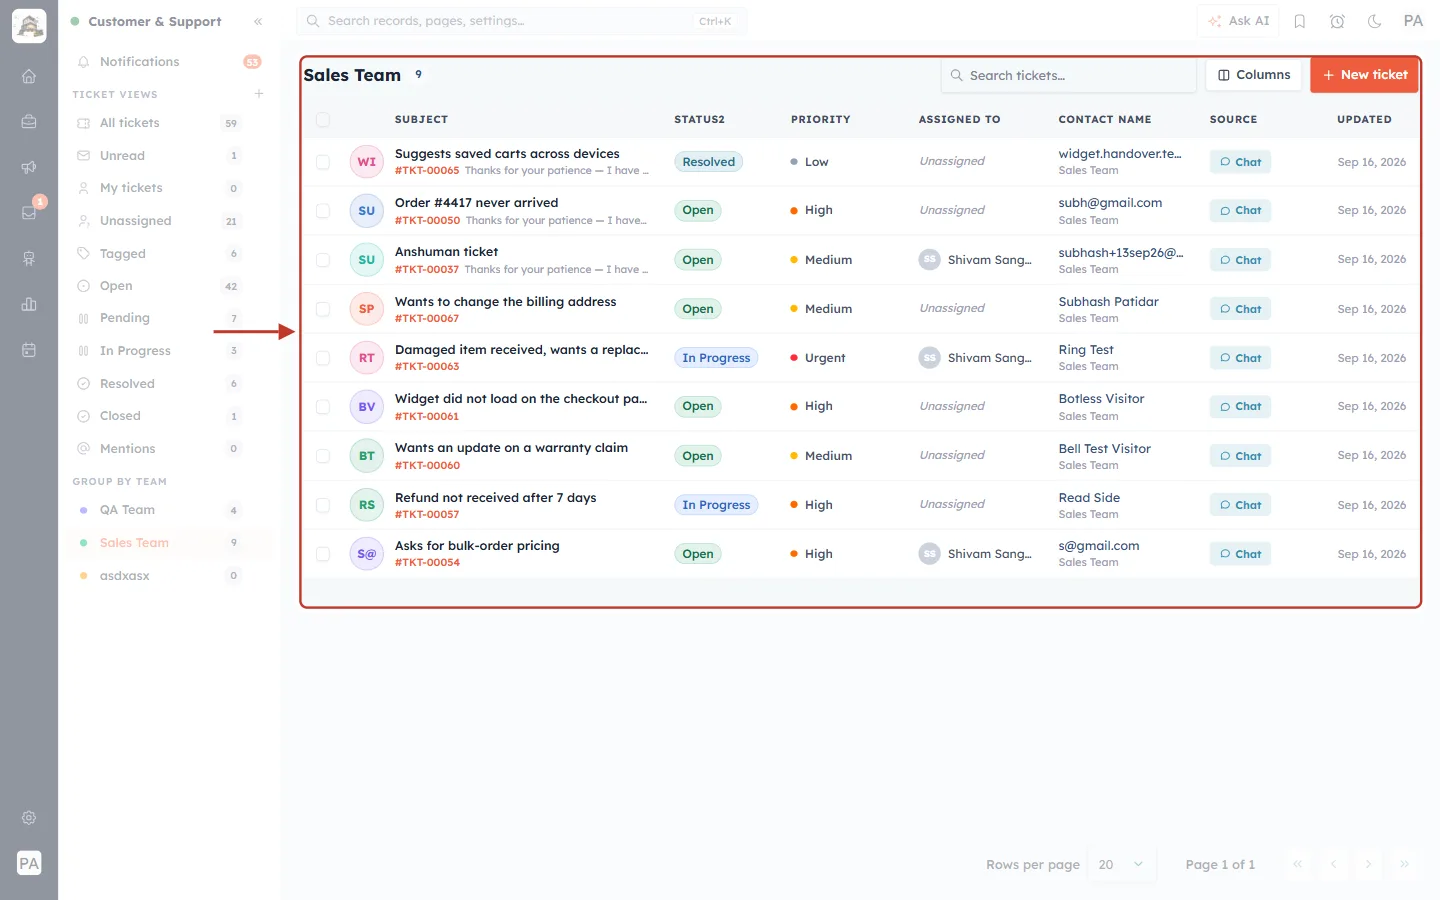
What this screenshot shows. The Sales Team group is open; its list is ringed.
Sales Team 9 — only that team’s tickets.
Under each contact name the team (Sales Team) is shown, so you can tell at a glance whose queue a ticket is in.
Team leads can use their team’s group as their daily list, just like My tickets.
Part 4 — Notifications#
Step 11: Open your notifications#
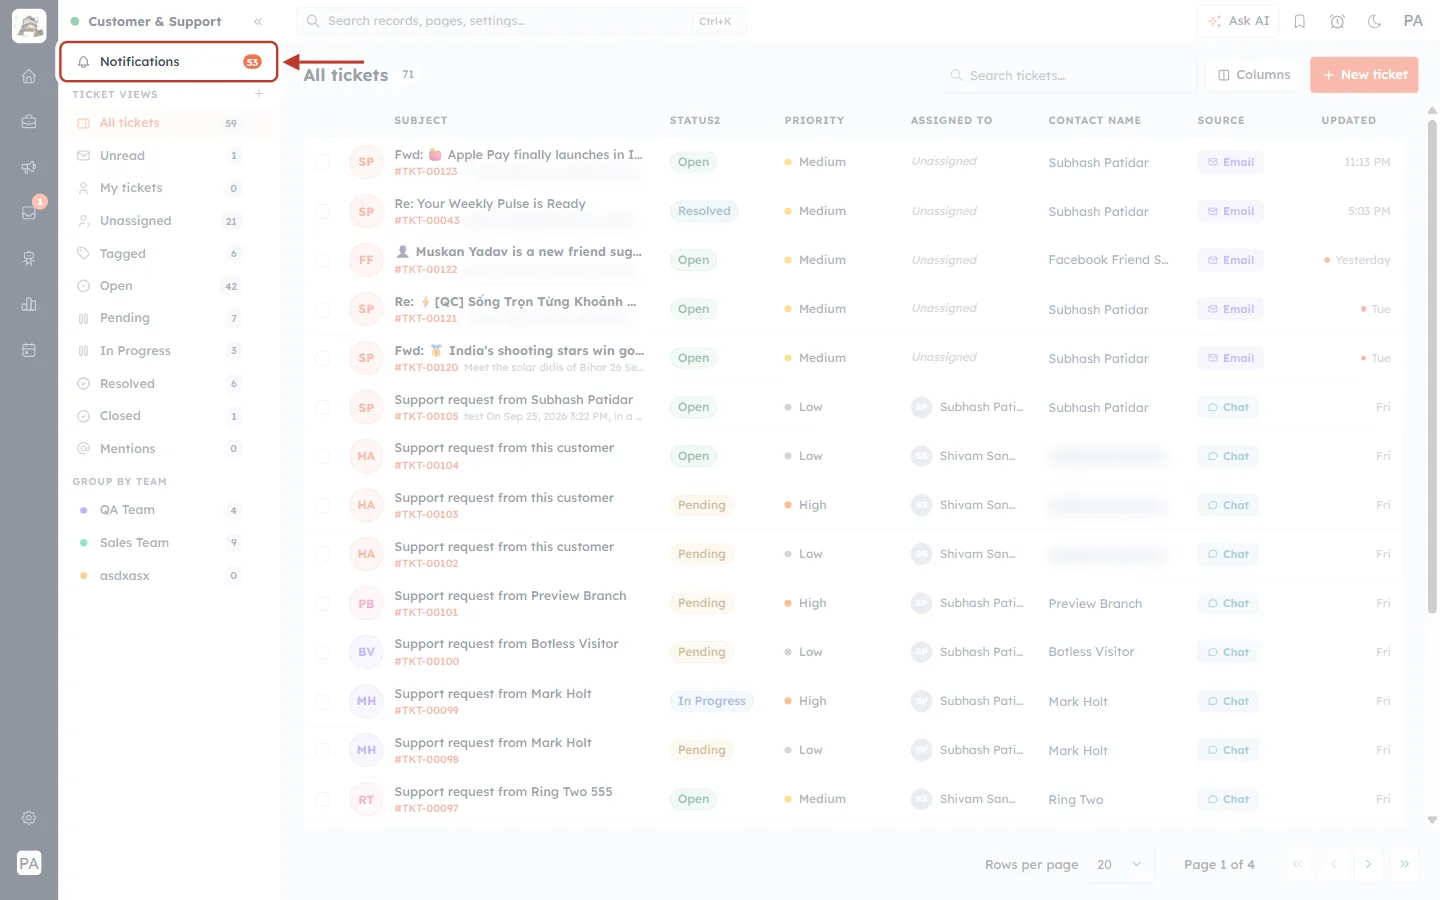
What this screenshot shows. Notifications, at the top of the sidebar, is ringed. The orange number is how many notifications you have not read.
Click it to open the notifications panel.
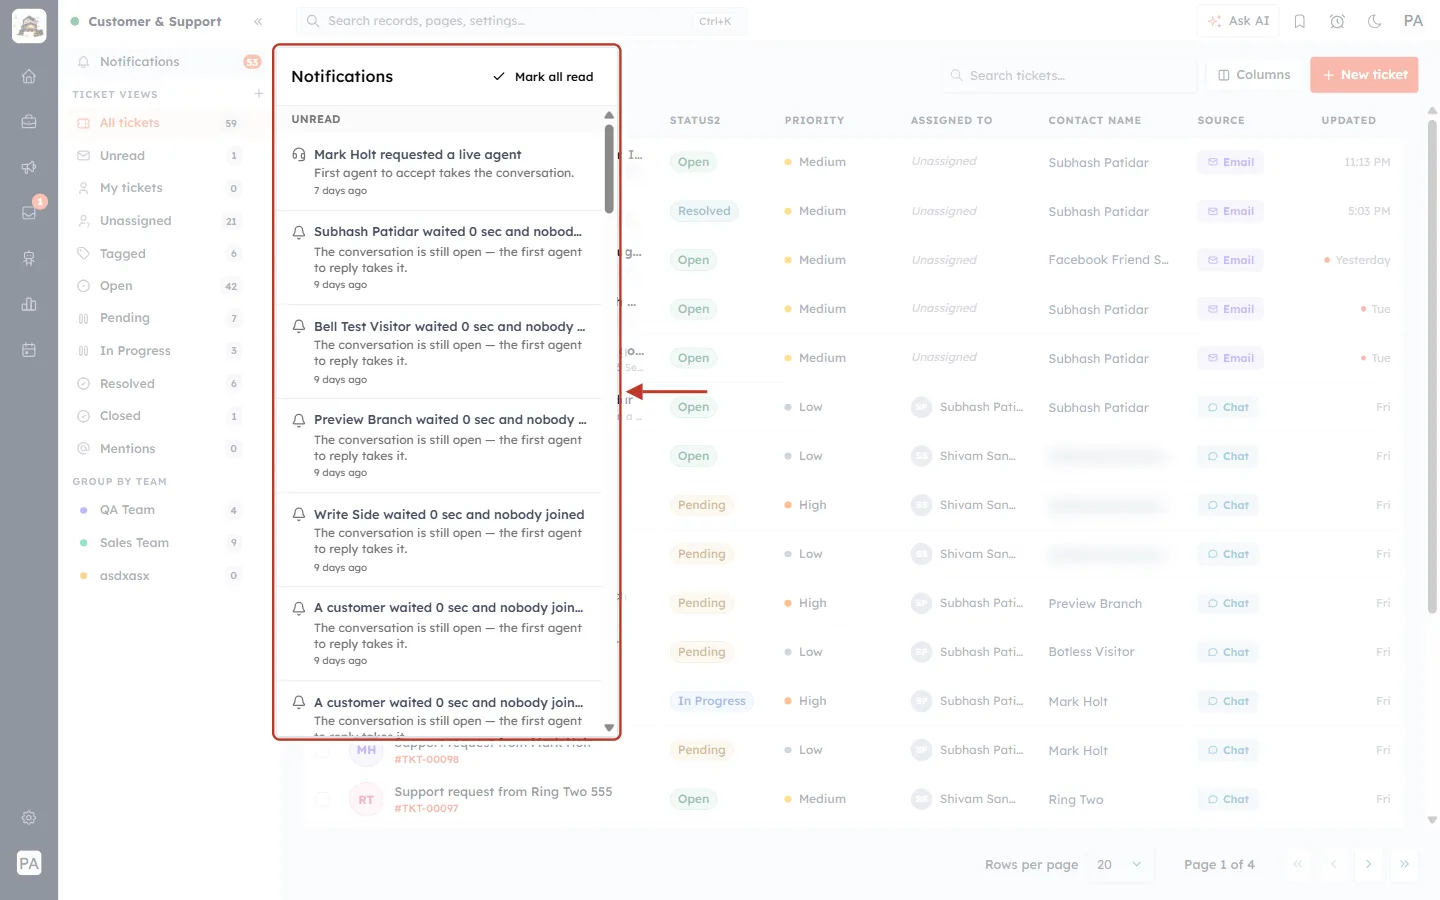
What this screenshot shows. The notifications panel is ringed. Unread notifications are listed under UNREAD, newest first.
… requested a live agent (headset icon) — “First agent to accept takes the conversation.” A website visitor asked for a person; open it quickly.
… waited … and nobody joined (bell icon) — a chat that was not answered in time. “The conversation is still open — the first agent to reply takes it.”
Each notification shows how long ago it happened. Click one to open the conversation or ticket.
Scroll the panel to see older notifications. When there are none you will see “You’re all caught up.”
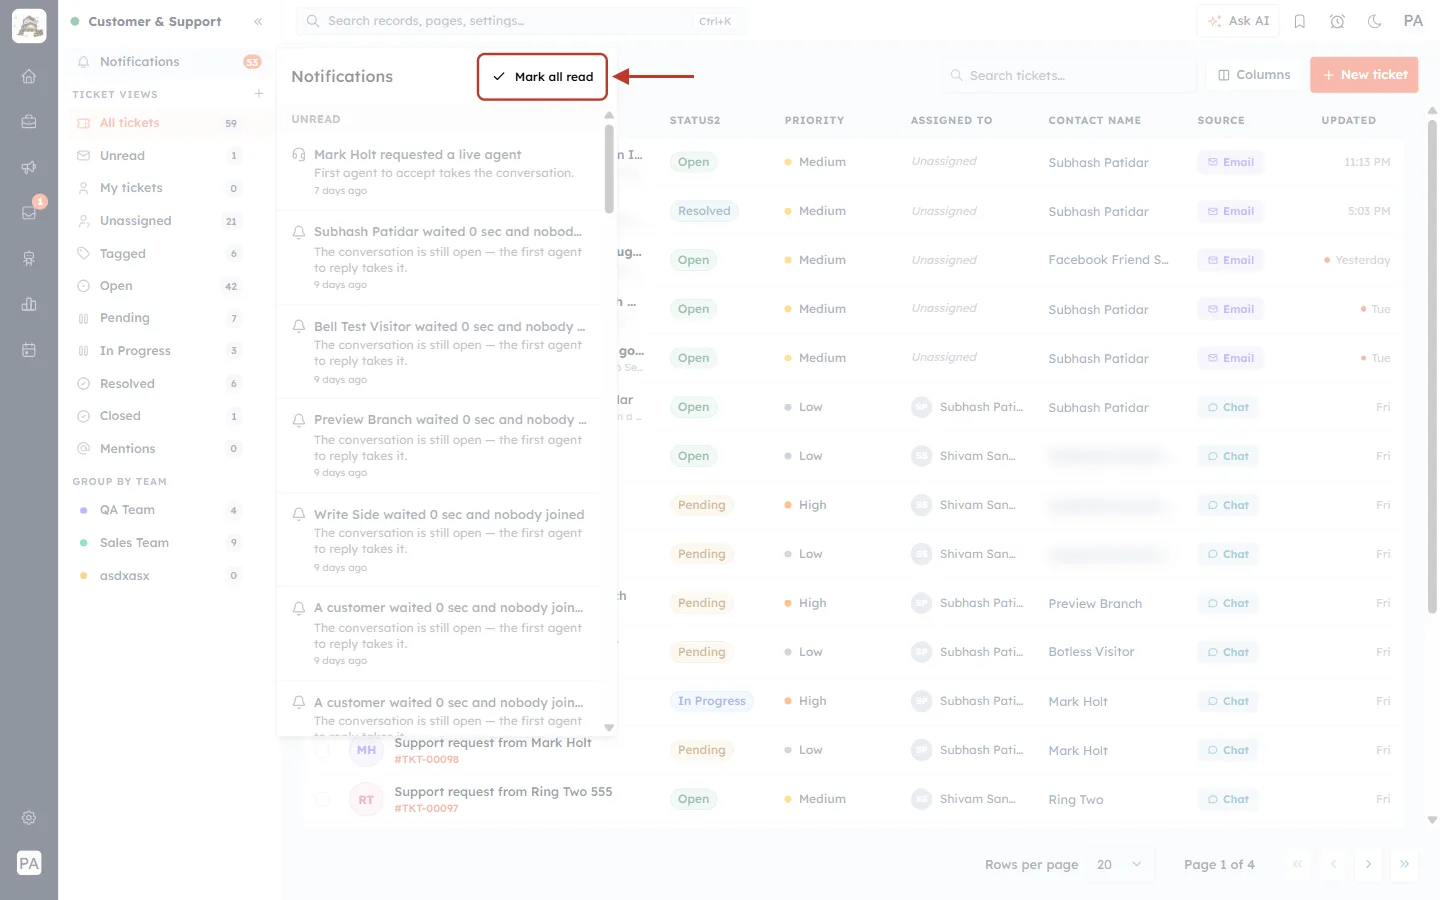
What this screenshot shows. ✓ Mark all read, at the top right of the panel, is ringed.
Marks every notification as read and clears the orange count.
Use it once you have dealt with the alerts — the chats and tickets themselves are not changed.
✅
Which ticket events notify an agent (new ticket, reassigned, customer replied…) is chosen by your admin — see Automatic Customer Emails, Part 4.
Part 5 — Shape the list#
Step 12: Choose which columns to show#
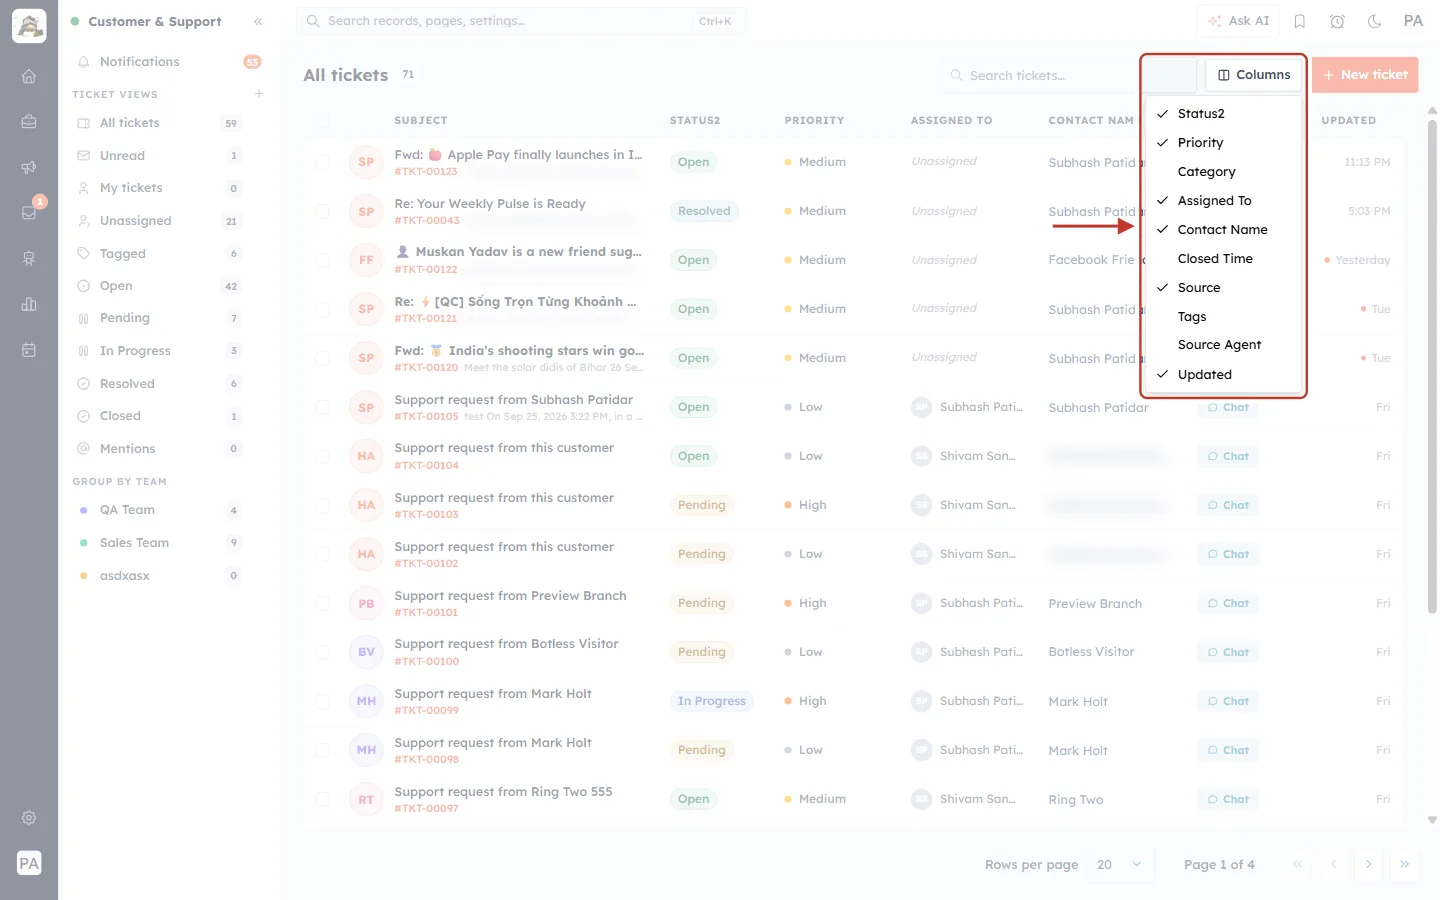
What this screenshot shows. The Columns button and its menu are ringed. Ticked columns are shown in the list.
Shown by default: Status, Priority, Assigned To, Contact Name, Source and Updated.
Also available: Category, Closed Time, Tags and Source Agent.
Click a name to show or hide it. Turn on Category and Tags if your team sorts work by topic; turn on Closed Time when reviewing finished tickets.
Step 13: Search the list#
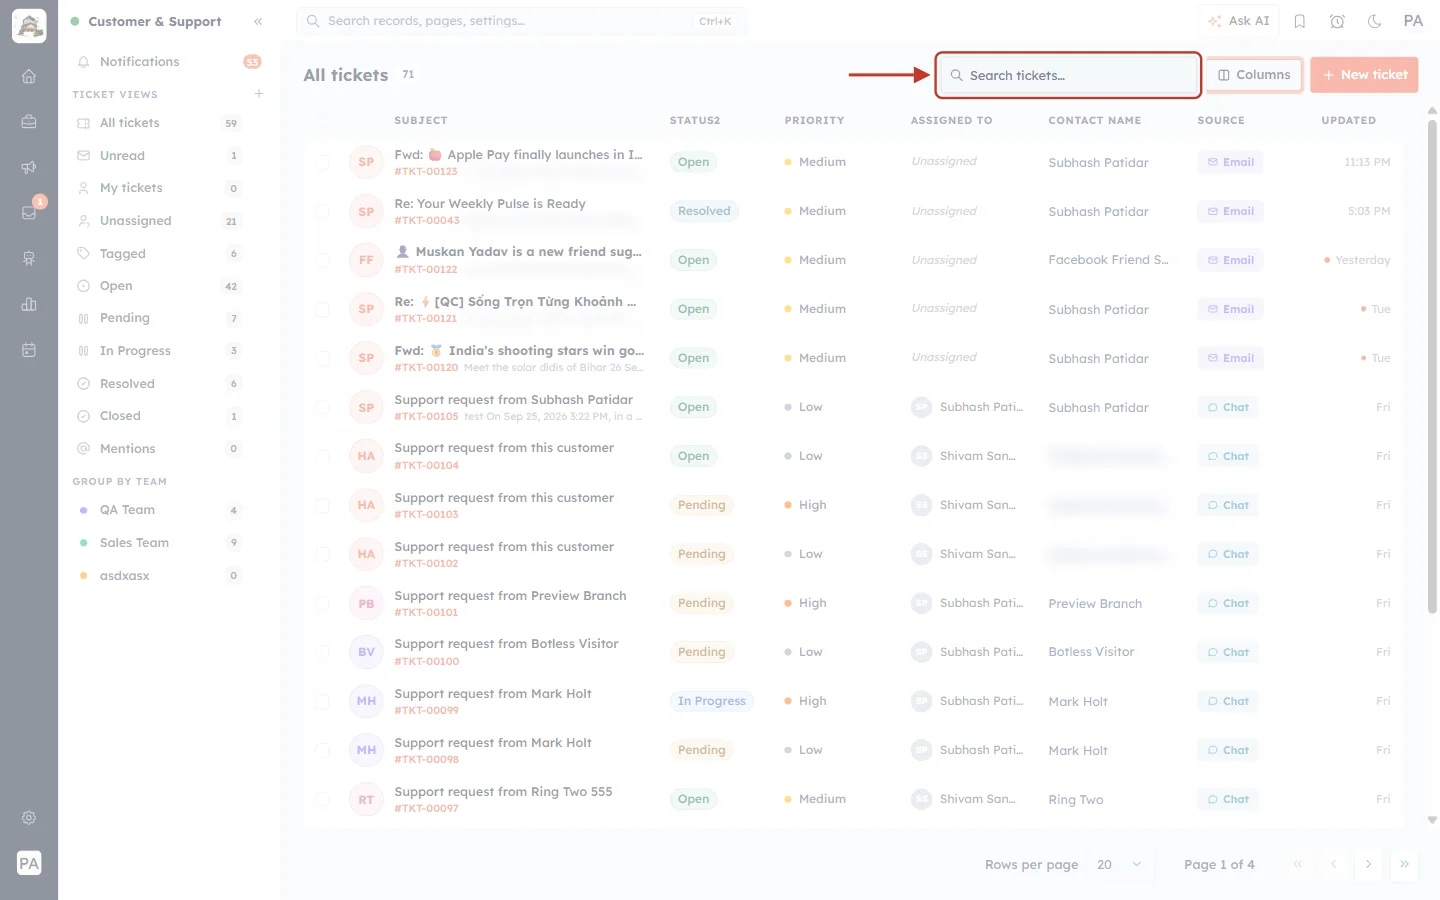
What this screenshot shows. The Search tickets… box above the list is ringed.
Type a word from the subject, a ticket number or a customer’s name to narrow the list.
To search across every ticket, switch to All tickets first.
Step 14: Create your own view#
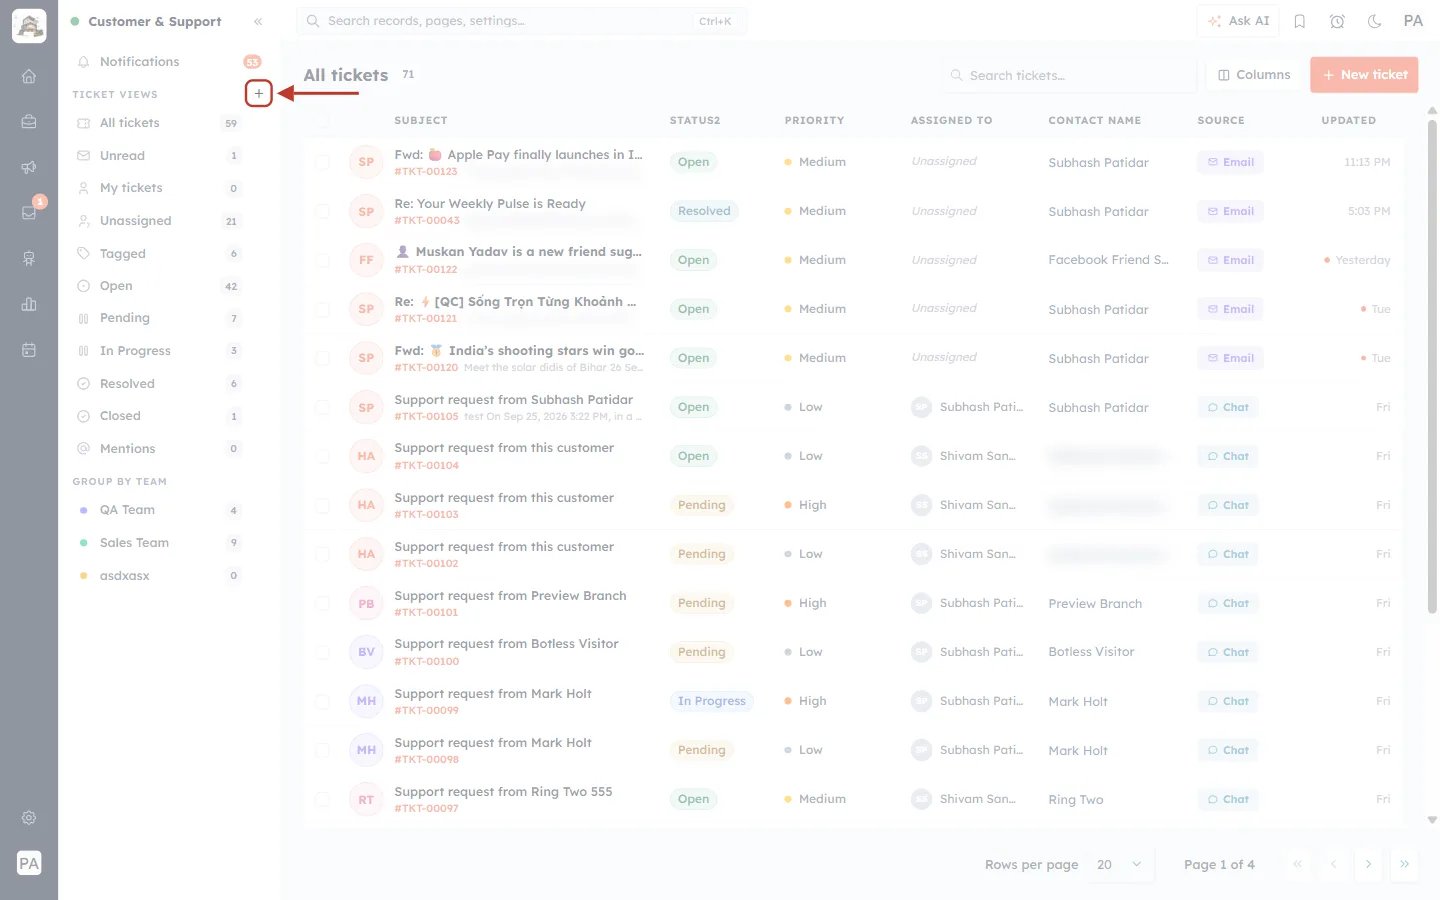
What this screenshot shows. The + next to TICKET VIEWS is ringed.
Click it when the built-in views are not specific enough — for example “urgent billing tickets” or “bugs assigned to anyone in QA”.
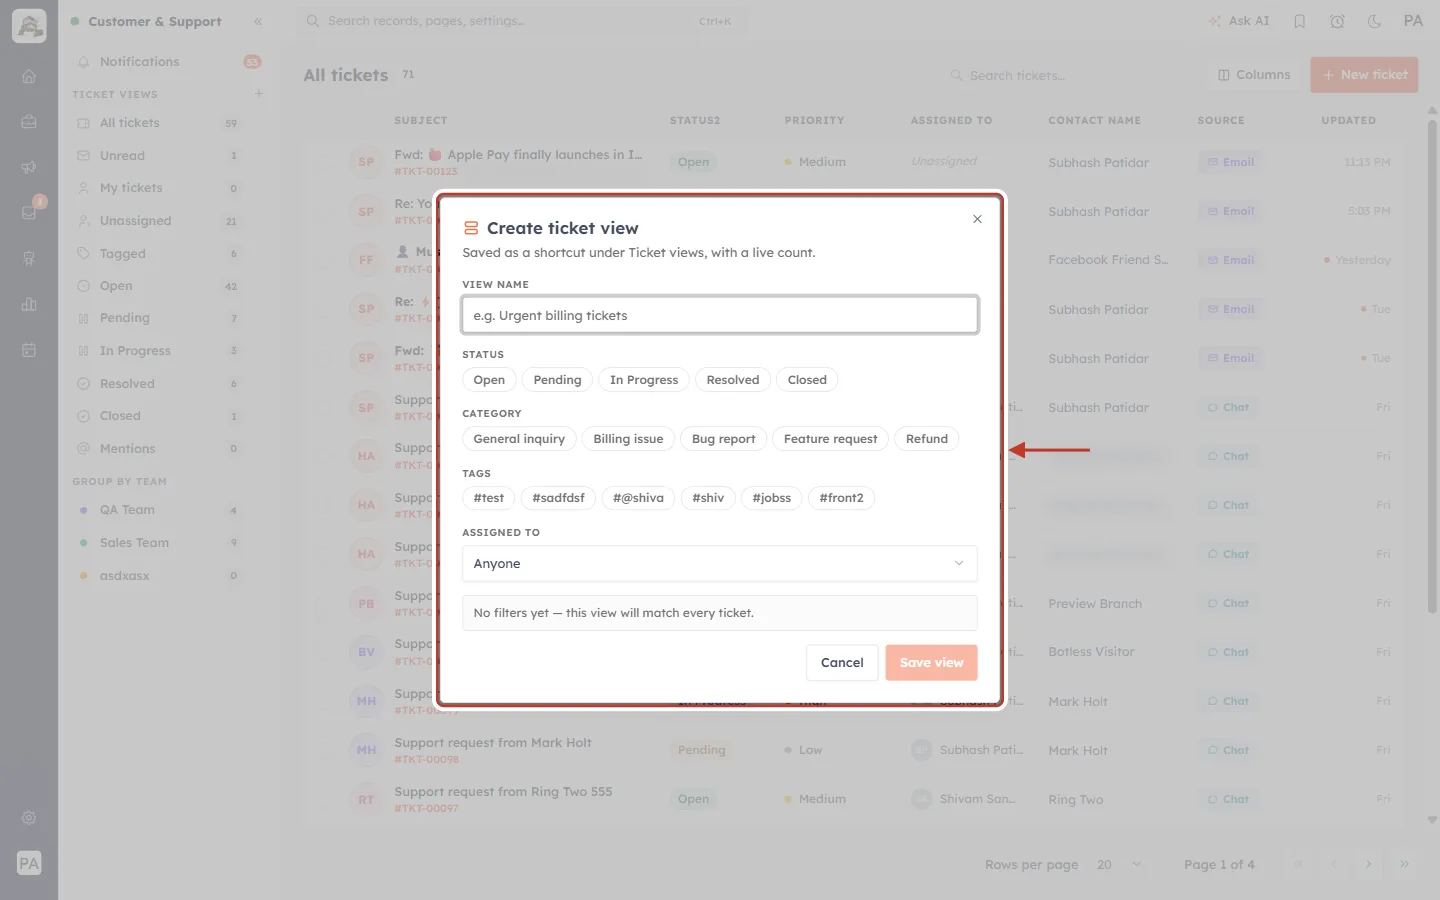
What this screenshot shows. The Create ticket view form is ringed. “Saved as a shortcut under Ticket views, with a live count.”
VIEW NAME — for example Urgent billing tickets.
STATUS, CATEGORY and TAGS — click any chips to filter by them (for example Open + Billing issue).
ASSIGNED TO — Anyone, or a specific person.
“No filters yet — this view will match every ticket.” changes to a summary as you choose filters.
Save view adds it to the sidebar; Cancel closes without saving. Your own views can be changed later with Edit view.
A simple daily routine#
Check Notifications for live-agent requests and missed chats.
Work through My tickets, highest priority first.
Team leads: empty Unassigned by assigning every ticket.
Answer anything in Mentions.
Before you finish: review Pending and resolve or chase.
Troubleshooting#
The count next to a view does not match the list. Sidebar counts can lag behind. Use Refresh counts or reload the page.
My tickets is empty but I know I have work. The tickets may be assigned to your team rather than to you — check your team under Group by team, or Unassigned.
A team is missing from Group by team. Teams are managed under Settings → Teams. Ask your admin to add you to the team.
I cannot find a ticket. Switch to All tickets and search by ticket number. If it still does not appear, your profile may not allow you to see it.
The notification count does not go down. Open the notifications and use Mark all read.
Previous and next#
Next: Create a Ticket Manually: Log Phone, Email & Walk-In Requests as Support Tickets (Step-by-Step)
Related#
Was this article helpful?
Ready to implement this?
OpenAI Engage and apply what you just learned to your own workspace.
Open AI Engage CRM