Loading…


KnowledgeBase
Create and Manage Email Templates for Your Team
What are Email Templates?#
Email templates are reusable email designs your team can select when building a campaign. Instead of designing a new email from scratch every time, you save branded layouts — headers, footers, colour schemes, button styles — and reuse them across campaigns.
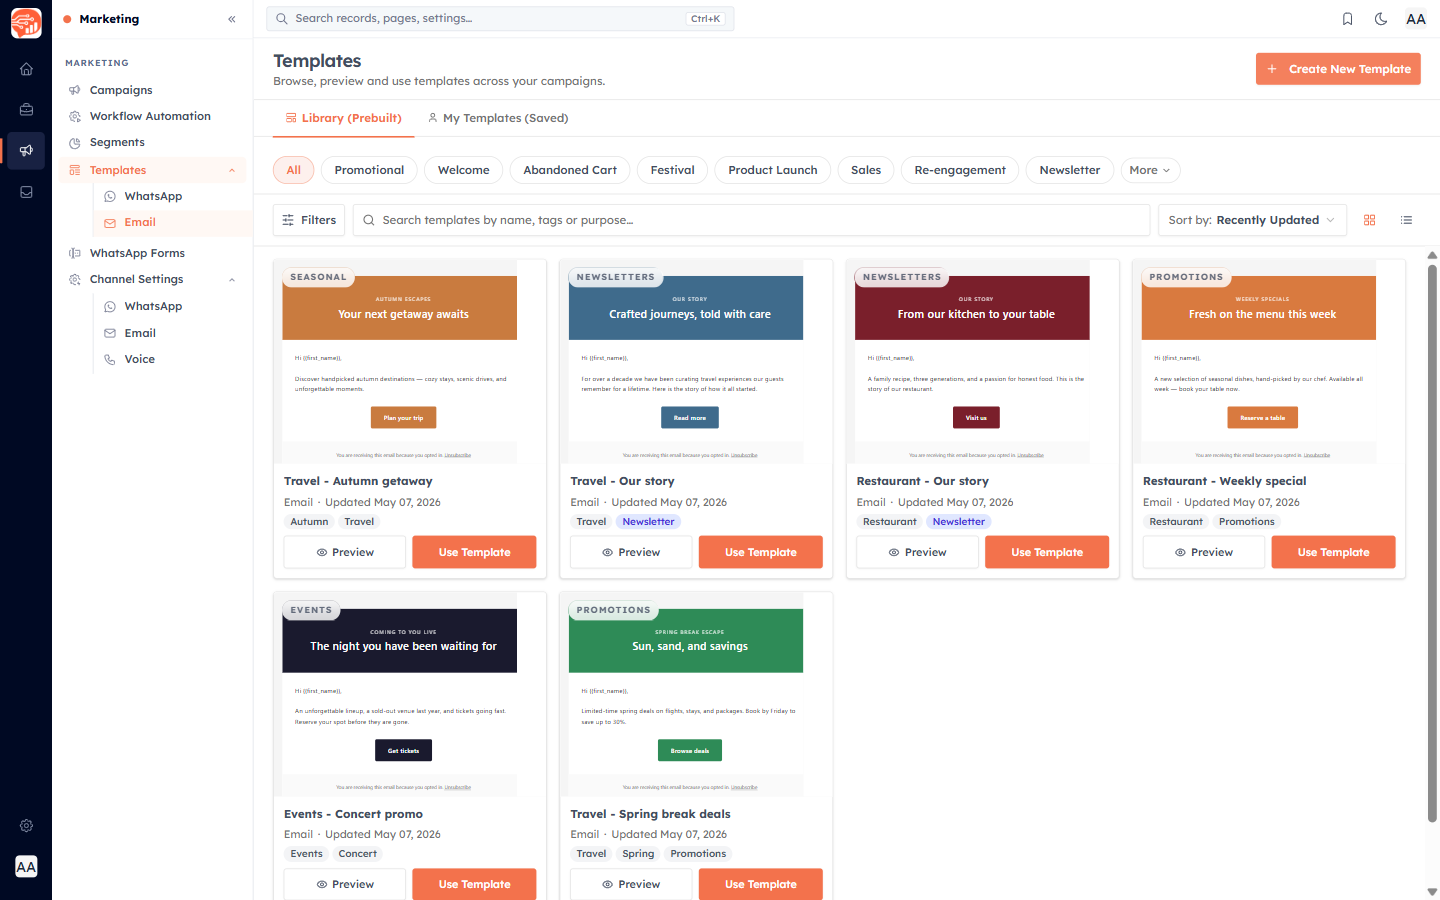
Templates are organised by category — for example Promotional, Welcome, Newsletter, Product Launch, Sales, Re-engagement, Festival, Seasonal, and Transactional — and your team can add custom categories too.
The prebuilt library#
AI Engage CRM ships with a prebuilt template library — professionally designed emails organised by category and season. Browse the library and clone any template to customise it for your brand. This is the fastest way to start — you get a polished design in seconds and only need to update the copy, images, and colours.
💡
Use the category to keep your library organised — filter the templates list by category to quickly find the right starting point.
Step 1 — Open Email Templates#
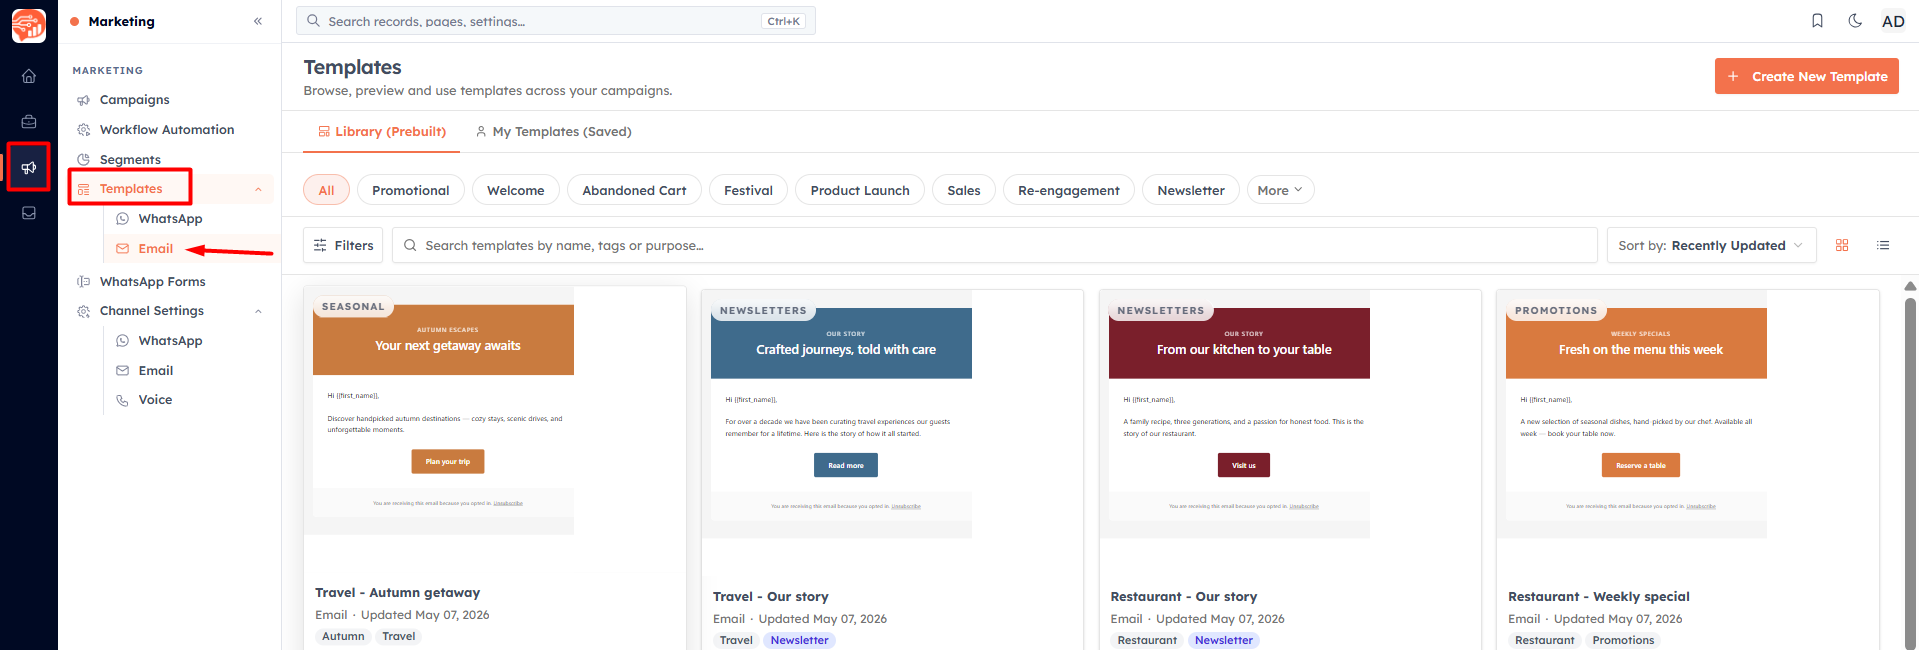
Navigate to Settings → Email → Templates or click Templates in the marketing navigation. The template gallery shows all your saved templates alongside the prebuilt library.
Step 2 — Create a new template#
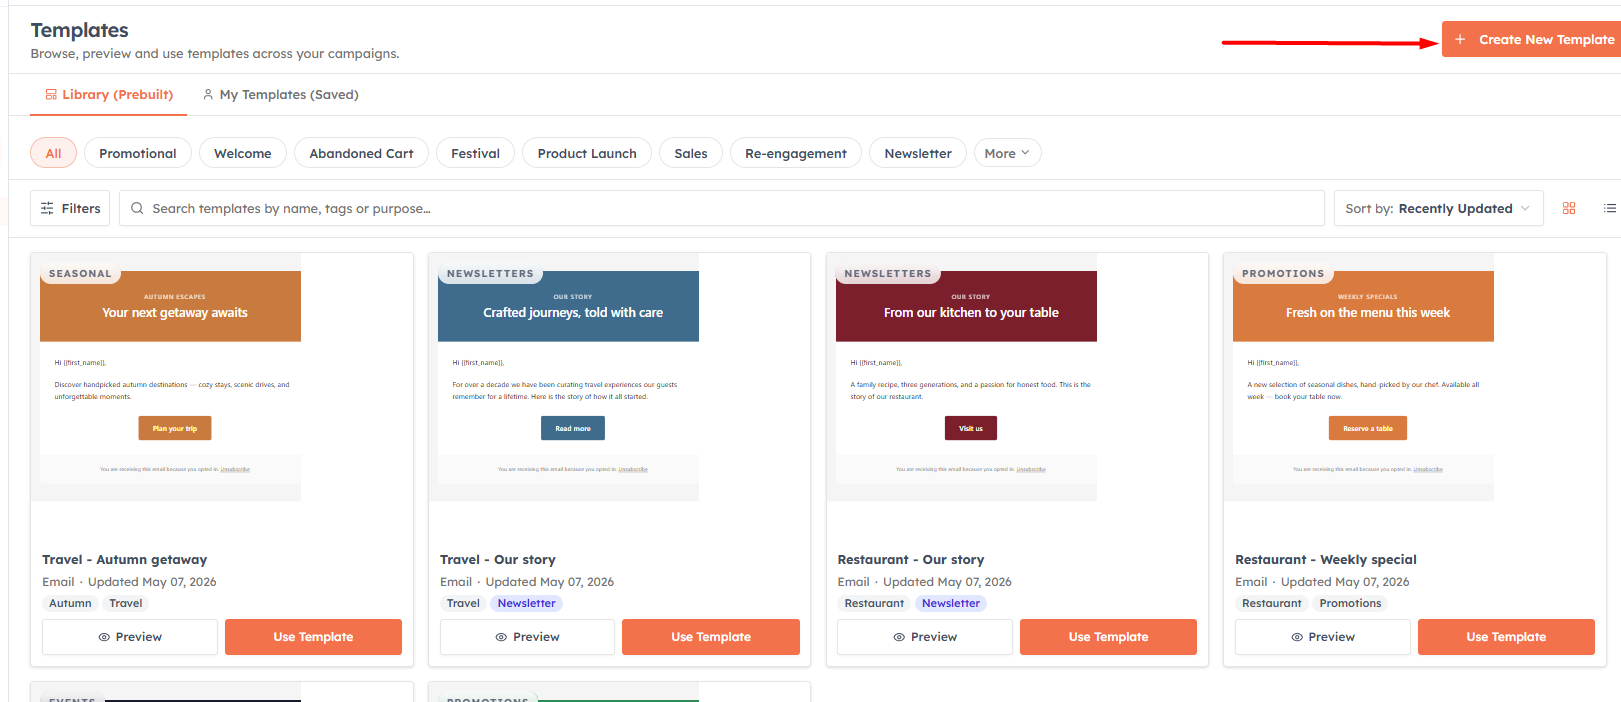
Click + Create New Template.
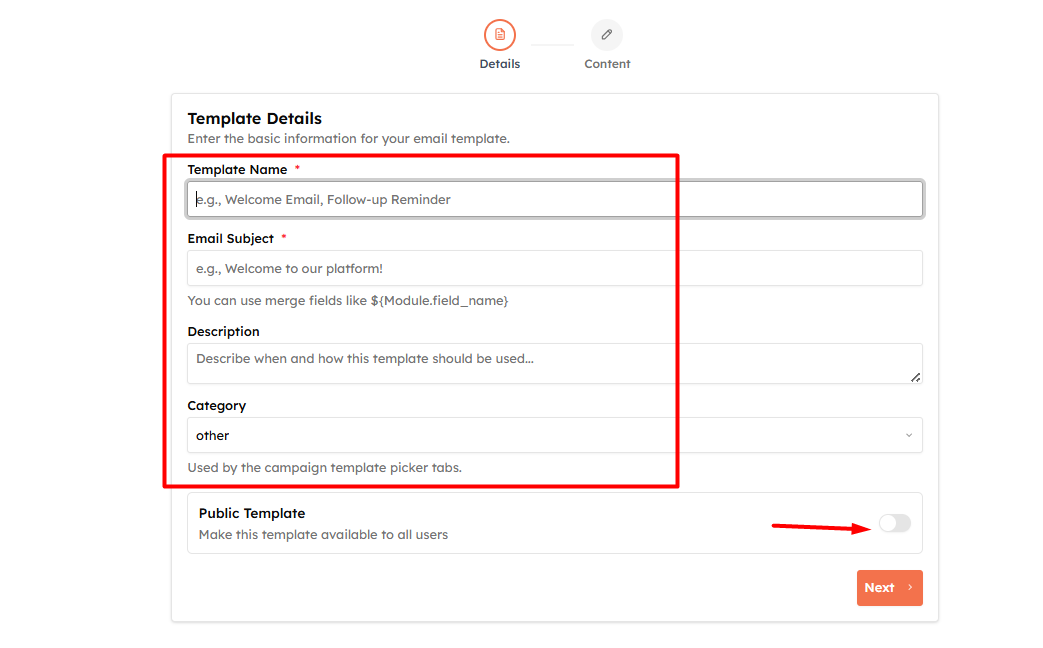
Fill in the template details:
Name — internal name visible only to your team (e.g., Monthly Newsletter — Base Layout)
Subject — default subject line for campaigns using this template (can be overridden per campaign)
Description — optional note about when to use this template
Category — pick from the available categories (e.g. Promotional, Newsletter, Sales, Seasonal, Transactional), or add your own
Public template - Enable this option to make the template available to all users.
Step 3 — Design in the email editor#
After saving the details, the full drag-and-drop email editor opens.
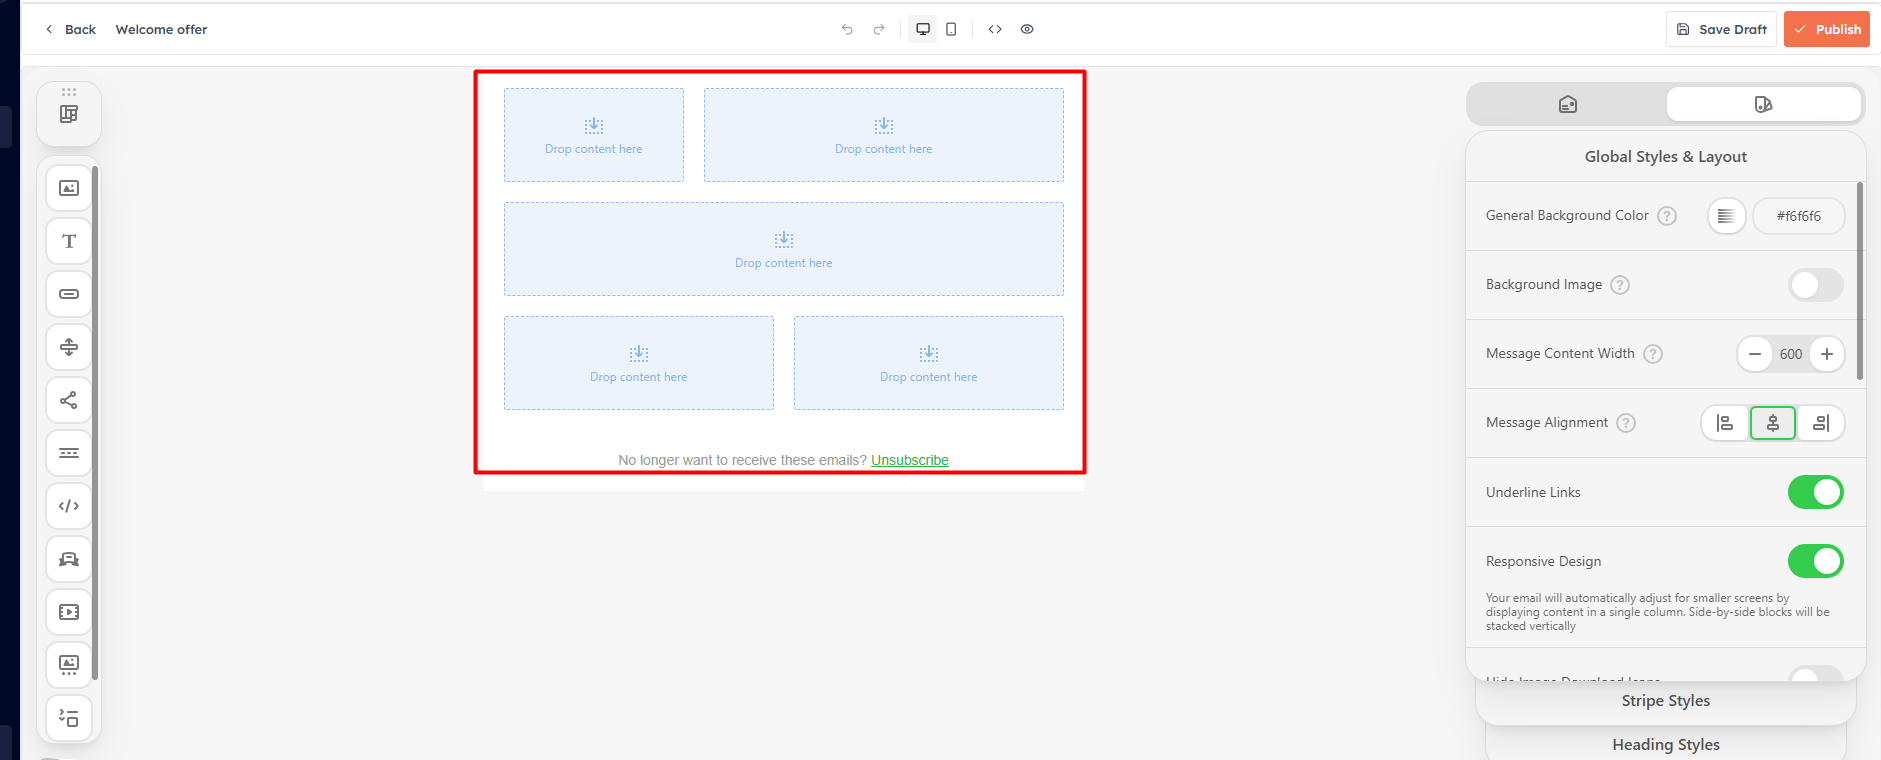
The editor is powered by Stripo and gives you a complete design canvas:
Blocks panel — drag in text blocks, images, buttons, dividers, social links, and more
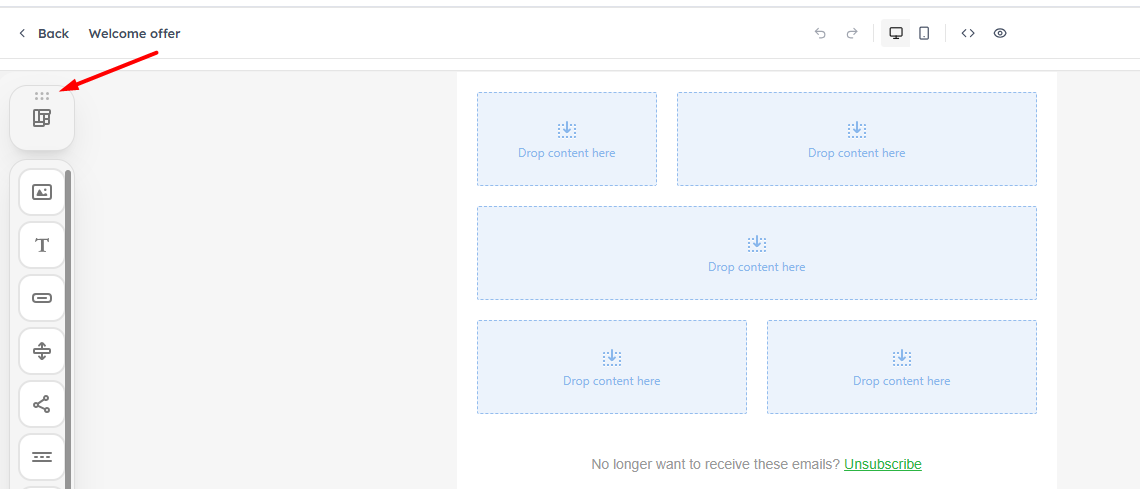
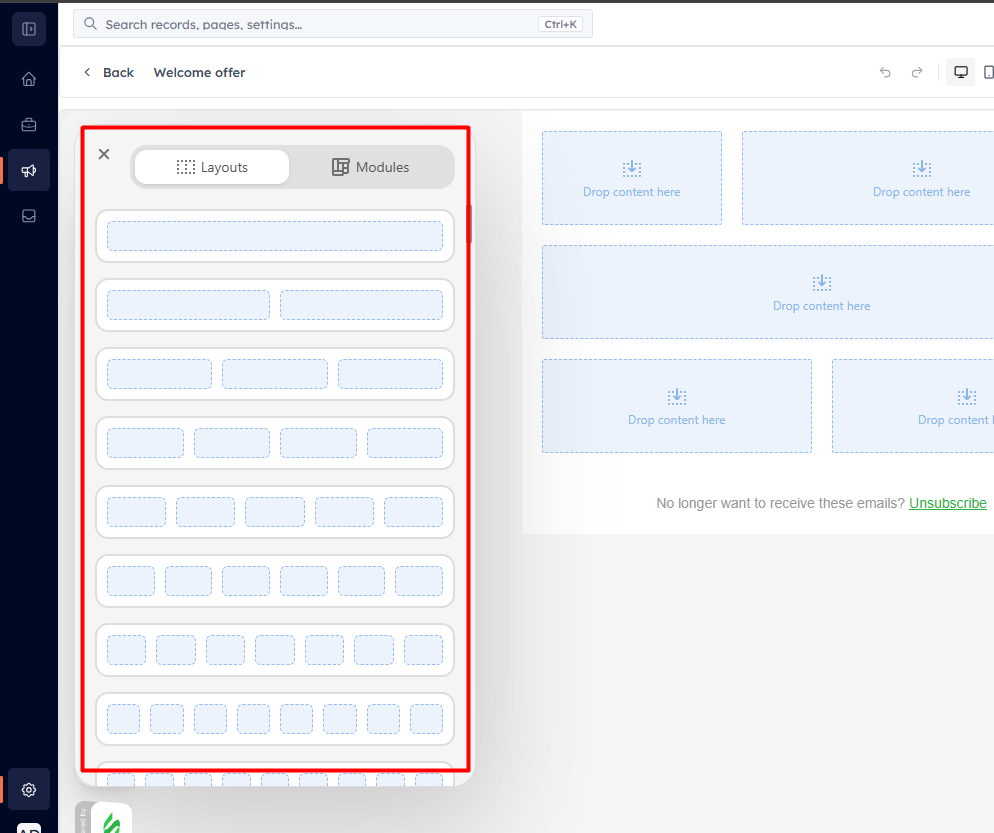
Structure — set the column layout (1, 2, or 3 columns) for each section
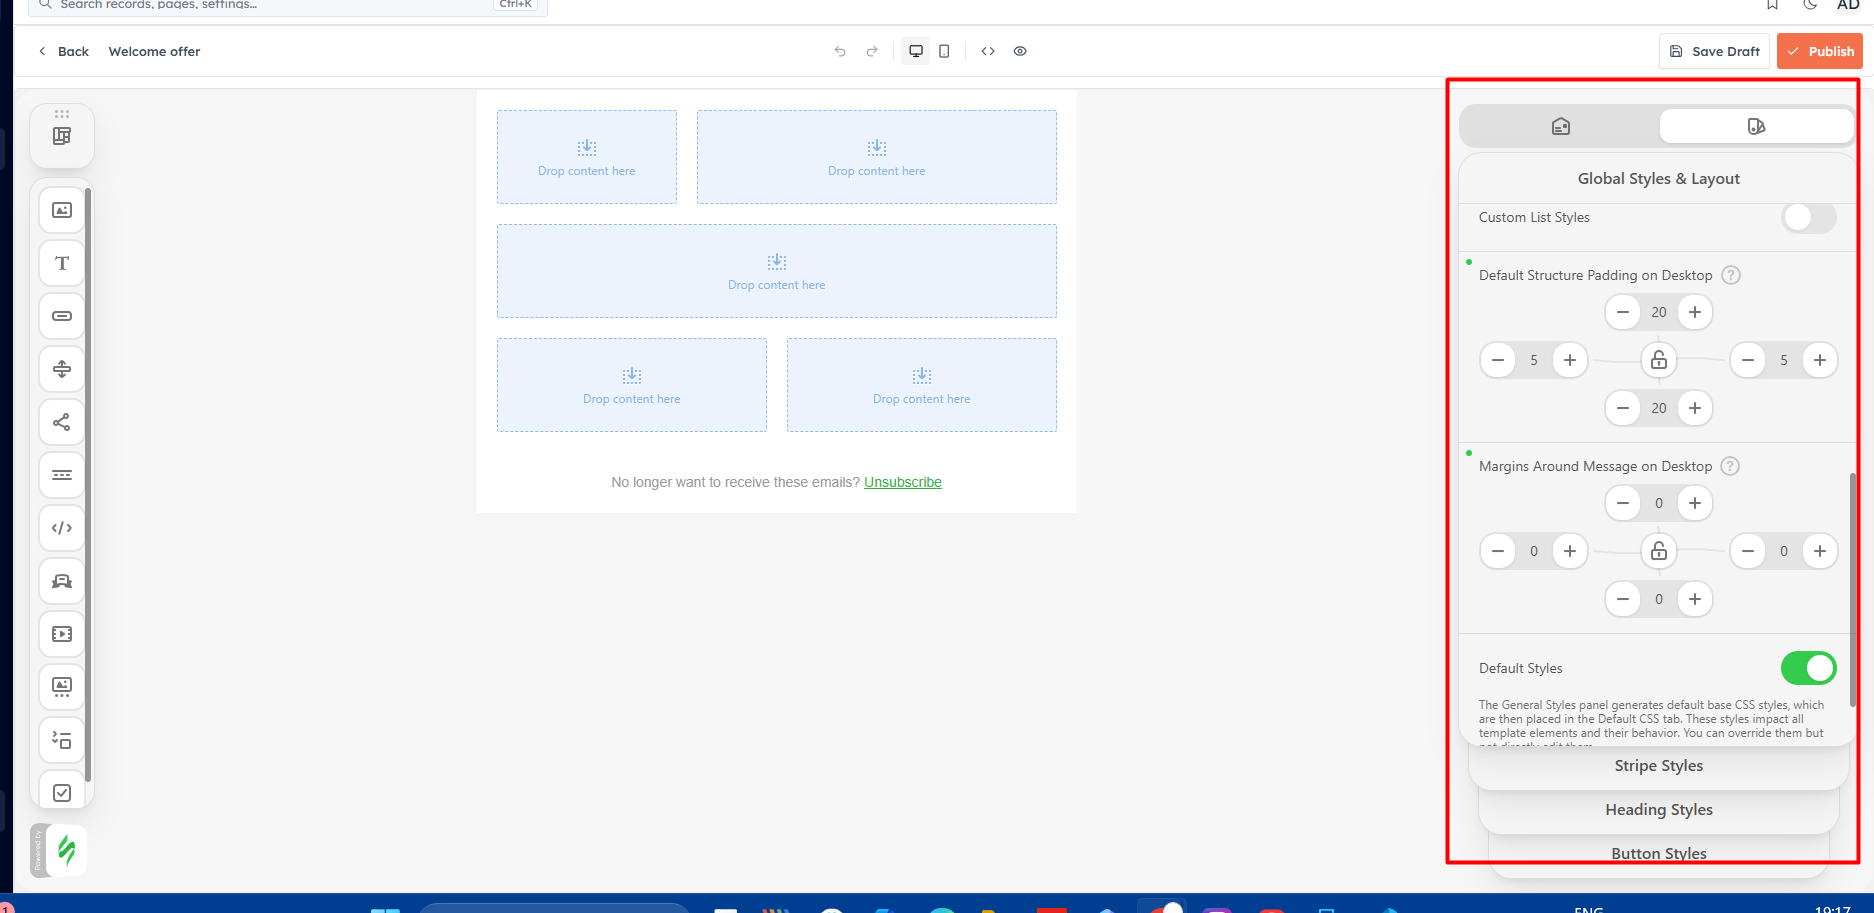
Styles — control background colour, font, padding, and link colours globally.
Desktop / Mobile preview — toggle between views to verify the design on both screen sizes
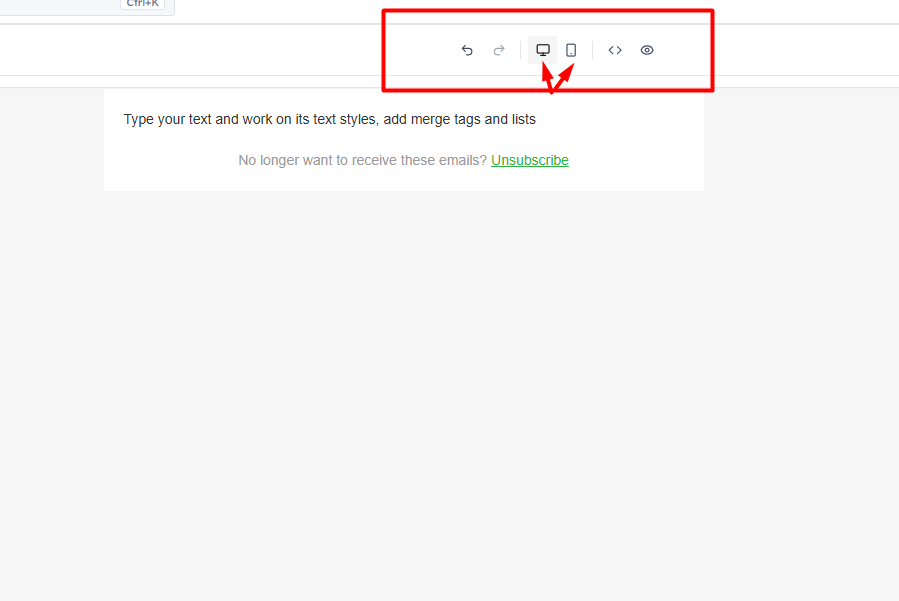
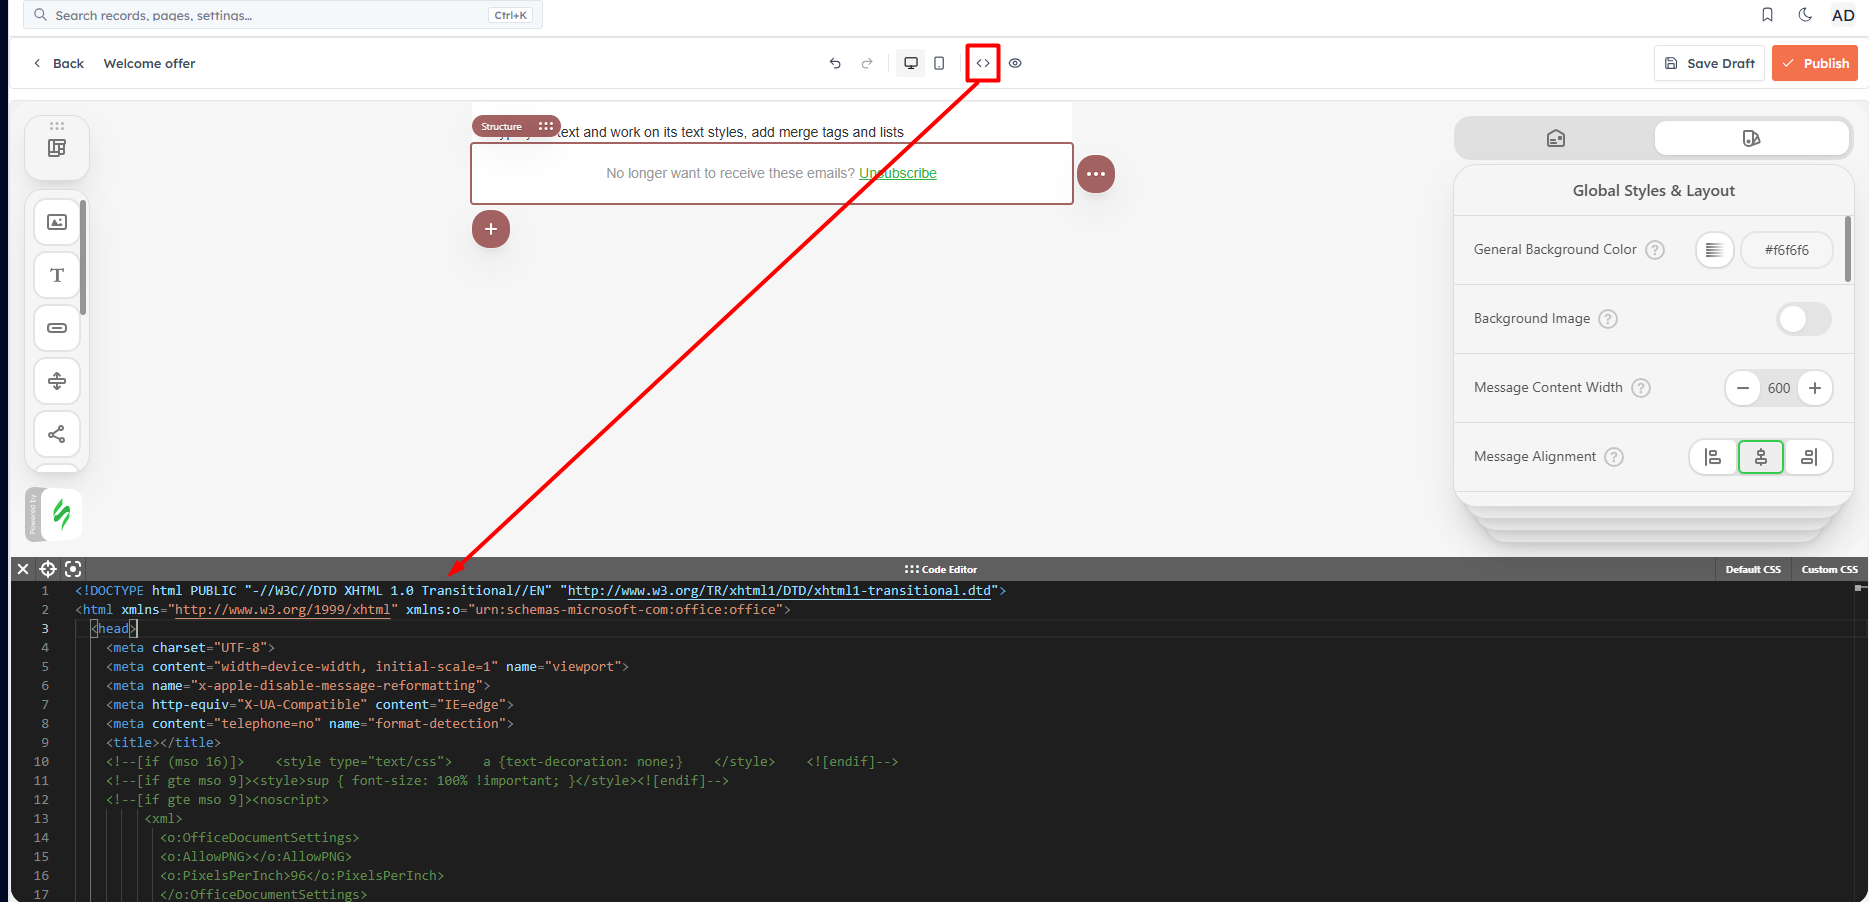
Code editor — switch to raw HTML/CSS for precise control
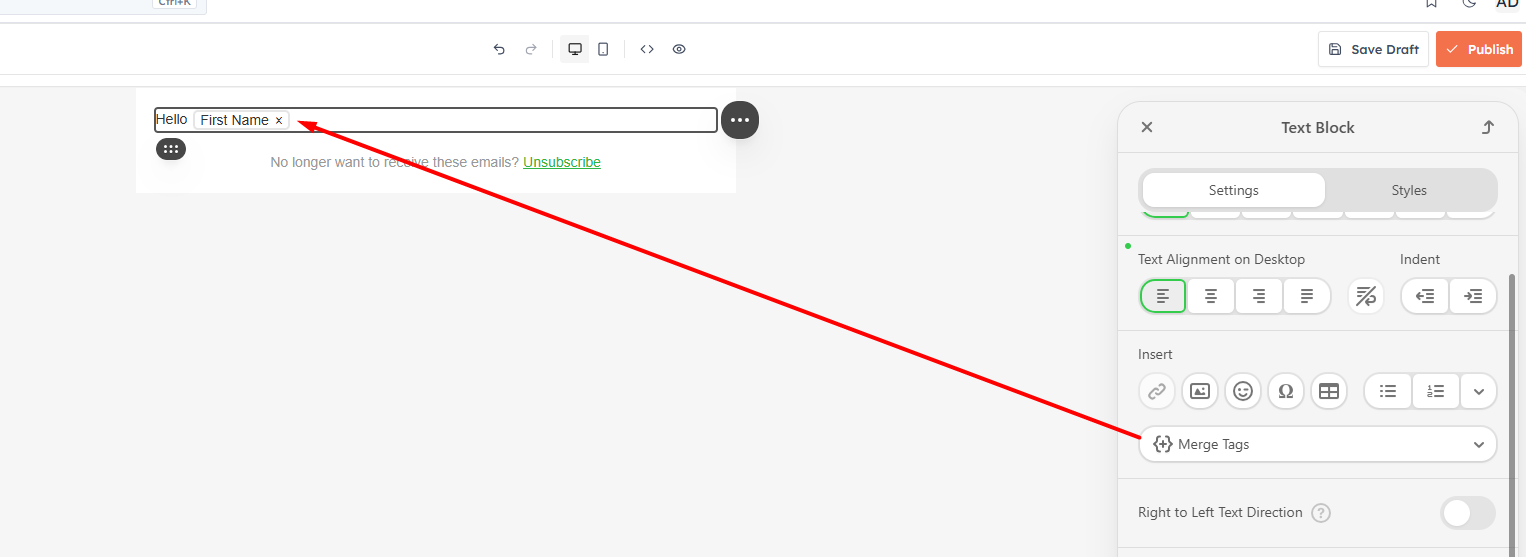
Merge fields (personalisation shortcodes like {{contact.first_name}}) can be inserted anywhere in the email body to personalise with each recipient's data.
💡
The editor auto-saves every 8 seconds while you work. You can also undo and redo changes with the toolbar buttons — no work is lost.
💡
Always check the Mobile preview before saving. More than 60% of emails are opened on mobile — a design that looks great on desktop can be unreadable on a phone if columns are too narrow or images are too large.
Managing templates#
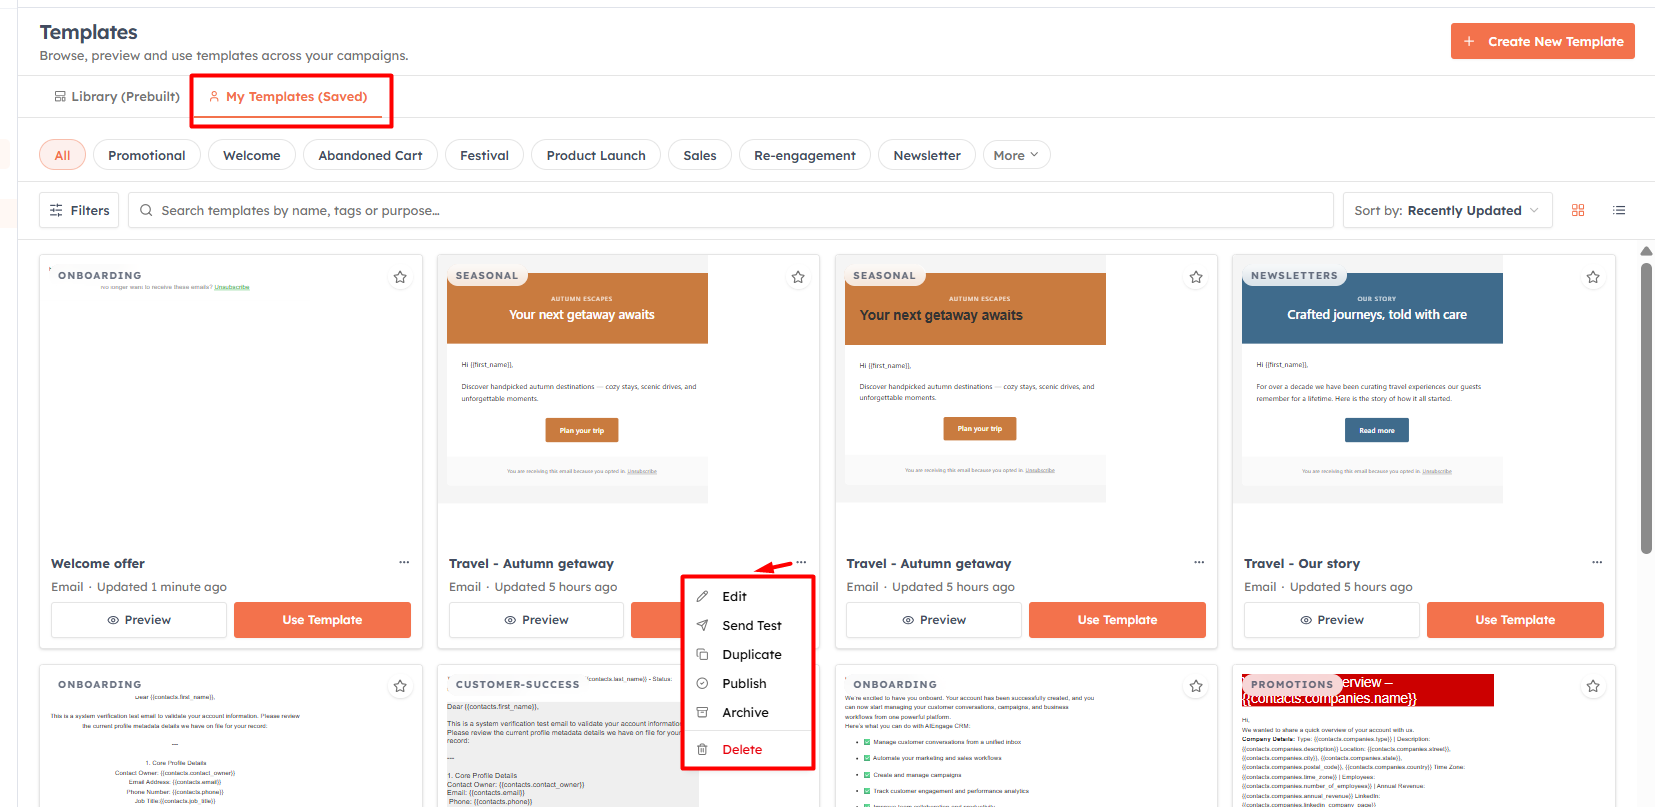
From the template gallery, each template card has an action menu:
Edit — reopen in the drag-and-drop editor
Duplicate — clone the template as a starting point for a variation
Archive — hide from the active gallery without deleting
Delete — permanently remove the template
💡
Saved templates appear in the template picker when your team creates a campaign. Use the Saved tab to find your custom templates, or the Prebuilt Library tab to browse Meta-curated designs.
Personalize with merge tags#
Merge tags drop each recipient's own data into your email — their first name, city, company and more — so every message reads as if written for one person. A tag looks like {{contact.first_name}}: the module slug, a dot, then the field slug. At send time the CRM swaps it for that contact's value.
Insert a tag#
- In the email body — the editor has a built-in Merge Tags section in its sidebar. Click a field to drop it in; it appears as a highlighted chip.
- In the subject line — there's no picker here, so type the tag by hand, e.g. Hi {{contact.first_name}}!
The fields on offer come from the module you chose for the template. A "Viewing" scope switcher lets you reach one step away — a contact's company, for example ({{contacts.companies.name}}) — and a System group provides things like the current date and your organization name.
Show a fallback when a field is empty#
If a contact has no value for a field, the tag renders as nothing — it's removed, never left as raw {{…}} text. To show a default instead, add a pipe and a quoted fallback inside the tag:
{{contact.first_name|"there"}} → shows "there" when the first name is blank.
You type the fallback yourself — there's no separate "default value" box.
💡
Merge tags are resolved in the subject and the body only. The preview/preheader text is not merge-rendered, so don't put tags there.
💡
A template can bind to any module, so its tags can start from Contacts, Deals, or a custom module. In an email campaign, personalization always resolves from the Contact being emailed. Either way, send yourself a test first to confirm the tags fill in as you expect.
Was this article helpful?
Ready to implement this?
OpenAI Engage and apply what you just learned to your own workspace.
Open AI Engage CRM