Loading…


KnowledgeBase
Personalize Emails with Merge Tags
What this covers#
A merge tag is a placeholder you drop into an email that gets swapped for real data when the email goes out. Write it once, and every recipient sees their own details.
In AI Engage CRM a merge tag looks like this:
{{contacts.first_name}}Three parts, separated by dots and wrapped in double curly braces: the module, then the field. So Hi {{contacts.first_name}}, arrives as “Hi Priya,” for one recipient and “Hi Sam,” for the next.
This article covers where those tags come from, how to reach fields on related records, and the handful of tags that are not tied to a contact at all.
Step 1 — Pick the module first#
Go to Marketing → Templates → Email and click Create New Template — the same wizard covered in Create and Manage Email Templates. It opens on Details, and the very first field is Module.
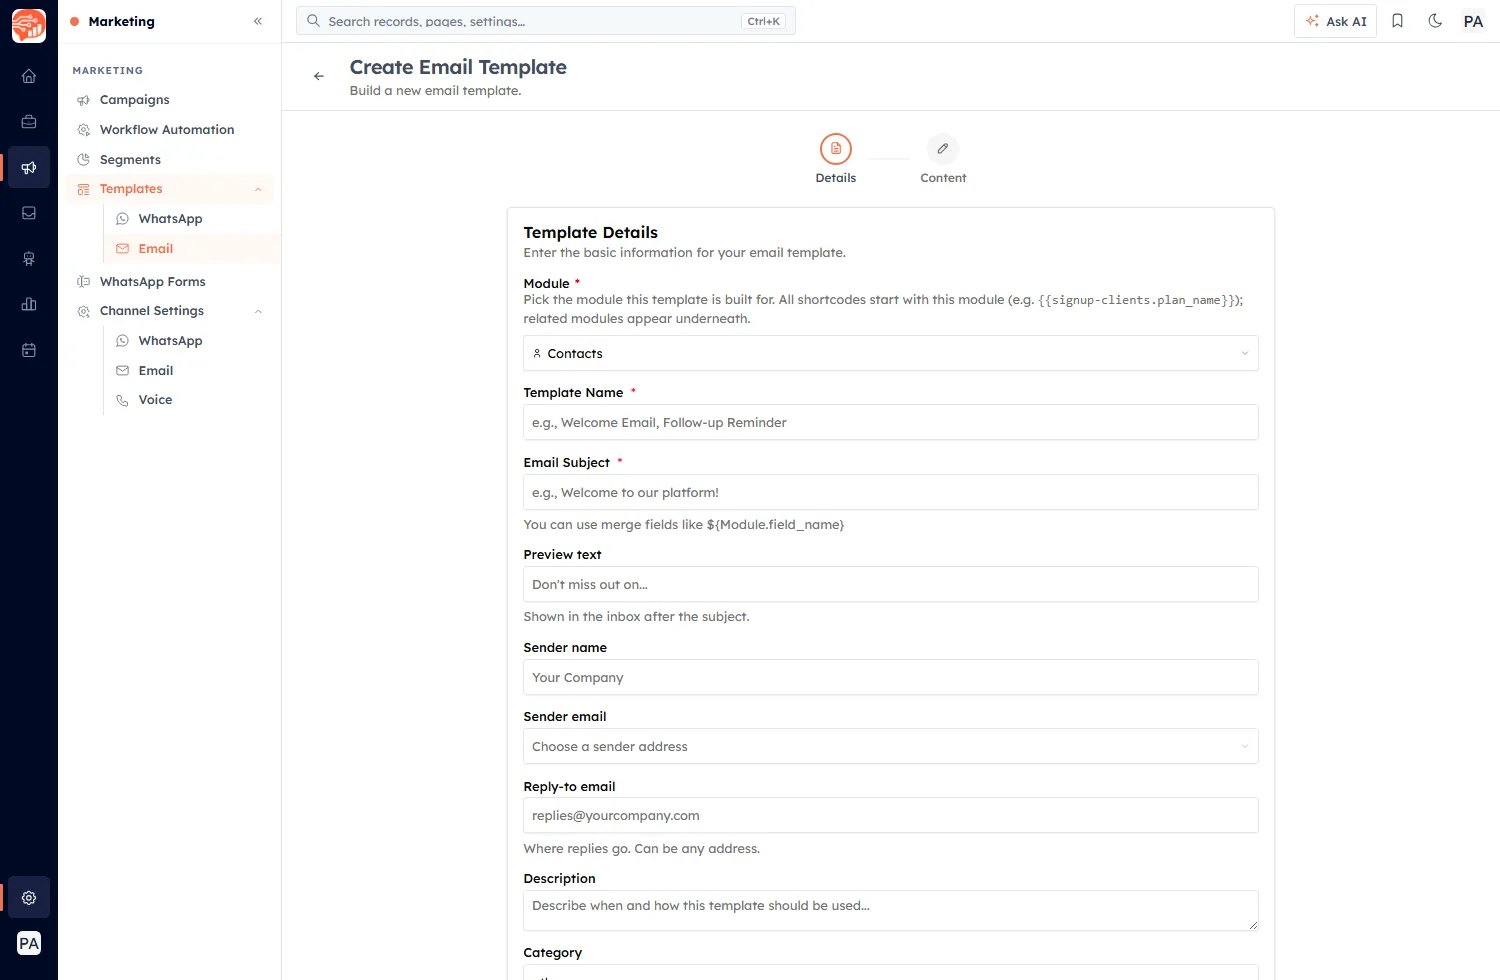
The Details step. The Module you choose here decides every merge tag available to the template.
This choice matters more than it looks. As the helper text under it says:
Pick the module this template is built for. All shortcodes start with this module (e.g.
{{signup-clients.plan_name}}); related modules appear underneath.
In other words, the module is the root of every tag in the template. Choose Contacts and your tags all begin {{contacts.. Choose a different module and they all begin with that one instead.
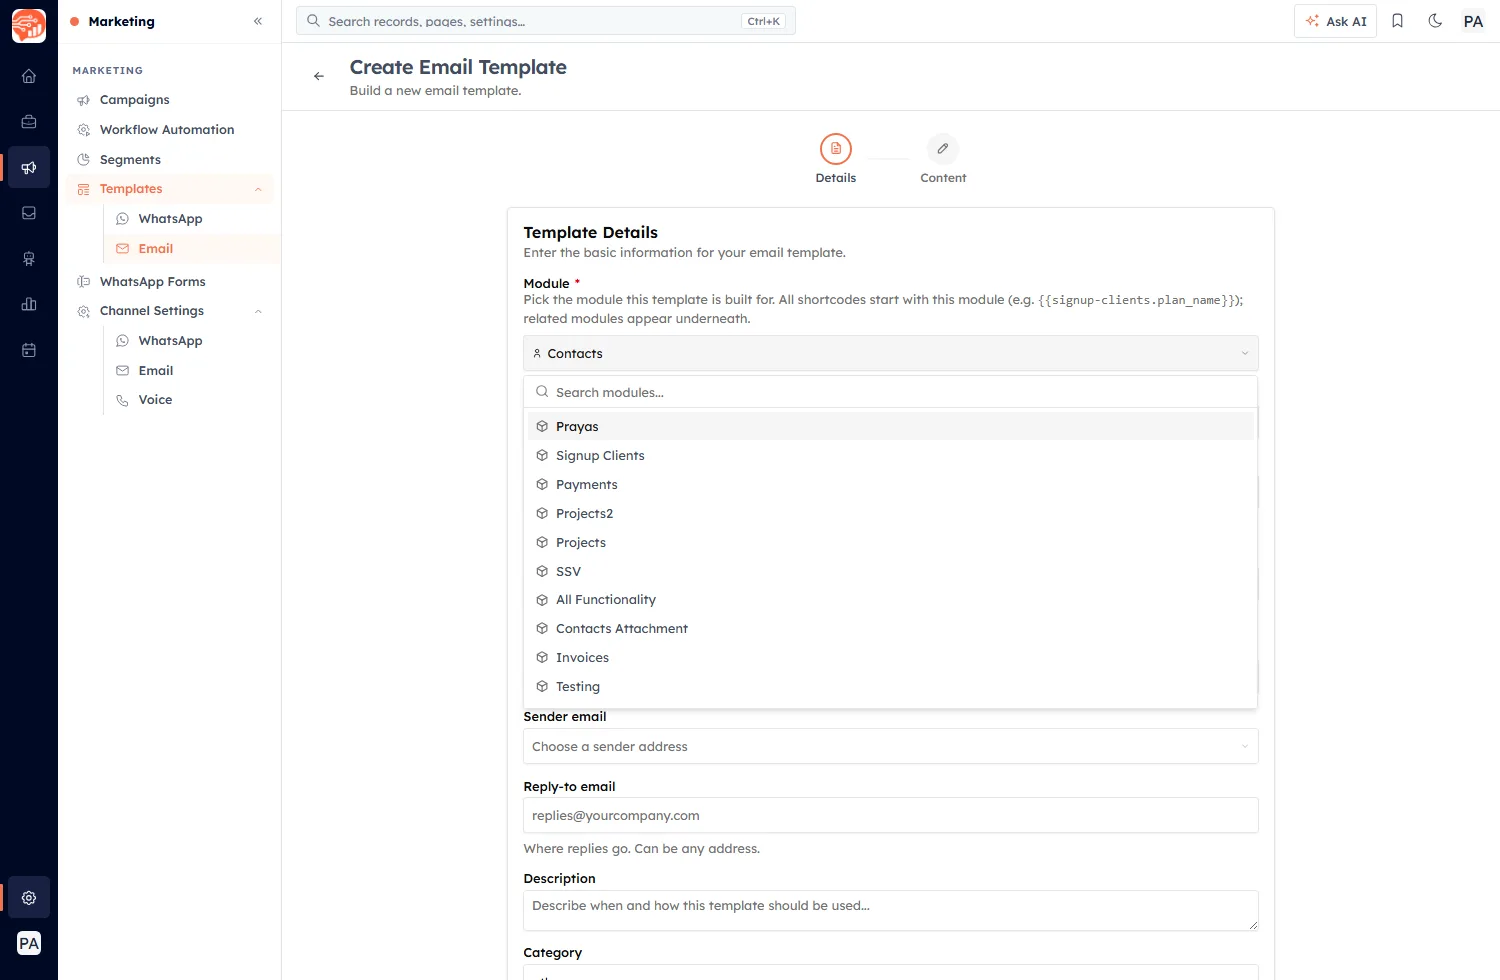
Picking the module the template is built for.
⚠️
Choose the module before you write the email. Changing it later changes the root of every tag, so anything you have already inserted will need redoing.
Step 2 — Tags for the module’s own fields#
With Contacts selected, every field on the Contacts module becomes available as a tag — the built-in ones and any custom fields you have added. A sample:
| Merge tag | Fills in with |
|---|---|
{{contacts.first_name}} | First Name |
{{contacts.last_name}} | Last Name |
{{contacts.email}} | |
{{contacts.phone}} | Phone |
{{contacts.job_title}} | Job Title |
{{contacts.company_name}} | Company Name |
{{contacts.lifecycle_stage}} | Lifecycle Stage |
{{contacts.lead_source}} | Lead Source |
{{contacts.city}} | City |
{{contacts.country}} | Country |
The pattern is always the same: take the field’s name, lowercase it, replace spaces with underscores. Lead Status becomes {{contacts.lead_status}}. You do not have to work this out by hand, though — the editor lists the tags for you and inserts them on click.
That includes custom fields: add one to Contacts and its tag appears in the list alongside the built-in ones.
Step 3 — Reach fields on related records#
This is the part worth knowing. A contact is linked to other records — their company, their deals, their invoices — and you can pull fields off those too. Those tags carry three parts instead of two:
{{contacts.companies.company_name}}
{{contacts.deals.deal_name}}
{{contacts.invoices.invoice_number}}
Read it as module → related module → field. So {{contacts.deals.amount}} means “the Amount on this contact’s deal”.
For a template rooted on Contacts, these related modules are offered:
| Related module | Tag prefix |
|---|---|
| Companies | {{contacts.companies.…}} |
| Deals | {{contacts.deals.…}} |
| Quotes | {{contacts.quotes.…}} |
| Invoices | {{contacts.invoices.…}} |
| Payments | {{contacts.payments.…}} |
| Meetings | {{contacts.meetings.…}} |
| Calls | {{contacts.calls.…}} |
| Tasks | {{contacts.tasks.…}} |
| Products | {{contacts.products.…}} |
Any custom modules you have built and linked to Contacts appear in this list too, under their own slug.
💡
A contact can have several deals or invoices, so the editor groups these tags under headings like Deals (latest record). The tag resolves against the most recent related record — not all of them. Merge tags cannot list every deal a contact has; for that, send from the deal instead.
Tags that are not about the contact#
A few tags stand outside the module entirely. They start with system. and are the same for everyone receiving the email:
| Merge tag | Fills in with |
|---|---|
{{system.current_date}} | Current Date |
{{system.current_time}} | Current Time |
{{system.current_datetime}} | Current Date & Time |
{{system.company_name}} | Your organization’s name |
{{system.company_logo_img}} | Your organization’s logo, as an image |
{{system.company_logo}} | The URL of that logo |
Use {{system.company_logo_img}} where you want the logo to render, and {{system.company_logo}} where you need the address of the image instead — behind a button, say.
Merge tags in the subject line#
The Email Subject field takes merge tags as well as the body does, which is the single highest-impact place to use one — it is what shows in a crowded inbox.
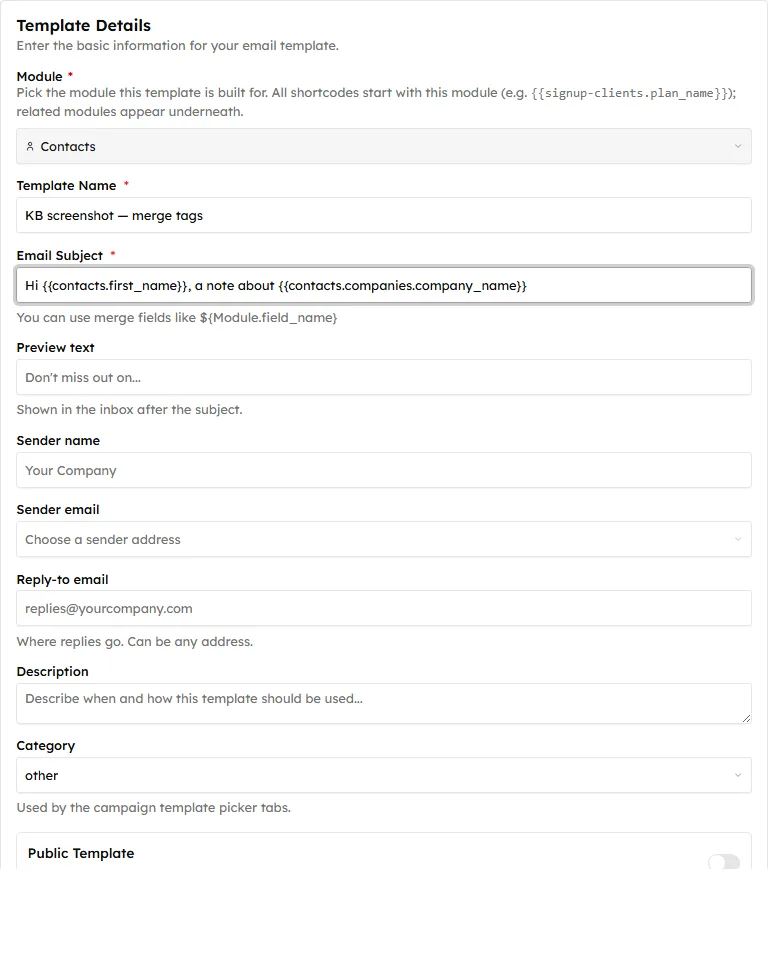
Merge tags in a subject line.
Keep subject-line tags to fields that are reliably filled in, and make sure the sentence still scans if the value is short or long.
Writing the email#
Click Next to move from Details to Content, where the drag-and-drop editor opens. Drop in a text block and insert tags as you write — the editor shows them as highlighted chips, so a tag is easy to tell apart from ordinary text at a glance.
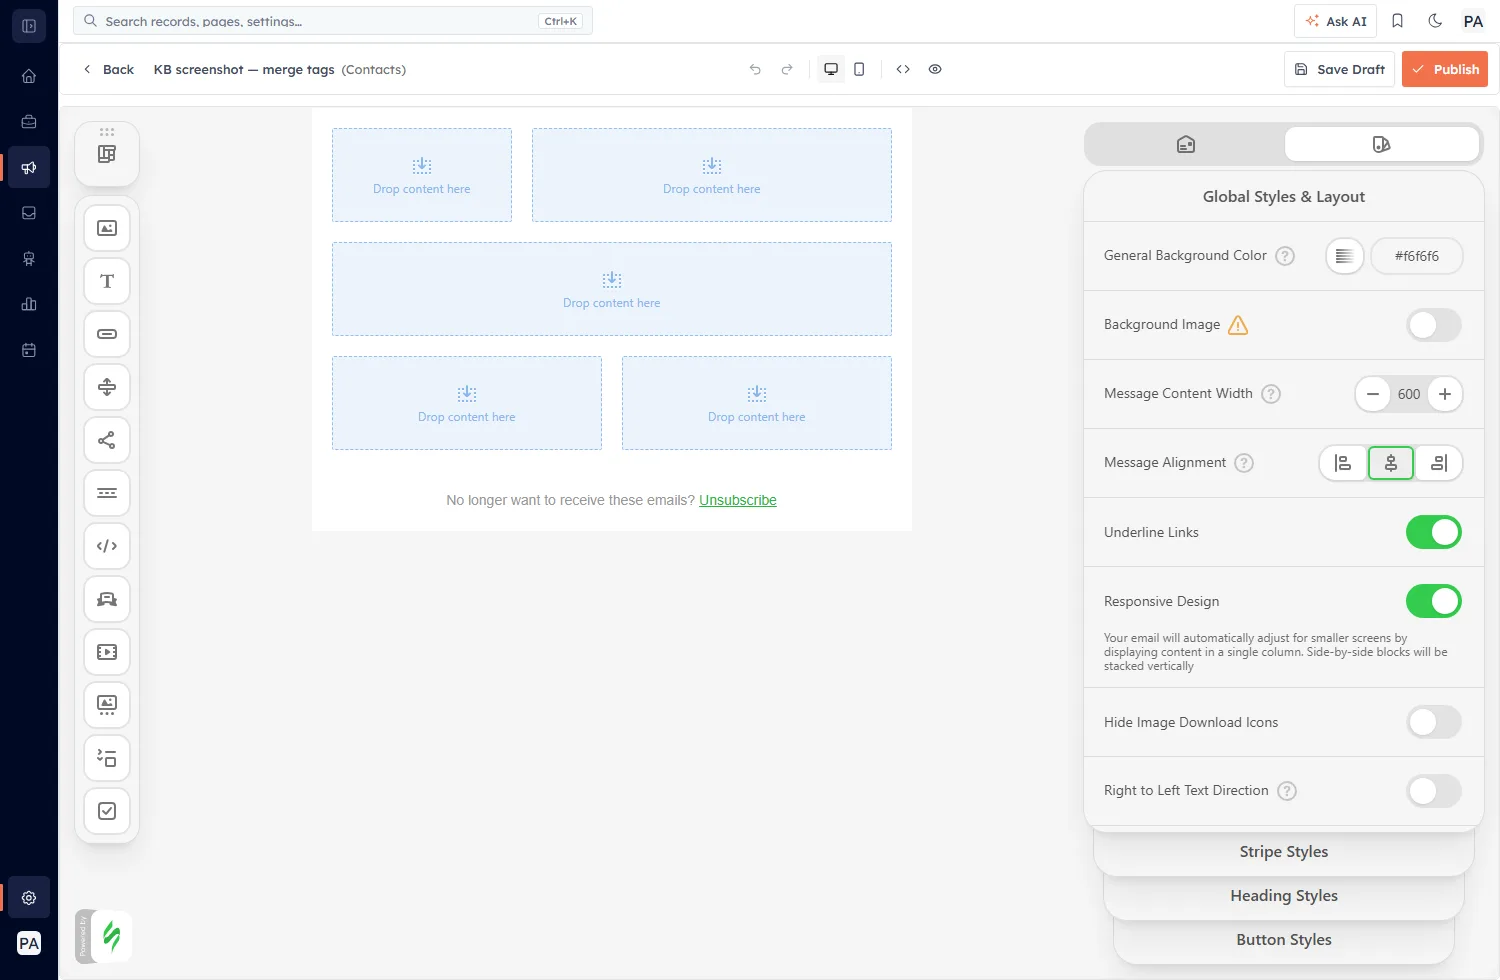
The Content step. The template name and its module are shown in the header — here, Contacts.
Note the header: it names the template and the module it is bound to, which is a quick way to confirm you are inserting tags from the right root.
Check it before you send#
A merge tag is only as good as the data behind it, and the failure mode is public — a blank where a name should be, in every inbox at once. Two habits worth keeping:
- Preview with real data. The preview lets you choose whose record fills the tags; by default it uses your own profile.
- Favour fields that are always populated. First name and email are safe on almost any record. Job title, city or a custom field may be blank on a good share of your contacts — check how well filled a field is before you build a sentence around it.
✉️
Send yourself a test before any campaign goes out. It is the fastest way to catch a tag that points at the wrong field, and the only way to see how the finished email actually lands in an inbox.
Once the template is saved, it is ready to use in an email campaign or when emailing a single contact — the tags resolve against whichever record the email is going to.
Was this article helpful?
Ready to implement this?
OpenAI Engage and apply what you just learned to your own workspace.
Open AI Engage CRM