Loading…


KnowledgeBase
Authenticate Your Email Domain (DKIM) Step by Step: Add the DNS Records, Validate and Improve Deliverability
Introduction#
When AiEngage CRM sends an email for you, Gmail, Outlook, Yahoo and other inbox providers check whether your domain has approved that sender. If it hasn't, your emails look like they come from a third party (“via sendgrid.net”) and many of them go to spam or are blocked.
Sender Authentication fixes this. You add your business domain to the CRM, the CRM gives you three DNS records, and you add them where your domain is managed (GoDaddy, Cloudflare, Namecheap, Hostinger and so on). Once the CRM finds them, your domain shows Verified. From then on, every email is signed with DKIM (DomainKeys Identified Mail), which proves it really comes from your brand.
This guide shows how to:
Open the Sender Authentication page.
Add your domain and generate its DNS records.
Copy the records to your DNS provider.
Validate them, and fix records that are still Pending.
Re-verify, add another domain, or remove one.
Each screenshot has a red ring and arrow on the part to look at, followed by a description of the whole screen. The domain acme.com and its records are examples. Your own domain will show its own values.
Before You Begin#
A business domain you own, such as yourcompany.com. Free email domains like gmail.com, yahoo.com or outlook.com can’t be authenticated, and you can’t send from addresses on them.
Access to your domain’s DNS settings. This is usually the company where you bought the domain, or Cloudflare if your domain uses it. If someone else manages your website or IT, ask them to add the records.
Permission to change Email settings in the CRM (usually an Administrator).
About 10 minutes, plus waiting time for DNS (usually 15–30 minutes, up to 48 hours).
⚠️
Authenticate your domain before sending a campaign to real contacts. Without it, deliverability is poor, and Gmail and Yahoo may reject bulk mail from unauthenticated senders.
Step 1: Open Sender Authentication#
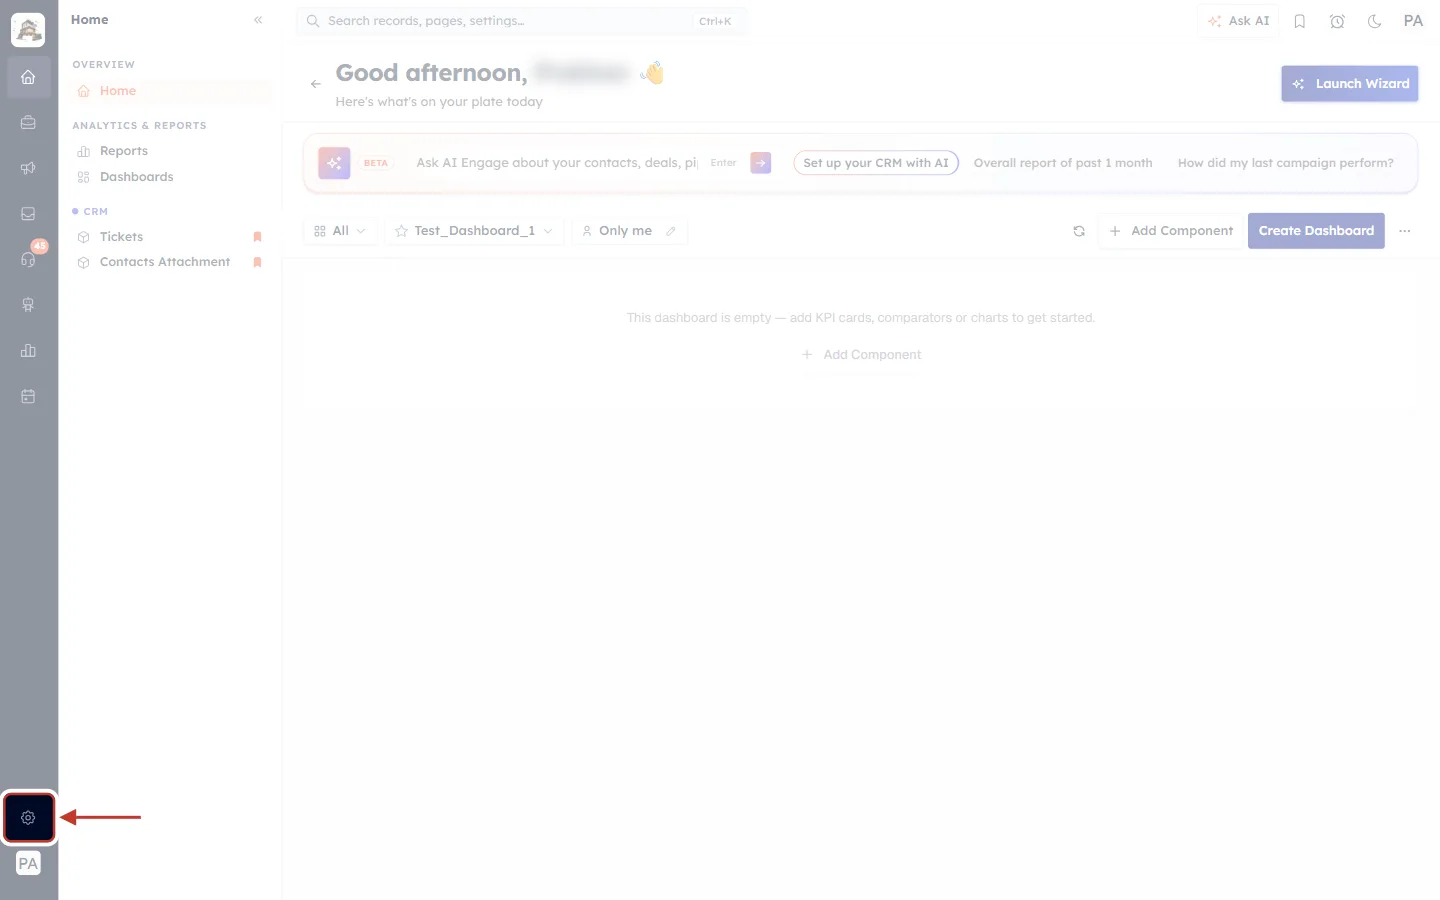
What this screenshot shows. The ringed gear icon at the bottom of the dark left rail opens Settings.
The rail is visible on every page of the CRM. The icons above the gear open Home, Sales, Marketing, Inbox, Support, Reports and Calendar.
The page behind is your Home dashboard. You can start from any page.
Only users allowed to manage settings see every Settings section. If you don’t see Email in the next step, ask an Administrator.
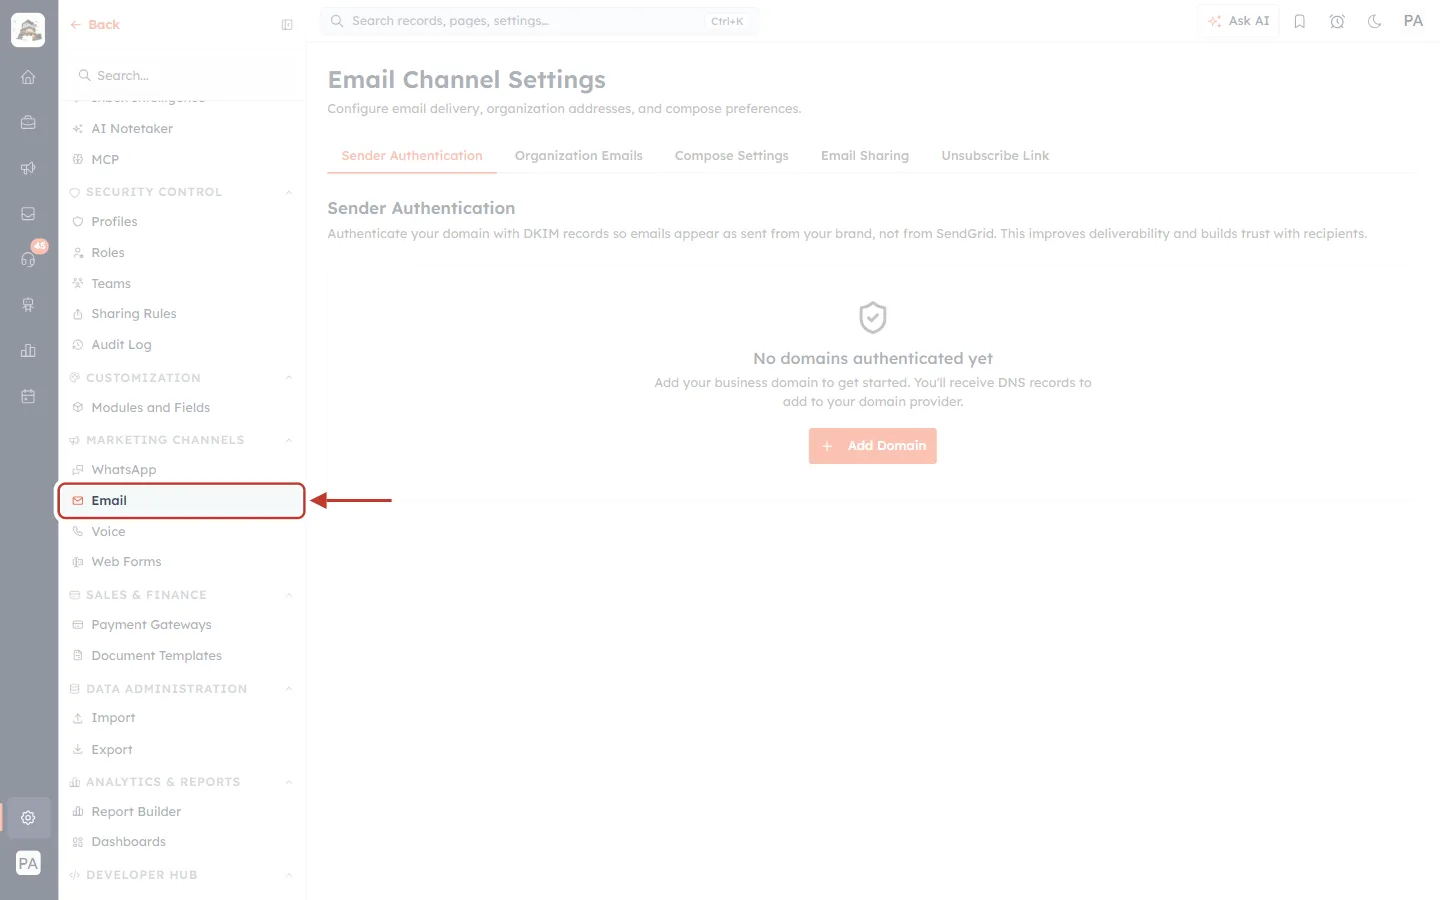
What this screenshot shows. In the Settings menu on the left, the ringed Email item sits under MARKETING CHANNELS, below WhatsApp.
Settings are grouped into sections: General, AI Centre Hub, Security Control, Customization, Marketing Channels, Sales & Finance, Data Administration, Analytics & Reports and Developer Hub.
You can also type Email in the Search… box at the top of the menu.
Click Email to open Email Channel Settings.
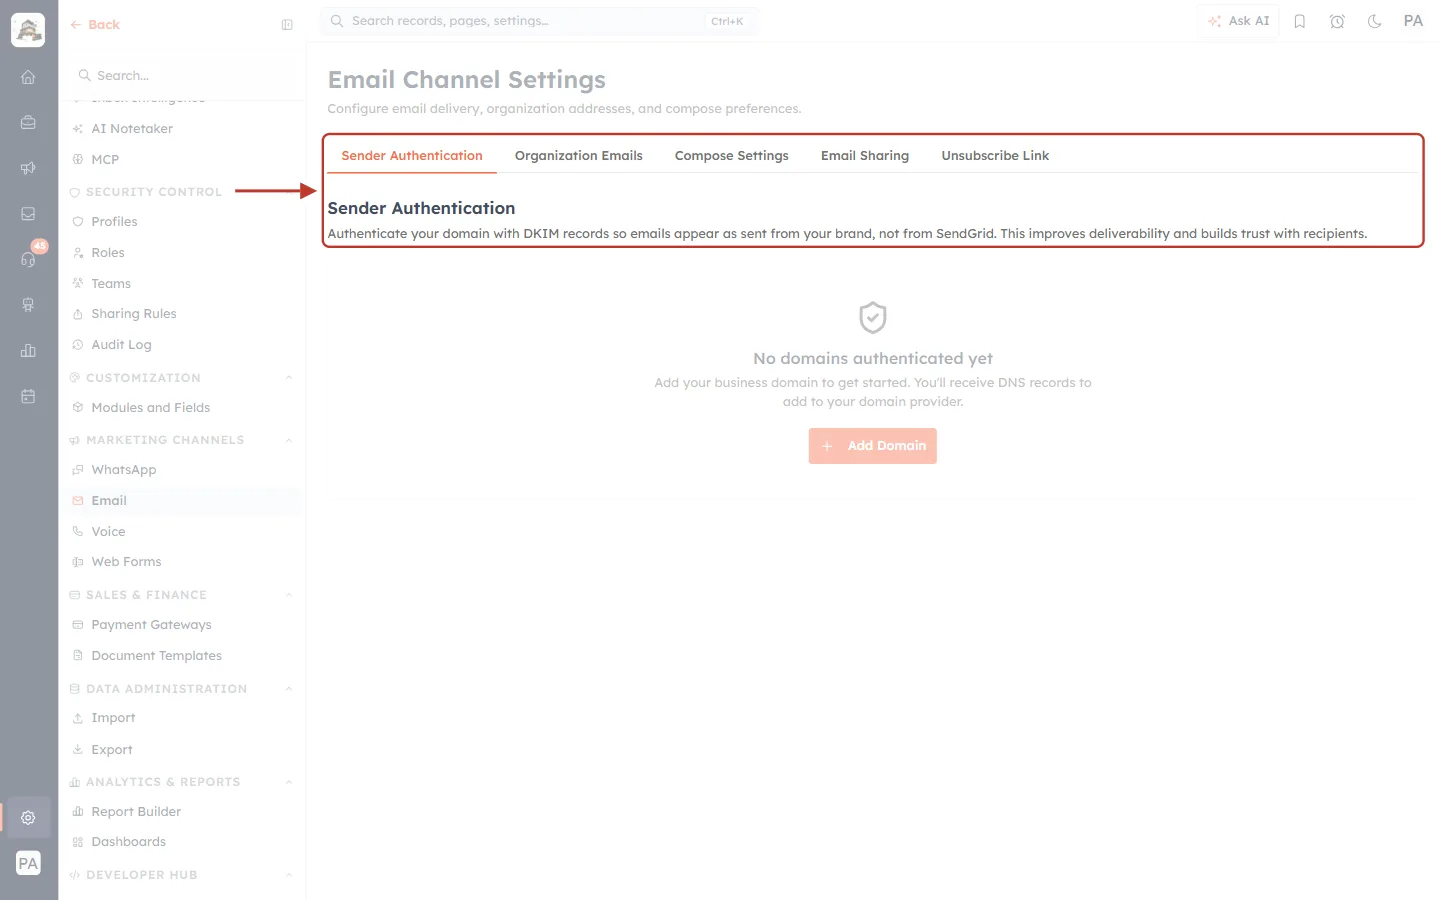
What this screenshot shows. Email Channel Settings opens on the ringed Sender Authentication tab, underlined in orange.
The other tabs are Organization Emails (the From addresses your team sends from), Compose Settings, Email Sharing and Unsubscribe Link.
The text under the heading explains why this matters: Authenticate your domain with DKIM records so emails appear as sent from your brand, not from SendGrid. (SendGrid is the delivery service the CRM uses behind the scenes.)
Below it is the list of your domains, which is empty until you add one.
Step 2: Add Your Domain#
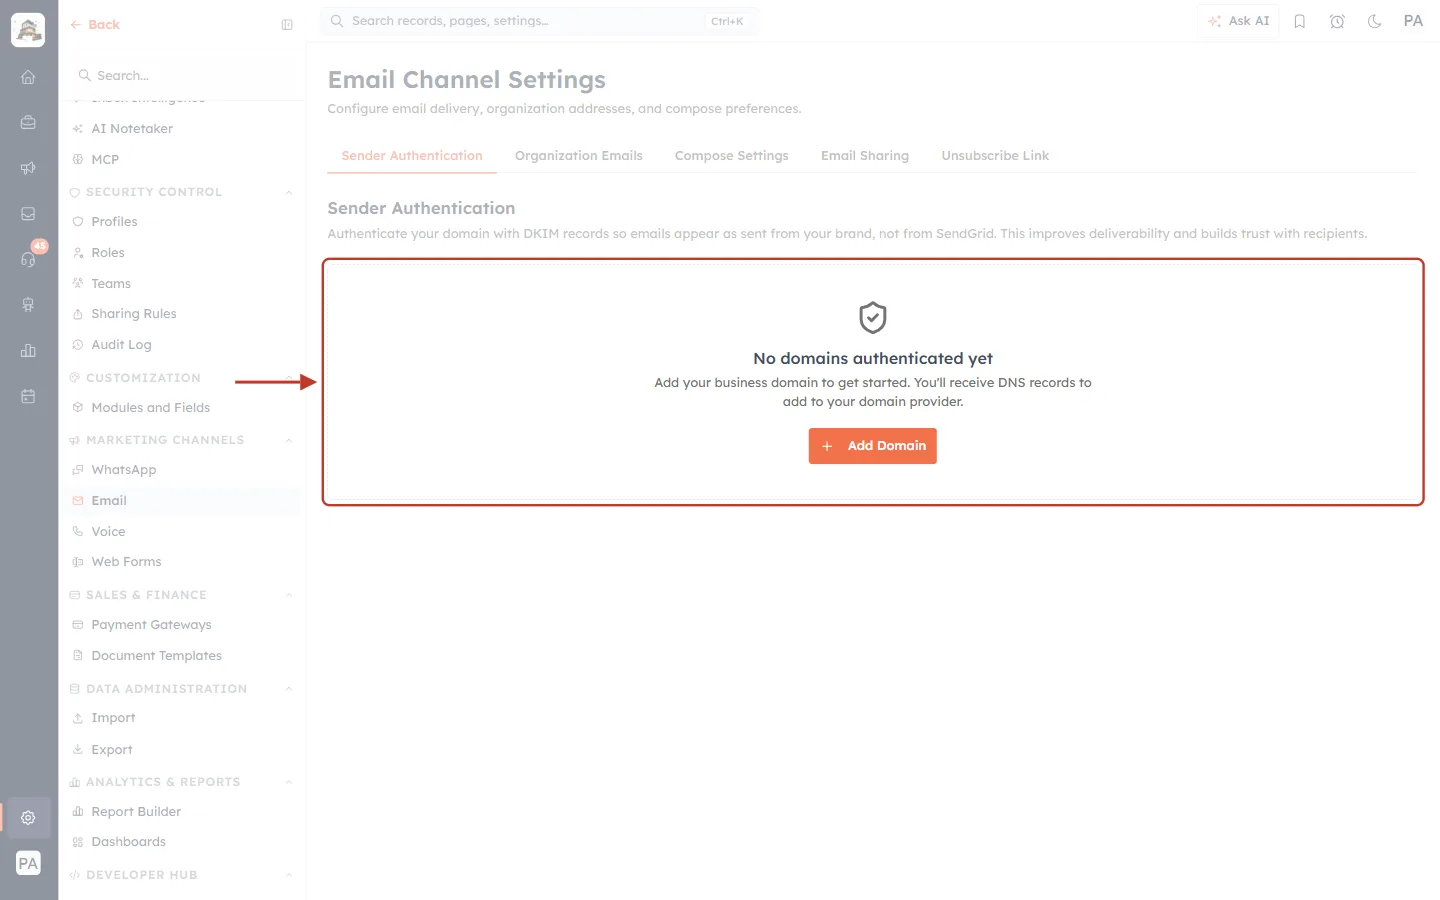
What this screenshot shows. If no domain has been added yet, the ringed box reads No domains authenticated yet.
The shield icon and text explain the next step: Add your business domain to get started. You’ll receive DNS records to add to your domain provider.
Once a domain has been added, this box is replaced by a card for each domain (see Step 3).
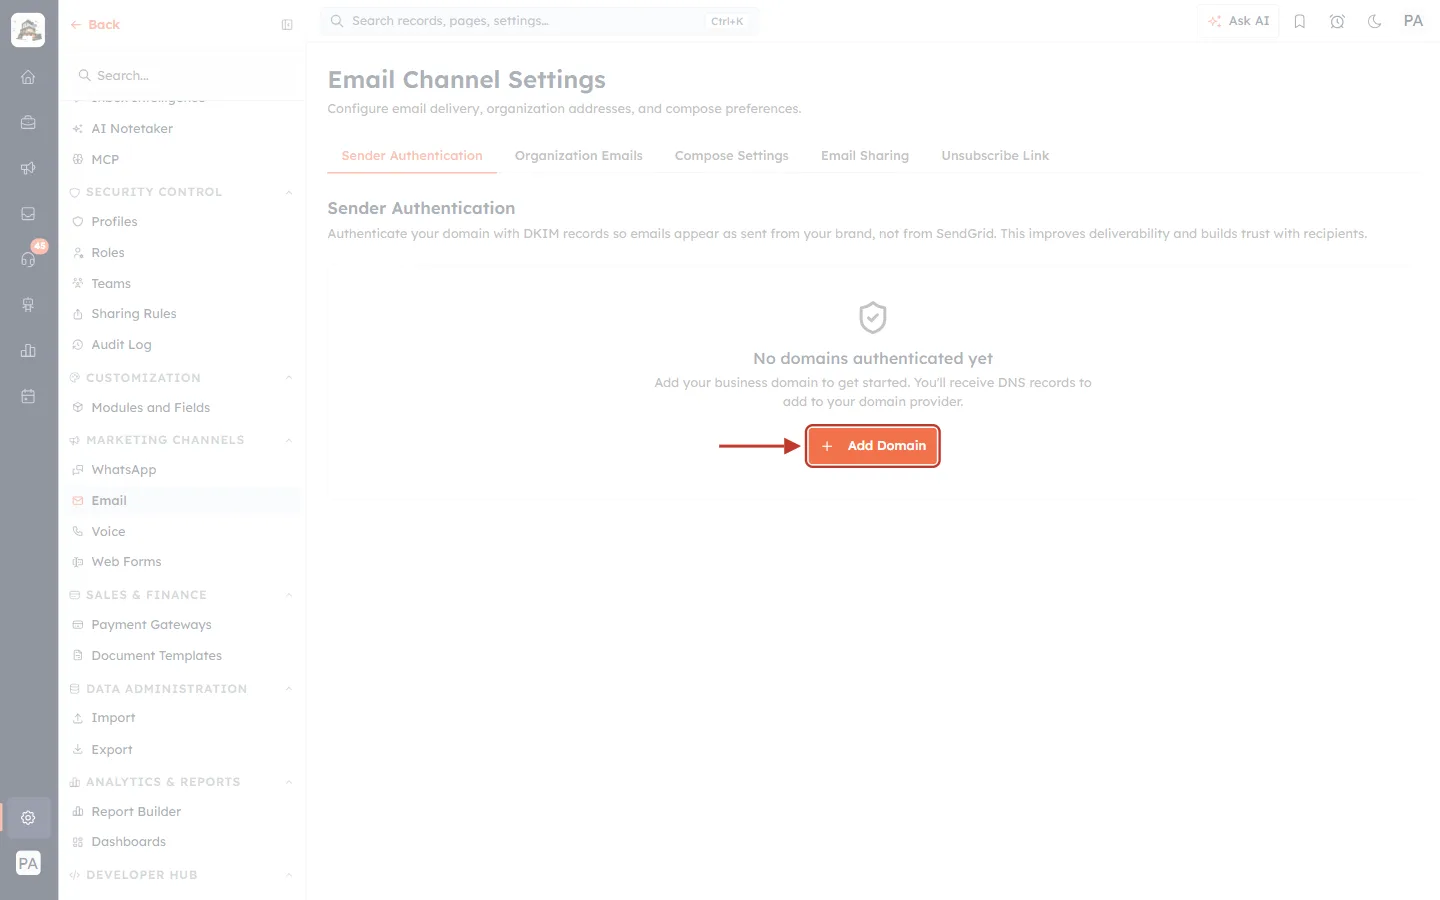
What this screenshot shows. The ringed orange Add Domain button opens the form for adding your domain.
If you already have a domain here, use + Add Another Domain under the list instead. It opens the same form.
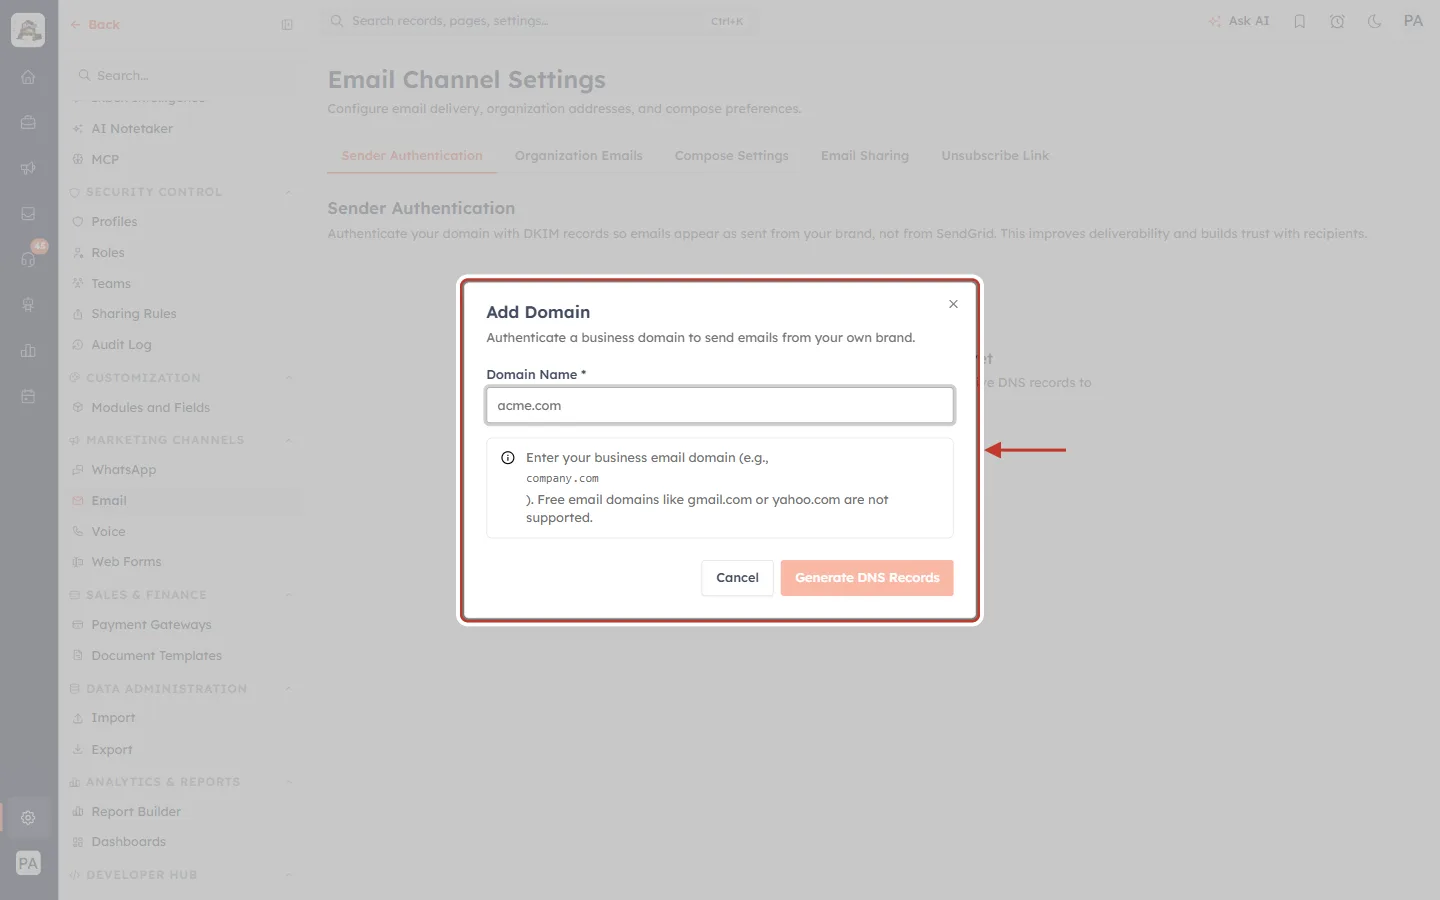
What this screenshot shows. The ringed Add Domain dialog asks for one thing: your domain name.
Domain Name * is required. The grey acme.com is only a placeholder showing the format.
The note underneath repeats the rule about free email domains.
Generate DNS Records stays disabled until you type something. Cancel or the × closes the dialog without adding anything.
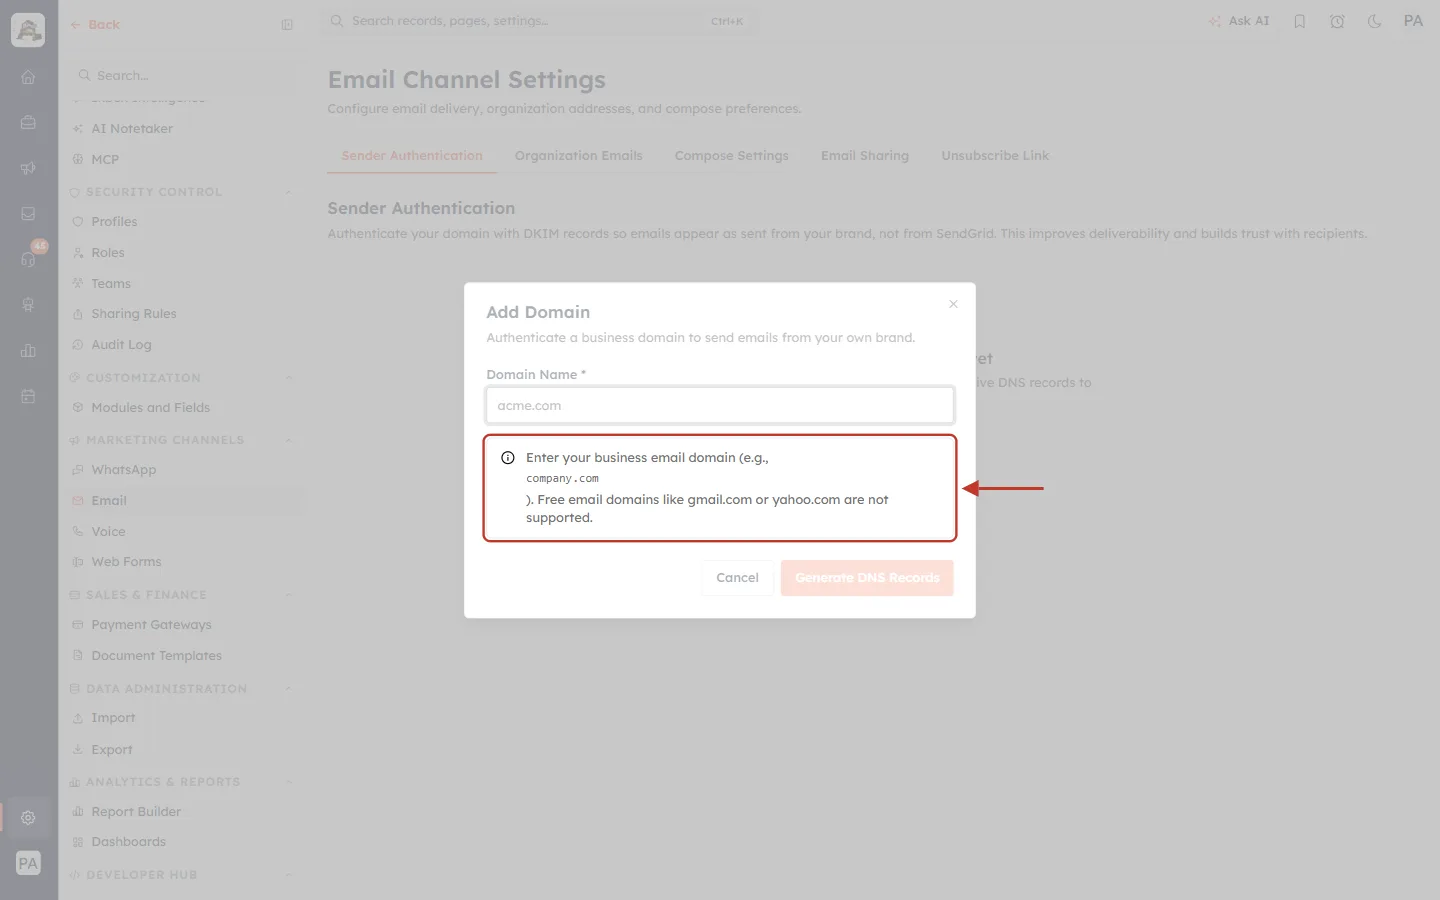
What this screenshot shows. The ringed note reads: Enter your business email domain (e.g., company.com). Free email domains like gmail.com or yahoo.com are not supported.
Enter only the domain, the part after the @ in your email address. For marketing@yourcompany.com, type yourcompany.com.
Don’t type https://, www. or an email address.
Capital letters and extra spaces are removed for you.
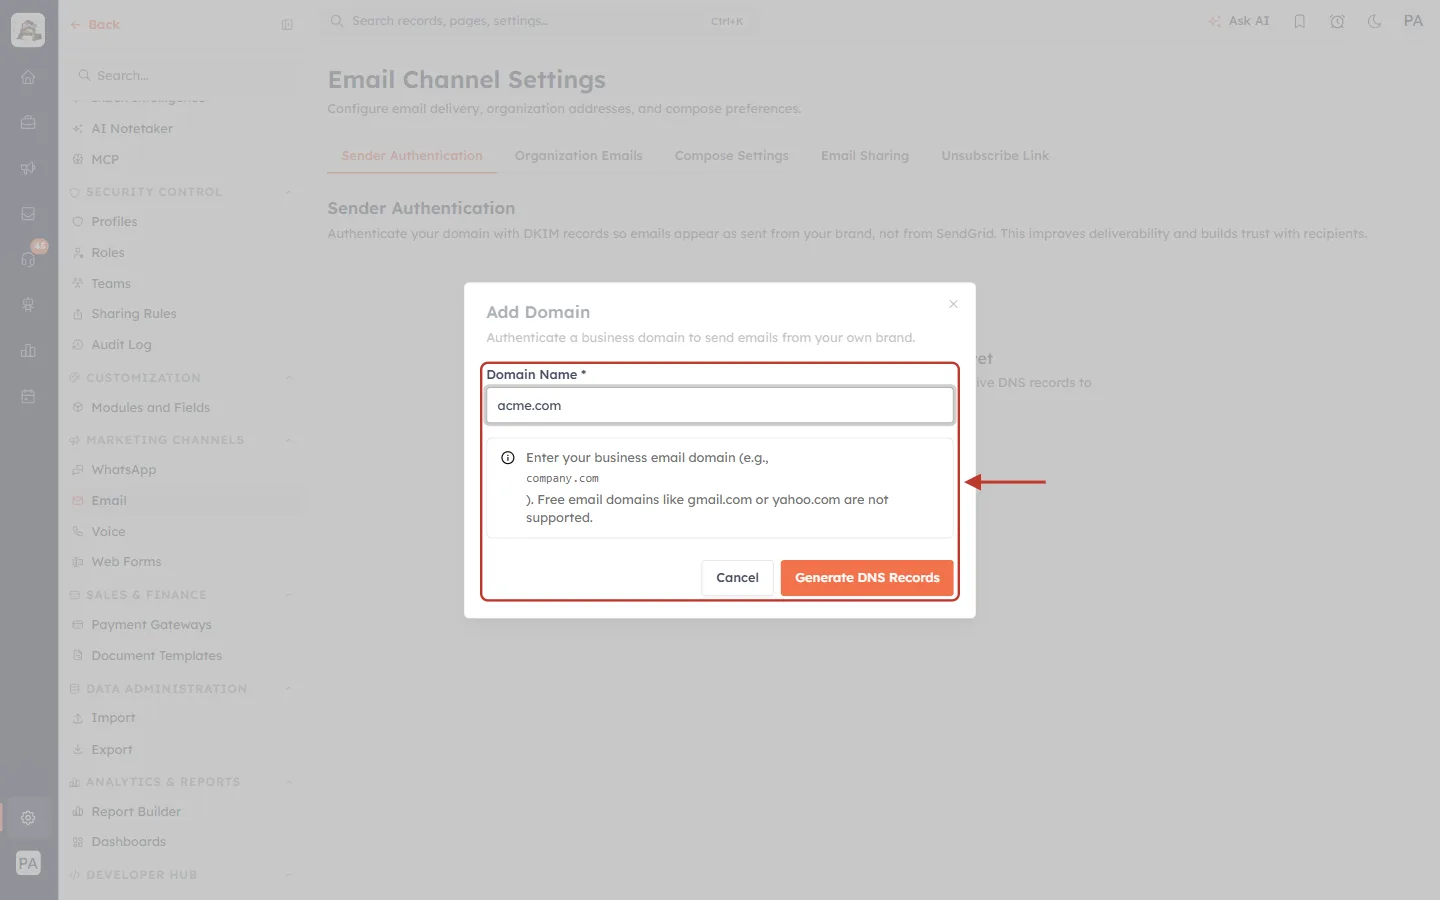
What this screenshot shows. The domain (acme.com in this example) has been typed into Domain Name, and the ringed area includes the now-active Generate DNS Records button.
Check the spelling. A typo creates records for the wrong domain, and you would need to remove it and start again.
Click Generate DNS Records, or press Enter. The button shows Generating… for a moment.
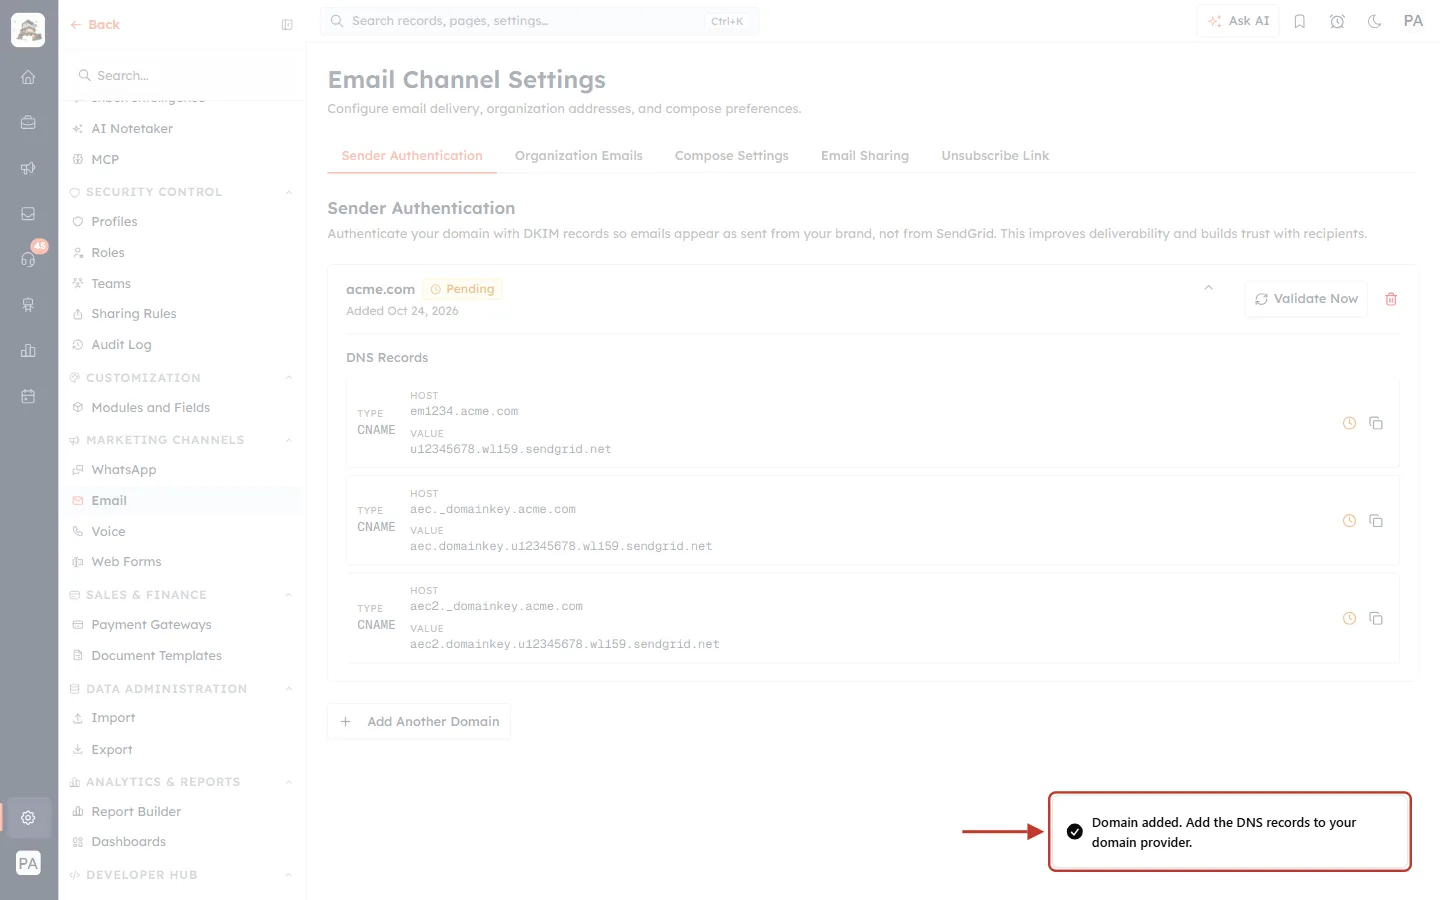
What this screenshot shows. The ringed message in the bottom-right corner confirms: Domain added. Add the DNS records to your domain provider.
The dialog closes and your domain appears in the list with its records.
If you see Failed to add domain or another error instead, check the domain name. A free email domain, or a domain that is already added, can’t be added.
Step 3: Find the Three DNS Records#
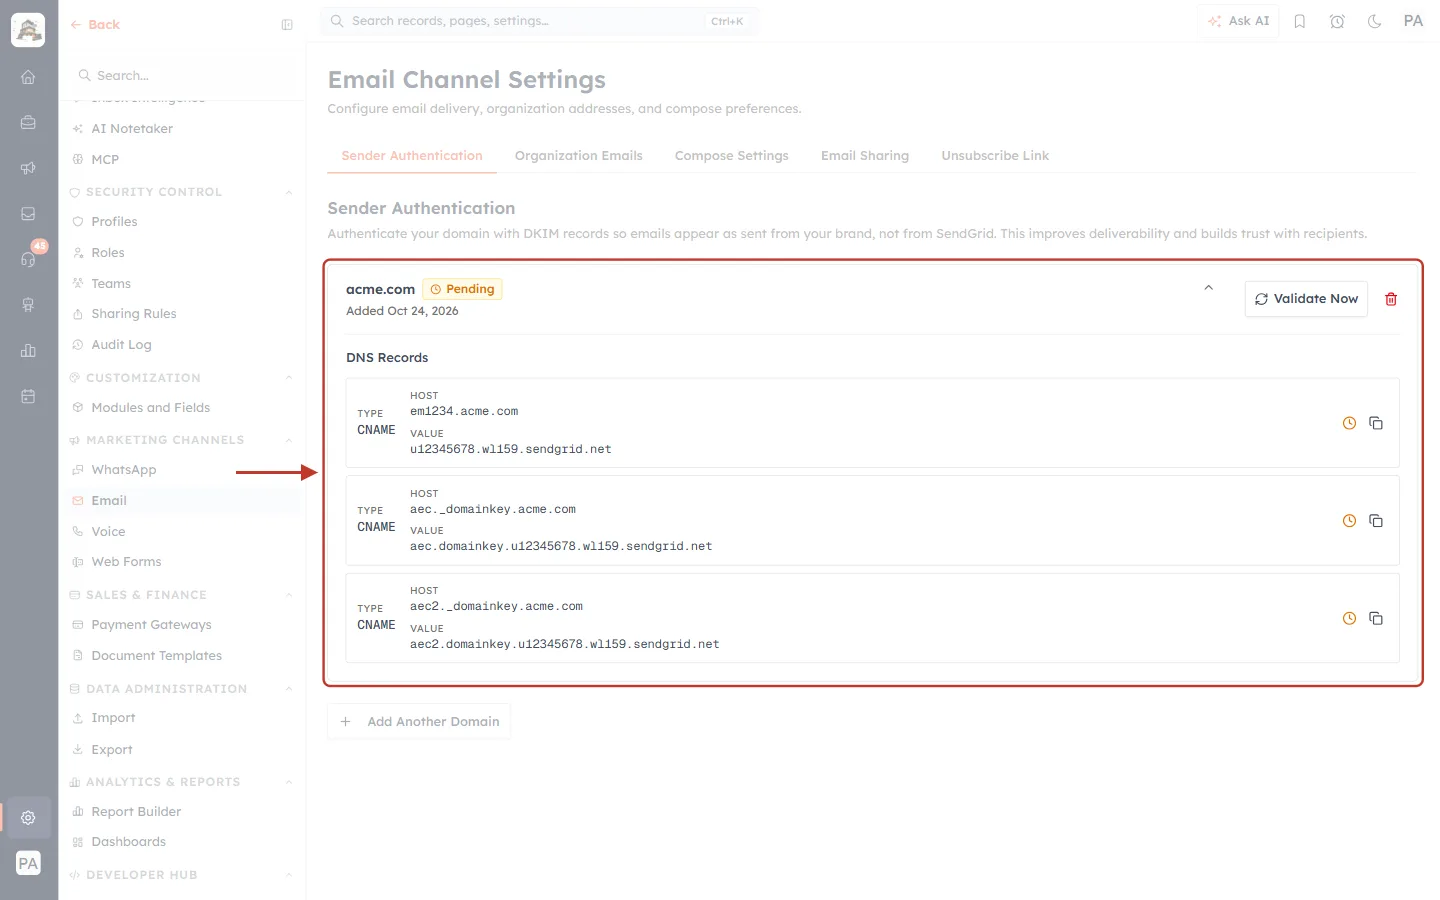
What this screenshot shows. The ringed card is your new domain. It opens expanded, so the records you need are visible straight away.
The top line shows the domain name, a status badge, and Added with today’s date.
On the right are Validate Now (Step 5) and a red trash icon (removes the domain).
The small arrow next to Validate Now collapses or expands the records.
Under DNS Records there are three boxes, one per record.
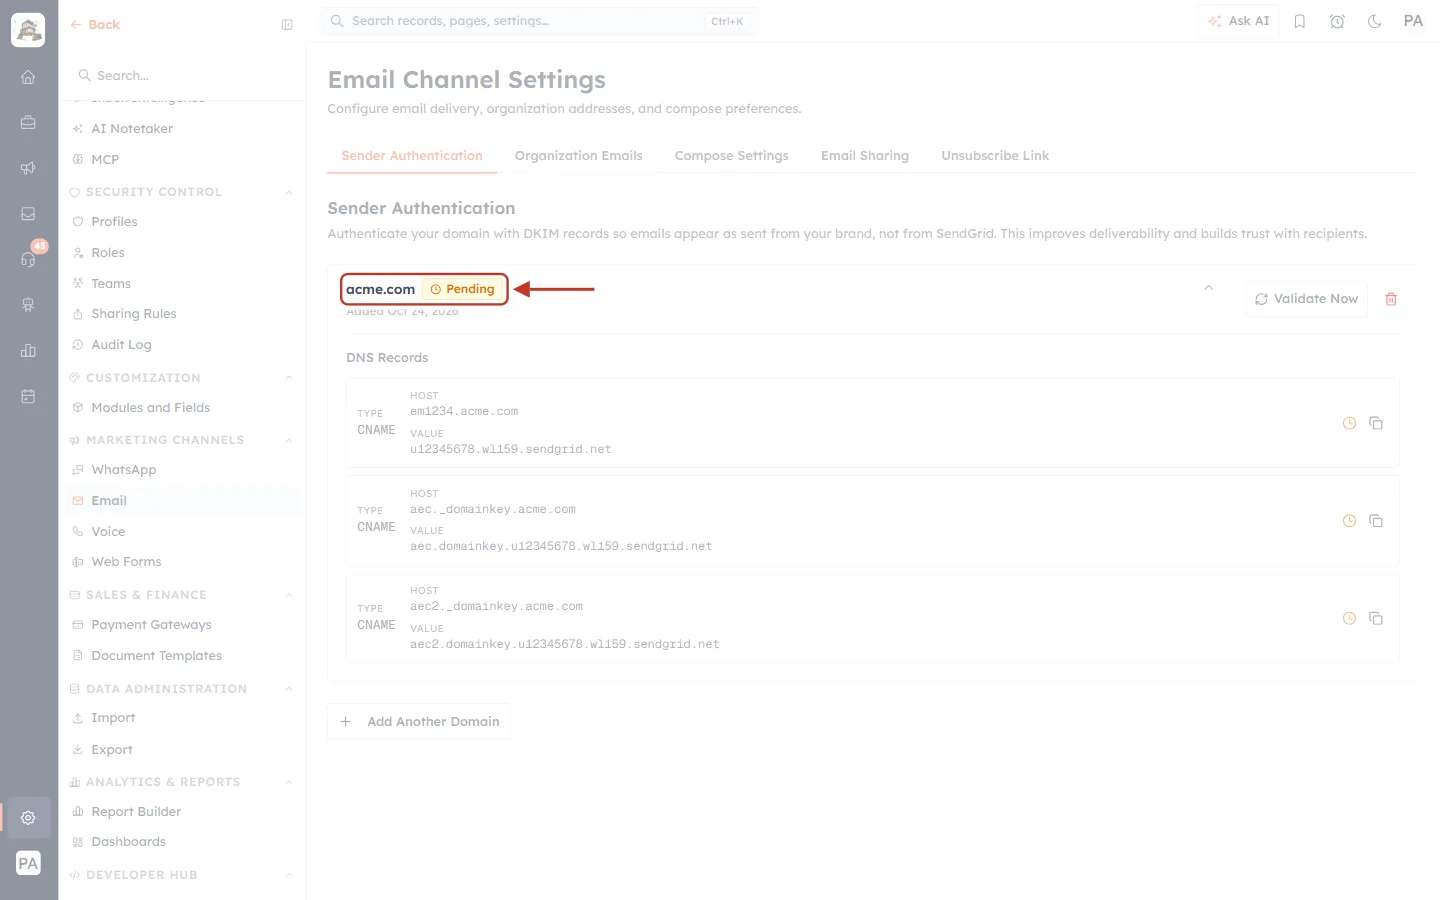
What this screenshot shows. The ringed orange Pending badge next to the domain name means the CRM hasn’t found all three records in your DNS yet.
Every new domain starts as Pending.
It changes to green Verified once all three records are found.
A red Failed badge means verification didn’t succeed. Check the records and validate again.
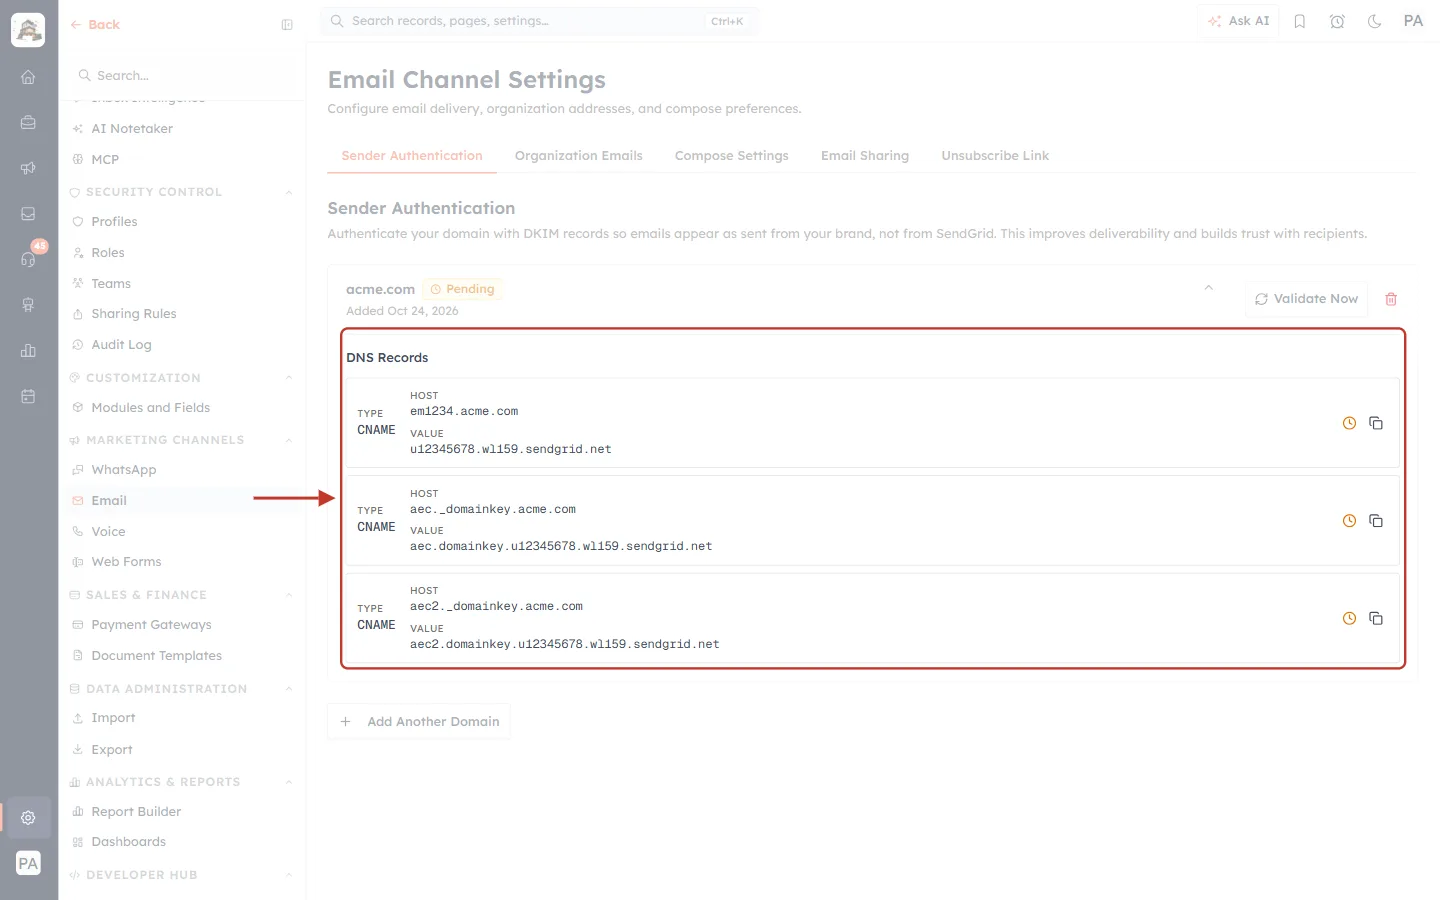
What this screenshot shows. The ringed DNS Records section lists the three records to add to your DNS provider.
TYPE: all three are CNAME records. You don’t need a TXT record.
HOST: the name of the record, for example em1234.acme.com, aec._domainkey.acme.com and aec2._domainkey.acme.com.
VALUE: where the record points, always ending in sendgrid.net.
The first record handles sending and return mail (and SPF for you). The two _domainkey records are the DKIM keys that sign your emails.
Your own numbers will differ from the example. Always copy the values from your screen.
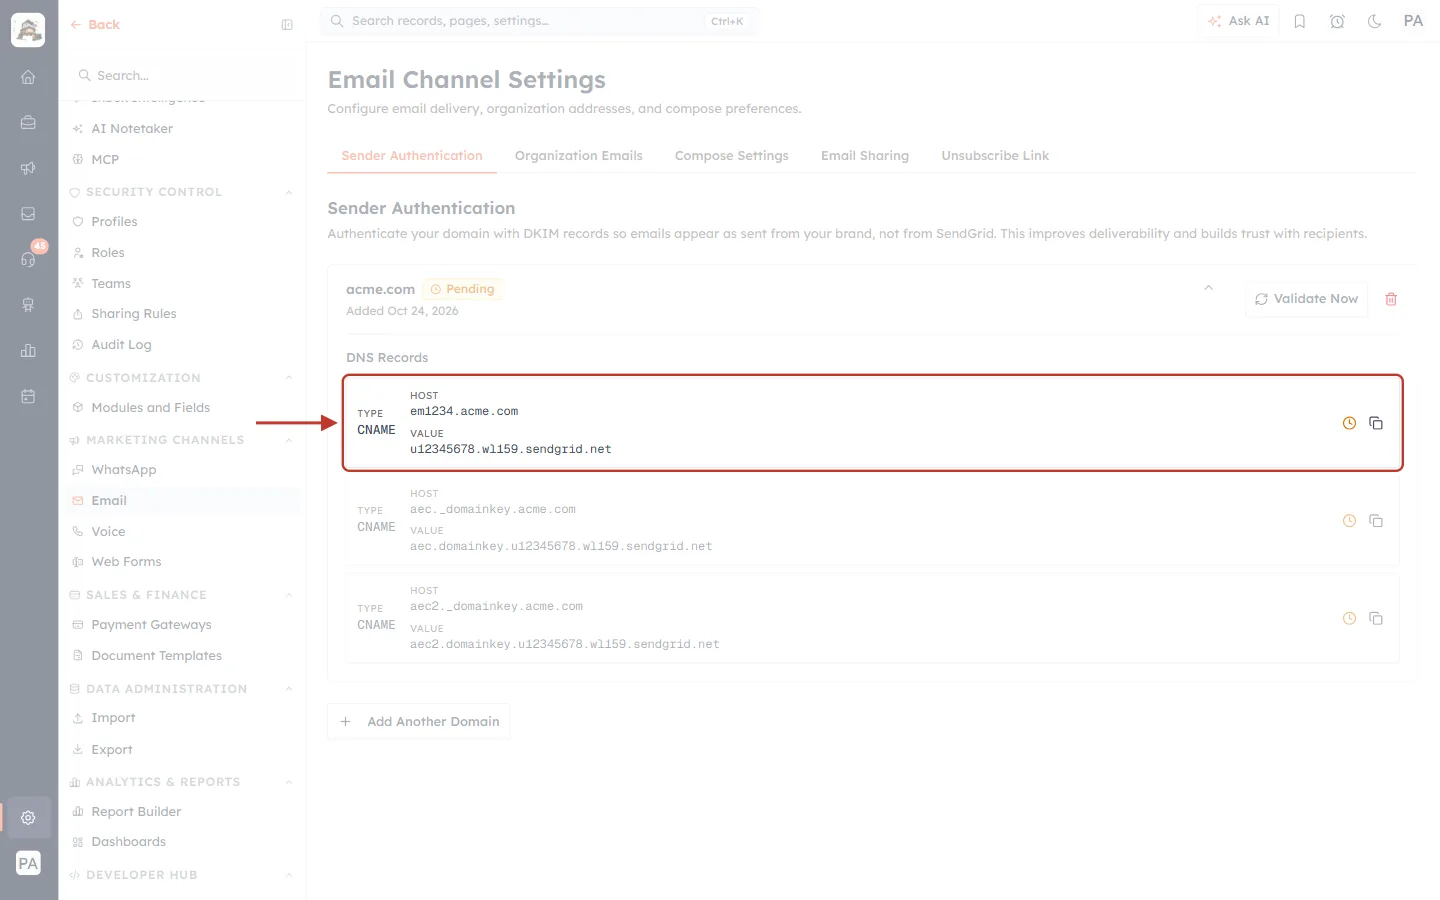
What this screenshot shows. The ringed box is one complete record, with everything you need to create it at your DNS provider.
On the left: TYPE (CNAME), then HOST and VALUE in a fixed-width font so every character is clear.
On the right: an orange clock means this record hasn’t been found yet. It turns into a green tick once it is found.
Next to it is the copy button.
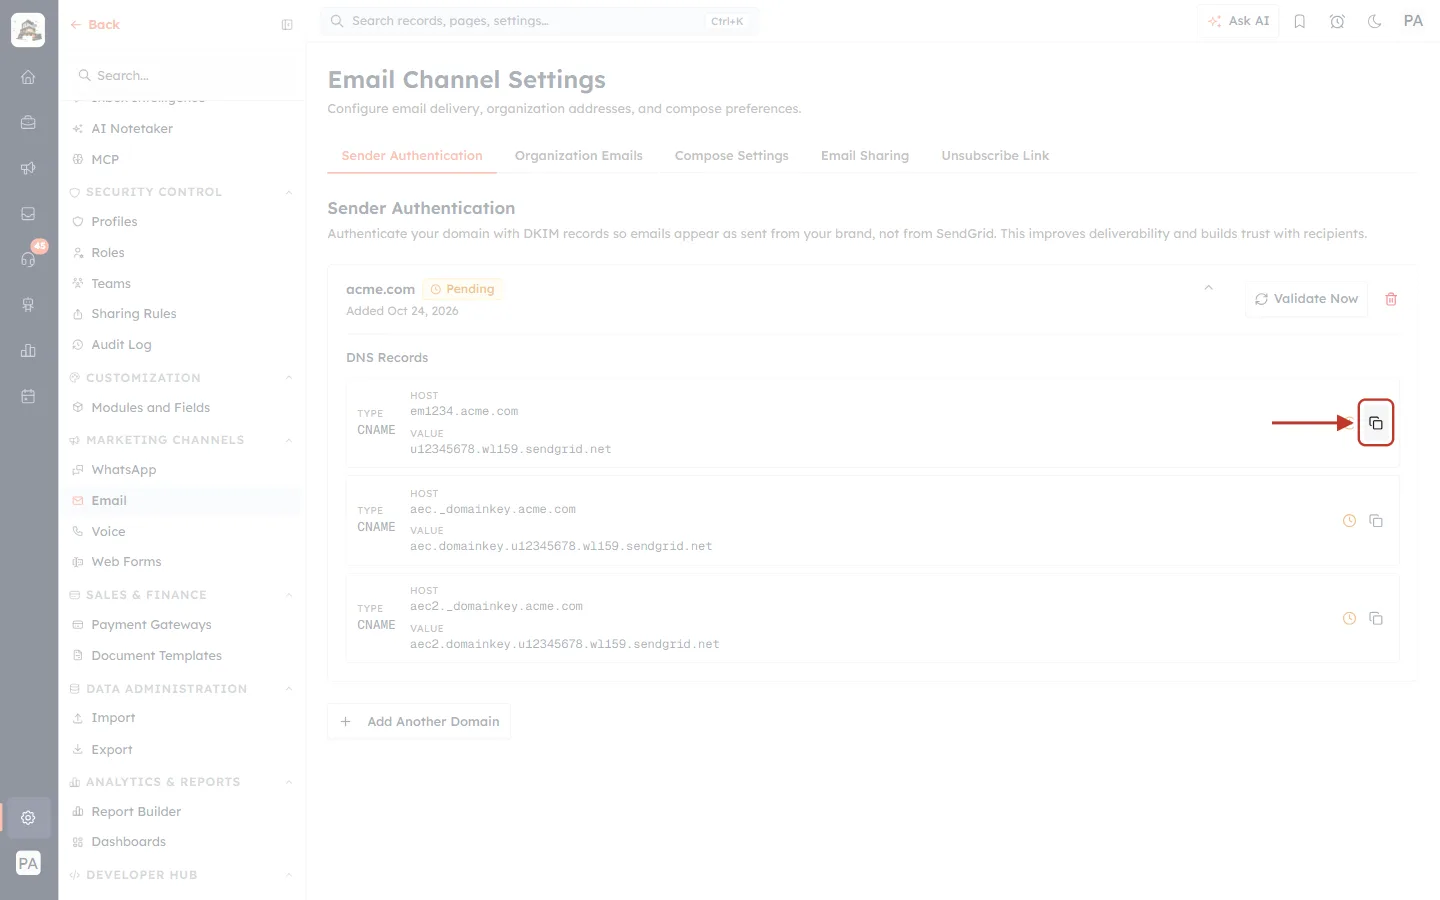
What this screenshot shows. Click the ringed copy button to copy that record’s VALUE. The message Copied to clipboard appears in the bottom-right corner.
Copying avoids typing mistakes. A single wrong character stops the record from being found.
The button copies the VALUE only. Select the HOST text with your mouse and copy it (Ctrl+C, or Cmd+C on a Mac).
Step 4: Add the Records at Your DNS Provider#
Keep the CRM open in one browser tab. In another tab, sign in where your domain’s DNS is managed. Then, for each of the three records:
Open the DNS (or DNS Management, Zone Editor, Advanced DNS) page for your domain.
Click Add record (or Add, Add New Record).
Set Type to CNAME.
In Host (also called Name), enter the HOST from the CRM. See the table below for how much of it to type.
In Value (also called Points to, Target or Data), paste the VALUE you copied.
Leave TTL at its default (Automatic or 1 hour is fine).
Save, then repeat for the next record.
How much of the HOST to type#
Most DNS providers add your domain to the end of the host automatically. If you type the whole host there, it can end up doubled (for example em1234.acme.com.acme.com), and the record won’t be found.
HOST shown in the CRM | Type this at GoDaddy, Namecheap, Hostinger, Squarespace and most providers | Cloudflare |
|---|---|---|
em1234.acme.com | em1234 | em1234 (or the full host; Cloudflare accepts both) |
aec._domainkey.acme.com | aec._domainkey | aec._domainkey |
aec2._domainkey.acme.com | aec2._domainkey | aec2._domainkey |
If you aren’t sure, add one record, then look at how the provider displays it. If it shows your domain twice, edit it and remove the extra part.
Notes for popular providers#
GoDaddy: My Products → your domain → DNS → Add New Record → Type CNAME, Name, Value → Save.
Cloudflare: your domain → DNS → Records → Add record. Set Proxy status to DNS only (grey cloud), not Proxied (orange cloud). Proxied records can’t be verified.
Namecheap: Domain List → Manage → Advanced DNS → Add New Record → CNAME Record → tick to save.
Squarespace Domains (formerly Google Domains): Domains → your domain → DNS → Custom records → Add record.
⚠️
If a CNAME with the same host already exists (for example from an older email tool), edit it to the new value instead of adding a second one. A host can have only one CNAME.
ℹ️
DNS changes usually take 15–30 minutes to take effect, but can take up to 48 hours. You can close the CRM and come back later. Your domain and its records stay on the Sender Authentication page.
Step 5: Validate Your Domain#
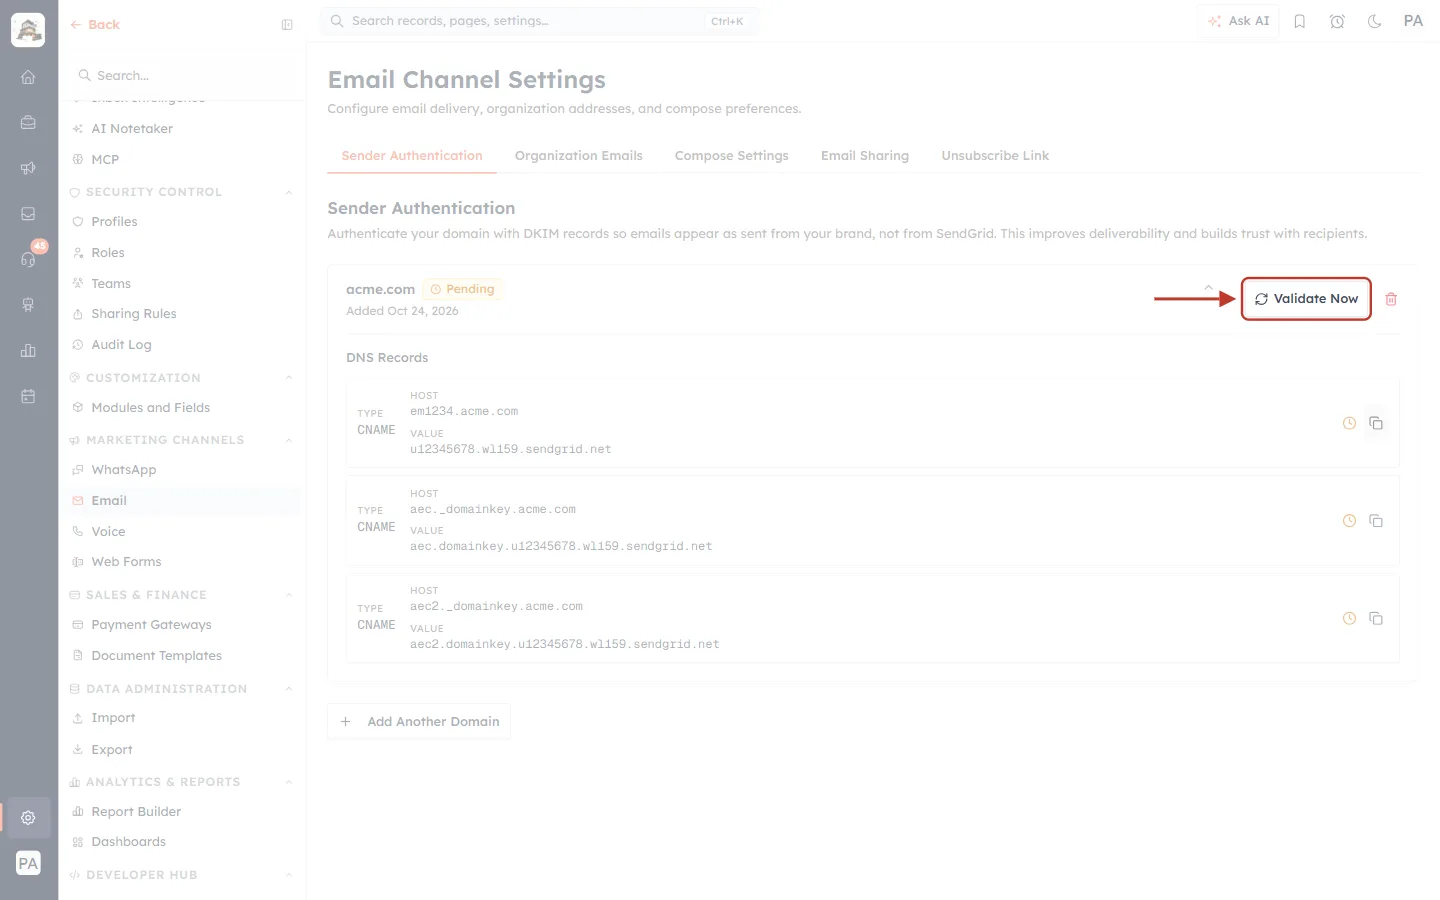
What this screenshot shows. Back on the Sender Authentication page, click the ringed Validate Now button on your domain’s card.
The CRM looks up all three records in your DNS. The arrows in the button spin while it checks.
Validating doesn’t change anything at your DNS provider. You can click it as often as you like.
If some records are still missing#
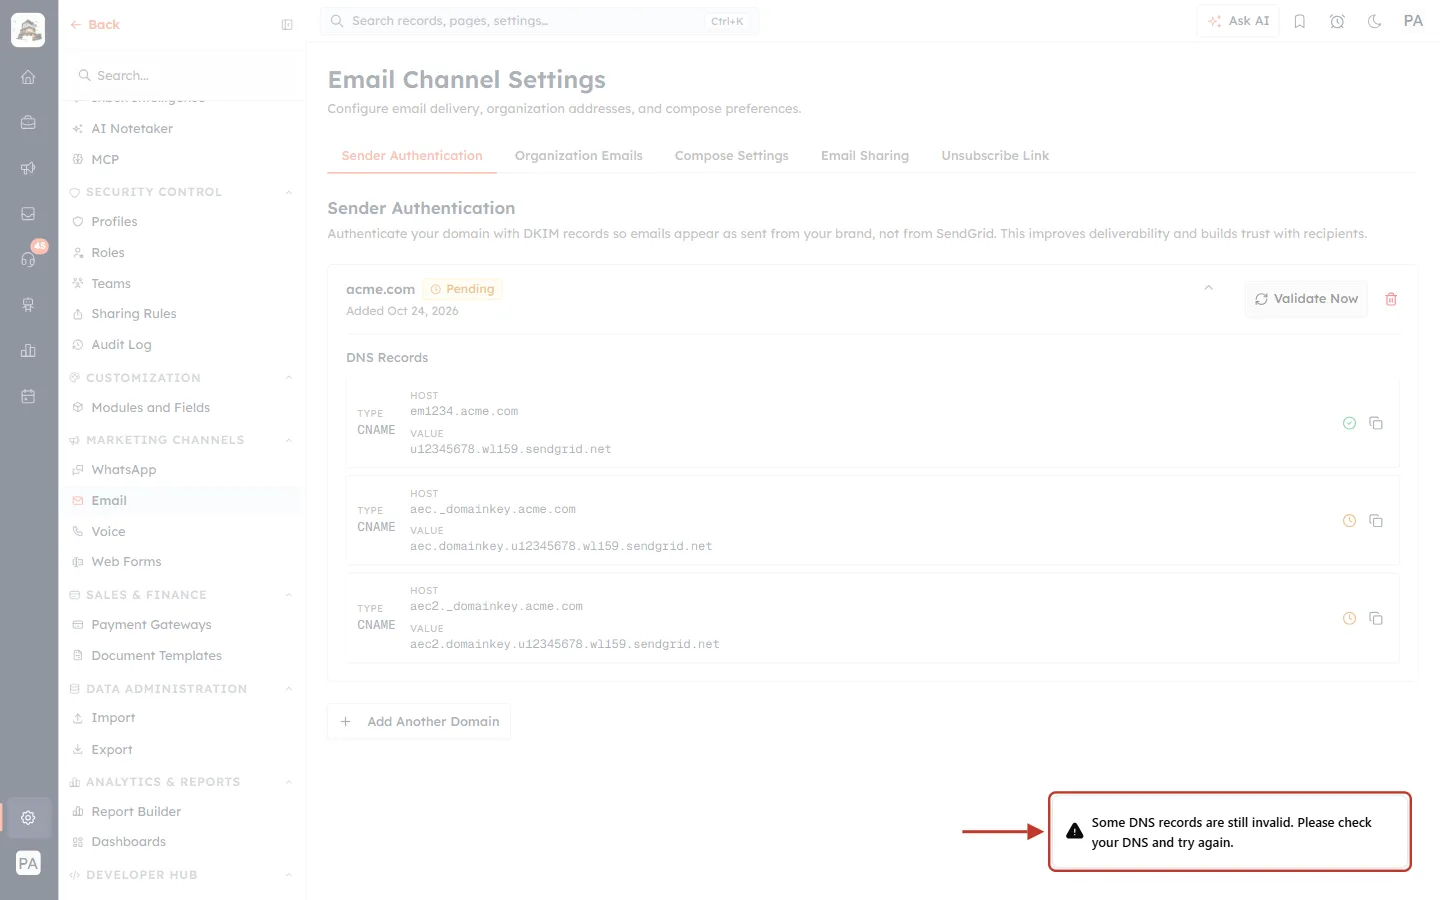
What this screenshot shows. If not all records are found yet, the ringed message reads: Some DNS records are still invalid. Please check your DNS and try again.
The domain stays Pending.
This is normal shortly after adding the records. DNS may simply not have updated yet.
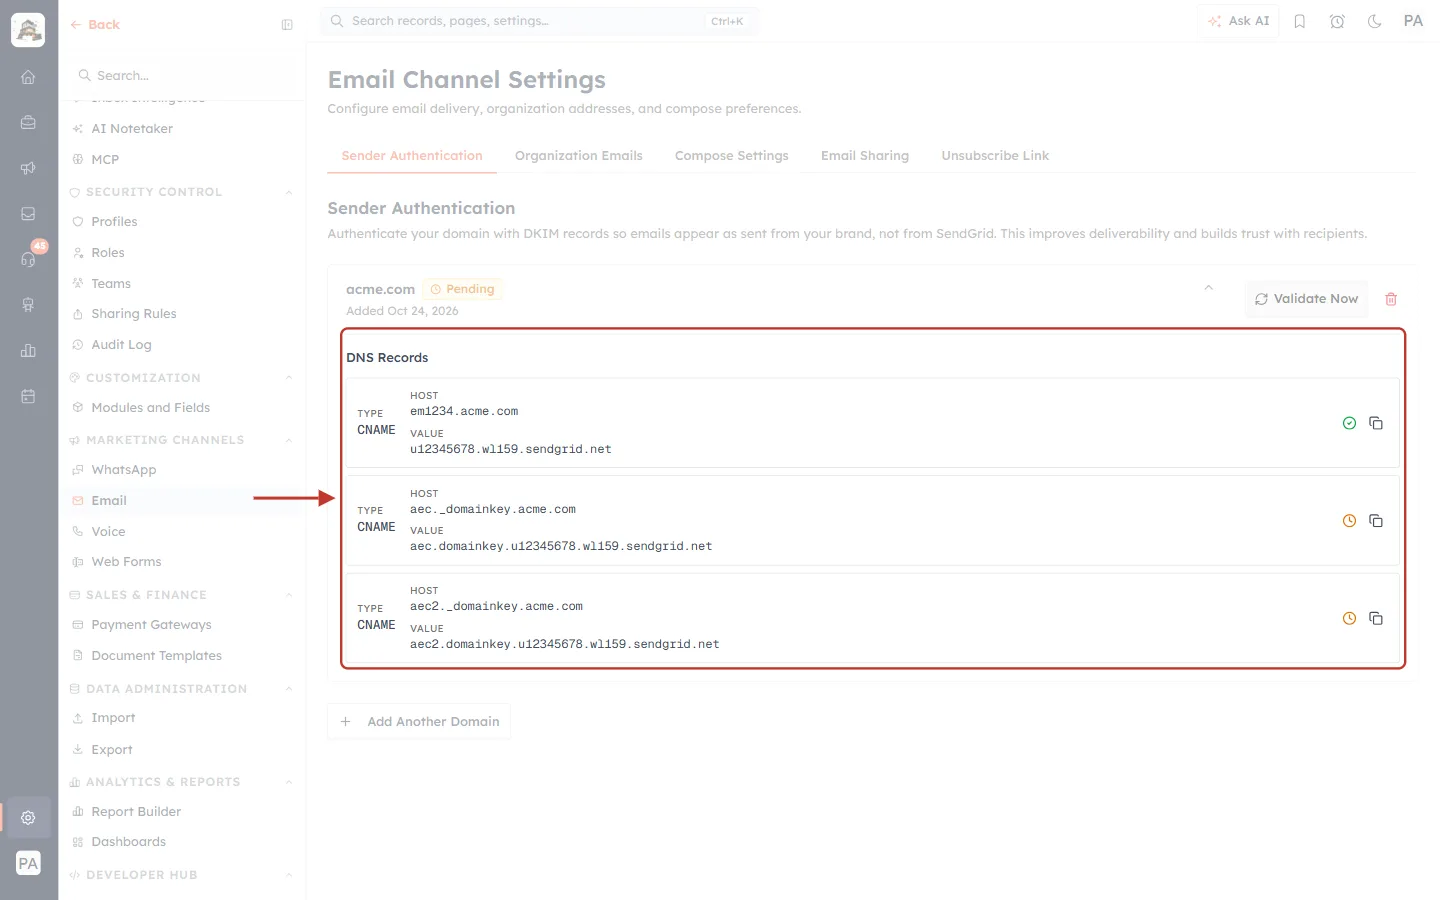
What this screenshot shows. In the ringed DNS Records section, each record now shows whether it was found.
A green tick (here, the first record) means that record is correct.
An orange clock (here, the two _domainkey records) means that record still wasn’t found.
Check only the records with a clock at your DNS provider, then click Validate Now again.
If a record still isn’t found after an hour, check that:
The type is CNAME, not TXT or A.
The host isn’t doubled (see the table in Step 4) and has no spelling mistakes. Note the underscore in _domainkey.
The value was pasted exactly, with no space before or after it.
On Cloudflare, the record is set to DNS only (grey cloud).
There isn’t a second, older record with the same host.
When all three records are found#
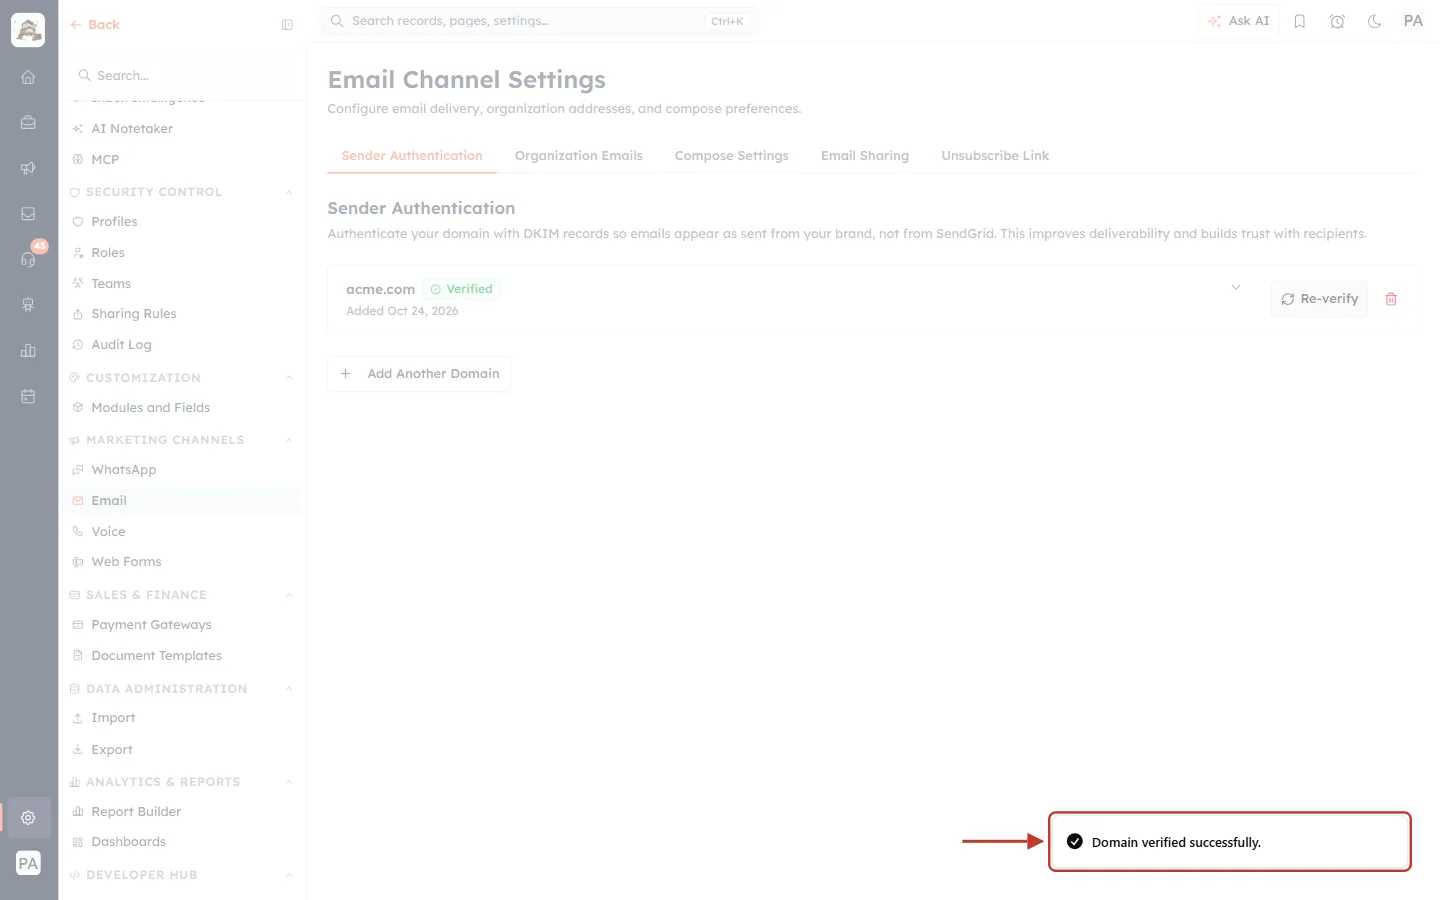
What this screenshot shows. When all three records are found, the ringed message reads Domain verified successfully.
The badge next to your domain turns green and reads Verified.
From now on, emails from addresses on this domain are DKIM-signed.
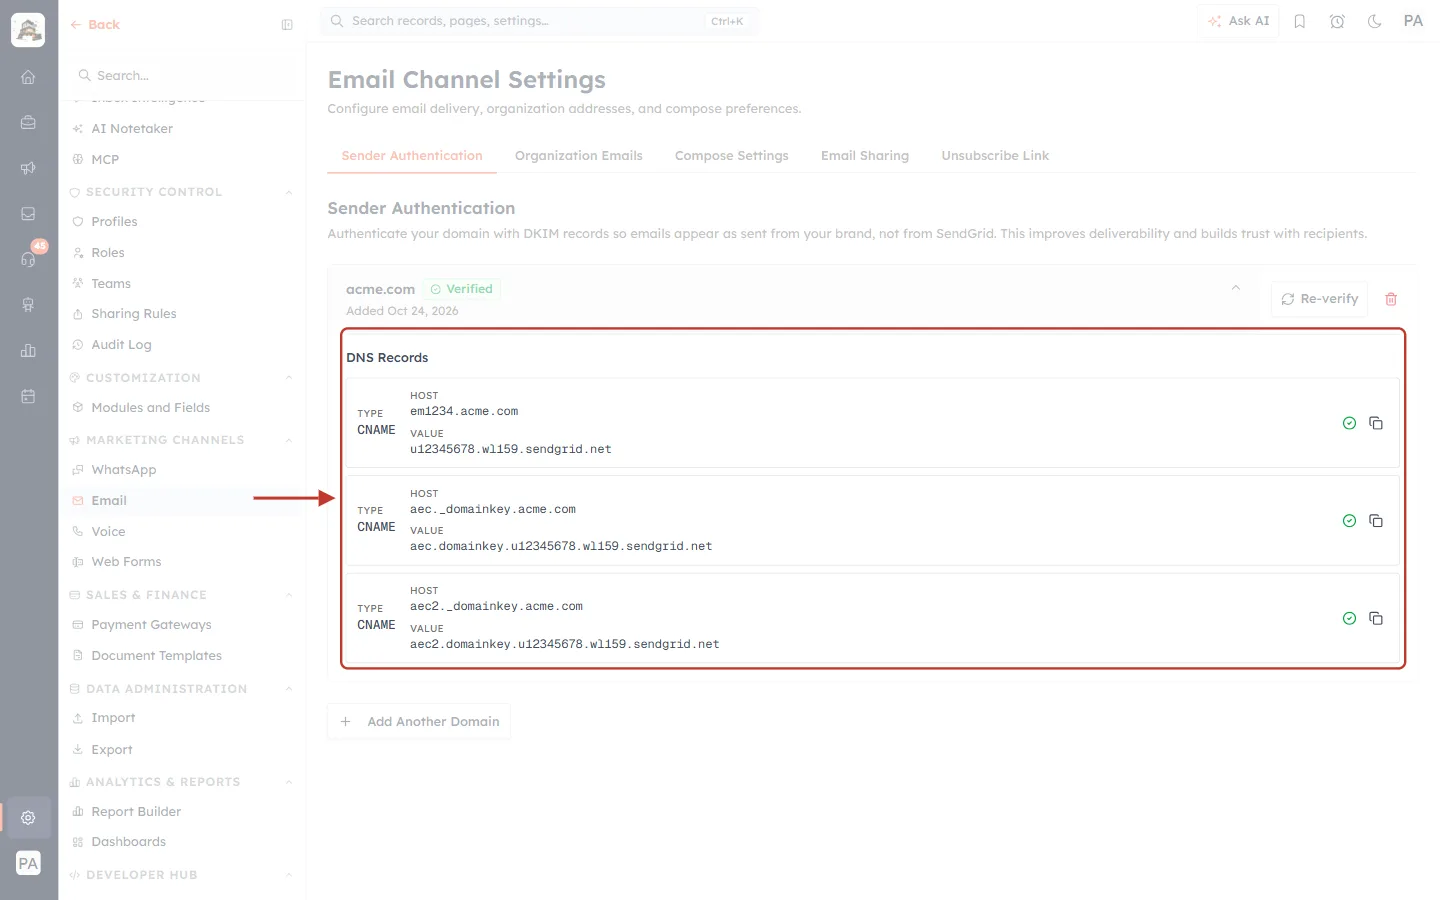
What this screenshot shows. The ringed DNS Records section shows a green tick on every record.
The button at the top of the card now reads Re-verify instead of Validate Now.
Keep these records in your DNS. If you delete them, your domain stops being authenticated.
✅
Your domain is ready. Next, add the From addresses your team will send from on the Organization Emails tab (see Set Up Your Organisation Email Address in AI Engage CRM), then send yourself a test email (see Preview & Send Test Emails Before Launching).
Step 6: Manage Your Domains Later#
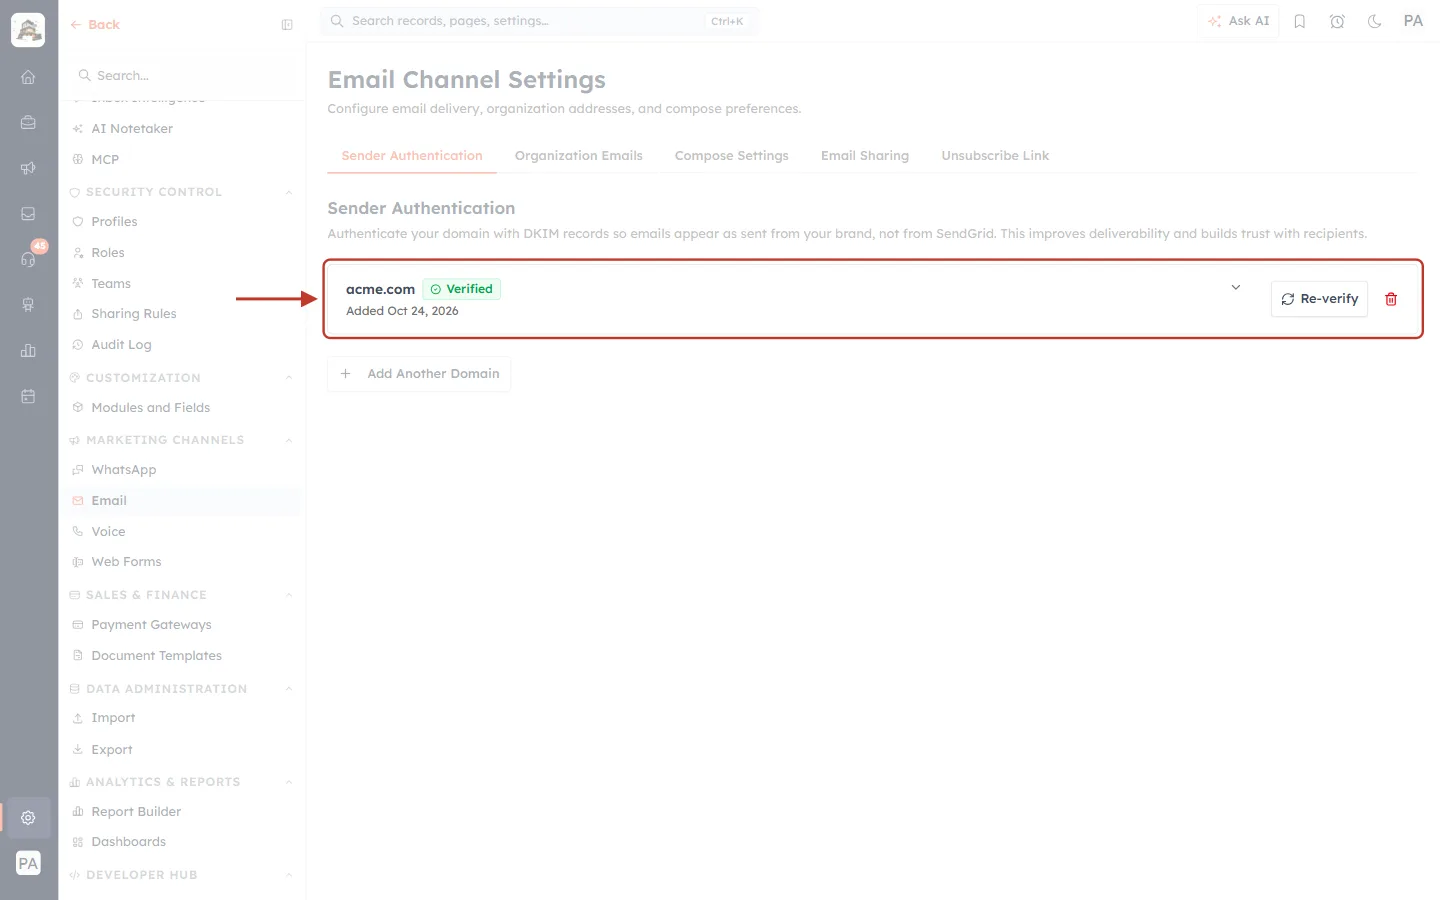
What this screenshot shows. When you come back later, a verified domain shows as the ringed, collapsed card.
It shows the domain name, the green Verified badge and the date it was added.
On the right are Re-verify and the red trash icon.
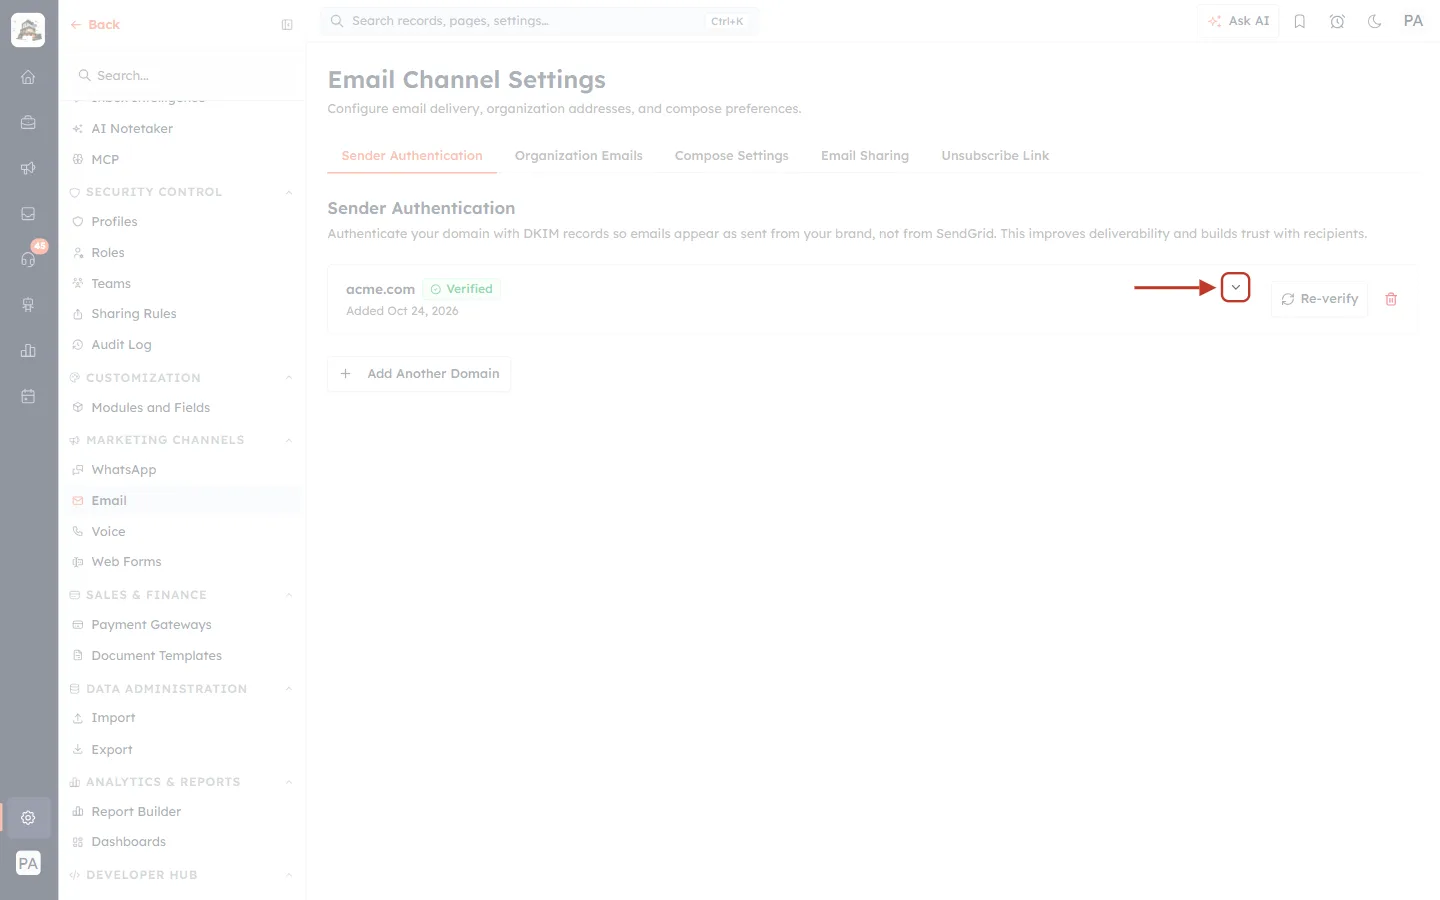
What this screenshot shows. Click the ringed small arrow to expand the card and see its DNS records again, for example if you move your domain to another DNS provider.
Click it again to collapse the card.
Domains that aren’t verified yet always open expanded.
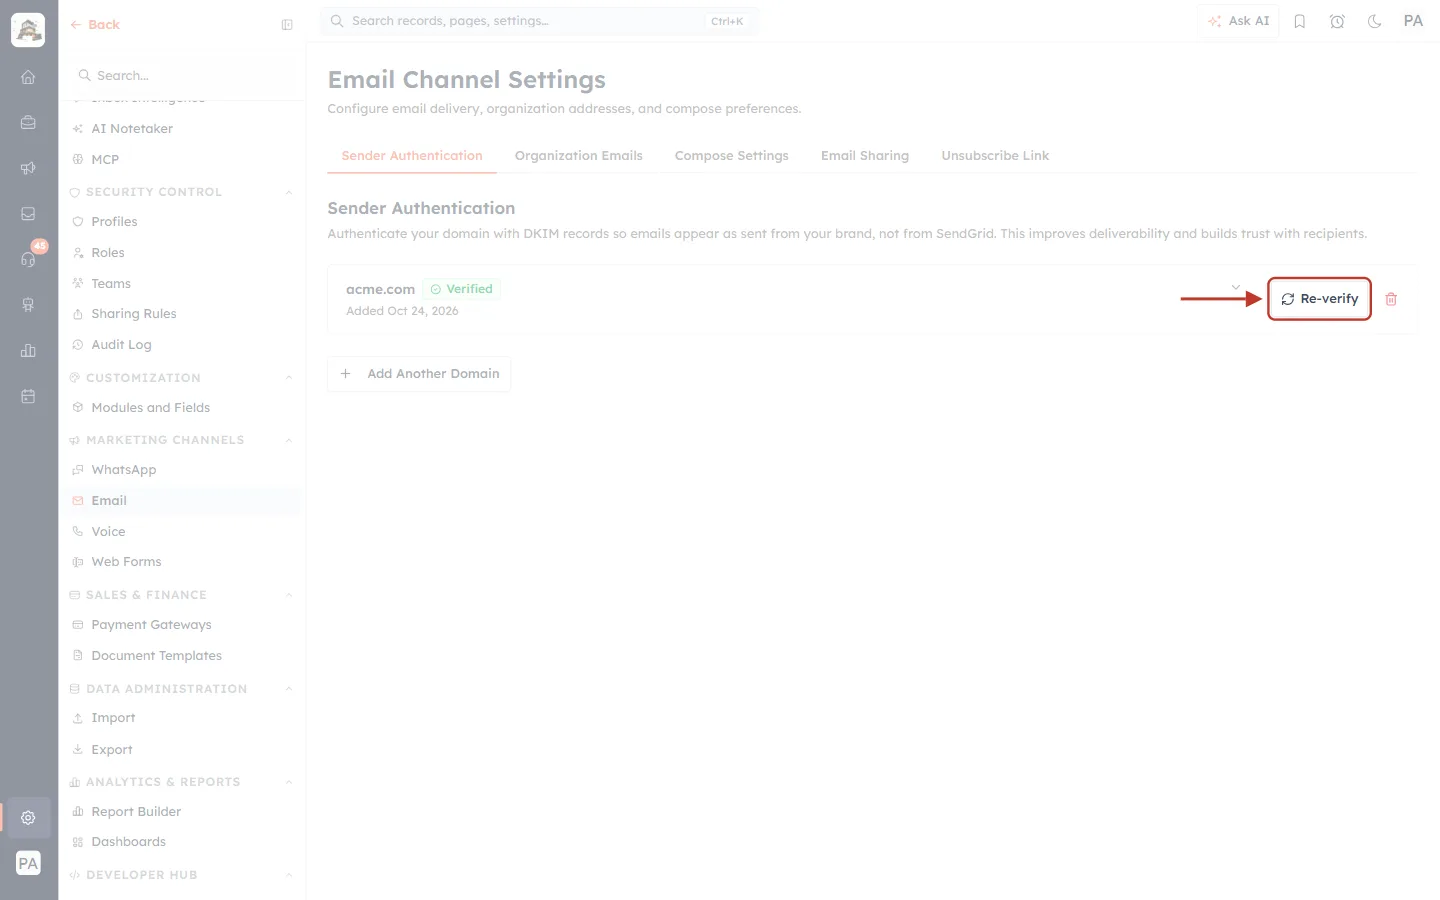
What this screenshot shows. The ringed Re-verify button checks the records again.
Use it after changing DNS provider or editing DNS, to confirm the records are still in place.
If a record has gone missing, you see the still invalid message and the clock icons show which one to fix.
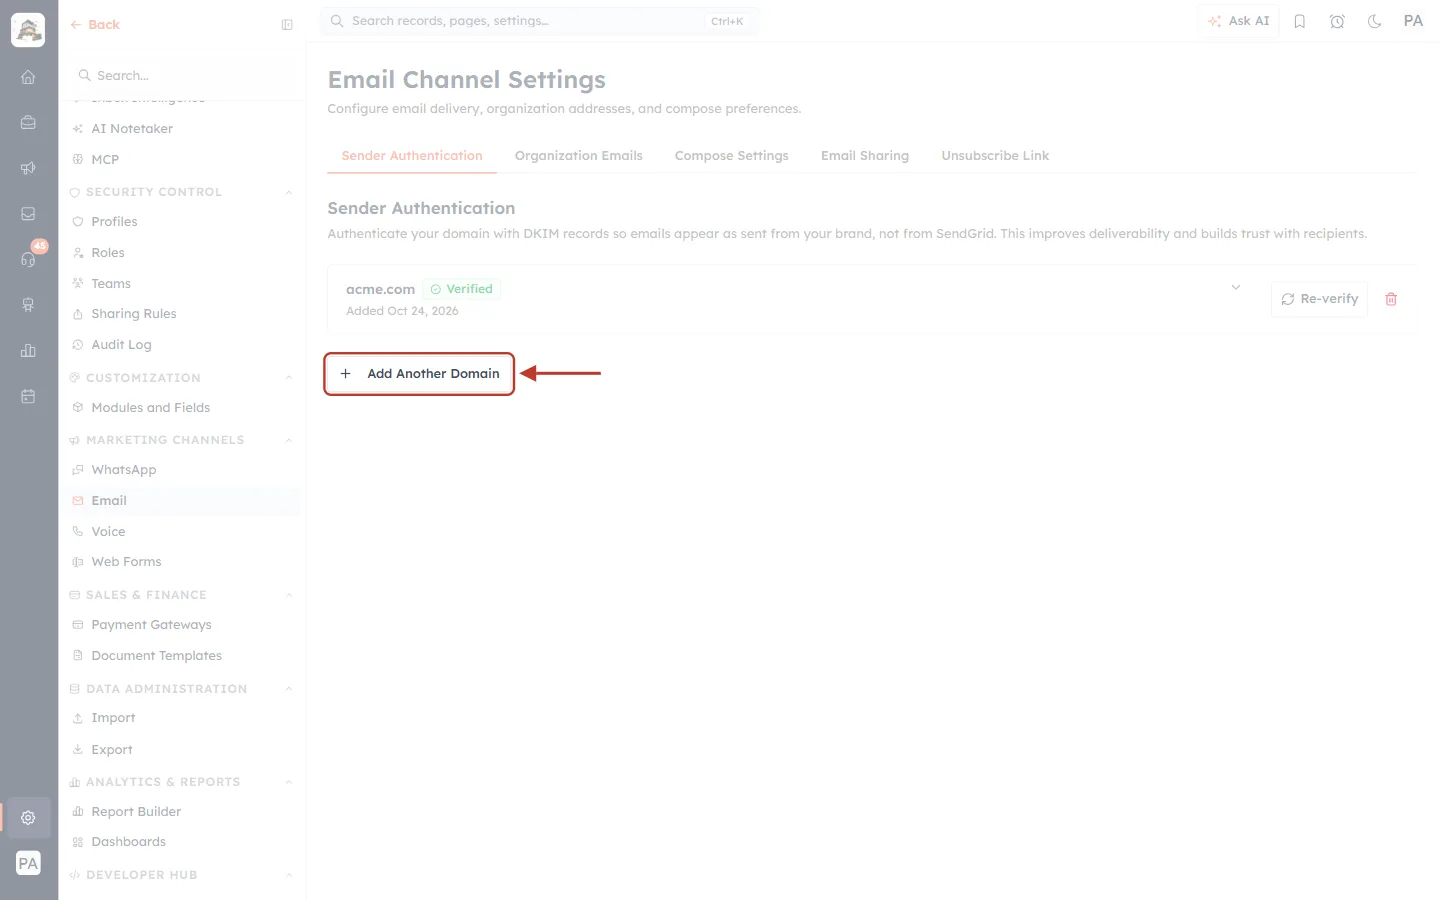
What this screenshot shows. The ringed + Add Another Domain button, under your list, adds a second domain.
Do this if your team sends from more than one domain, for example yourcompany.com and yourcompany.co.uk.
Each domain gets its own three records. Follow Steps 2 to 5 again.
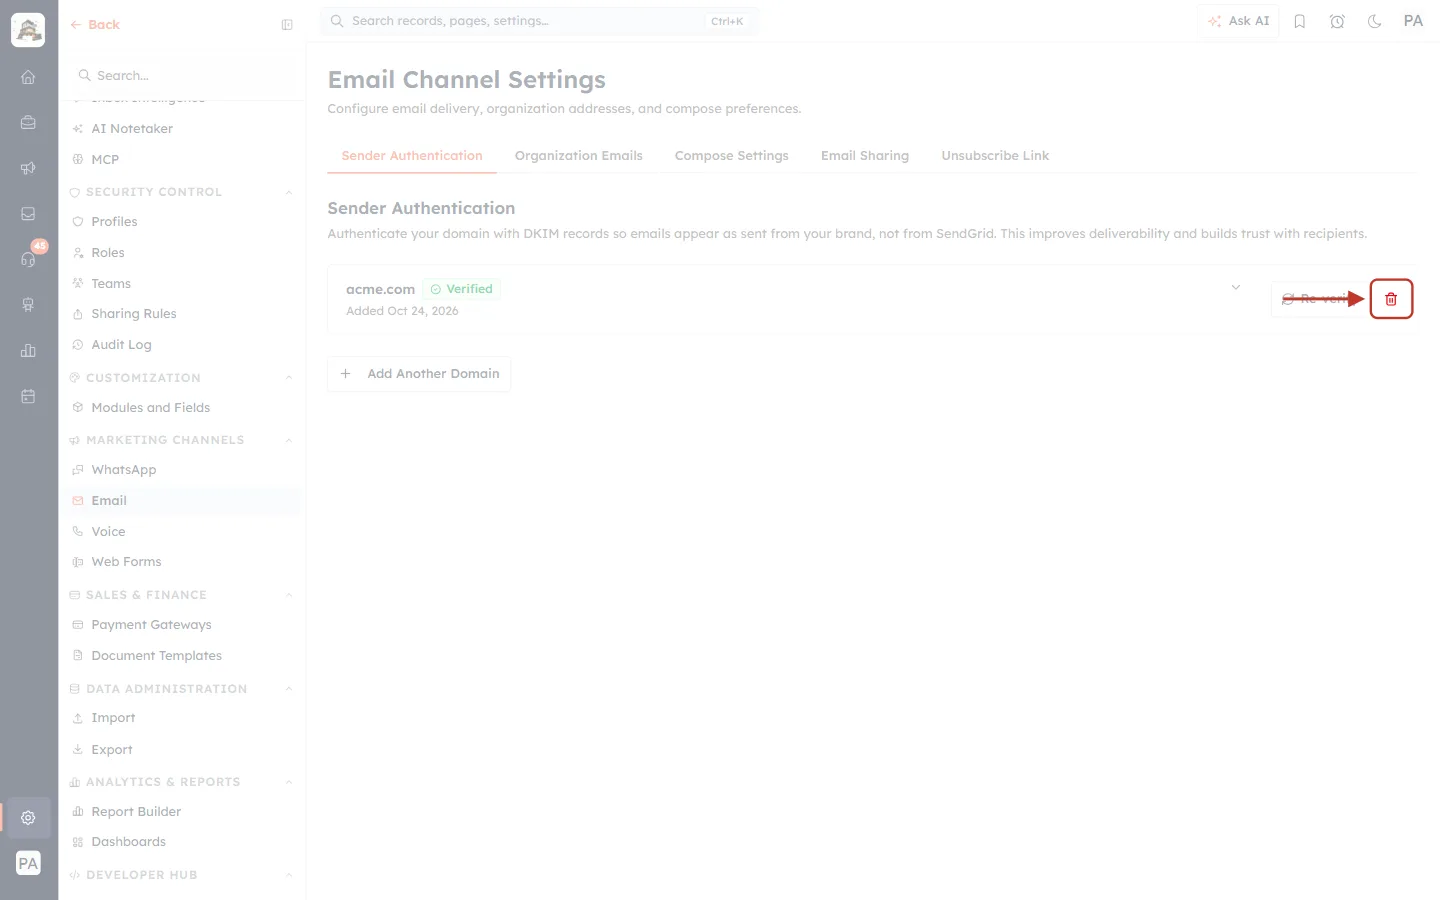
What this screenshot shows. The ringed red trash icon removes a domain from the CRM.
Clicking it doesn’t delete anything straight away. It asks you to confirm first.
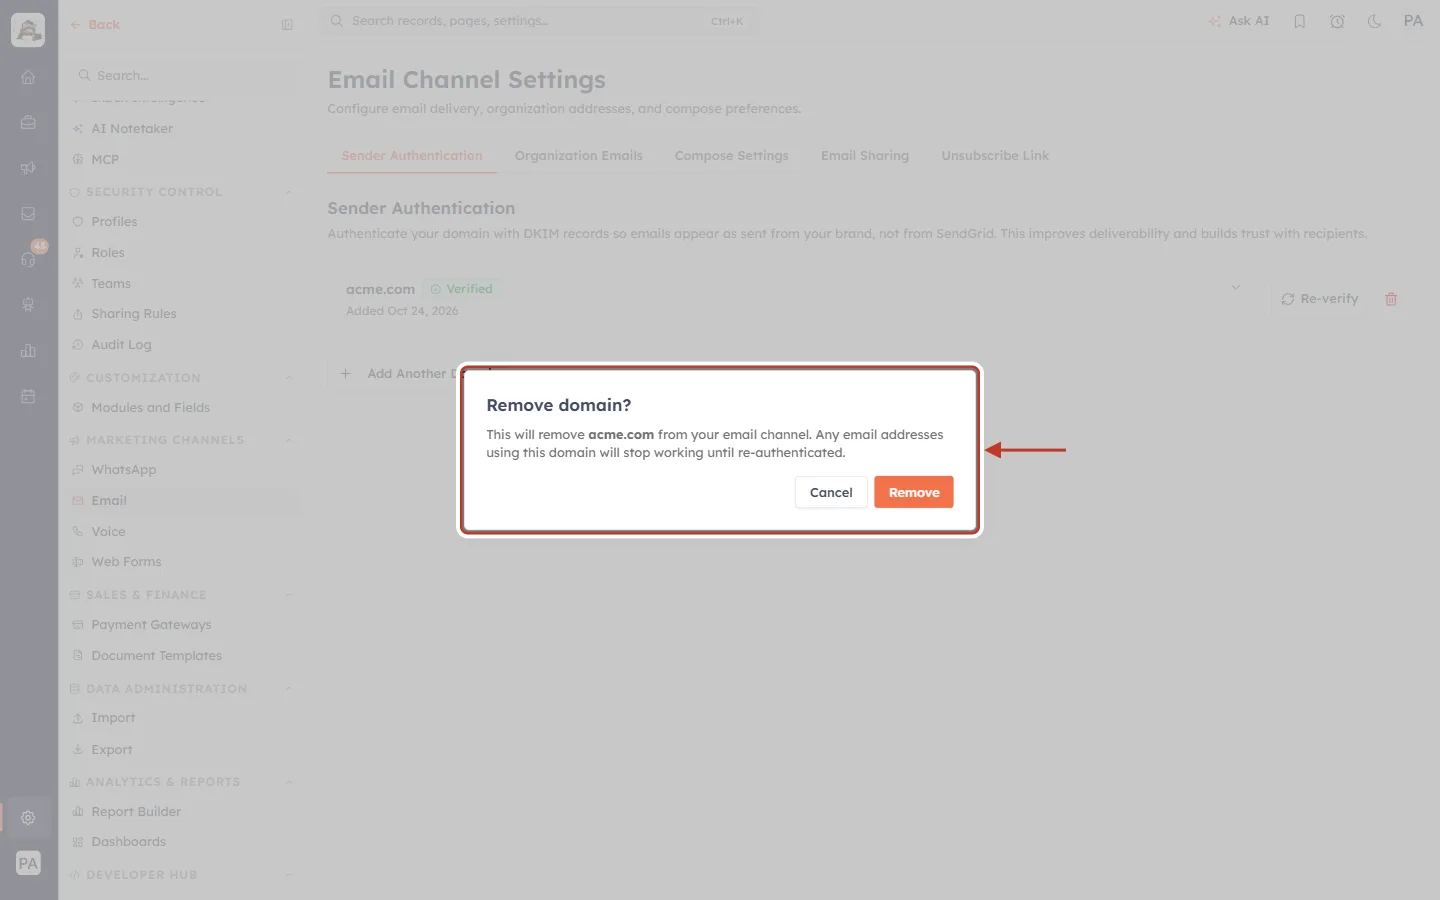
What this screenshot shows. The ringed Remove domain? dialog asks you to confirm.
It warns: This will remove acme.com from your email channel. Any email addresses using this domain will stop working until re-authenticated.
Cancel keeps the domain. Remove (orange) removes it, and you see Domain removed.
Removing the domain in the CRM doesn’t delete the records at your DNS provider. Delete those yourself if you no longer need them.
To use the domain again, add it again (Step 2) and validate.
Recommended: Add a DMARC Record#
Gmail and Yahoo also expect bulk senders to publish a DMARC record. The CRM doesn’t generate one or check it, but adding one helps deliverability. At your DNS provider, add a TXT record with host _dmarc and a value such as v=DMARC1; p=none; rua=mailto:dmarc@yourcompany.com. Replace the email address with one you can read. If your domain already has a DMARC record, keep it.
Frequently Asked Questions#
Can I send from a Gmail, Yahoo or Outlook address?
No. Free email domains can’t be authenticated, so you can’t send from them. Use an address on your own business domain.
Do I need a TXT record for DKIM?
No. The CRM uses three CNAME records. Earlier instructions mentioning a TXT record are out of date.
How long does verification take?
As soon as your DNS provider publishes the records, usually 15–30 minutes and at most 48 hours. Click Validate Now whenever you like.
One record has a tick, but the others still show a clock. Why?
Each record is checked separately. Look at the records with a clock: a doubled host, a missing underscore in _domainkey or Cloudflare’s orange cloud are the usual causes.
Will authenticating my domain affect my website or my normal mailbox?
No. The records only add new names under your domain. Your website, mailboxes and existing MX records are unchanged.
What happens if I remove the records from my DNS later?
Your emails stop being DKIM-signed and deliverability drops. Leave the records in place for as long as you send from the CRM.
Previous and Next#
Related Articles#
Was this article helpful?
Ready to implement this?
OpenAI Engage and apply what you just learned to your own workspace.
Open AI Engage CRM