Loading…


KnowledgeBase
Email Setting Restrictions: Control Who Can Send and Who Can See
Where these settings live#
Email restrictions are managed from Settings → Marketing Channels → Email, on the Email Channel Settings screen. It has five tabs — Sender Authentication, Organization Emails, Compose Settings, Email Sharing, and Unsubscribe Link. The two that control restrictions are Organization Emails (who can send) and Email Sharing (who can see).
💡
Access is gated by the Email Channel permission. It is effectively an admin-level permission — anyone who can open Email Sharing can change every user’s sharing settings, excluded domains, and run role-wide updates.
Restrict who can send from an address#
Open the Organization Emails tab. Each shared address has a Who can use column showing either Anyone or the specific users/roles allowed.
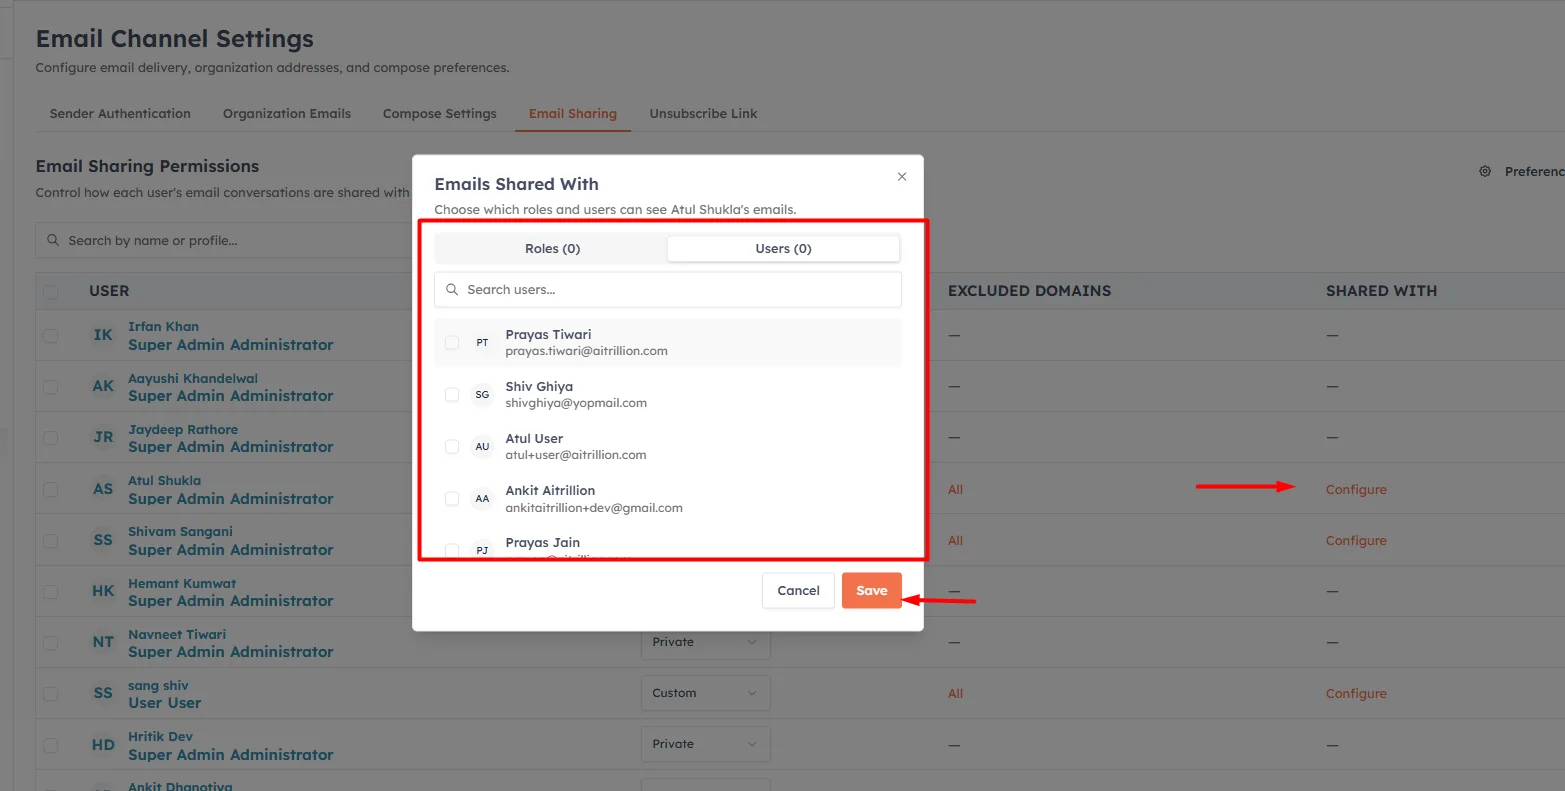
Click Add Another (or the pencil to edit) and set Who can use this email address:
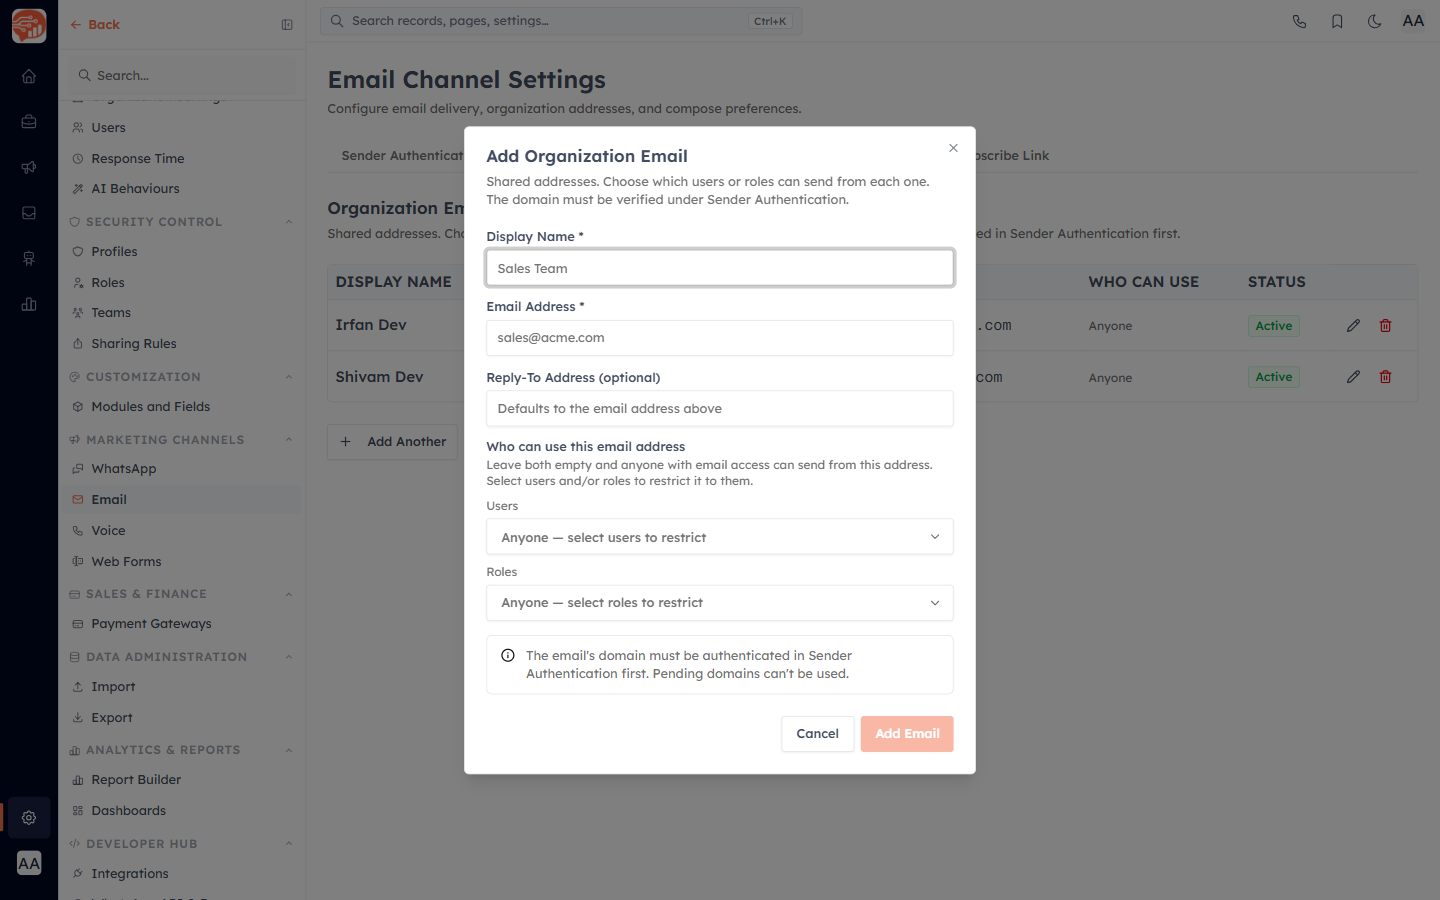
Leave Users and Roles empty — anyone with email access can send from the address.
Select users and/or roles — only they can send from it.
💡
There is no All/Specific switch — the mode is decided by whether you have selected anyone. If you restrict an address, you must pick at least one user or role; an address usable by nobody cannot be saved.
The restriction is enforced in two places: the address won’t appear in the From dropdown for people who aren’t allowed, and the send is blocked server-side with "You cannot send from this address." if attempted anyway.
💡
Access is by direct role membership only — a manager above an allowed role is not automatically allowed. Also, the address’s domain must already be verified under Sender Authentication before you can add it.
Restrict who can see emails#
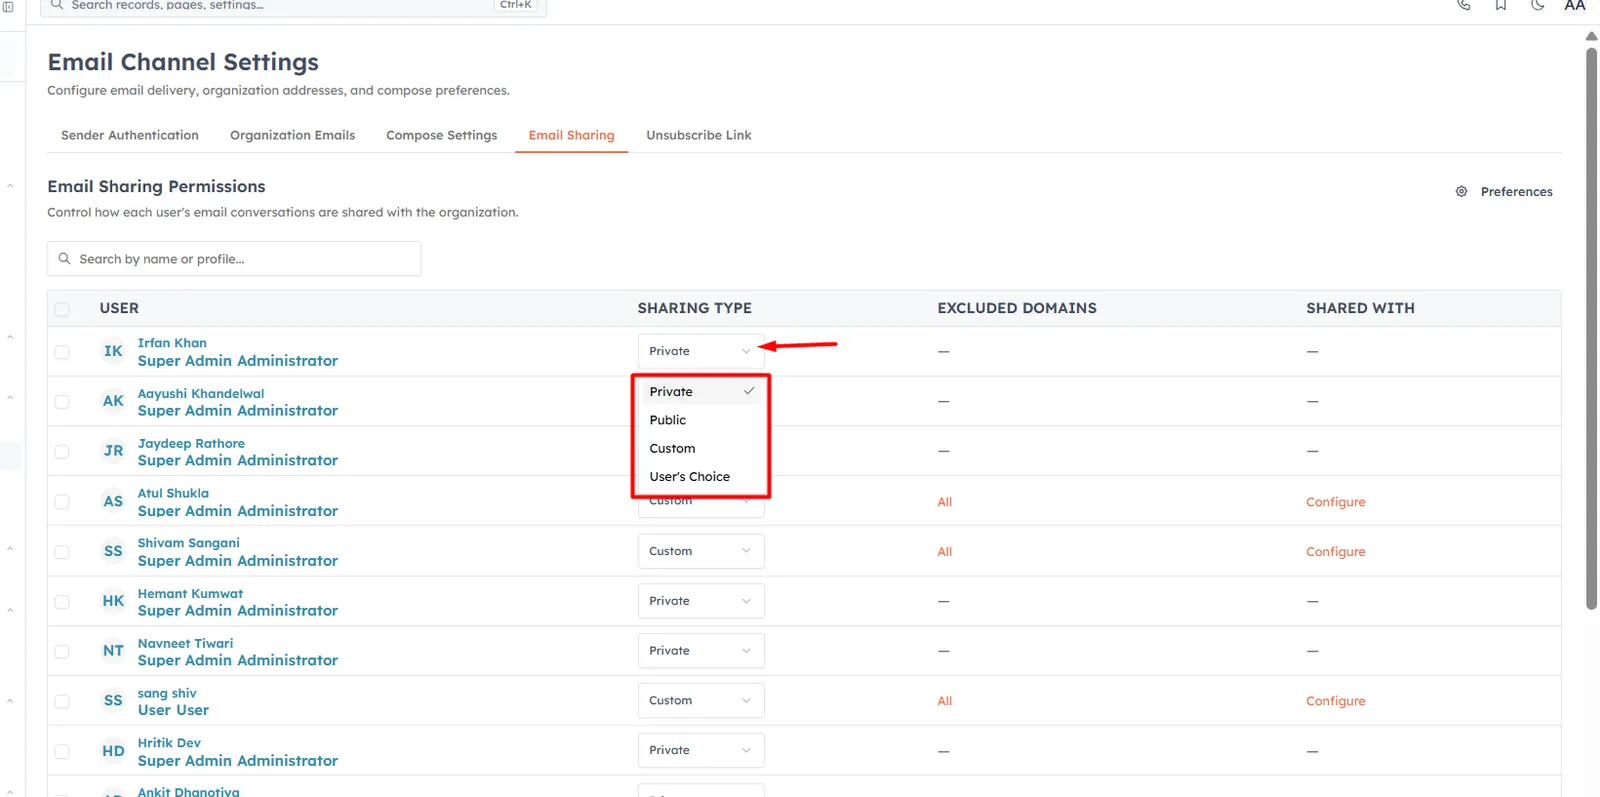
Open the Email Sharing tab. Each user has a Sharing Type that controls who else in your organisation can read their email conversations.
Private — nobody else sees this user’s emails. This is the default.
Public — everyone can see them. A second Access Level appears: Read Only, Read/Write, or Read/Write/Delete.
Custom — visible only to the roles/users you pick under Shared With.
User’s Choice — hands the decision to the user.
💡
Two rules always apply: a user always sees their own emails, and a manager above them in the role hierarchy can always read them (read-only). Neither can be switched off.
💡
Custom needs two things. Picking roles/users under Shared With is only half of it — the sender must also tick Share Email on the individual contact. Without that tick, the emails stay invisible even to people on the Shared With list.
💡
User’s Choice currently behaves as Private. There is no screen yet where a user sets their own preference, so until they do, their emails stay private.
Excluded Domains#
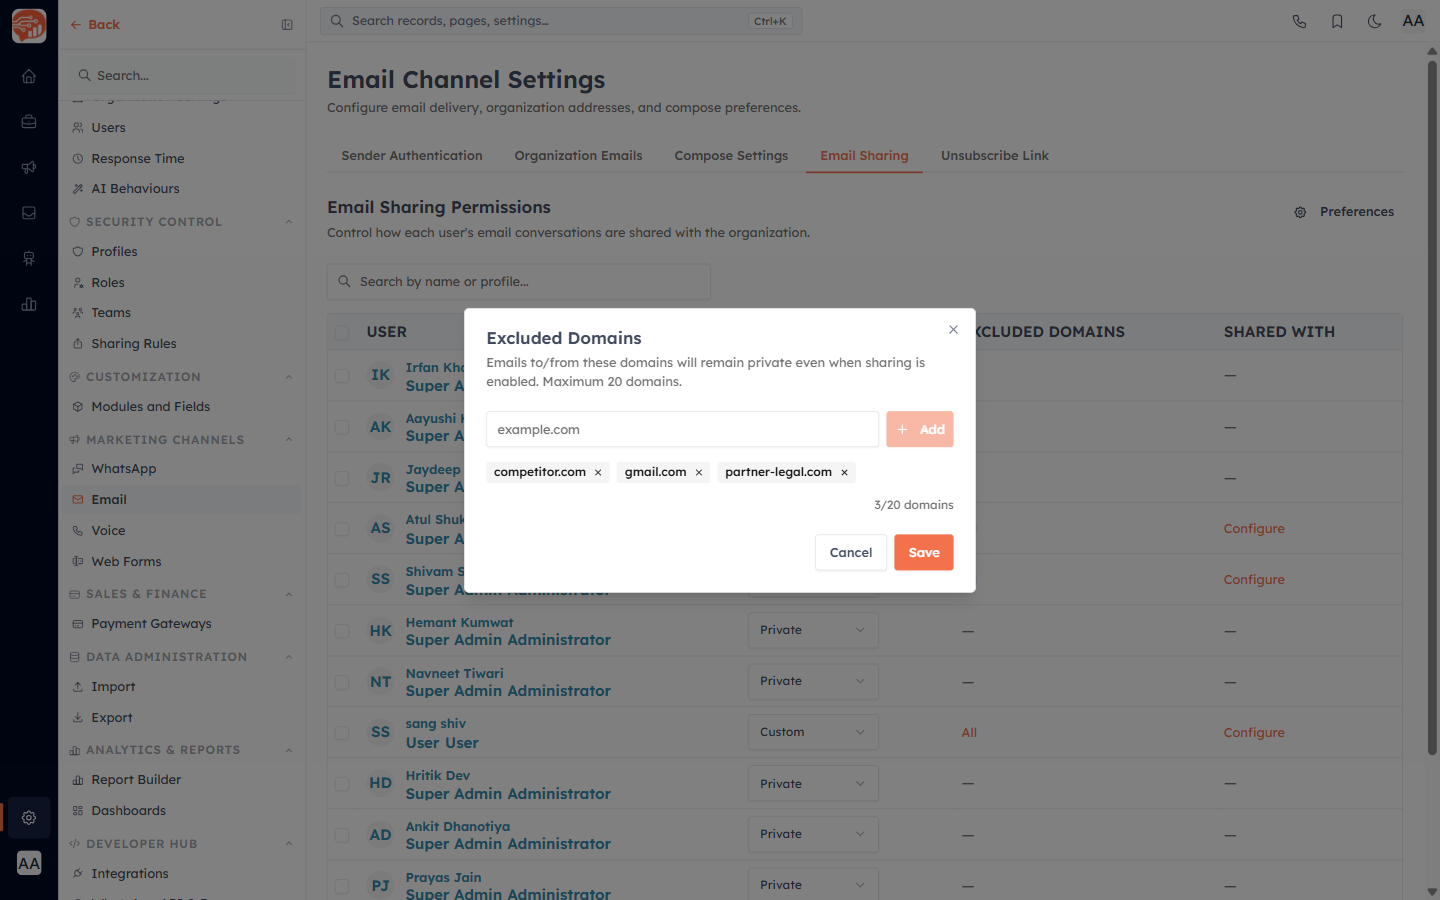
For users set to Public or Custom, the Excluded Domains column lets you keep sensitive conversations private. Click All (or the domain count) to open the dialog, type a domain, and click Add — up to 20 domains. Click Save.
💡
What this does and does not do. Excluding a domain hides matching emails from other users — it does not stop anyone emailing that domain. Sends go out normally. It matches the To, CC and BCC recipients, and the sender plus their role-hierarchy superiors can still see the emails regardless.
Remove a domain with the × on its chip, then Save. Removing all of them returns the column to All (nothing excluded). Press Cancel to discard changes — there is no separate reset button.
Set defaults by role#
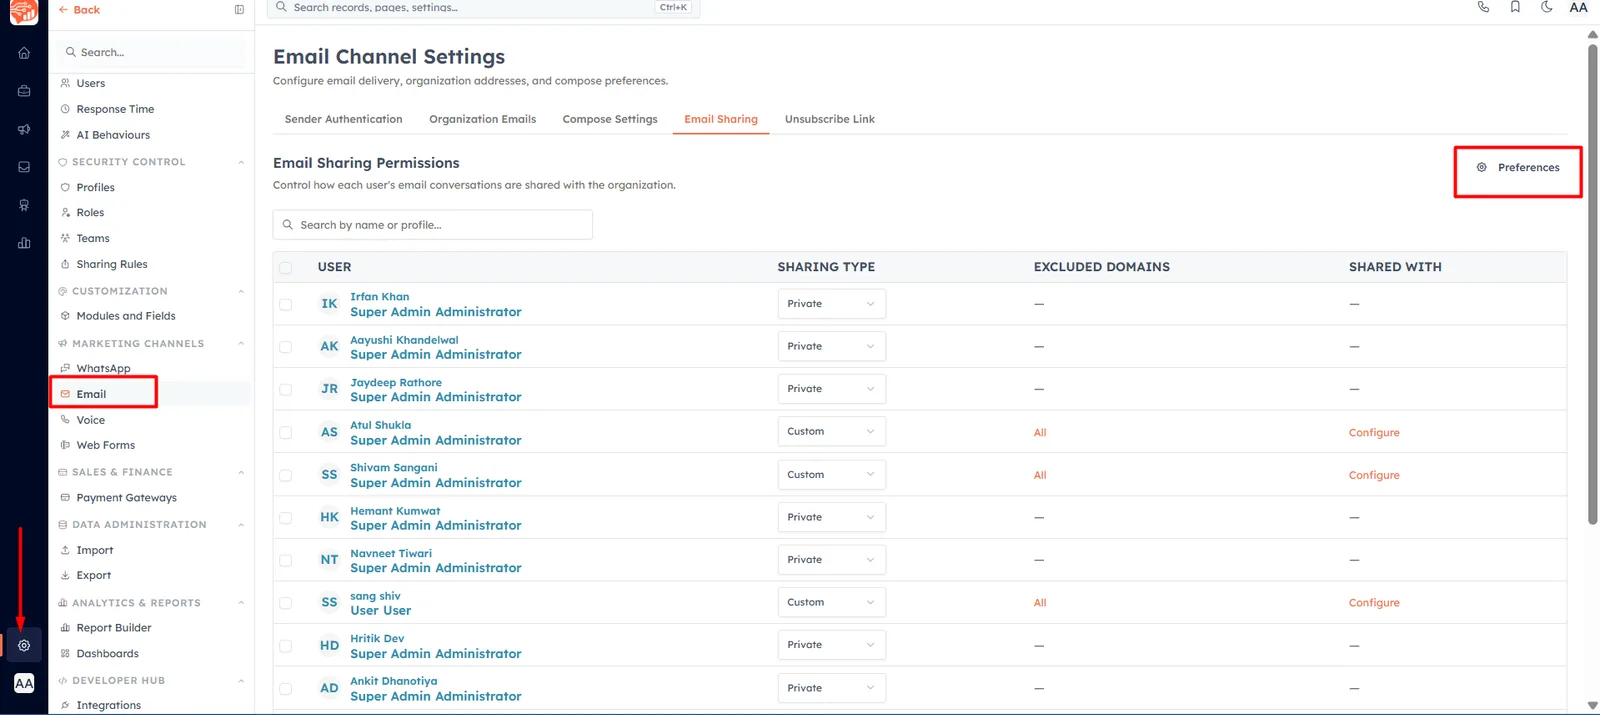
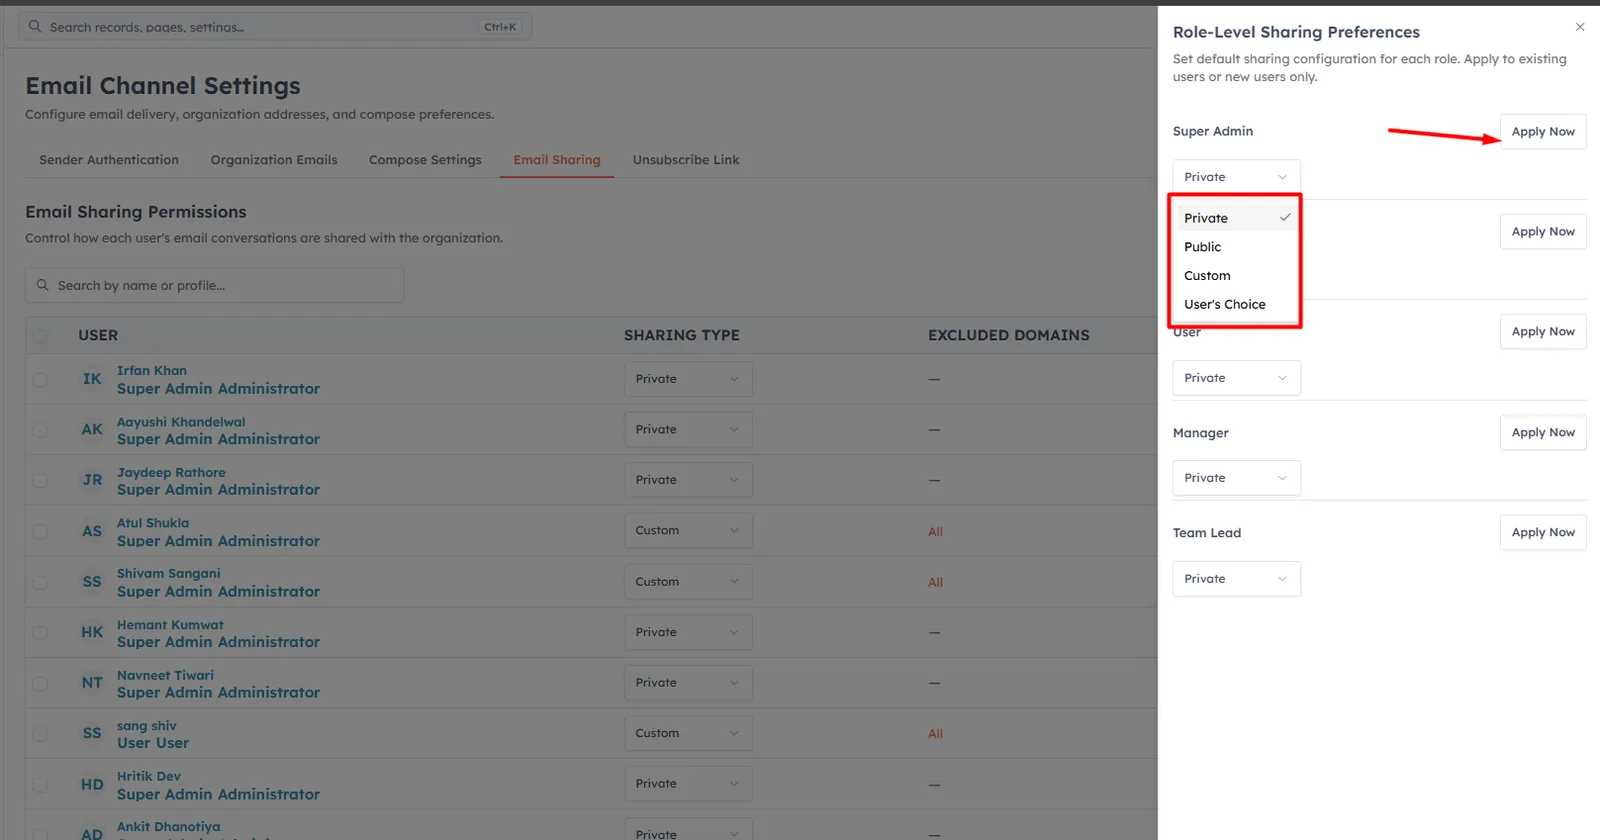
The Preferences button (top-right of Email Sharing) opens Role-Level Sharing Preferences, where you set a default sharing type and access level per role, then click Apply Now and choose:
New users only — the default for people added to the role later; existing users keep their settings.
New & existing users — also rewrites everyone currently in that role.
💡
"New & existing users" overwrites current settings and cannot be undone. There is no revert — use "New users only" unless you deliberately want to reset the whole role.
Update several users at once#
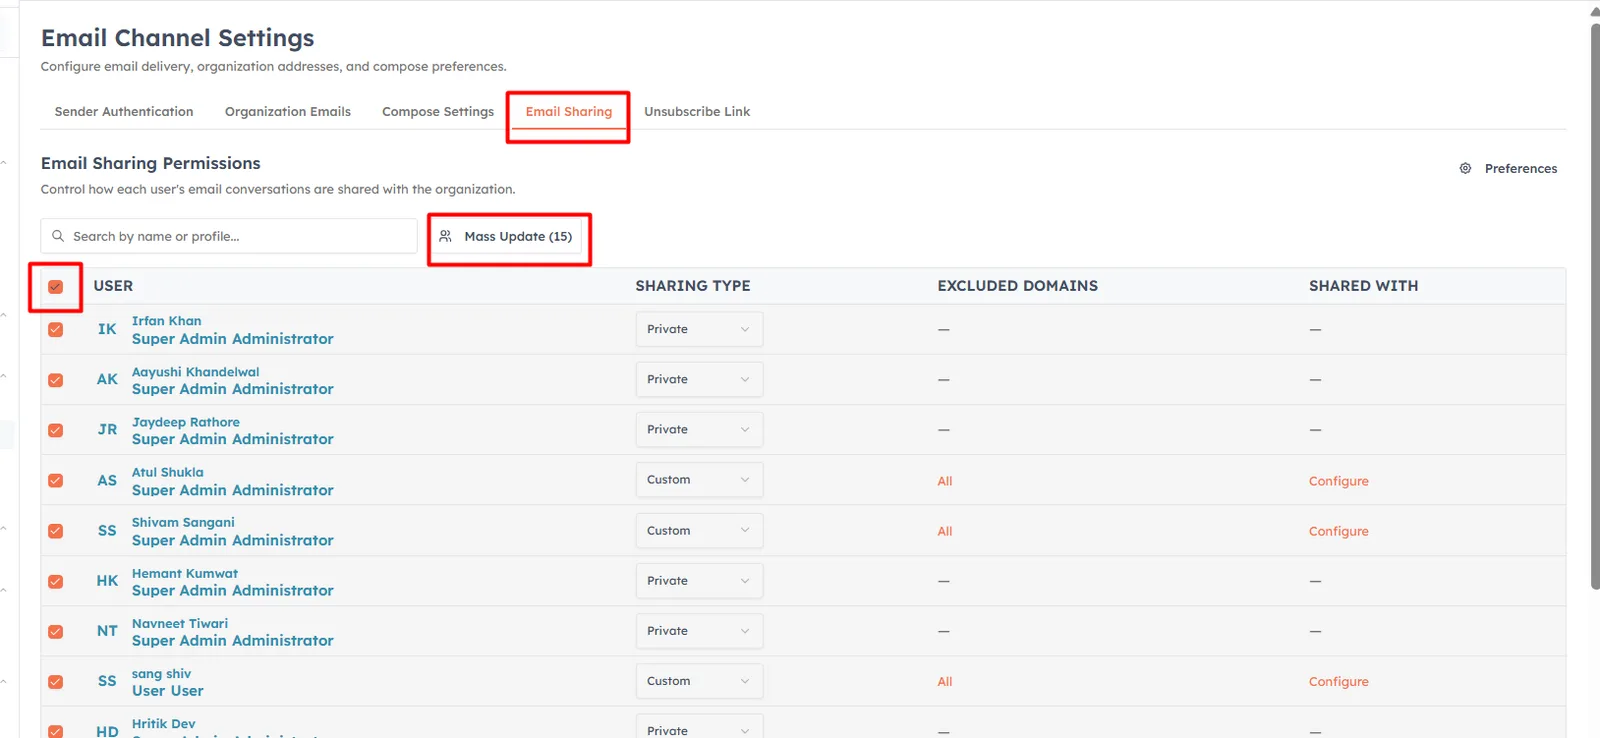
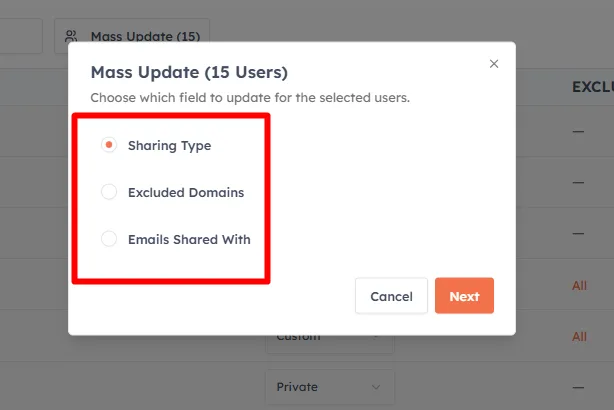
Tick users in the table and click Mass Update to change Sharing Type, Excluded Domains, or Emails Shared With for all of them. Note that mass-updating excluded domains replaces each user’s existing list rather than adding to it.
Other limits that can block an email#
Beyond these permissions, a send can also be stopped by:
Plan limit on how many organisation sender addresses you can add.
Daily caps on workflow and campaign emails, and your email credit balance.
Recipient status — inactive contacts, and anyone who has unsubscribed or hard-bounced.
💡
Related: Email Sharing Settings and Set Up Your Organisation Email Address.
Was this article helpful?
Ready to implement this?
OpenAI Engage and apply what you just learned to your own workspace.
Open AI Engage CRM