Loading…


KnowledgeBase
Preview & Send Test Emails Before Launching
What this covers#
A campaign is the one thing in the CRM you cannot take back. Once it sends, it has sent — to everyone, at once. The Preview & test screen is the last place a mistake is still free, and it is worth two minutes every time.
It does two jobs: it shows you the finished email rendered with a real contact’s data, and it mails a copy to any address you name so you can see it land in an actual inbox.
Getting there#
Open Marketing → Campaigns and open the campaign you are working on. The builder runs in three steps, shown across the top:
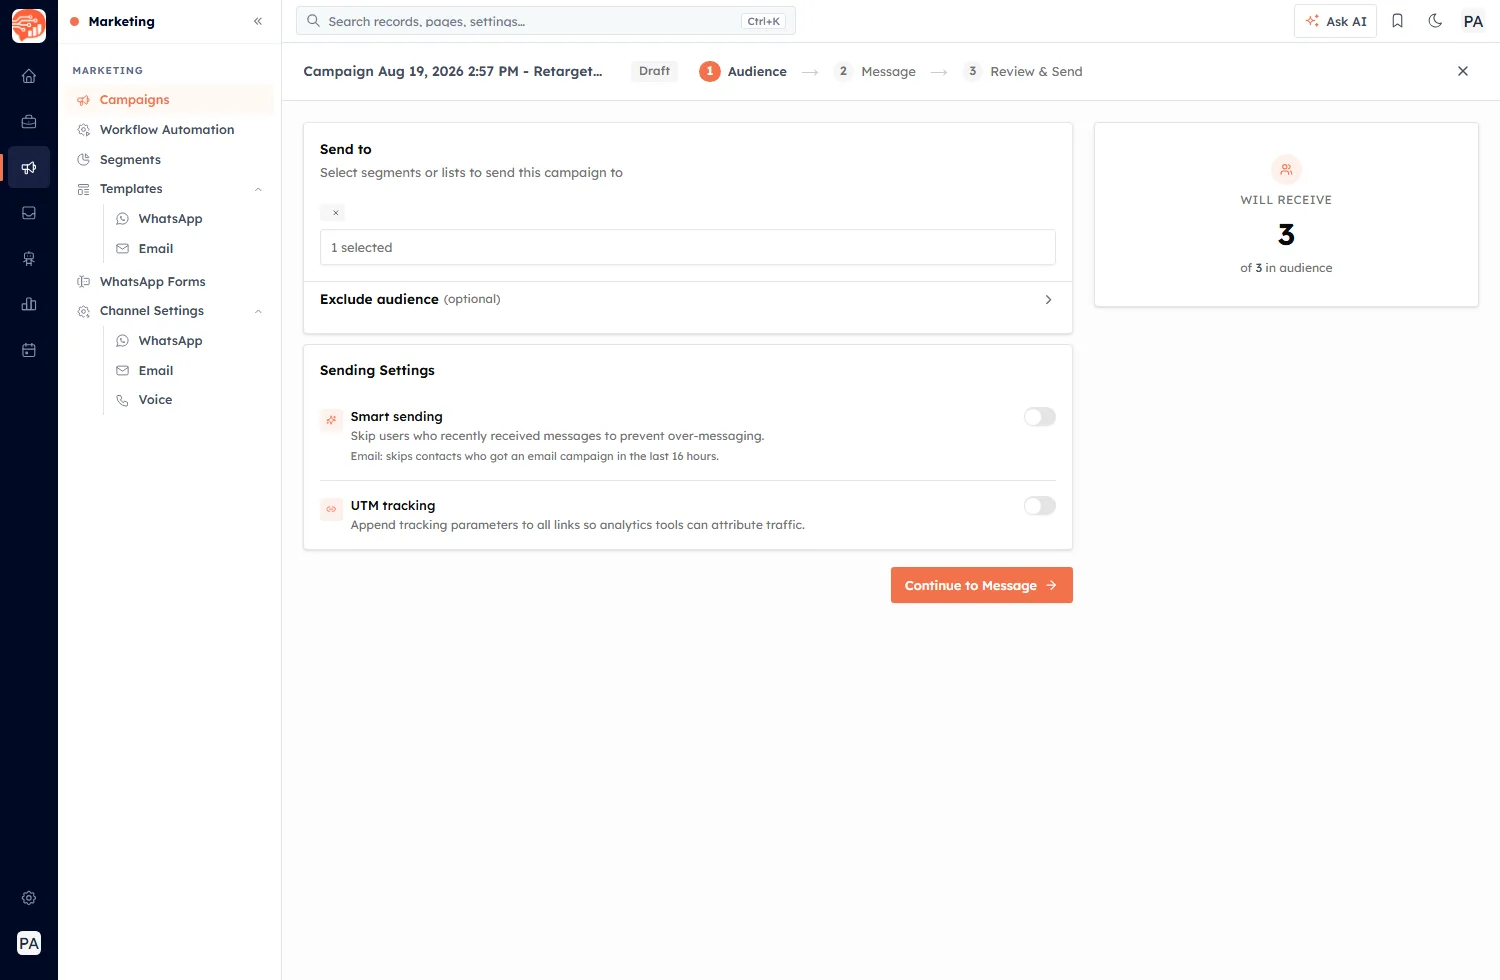
The campaign builder. Step 1 picks who receives it; the panel on the right counts the audience as you go.
- Audience — who it goes to
- Message — what it says
- Review & Send — the final check
Work through to Review & Send using the Continue button at the foot of each step. The numbered chips in the header show where you are; they are signposts rather than shortcuts.
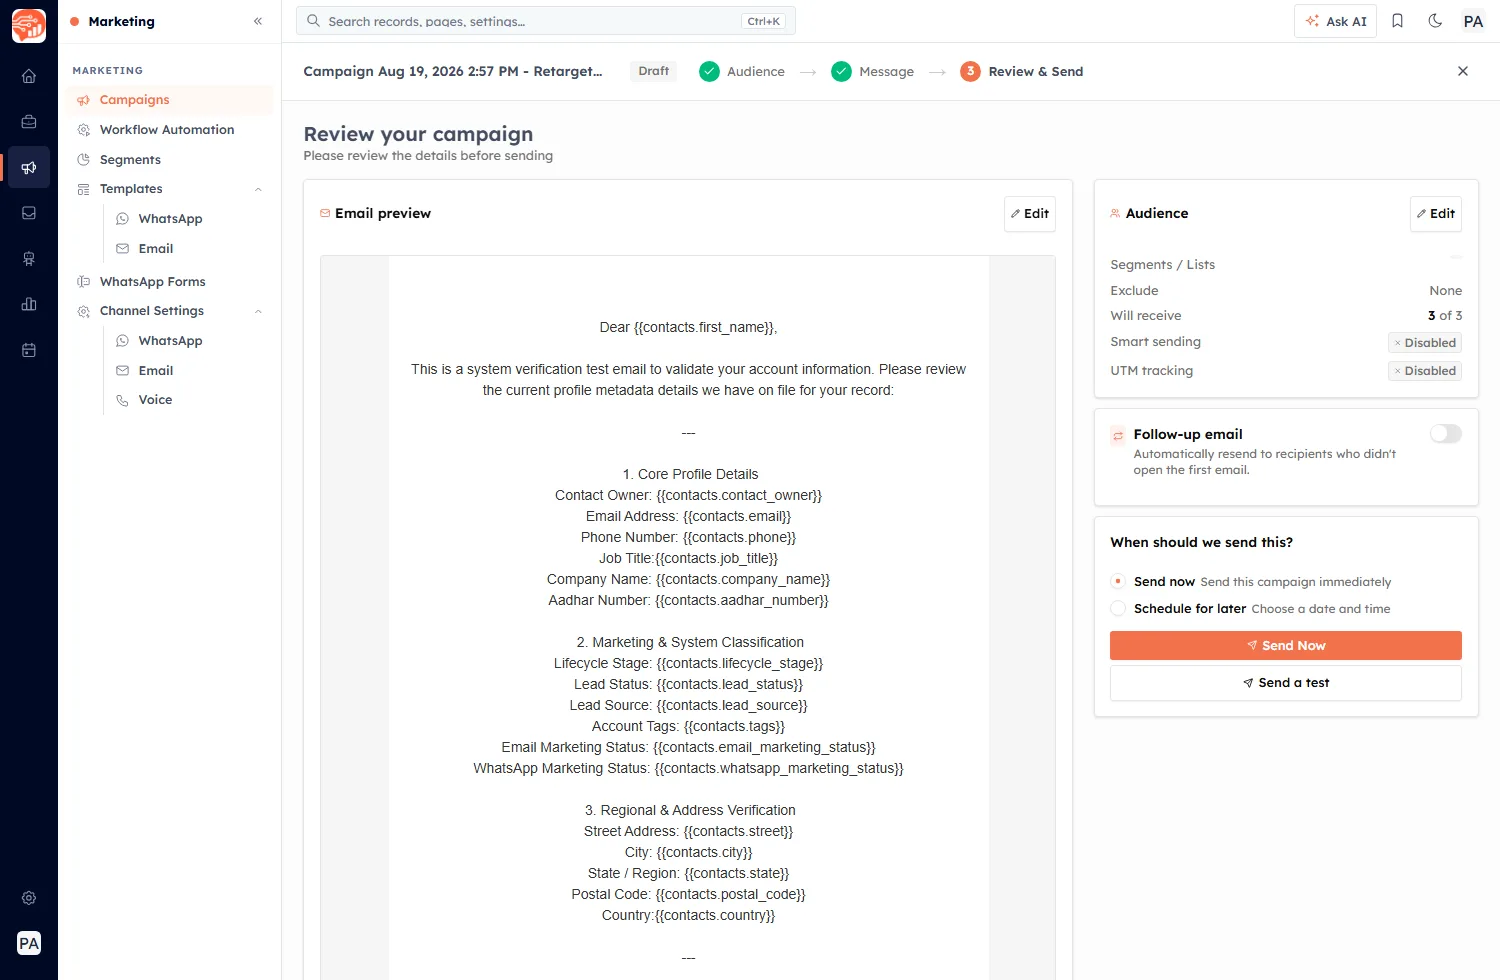
Step 3, where the campaign gets its last check before going out.
On this step, click Send a test. The Preview & test window opens.
The Preview & test window#
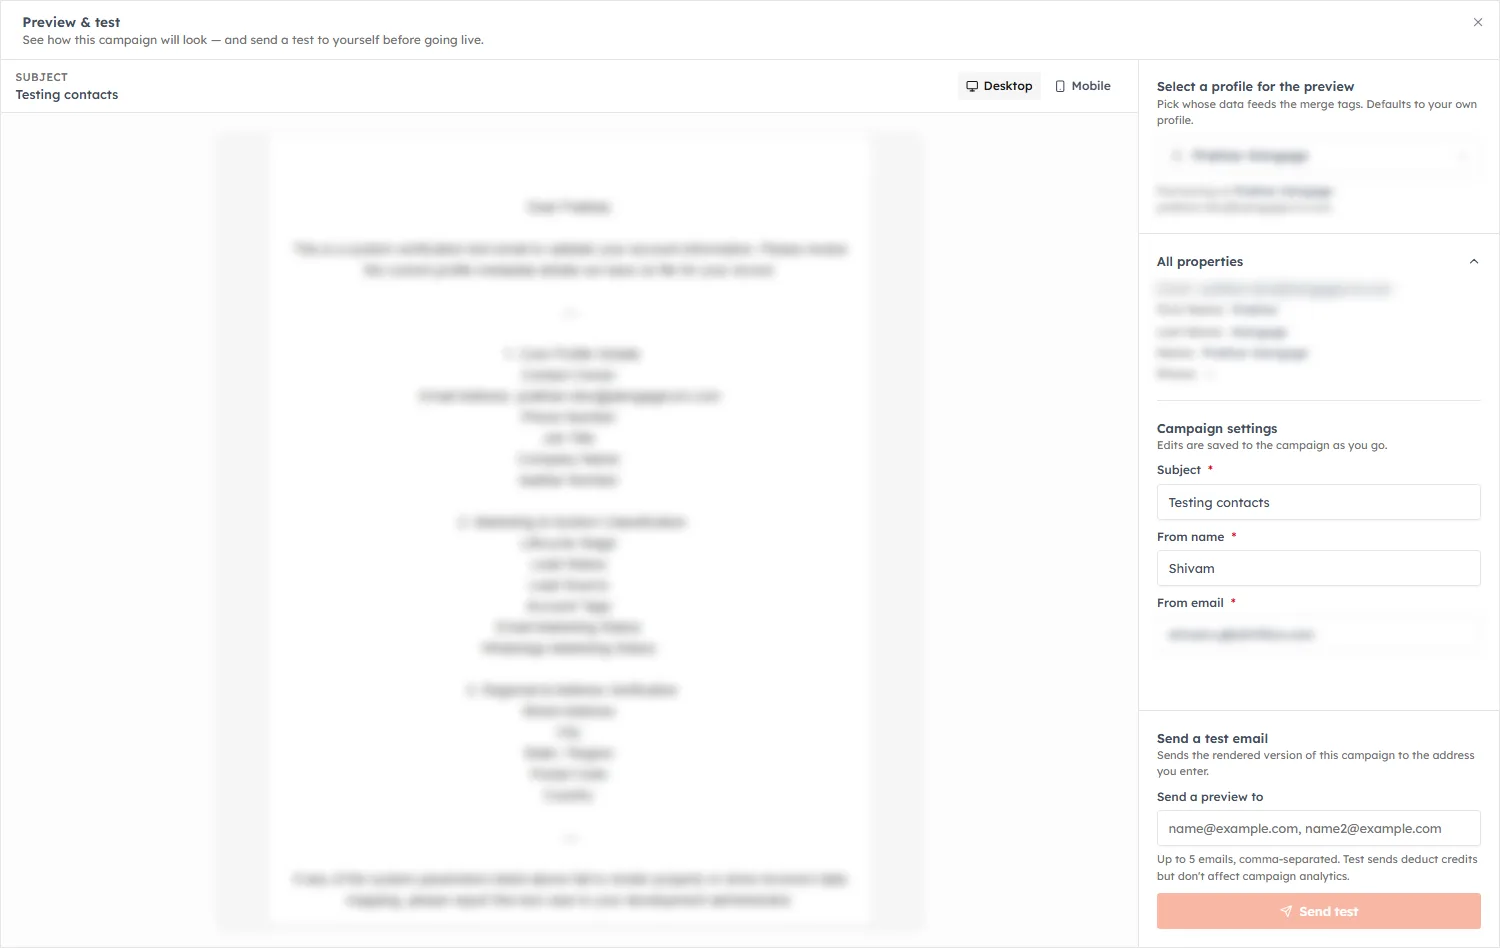
Preview & test. The rendered email fills the left; everything you can change or check sits on the right. Personal data is blurred here.
It is split in two: the email as it will actually arrive on the left, and the controls on the right.
Check it on both screen sizes#
Above the preview are Desktop and Mobile toggles. Use both. Most marketing email is opened on a phone, and a layout that looks balanced on a wide screen is where narrow columns, oversized images and cramped buttons show up.
The SUBJECT is shown above the preview too — the one piece of the email a recipient sees before they decide whether to open it at all.
Preview as a real contact#
The right-hand panel opens with Select a profile for the preview:
Pick whose data feeds the merge tags. Defaults to your own profile.
This is the part that matters if your email uses merge tags. Your own profile is fully filled in, so a preview of you will always look perfect. That tells you nothing about the contact whose job title is blank.
Switch the profile to a genuine recipient and read it again. Beneath the picker, All properties lists exactly what that person has on file — email, first name, last name, phone and the rest — with a dash against anything empty. Those dashes are your warning: a field that is blank here is blank in their copy of the email.
⚠️
Preview as somebody other than yourself. Previewing as your own profile is the single most common way a broken merge tag reaches a whole audience — your record is complete, so nothing looks wrong. Try two or three real contacts, ideally ones with patchy data.
Fix the details without leaving#
Under Campaign settings you can correct the Subject, From name and From email right there. The panel notes:
Edits are saved to the campaign as you go.
So there is no separate save — a change here is a change to the campaign itself. Handy, but worth knowing before you experiment.
Sending yourself a test#
At the bottom of the panel is Send a test email, which “sends the rendered version of this campaign to the address you enter”. Type the address into Send a preview to and click Send test.
The rules are stated on screen, and both halves matter:
Up to 5 emails, comma-separated. Test sends deduct credits but don’t affect campaign analytics.
- Up to five addresses at once, separated by commas — enough to loop in a colleague or check how it renders in a different mail client.
- Test sends cost credits. They come out of the same balance as the campaign itself, so testing is not free. It is still far cheaper than sending a broken email to your whole list.
- Tests do not touch your analytics. Your own opens and clicks will not pollute the campaign’s open and click rates — so test as often as you need without distorting the numbers.
A successful send confirms with a message naming how many recipients it reached; if any fail, you are told how many. If the campaign still has placeholders that need values, the button says so instead of sending.
📬
Send the test to an address on a different mail provider from your own — a personal account, say. Gmail, Outlook and Apple Mail each render HTML differently, and the one place your email is guaranteed to look right is the client you built it in.
A checklist before you launch#
- Does the subject line read well, and is it short enough not to be cut off?
- Do the merge tags resolve for a real contact — not just for you?
- Does it hold together on Mobile as well as Desktop?
- Are the From name and From email the ones you want replies going to?
- Do the links work, and do they point where you meant?
- Does the audience count on step 1 match what you expect?
Once it all checks out, go back to Review & Send and either send now or schedule it for later. Afterwards, campaign performance is where the results show up — without your test sends mixed in.
Was this article helpful?
Ready to implement this?
OpenAI Engage and apply what you just learned to your own workspace.
Open AI Engage CRM