Loading…


KnowledgeBase
Send an Email from a Contact or Lead Record
Every contact record in AI Engage carries its own Emails section — a place to write a one-to-one email, drop in a saved template, schedule it for later, and then watch what happens to it (delivered, opened, clicked, bounced) without ever leaving the record. This guide covers the whole flow: opening the composer, choosing who it comes from, sending or scheduling, and reading the per-record history.
Before you start#
The Emails section and the Compose Email action appear on Contacts records. Two things must be in place before you can send:
A connected sending address — at least one organisation email must be set up, or the composer shows “No sender addresses available.” and Send stays disabled. See Set Up Org Email.
An email address on the contact — if the record has no email, the Compose Email button is greyed out with the tooltip “No email address on this contact.” Add an email to the record first.
💡
The quick-action Emails button on the record summary rail opens the same composer. On non-contact modules it is disabled with “Send Email is only available on Contacts.”, and when email isn't connected the tooltip reads “Email isn't connected yet.” with a one-click link to set it up.
Compose a one-to-one email#
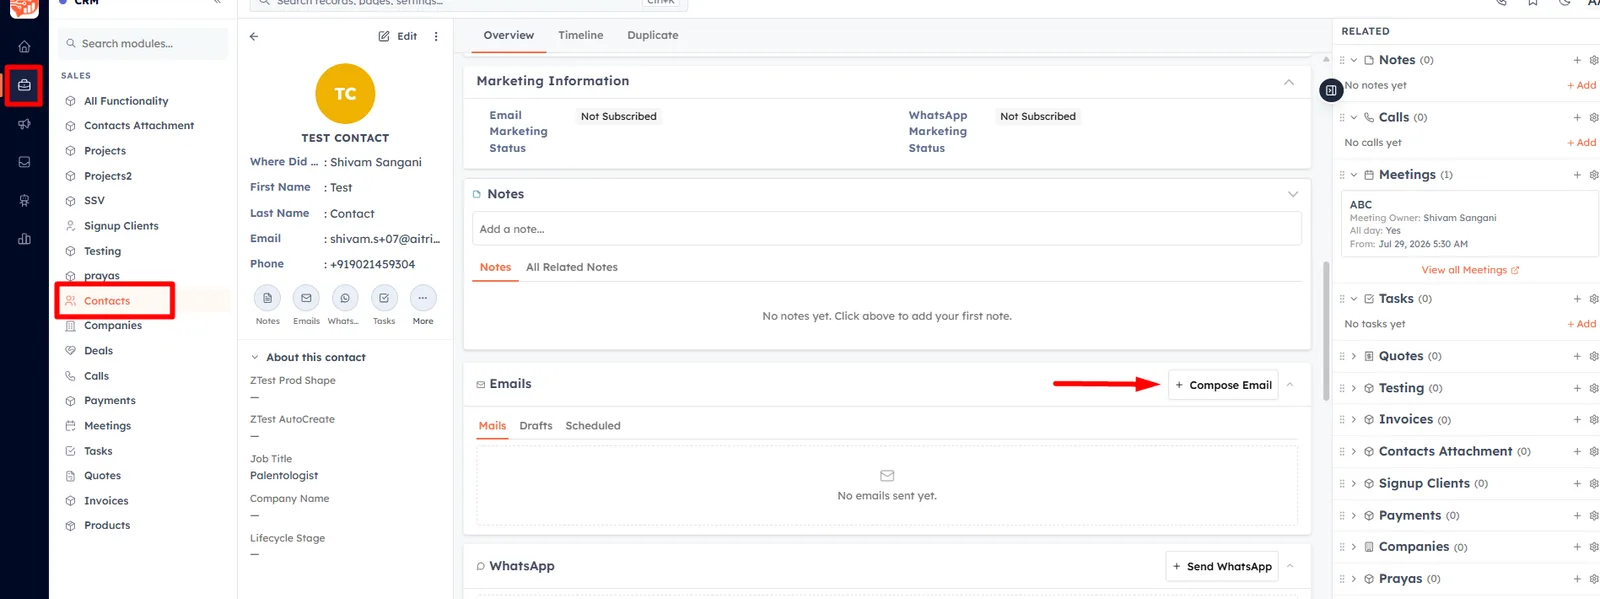
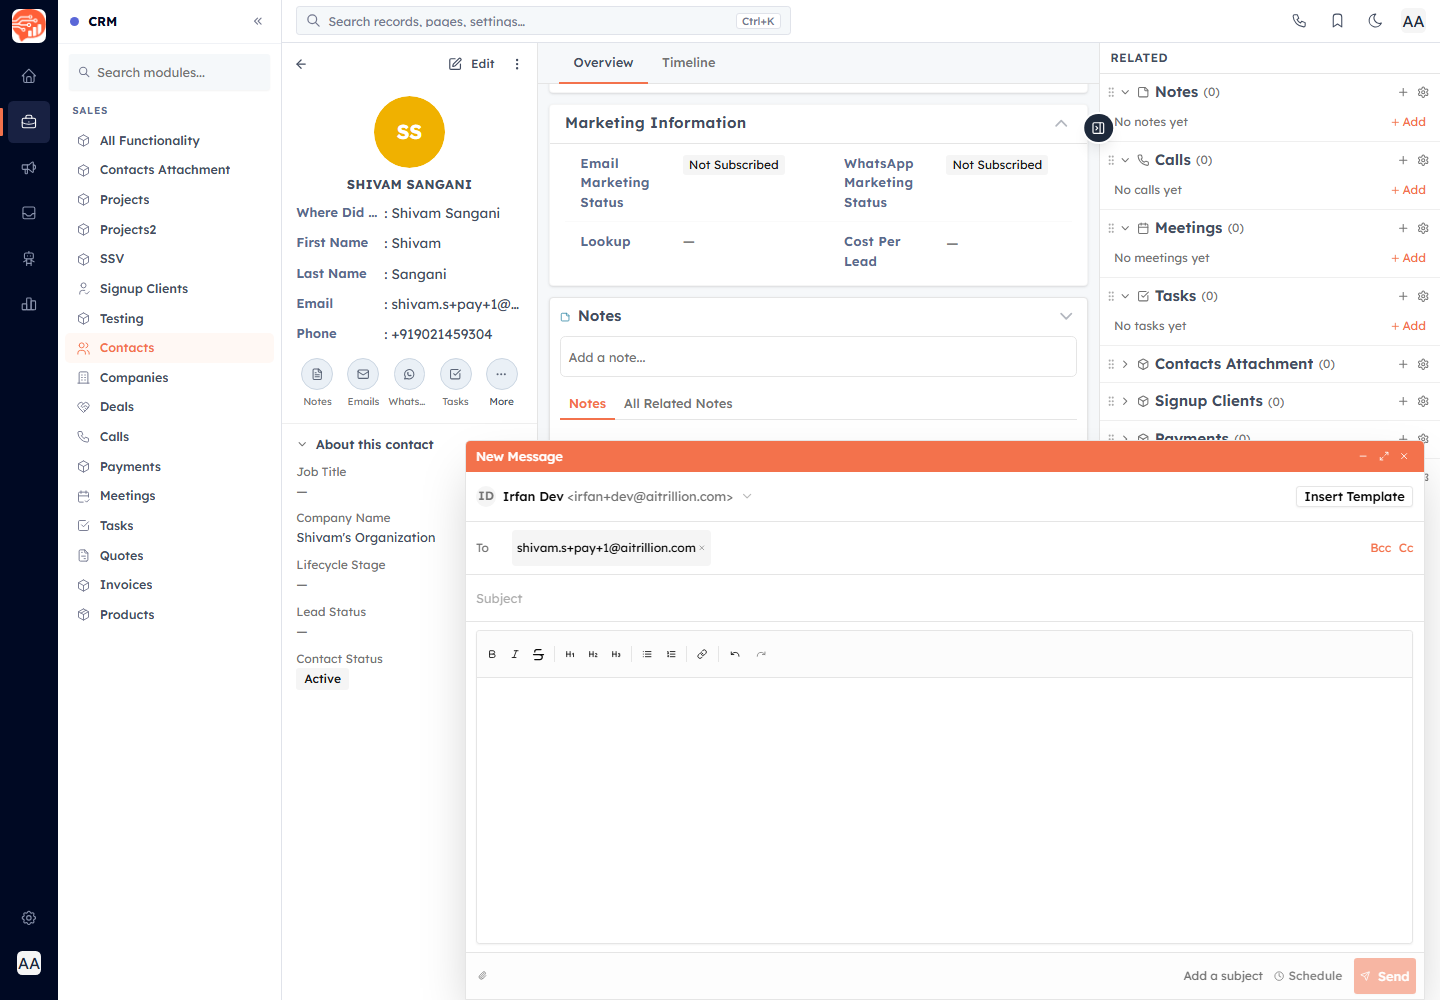
Open the contact, find the Emails section, and click Compose Email. A floating compose panel opens at the bottom-right of the screen — the page behind it stays usable, and you can Minimize, Maximize, or Close it from the header.
Check the From address. It defaults to your saved default sending address (or the first one available). Click it to pick a different sender; personal addresses are marked (personal).
The To field is pre-filled with the contact's email. Add more recipients as needed, and use the Cc and Bcc links to reveal those rows.
Type a Subject and write your message in the rich-text body.
Optionally attach files with the paperclip icon. Attachments are capped at a combined 22 MB; a file that would push you over the limit is rejected with an on-screen error and simply isn't added.
Click Send.
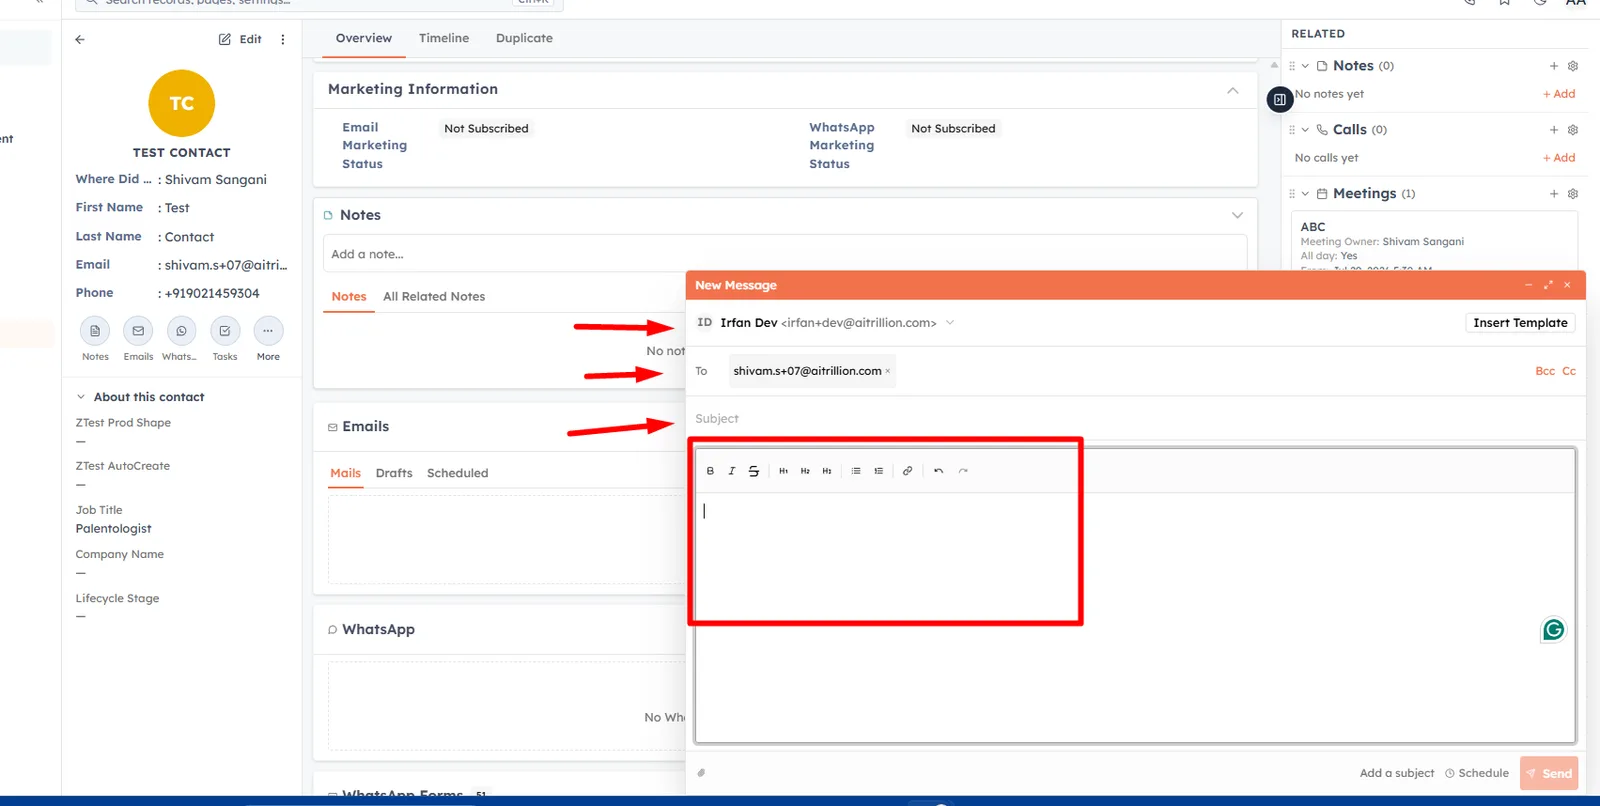
If Send is disabled, the composer tells you why in a short hint: “Select a ‘From’ address”, “Add at least one recipient”, “Add a subject” or “Add a message”. When no sending address exists at all, it reads “No sending address is configured. Add one in Email settings.”
Insert a template#
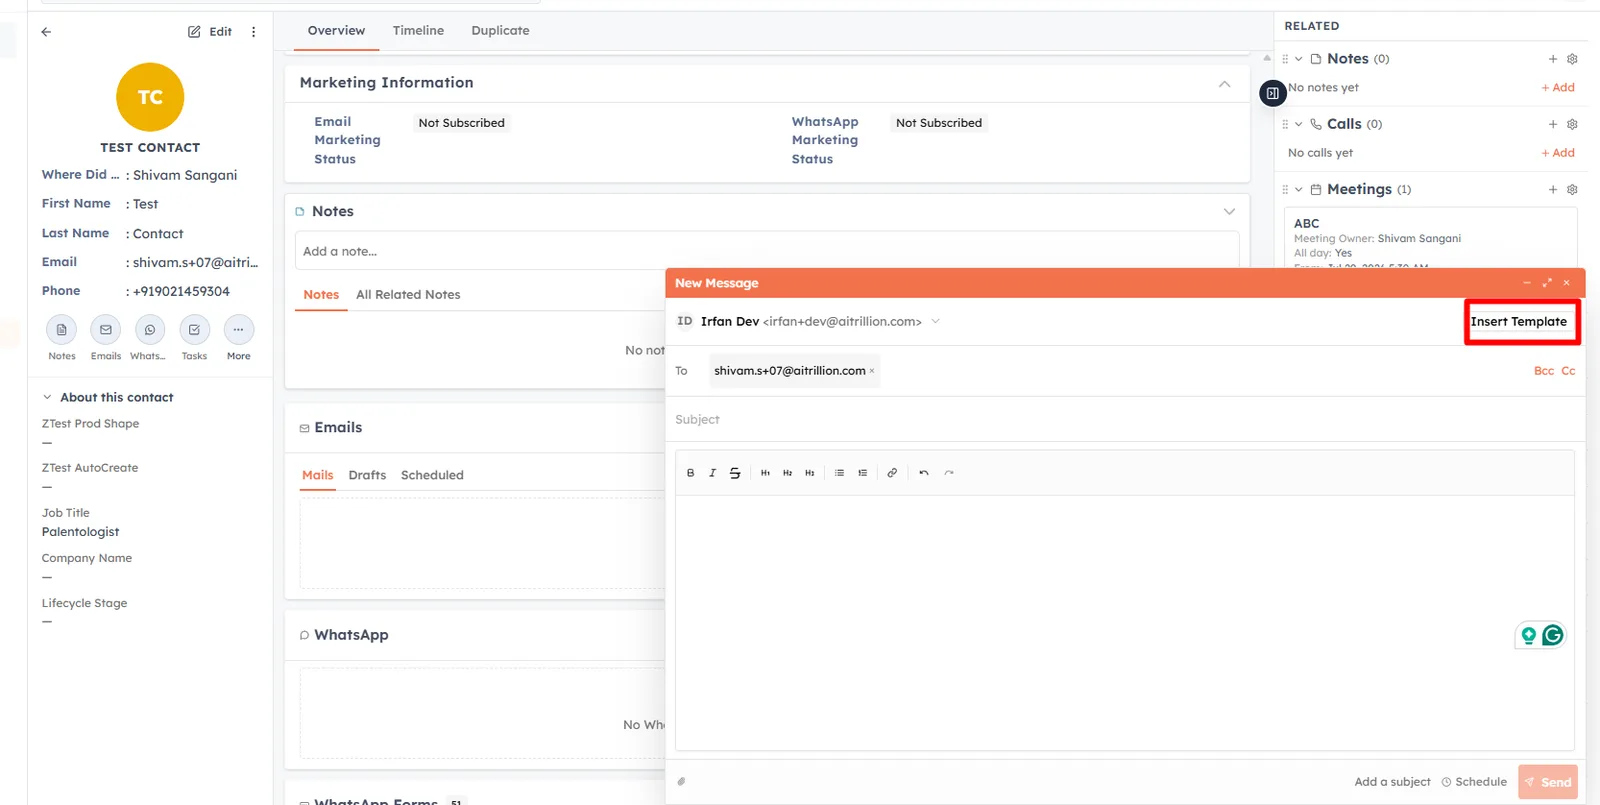
Click Insert Template to open the picker, search by name, and select one — its subject and body drop straight into the composer, ready to personalise. If your team hasn't built any yet, the picker shows “No templates yet. Create one in Email Templates.” Learn to build them in Email Templates.
Schedule for later#
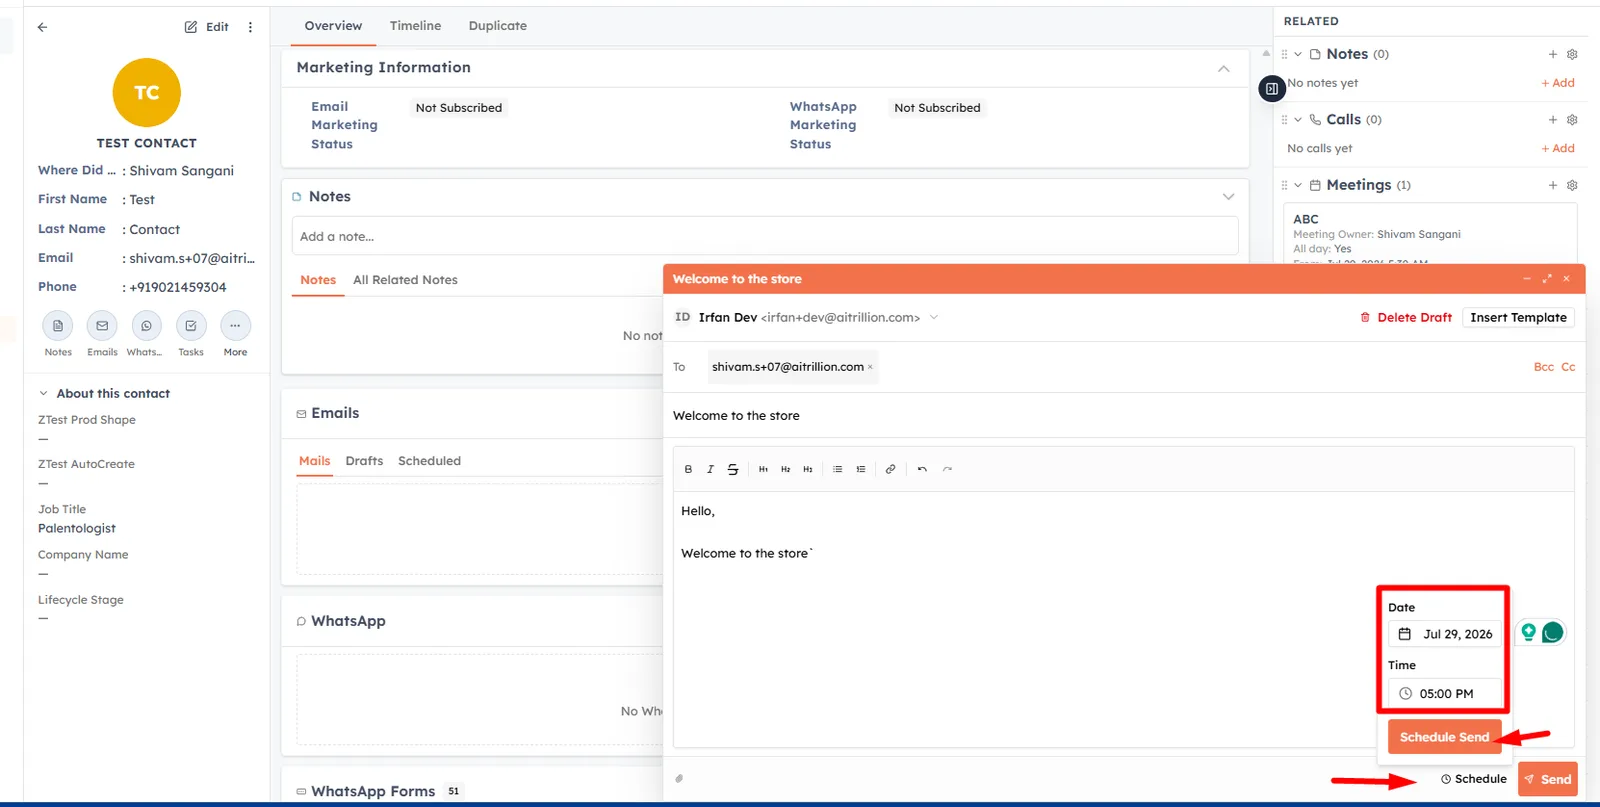
Click Schedule next to Send.
Pick a Date and Time. The default is roughly an hour from now, rounded to the next half-hour. Past date/times are blocked with “Please pick a future date/time.”
Click Schedule Send. The email moves to the Scheduled tab and sends automatically at that time.
Drafts#
The composer auto-saves your work as a draft roughly every 30 seconds. If you close a new compose with unsent content, AI Engage asks “Save as draft?” — choose Yes, Continue and it is stored under the record (confirmed with a “Saved as draft” toast). Reopen a draft any time from the Drafts tab to keep editing, or remove it with Delete Draft, which asks you to confirm before permanently deleting it.
Read the Emails timeline#
The section has three tabs:
Mails — everything sent from this record. Empty state: “No emails sent yet.”
Drafts — saved, unsent messages. Click one to resume editing.
Scheduled — queued sends waiting for their send time.
Each row shows the subject (or “(No subject)”), the sending address, a status badge and a date. Click a sent or scheduled email to open its detail sheet, which lists From, To, Cc, Bcc and Reply-To, the full message, any failure reason, and a Tracking panel:
Delivered — the time the message was accepted for delivery.
Opens — total opens, unique opens and the last-opened time, or “Not opened yet”.
Clicks — total clicks, unique clicks and the last-clicked time, or “No clicks yet”.
Bounce — if the message bounced, a Hard Bounce or Bounce row replaces the delivery details.
A scheduled email's detail sheet has an Edit button that reopens the composer so you can change it before it goes out.
💡
Blank or half-written composes aren't saved — a draft is only created once you've typed a subject, a body, added Cc/Bcc, or changed the recipients beyond the pre-filled contact email.
💡
Set a default From address, Reply-To and font once so every record compose starts the way you want — see Email Compose Defaults.
Good to know#
Share Email — on custom-sharing setups, a Share Email checkbox appears on the Mails tab to control whether this contact's emails are visible to teammates.
Reply-To — when you haven't set a separate Reply-To, replies go back to the From address.
Was this article helpful?
Ready to implement this?
OpenAI Engage and apply what you just learned to your own workspace.
Open AI Engage CRM