Loading…


KnowledgeBase
Turn On AI Summaries: Plan, Permission & Settings
What it takes to use AI summaries#
There’s no single “AI on/off” switch to flip. AI summaries — and the other AI features — become available the moment three requirements line up on your account:
The AI Summary permission on the user’s profile (administrators already have it).
A positive AI credit balance.
Miss any one and the feature is unavailable — an empty balance blocks generating even on the right plan with the right permission. Work through the three steps below in order.
Step 1 — Be on a plan that includes AI#
AI features are not available on the Free plan. They’re included on every paid plan — Lite, Growth, and Advance.
On Free, where AI would appear you’ll instead see a “Premium feature — this isn’t included in your plan” screen with a See plans button.
Upgrade from Billing → Change plan.
💡
The plan requirement applies to everyone, including administrators — an admin on the Free plan still can’t generate AI summaries. Being an admin only bypasses the permission step below, not the plan.
Step 2 — Grant the AI Summary permission#
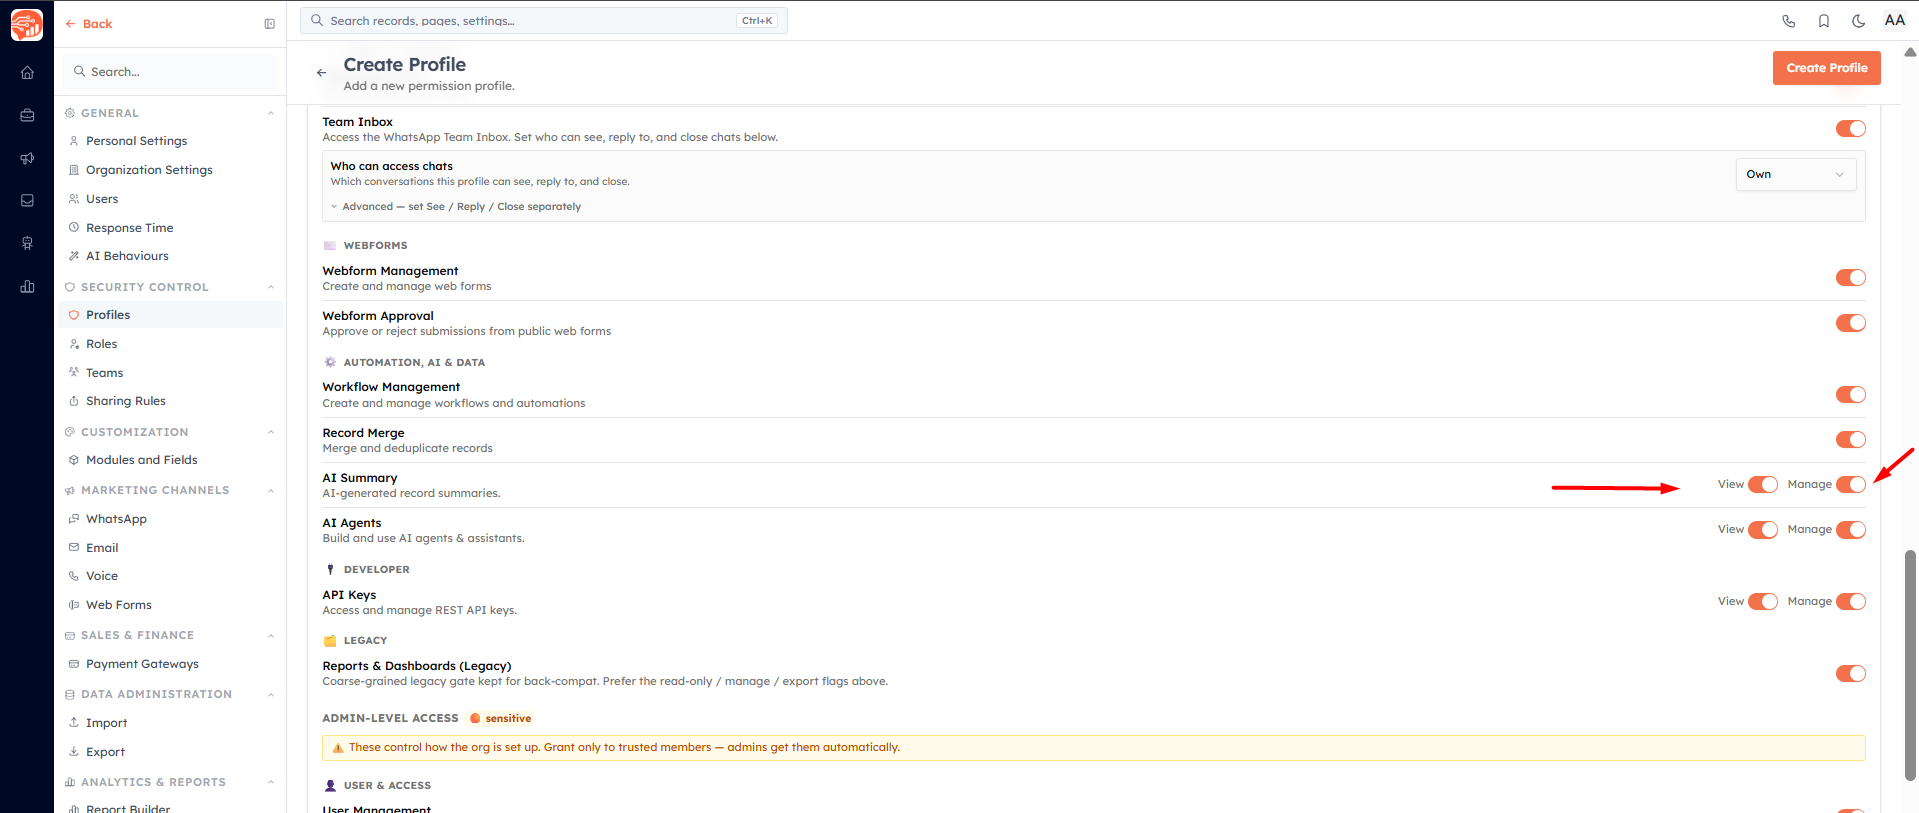
AI summaries are governed by a two-level profile permission, found under the Automation, AI & Data group in a profile’s permission list:
AI Summary — View — the user can read a summary that already exists on a record or chat, but the generate/re-summarise button is hidden.
AI Summary — Manage — the user can generate and re-summarise (the credit-spending action). Managers automatically get view as well.
To set it:
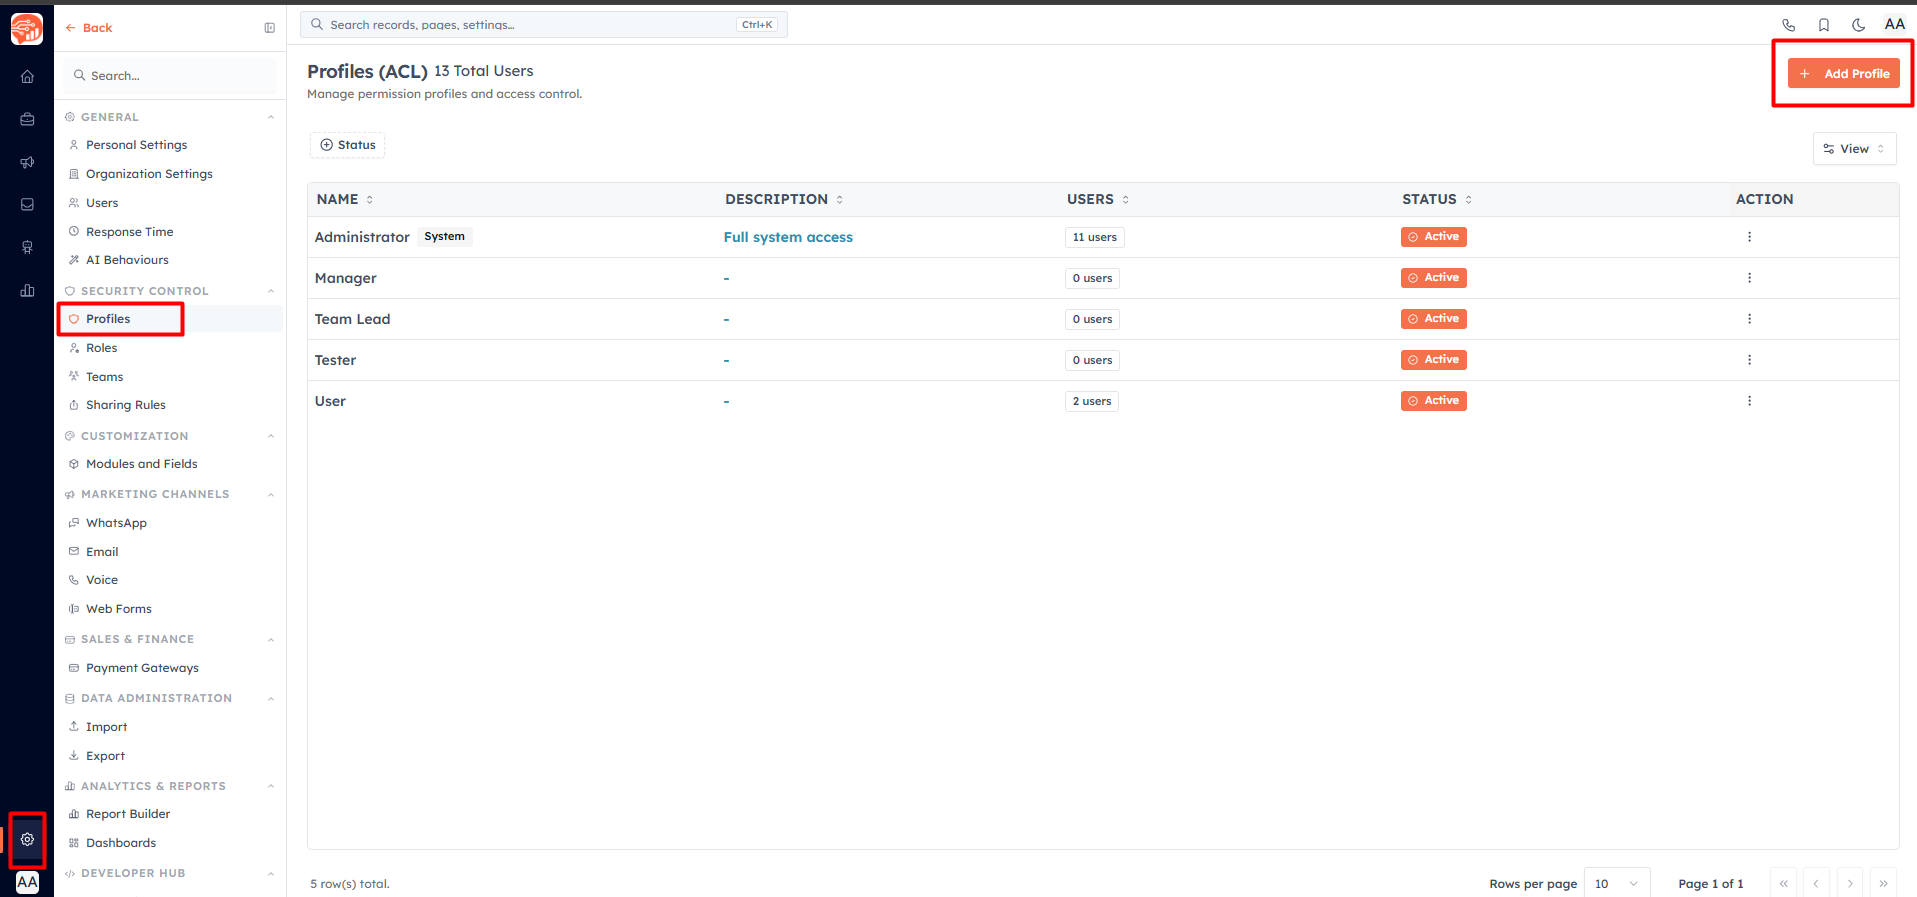
Open Settings → Profiles and edit (or create) the profile for that job type.
Find AI Summary — View and AI Summary — Manage under Automation, AI & Data.
Tick View for people who should read summaries, and Manage for people who should generate them. Save/Create the profile.
💡
Administrators already have full AI Summary access — no need to grant it. And if a profile held the older single “AI Features” permission before this was split into View/Manage, it keeps working — those users retain access automatically.
Step 3 — Add AI credits#
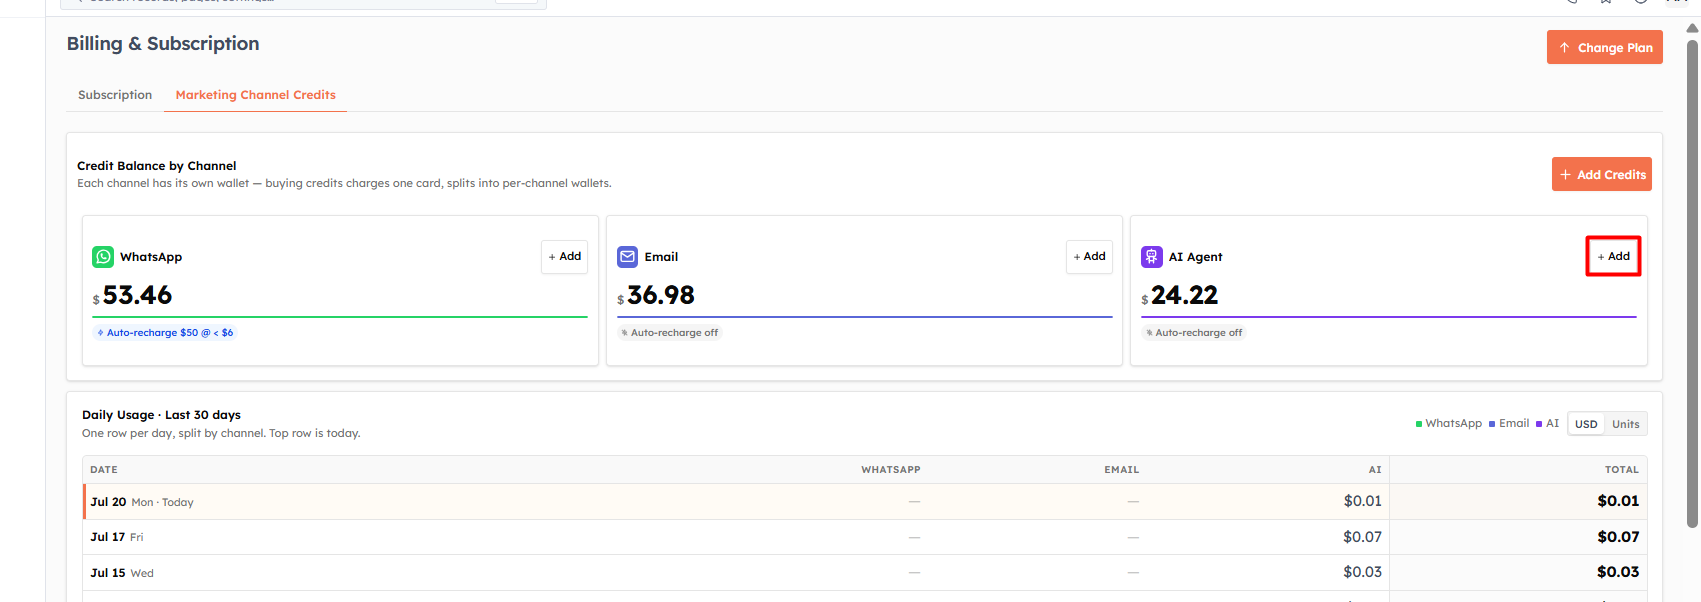
A plan lets you use AI, but the usage itself is paid for from an AI credit balance — and new accounts start at zero. Until you top up, generating a summary returns “You’re out of AI credits.” Add credits from Billing; the full model (what’s billed, how to top up, auto-recharge) is in AI Credits & Pricing.
Set the summary style — AI Behaviours#
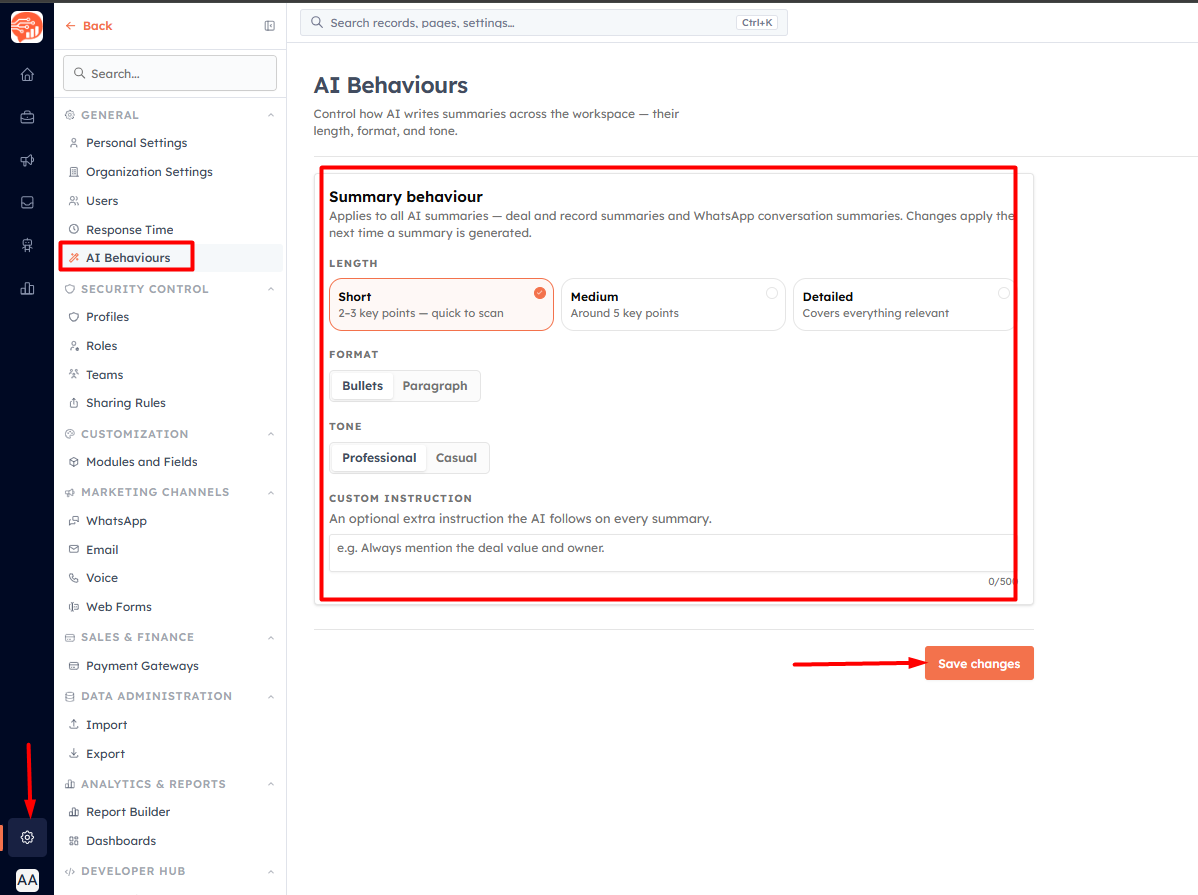
Once AI is on, you control how every summary across your organisation reads at Settings → AI Behaviours. (You can also jump here from the gear icon on any AI Summary card.) This page needs the Manage Organization permission.
Length
Short (default) — 2–3 key points.
Medium — around 5 key points.
Detailed — covers everything relevant.
Format — Bullets (default) or Paragraph.
Tone — Professional (default) or Casual.
Custom instruction — an optional free-text line (up to 500 characters) applied last, so it can fine-tune or override the choices above — e.g. “Always finish with the recommended next step.”
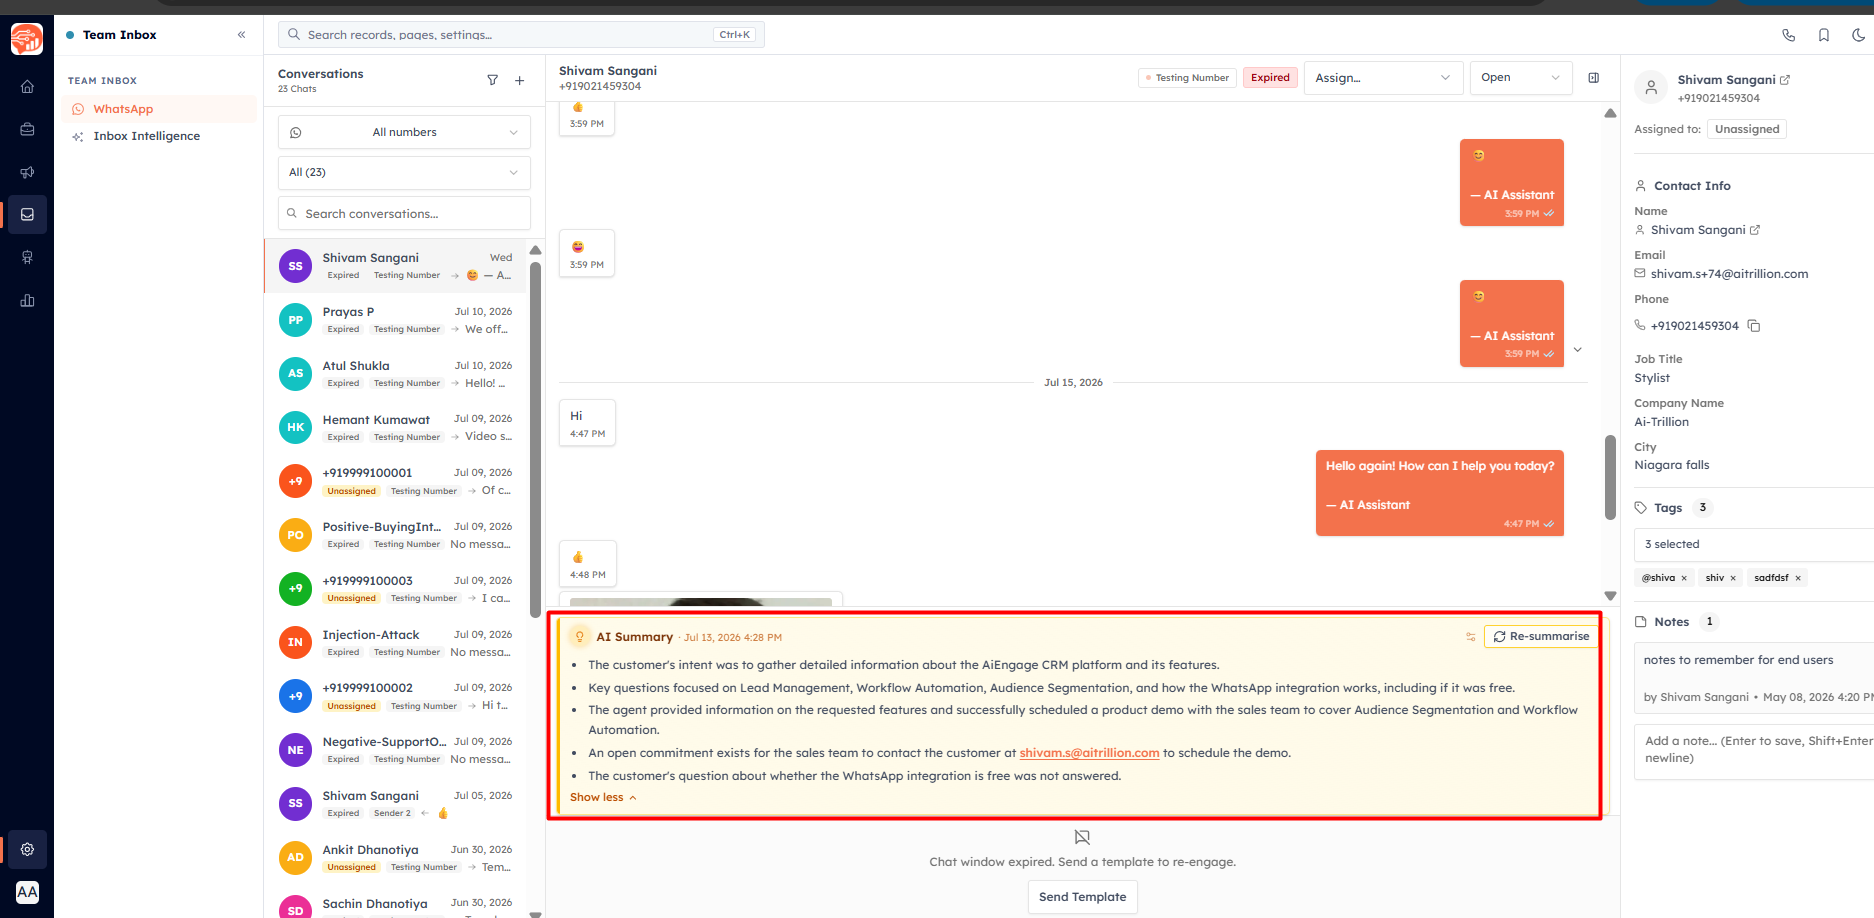
Click Save changes (you’ll see “AI behaviour settings saved.”). Changes apply the next time a summary is generated — existing summaries aren’t rewritten until you re-summarise.
💡
These settings shape record and conversation summaries. They don’t change the WhatsApp Inbox Intelligence answers, which use a fixed structured format.
Quick checklist#
✅ Profile has AI Summary — Manage (or the user is an admin)
✅ AI credit balance is above zero
✅ (Optional) AI Behaviours length/format/tone set to taste
💡
All set? Open any contact or deal and generate your first AI summary.
Was this article helpful?
Ready to implement this?
OpenAI Engage and apply what you just learned to your own workspace.
Open AI Engage CRM