Loading…


KnowledgeBase
Automatically Detect & Qualify Leads with Your AI Agent
Your AI agent can watch every conversation, decide whether it looks like a genuine lead based on criteria you write, and automatically set a field on that contact — for example moving them to a Qualified stage. This turns raw chat traffic into a prioritised list for sales without anyone reading each thread.
Before you start#
- An AI agent — lead qualification is configured in the agent builder. If you haven't built one yet, see Build Your First AI Agent and Configure Your AI Agent.
- A Contacts picklist field to write to — qualification sets a single-select (picklist) field on the Contacts module, so you need at least one such field with values (for example Lead Status).
- Create a contact for unknown numbers — qualification only runs on contacts. To qualify people messaging from new WhatsApp numbers, turn this on for your sender in Settings → WhatsApp Settings. Otherwise the AI can only qualify chats already linked to a contact.
Turn on lead detection#
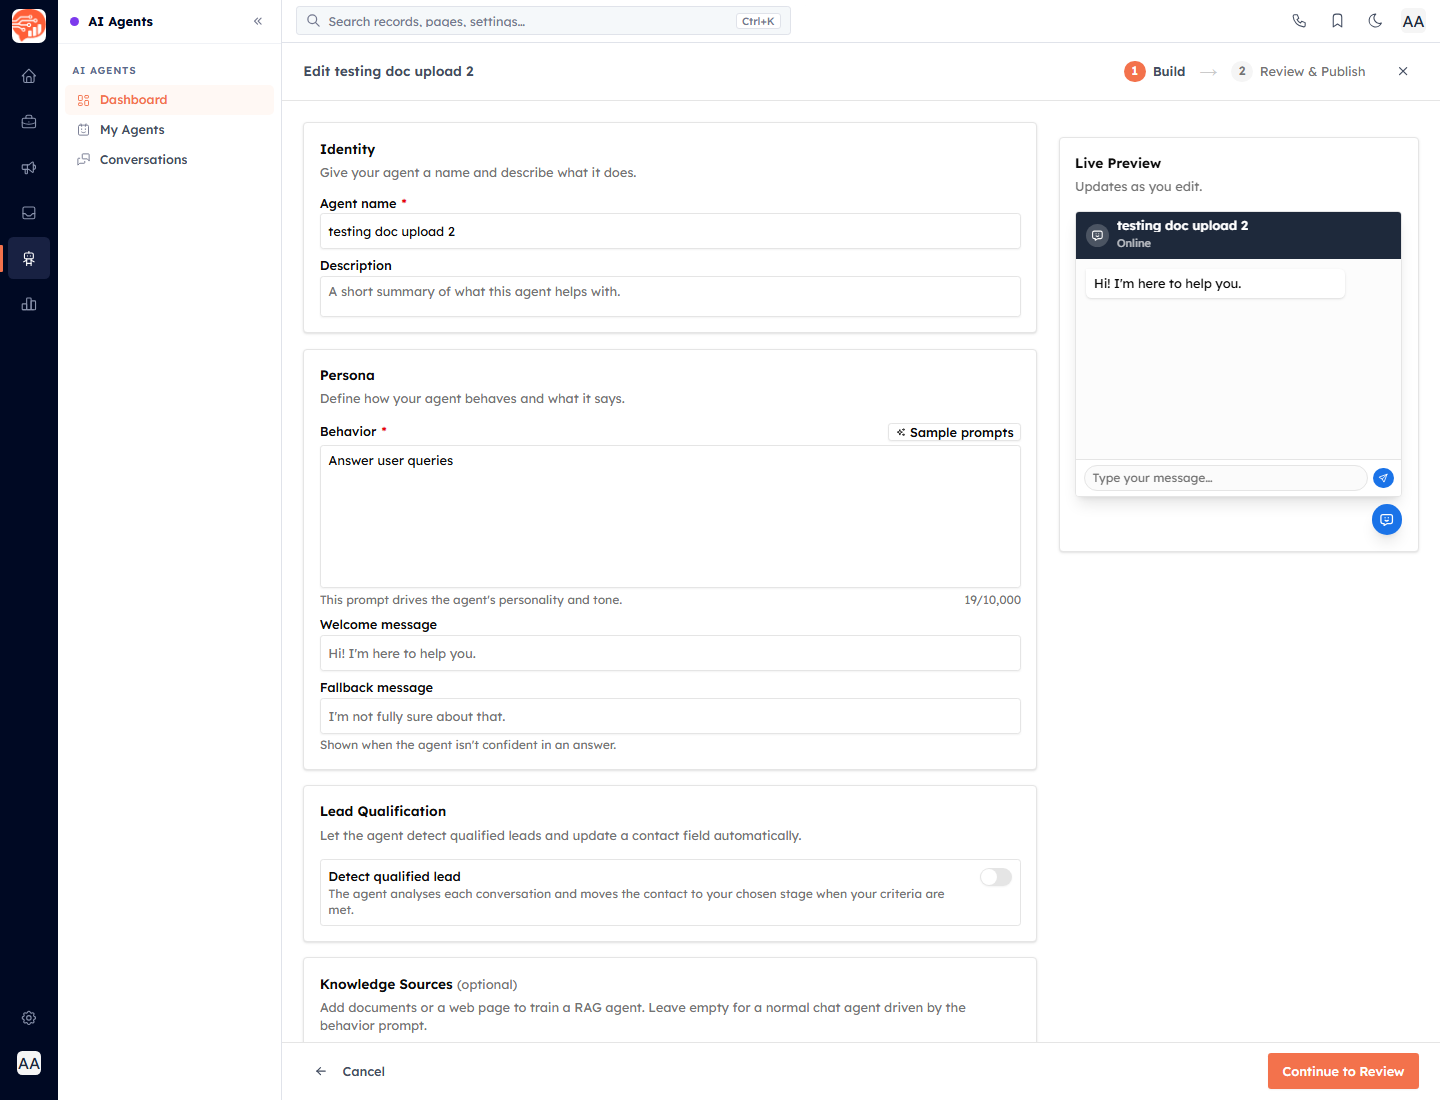
- Open the agent builder and find the Lead Qualification card (between Persona and Knowledge Sources).
- Switch on Detect qualified lead. As the card explains, the agent analyses each conversation and moves the contact to your chosen stage when your criteria are met.
- Fill in the three settings that appear (all are required to continue).
Configure the qualification#
- Qualified lead criteria — describe, in plain language, what makes a conversation a qualified lead (up to 2,000 characters). For example: The customer asks about pricing or a demo, shares a budget or timeline, or clearly wants to buy for their business. This text is exactly what the AI judges each conversation against. Use the Sample prompts button to start from a ready-made template — options include General buying intent, B2B / high-ticket sales, Demo / meeting request, Budget disclosed, E-commerce purchase intent, Service appointment, Real estate buyer / renter, Enterprise / long sales cycle, and Strict / high-quality only — then edit it to fit your business.
- Field to update — choose which Contacts picklist field a detected good lead is written to. Only single-select (picklist) fields on the Contacts module are offered, because the AI sets one value. It defaults to your lead-status field.
- Set value to — choose the value that field is set to when a lead qualifies. The options come from the field you picked above, so changing the Field to update clears this and you re-pick from the new field's values.
The helper line confirms the outcome: When the AI qualifies a contact, this field is set to the chosen value.
⚠️
If you see No picklist fields found on the Contacts module yet or This field has no values to choose from yet, add a single-select field (with values) to your Contacts module first, then come back and pick it here.
How it behaves#
- The agent evaluates each conversation against your criteria and, when they're met, sets the chosen field to the chosen value on that contact.
- Qualification runs on contacts only — a chat from an unknown number is qualified only if a contact was created for it (via Create a contact for unknown numbers).
- Write clear, specific criteria. Vague criteria qualify too many chats; overly strict criteria miss real leads. The Strict / high-quality only sample is a good base when you'd rather under-qualify.
✅
Because the agent writes a standard Contacts field, your existing views, filters, and automations that key off that field (for example a Qualified pipeline stage) start working automatically — no extra wiring needed.
Was this article helpful?
Ready to implement this?
OpenAI Engage and apply what you just learned to your own workspace.
Open AI Engage CRM