Loading…


KnowledgeBase
Business Hours, Schedules & Holidays for Response Time
Business Hours settings decide whether your response-time clock runs around the clock or only during the hours your team actually works. They live entirely inside Settings → Response Time → Enable tracking,
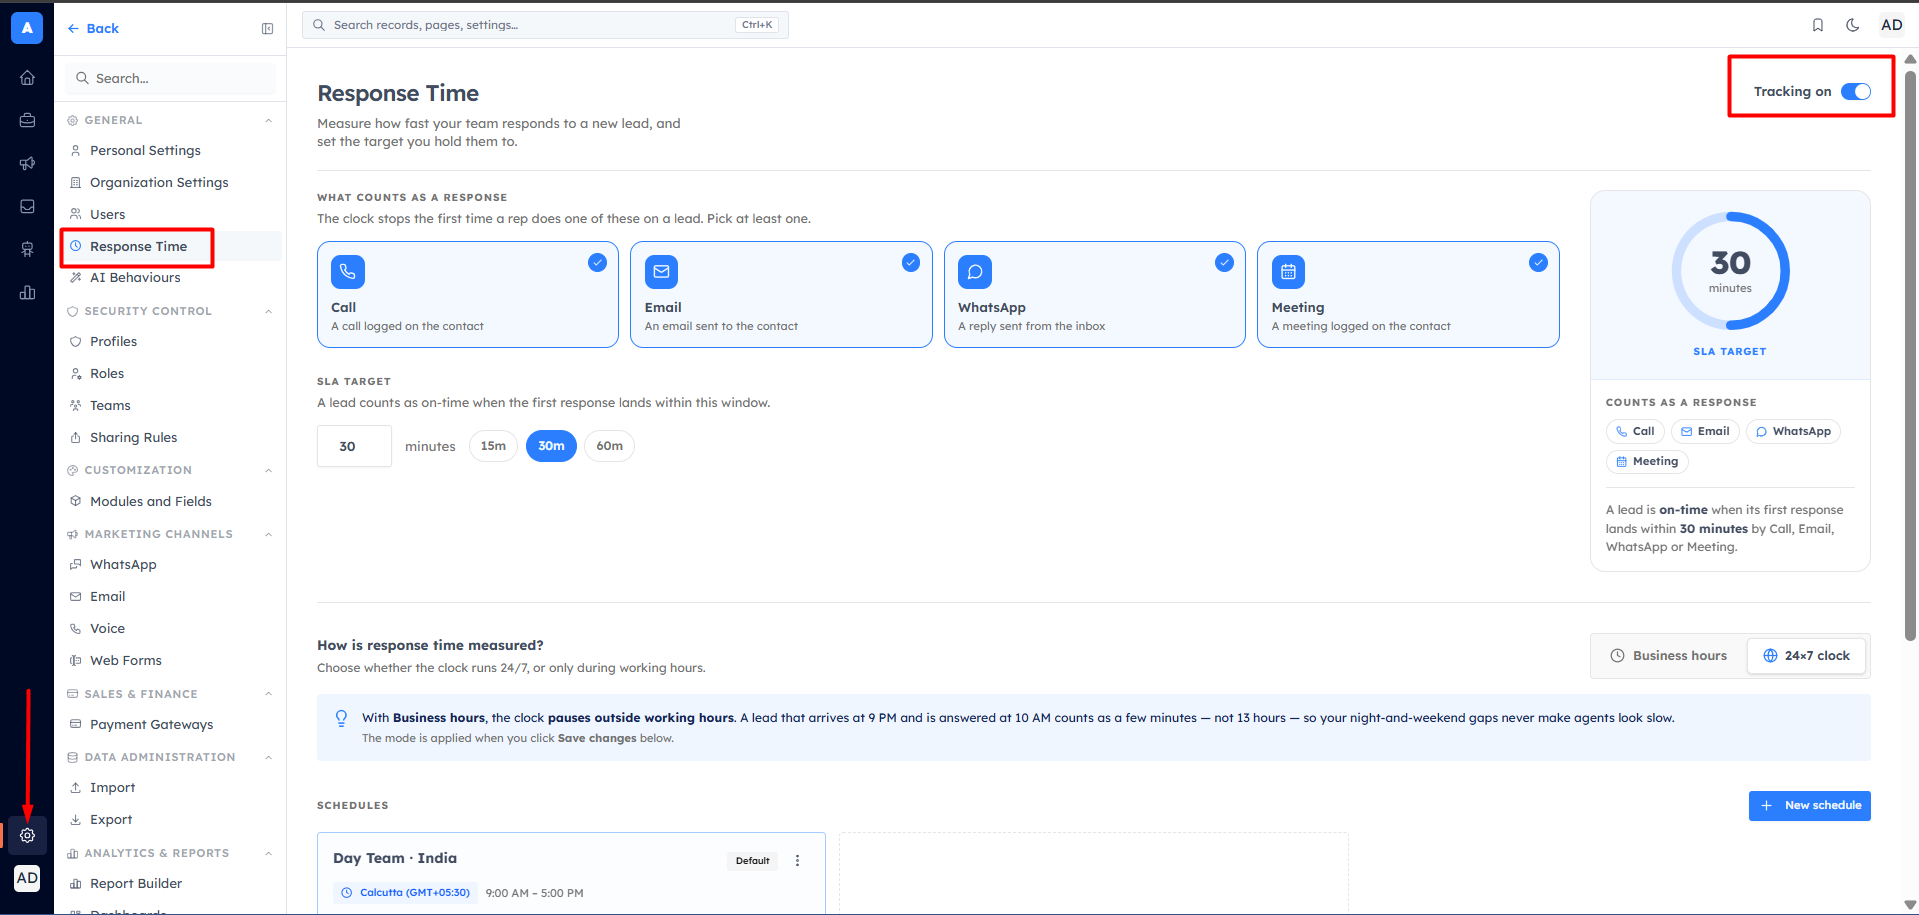
In a dedicated section below the activity and SLA controls. Here you pick a measurement mode, build reusable working-hours schedules (with per-day times, breaks and a timezone), assign them to teams and users, and maintain a Holidays list that the clock skips. This keeps your speed-to-lead numbers fair: nights, weekends and public holidays never count against an agent who could not have replied.
Before you start#
Open the page — go to Settings → Response Time and scroll to the Business Hours section under the SLA controls.
Tracking must be on — the master Tracking on toggle at the top of the page controls whether response time is measured at all. Pair these settings with your SLA target in Speed-to-Lead: Response-Time Tracking & Business Hours.
Two save buttons — the measurement mode saves only when you click Save changes at the bottom of the page (it is bundled with your activity and SLA settings). Schedules and Holidays each save immediately from their own buttons.
💡
Business Hours shape how the numbers in Speed-to-Lead are calculated. Set them up before you rely on those reports.
Choose how response time is measured#
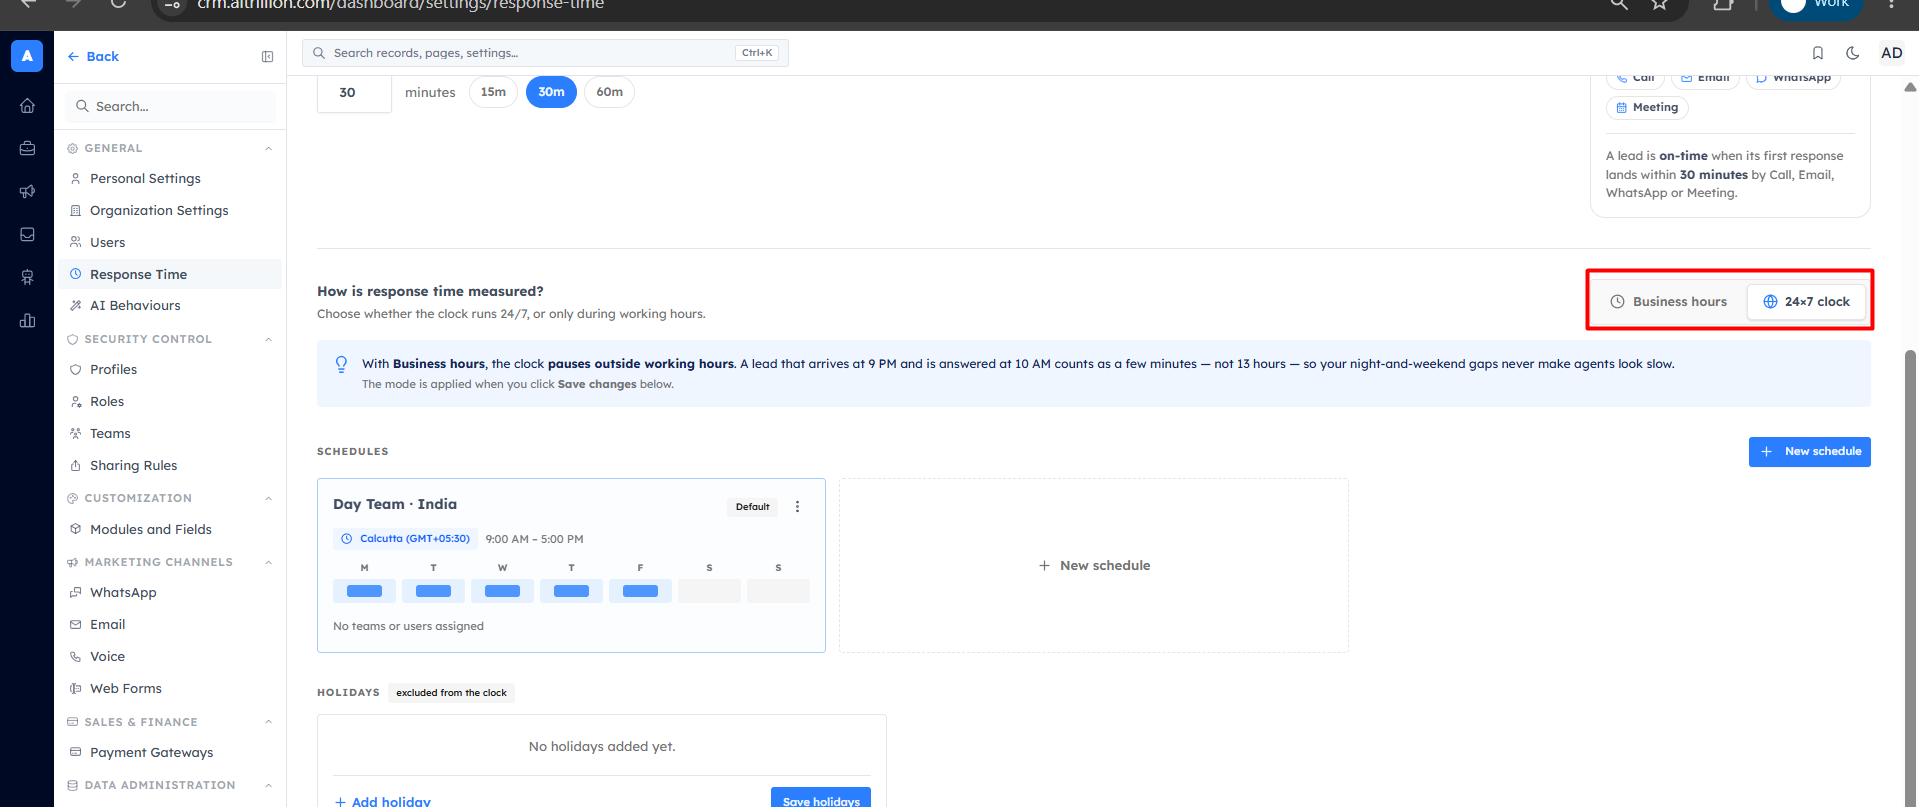
Under How is response time measured? pick one of two modes:
Business hours — the clock pauses outside working hours. A lead that arrives at 9 PM and is answered at 10 AM counts as only a few minutes, not 13 hours. Holidays are skipped too.
24×7 clock — the clock runs continuously, every hour of every day, regardless of schedules or holidays.
💡
The mode is applied only when you click Save changes at the bottom of the page. Changing schedules or holidays without saving the mode will not switch how the clock behaves.
Create a working-hours schedule#
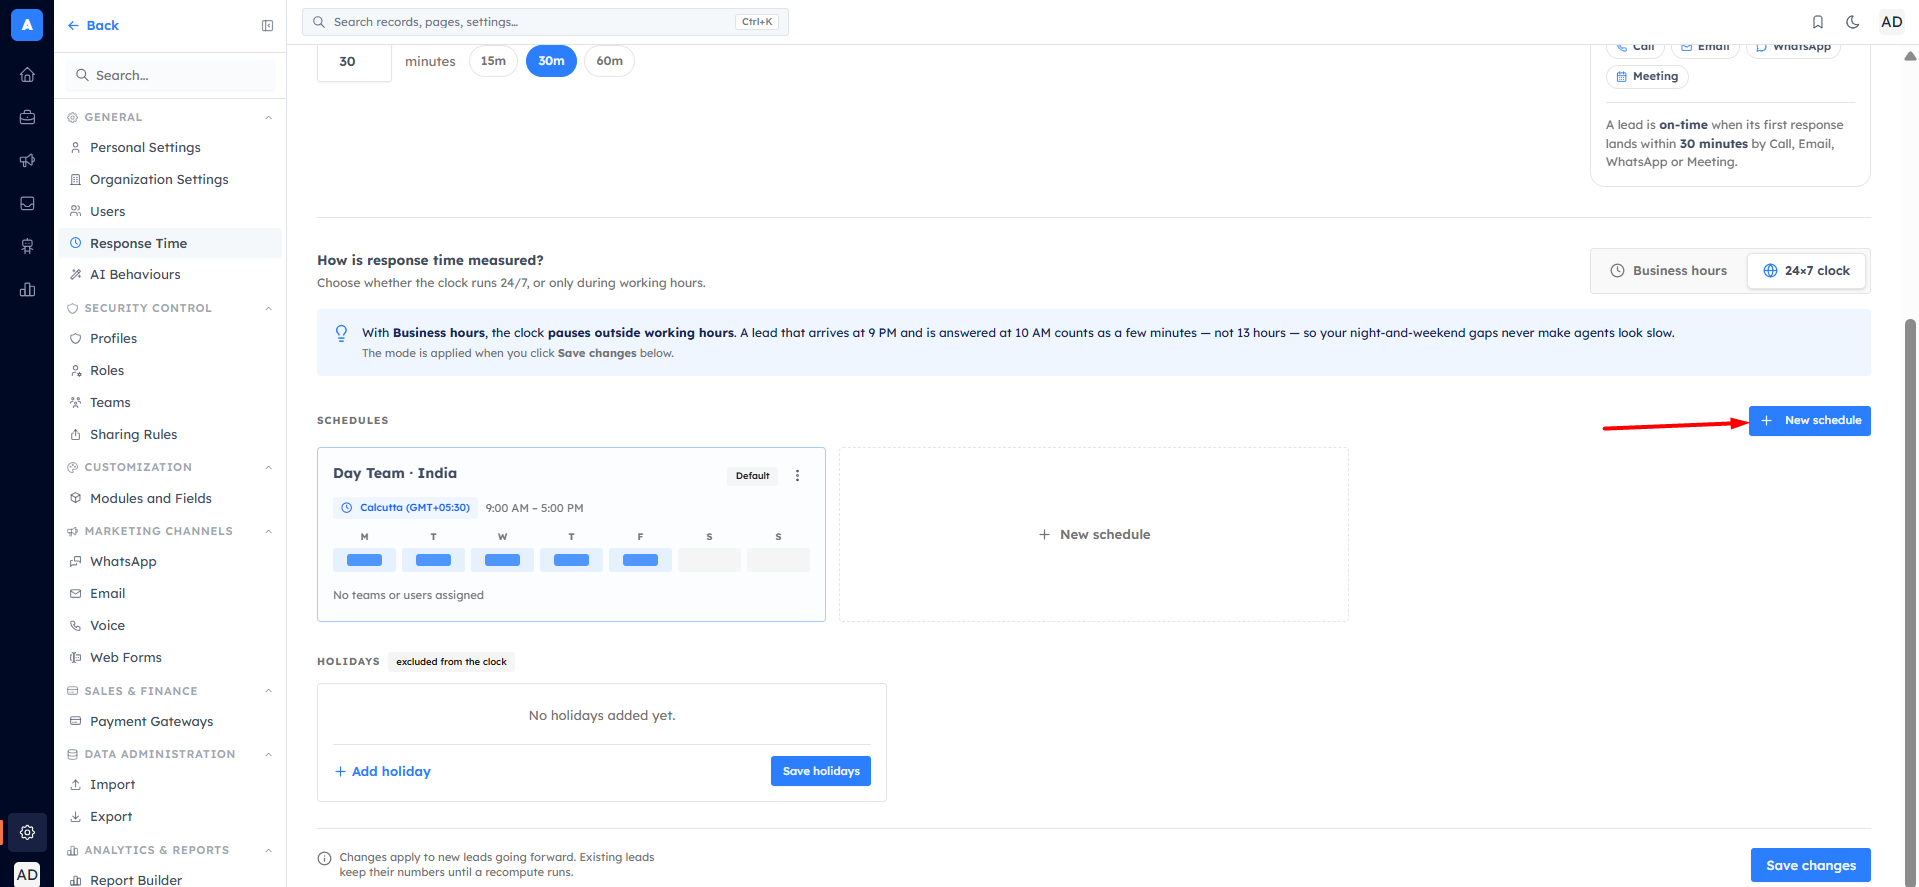
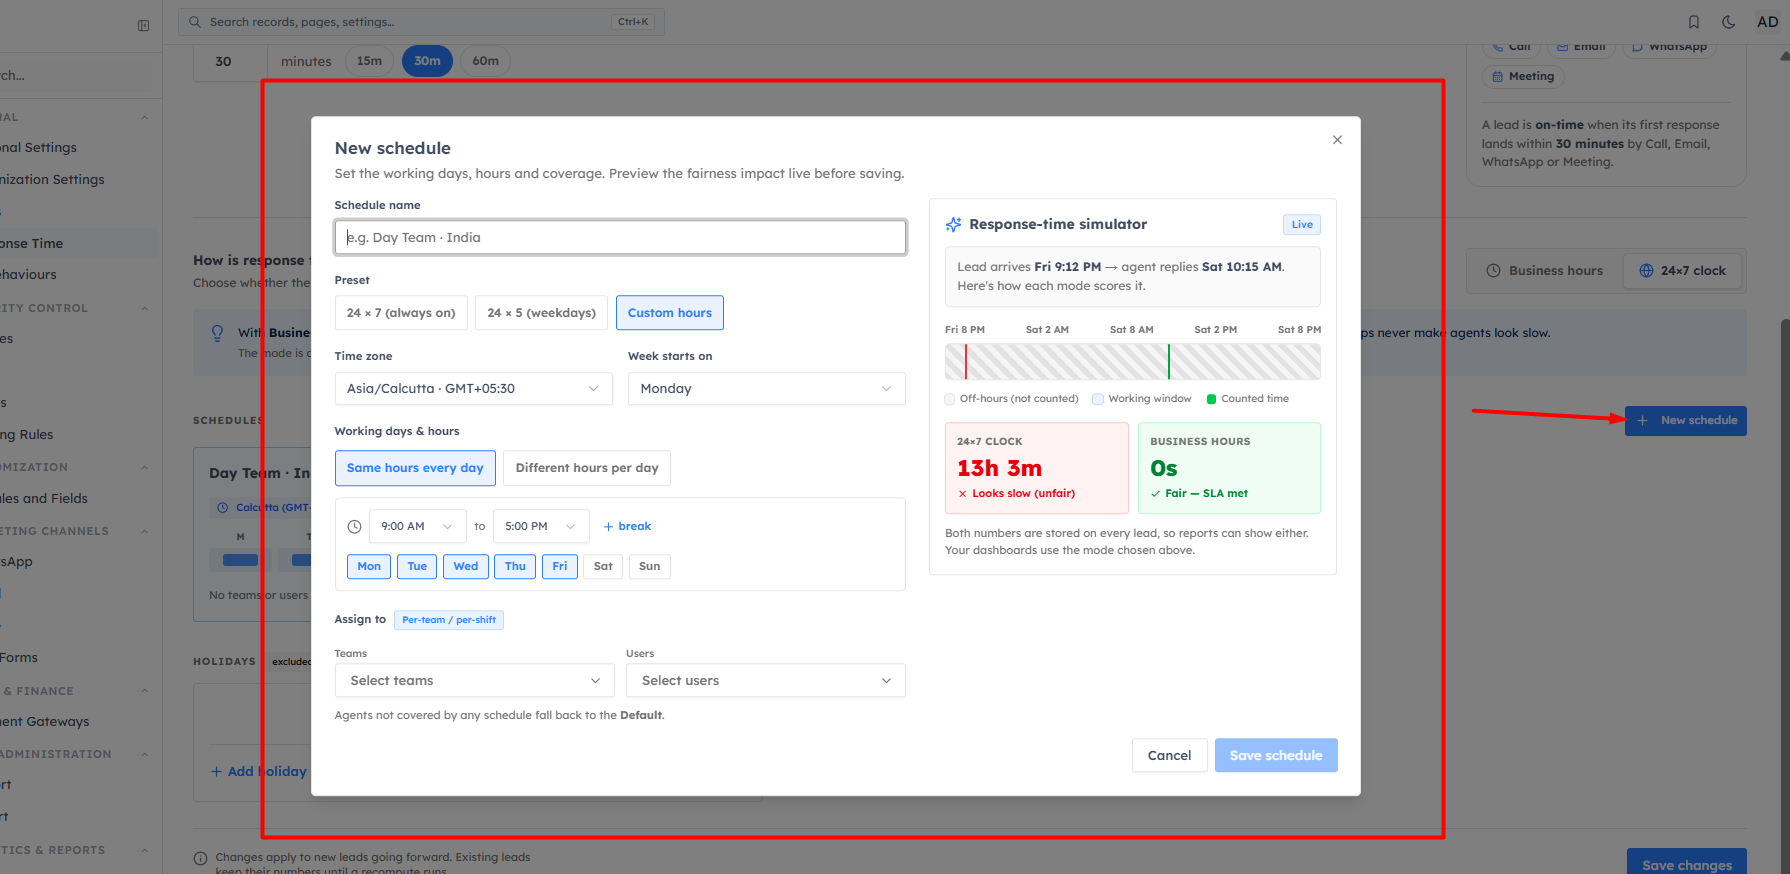
Schedules define the days and hours that count as working time. In the Schedules block, click New schedule (or the empty-state card) to open the editor. A live fairness simulator on the right recomputes as you edit.
Schedule name — give it a clear label, for example Day Team · India. This is required.
Preset — start from a template: 24 × 7 (always on) opens every day for a full 24 hours; 24 × 5 (weekdays) opens Monday–Friday for 24 hours and closes the weekend; Custom hours starts weekdays at 09:00–17:00 with the weekend closed. Editing any time switches the preset to Custom.
Time zone — choose the IANA zone the hours are read in (each option shows its current GMT offset). All times are wall-clock times in this zone.
Week starts on — Monday or Sunday.
Working days & hours — pick Same hours every day to set one start/end (and optional breaks) that applies to every open day, then toggle the day buttons on or off; or pick Different hours per day to set each day individually. A day left off shows Closed — not counted.
Breaks — inside any working day, add amber break rows (for example a 13:00–14:00 lunch). Break windows are carved out of working time.
Assign to — select the Teams and Users this schedule covers.
Save schedule — the card appears in the Schedules grid.
Times — chosen from a 30-minute grid (00:00–23:30) shown in 12-hour format; a start equal to its end reads as 24 hours.
Default fallback — the very first schedule you create is automatically marked Default. Any agent not covered by another schedule (by team or by user) falls back to this Default.
Set / change the default — use a card's three-dot menu → Set as default. Only one schedule can be Default at a time; setting a new one demotes the old.
💡
On each schedule card you can see at a glance its timezone, a one-line hours summary, a seven-day strip (M T W T F S S) of which days are open, and the teams or users assigned to it.
Add holidays#
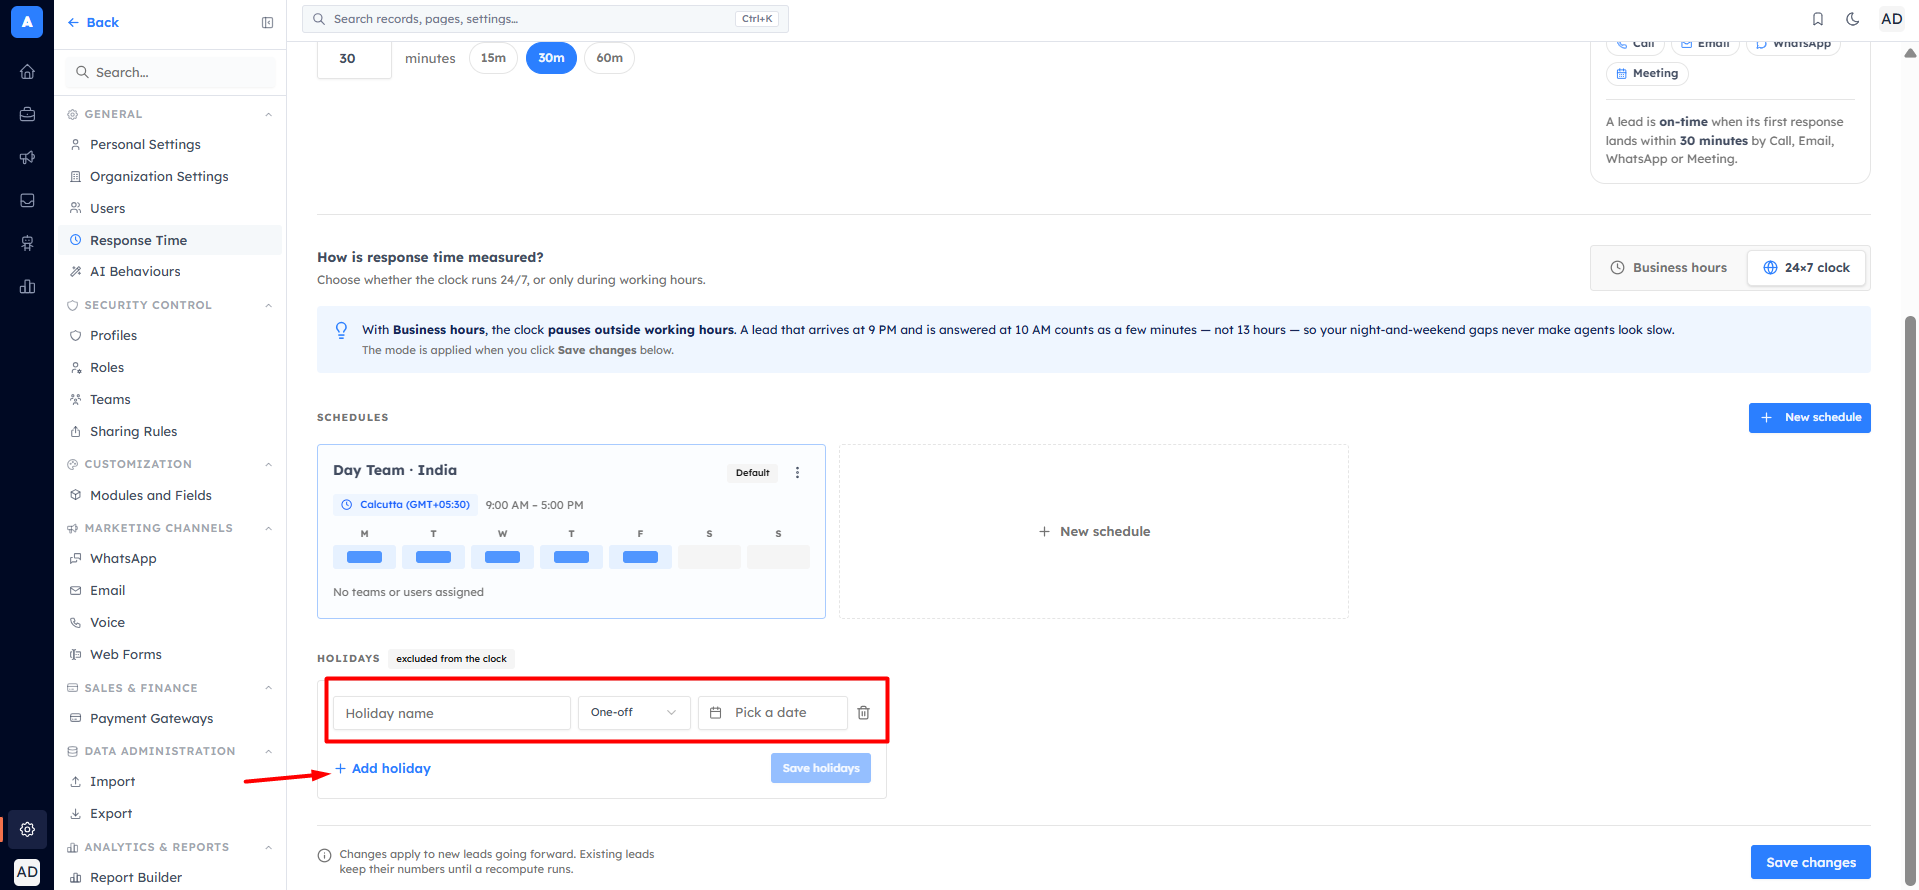
The Holidays block holds dates that are excluded from the clock — response time never accrues on them in Business hours mode. Each row needs a name and a date type:
Holiday name — a label such as New Year (required).
One-off — a specific calendar date you pick from the date picker; it applies to that year only.
Every year — a recurring month + day that repeats annually (year-agnostic, so 29 February is allowed).
Use Add holiday to add rows and the trash icon to remove them, then click Save holidays. The button stays disabled until every row has a name and a valid date.
Good to know#
Deleting a schedule — you are asked to confirm; agents assigned to it fall back to the Default schedule. This cannot be undone.
Immediate feedback — creating, updating, deleting or setting a default shows a confirmation toast; schedule and holiday changes take effect as soon as they save.
New leads only — as the page footer notes, changes apply to new leads going forward. Existing leads keep their numbers until a recompute runs.
Mode vs schedules — schedules and holidays only affect measurement while the mode is set to Business hours. In 24×7 clock mode they are ignored.
Was this article helpful?
Ready to implement this?
OpenAI Engage and apply what you just learned to your own workspace.
Open AI Engage CRM