Loading…


KnowledgeBase
Authenticate Your Webhooks with API Key or Basic Auth
What you'll build#
A webhook lets your workflow tell another system that something happened — for example, sending a new Deal straight to your billing app or a custom tool. It does this by making an HTTP request to a web address you choose.
Most systems will only accept that request if it can prove who's sending it. In this guide you'll add a Webhook action and secure it two ways: with an API Key or with Basic Auth (a username and password). Follow the red arrows in each picture to find the exact setting.
ℹ️
A webhook is just an automatic HTTP request. When the workflow runs, the CRM sends the record’s data to your URL and the other system receives it instantly.
Before you start#
Open the system you want to send data to and find its API (or “Developer”) settings. From there, note down:
The request URL — it must start with
https://.How it wants you to sign in — either an API key, or a username and password.
Step 1 — Open the Workflow builder#
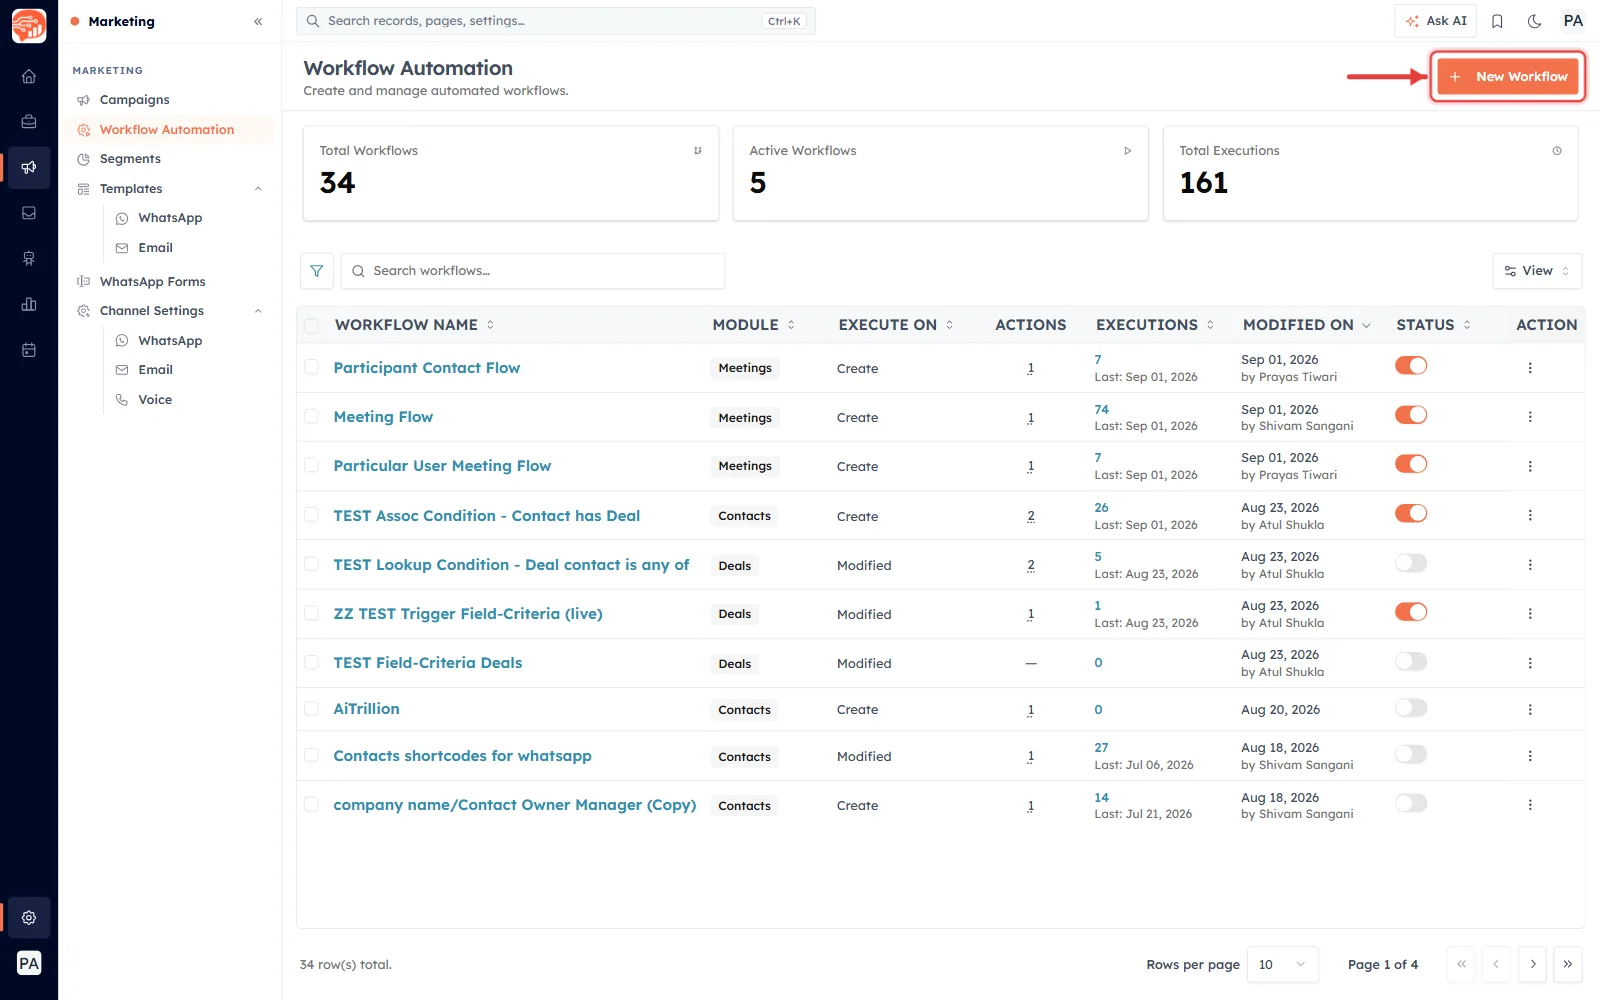
In the left sidebar, go to Marketing → Workflow Automation. On that page, click New Workflow in the top-right corner (red arrow), give your workflow a name, choose the module that should start it, and click Next: Editor.
Step 2 — Add the Webhook action#
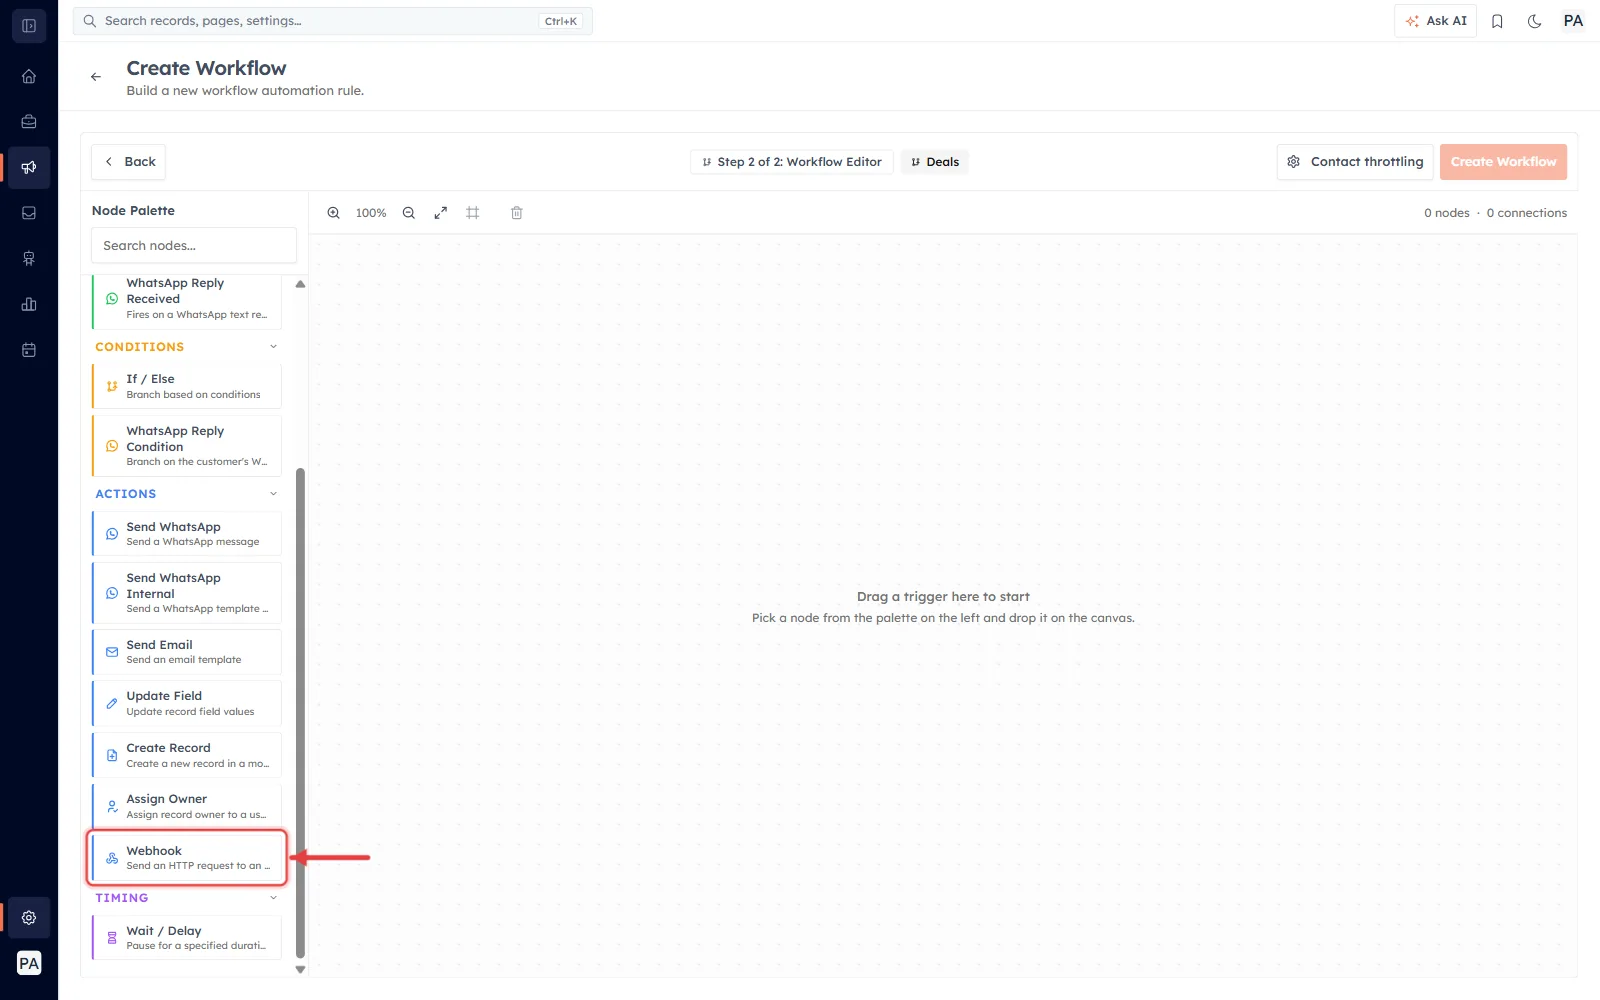
You're now on the builder canvas. First drag a trigger (such as Record Created) onto the canvas so the workflow knows when to run. Then, from the Actions group in the palette on the left, drag the Webhook action (red arrow) onto the canvas and click it to open the Configure Node panel.
Step 3 — Set the method and URL#
At the top of the panel, choose the method your endpoint expects — usually POST — and paste your Request URL. You can slot record values into the URL or the body using {{merge tags}}, so each request carries that record's own data.
Step 4 — Open the Authorization setting#
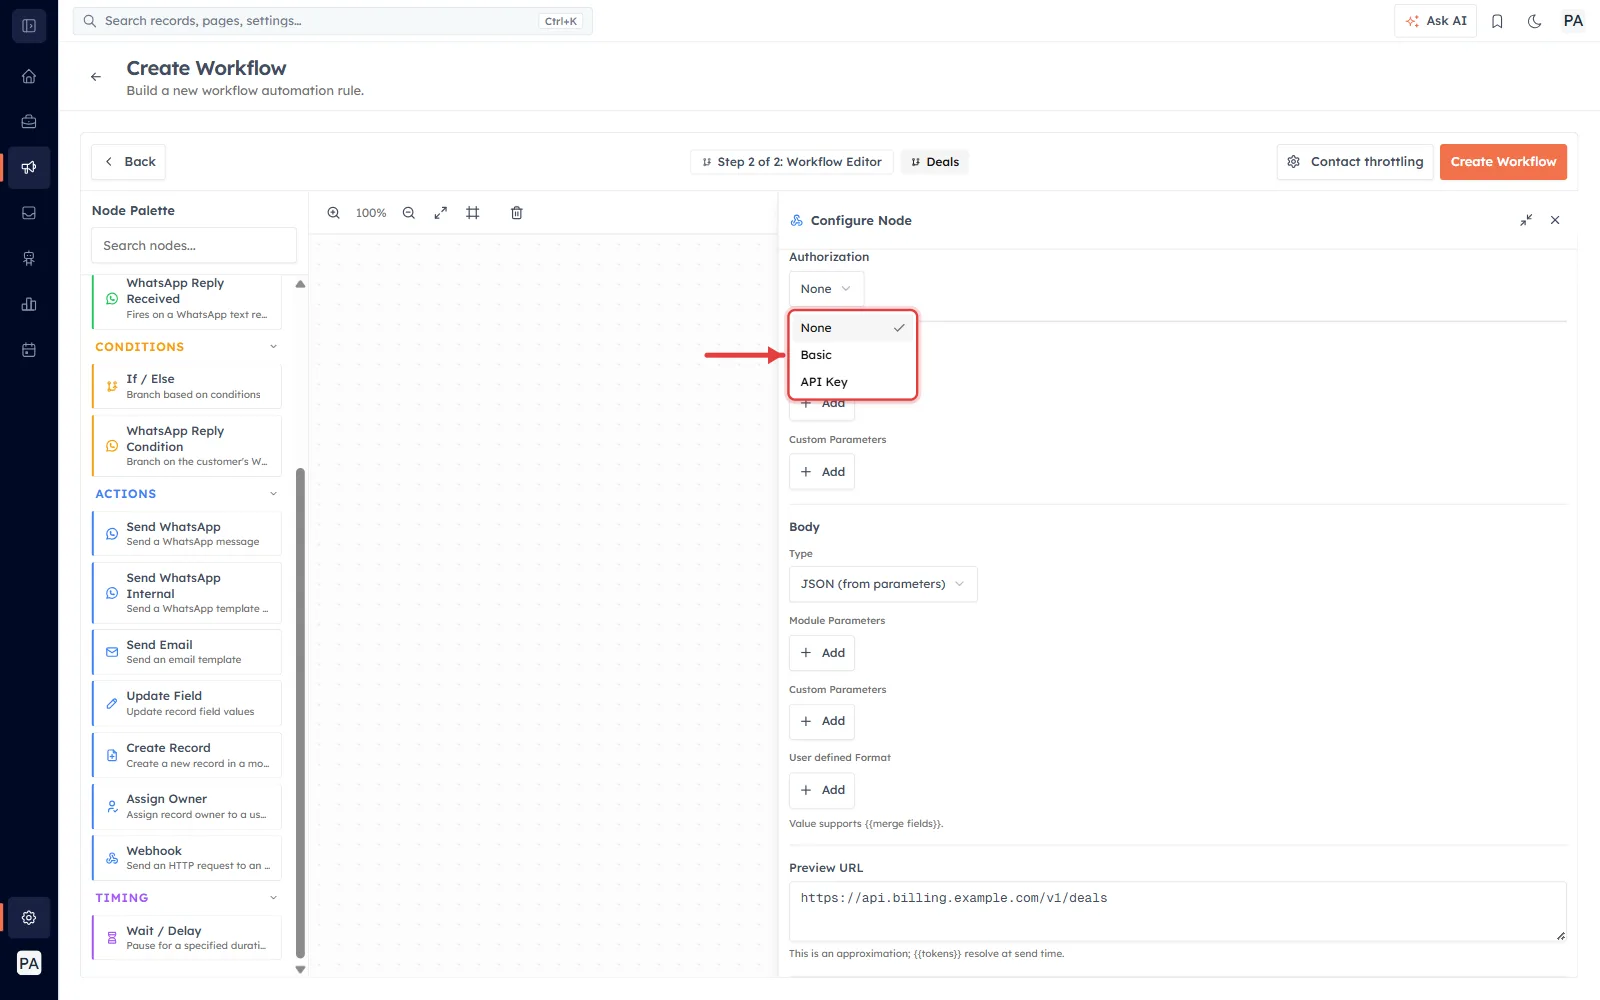
Scroll down to Authorization and open the dropdown (red arrow). You'll see three choices — None, Basic, and API Key. Pick the one your endpoint asks for. If the endpoint is open and needs no sign-in, leave it on None.
Option A — API Key#
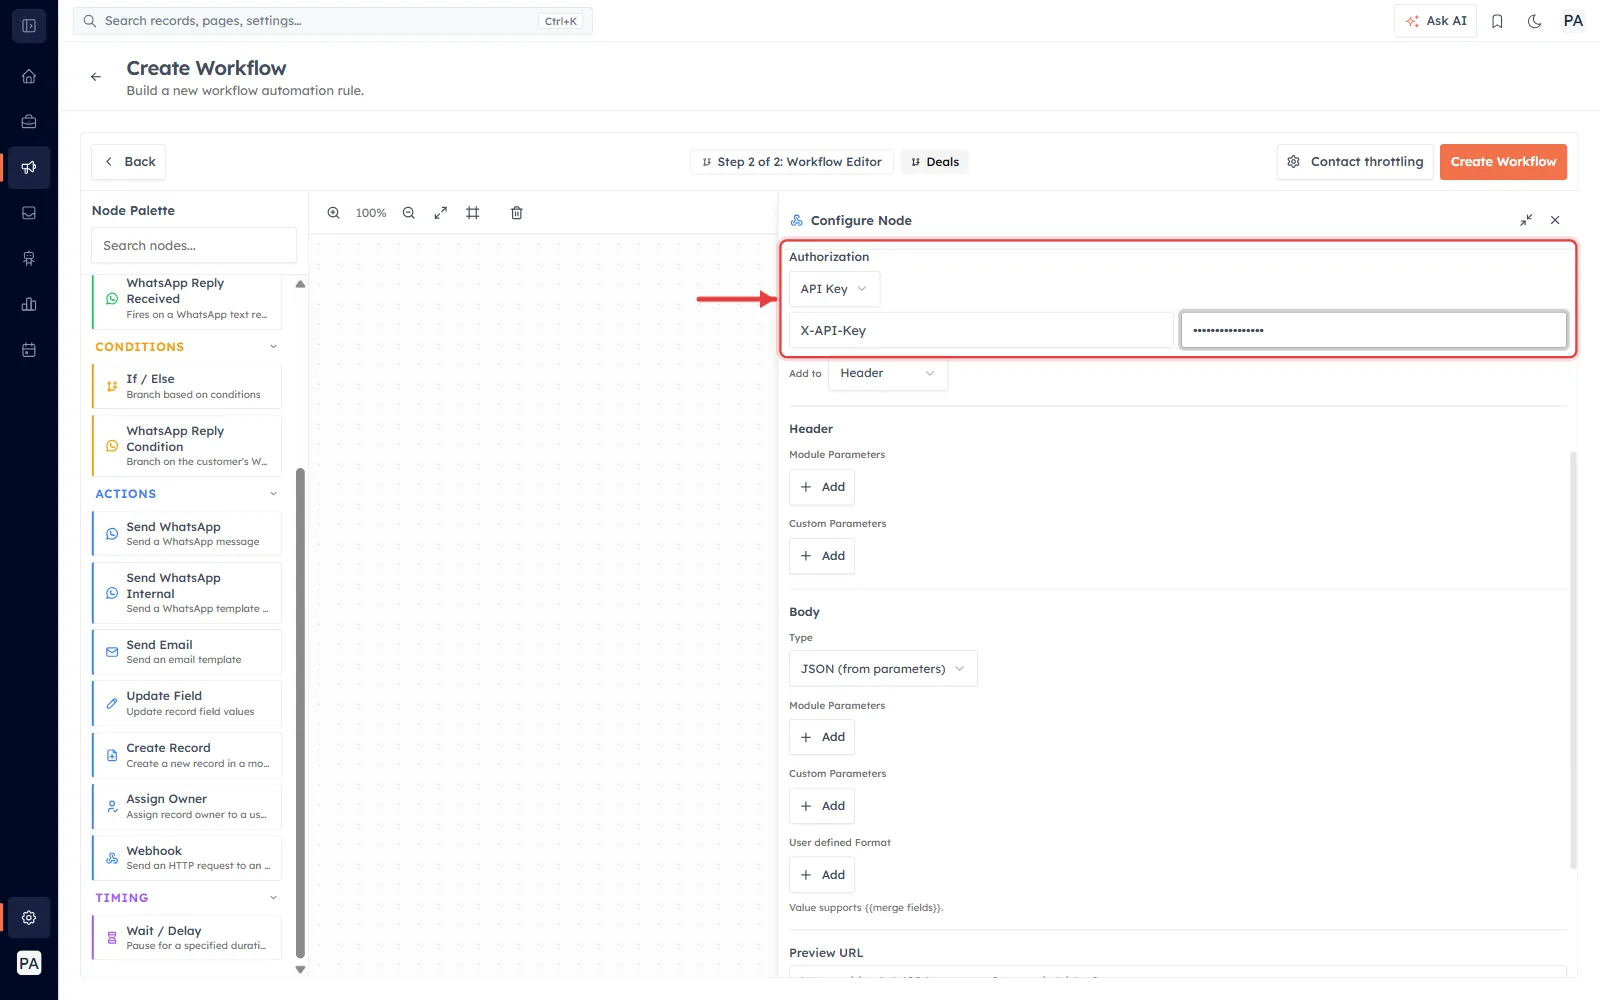
Choose API Key when the service gives you one secret key. Three small boxes appear (red arrow):
Key Name — the exact name the service expects, such as
X-API-KeyorAuthorization.Key Value — the secret key itself.
Add to — where the key travels: as a request Header (the usual choice) or as a URL Query parameter.
💡
Not sure which to pick? Most services want the key in a Header. Their docs will tell you the exact Key Name to use.
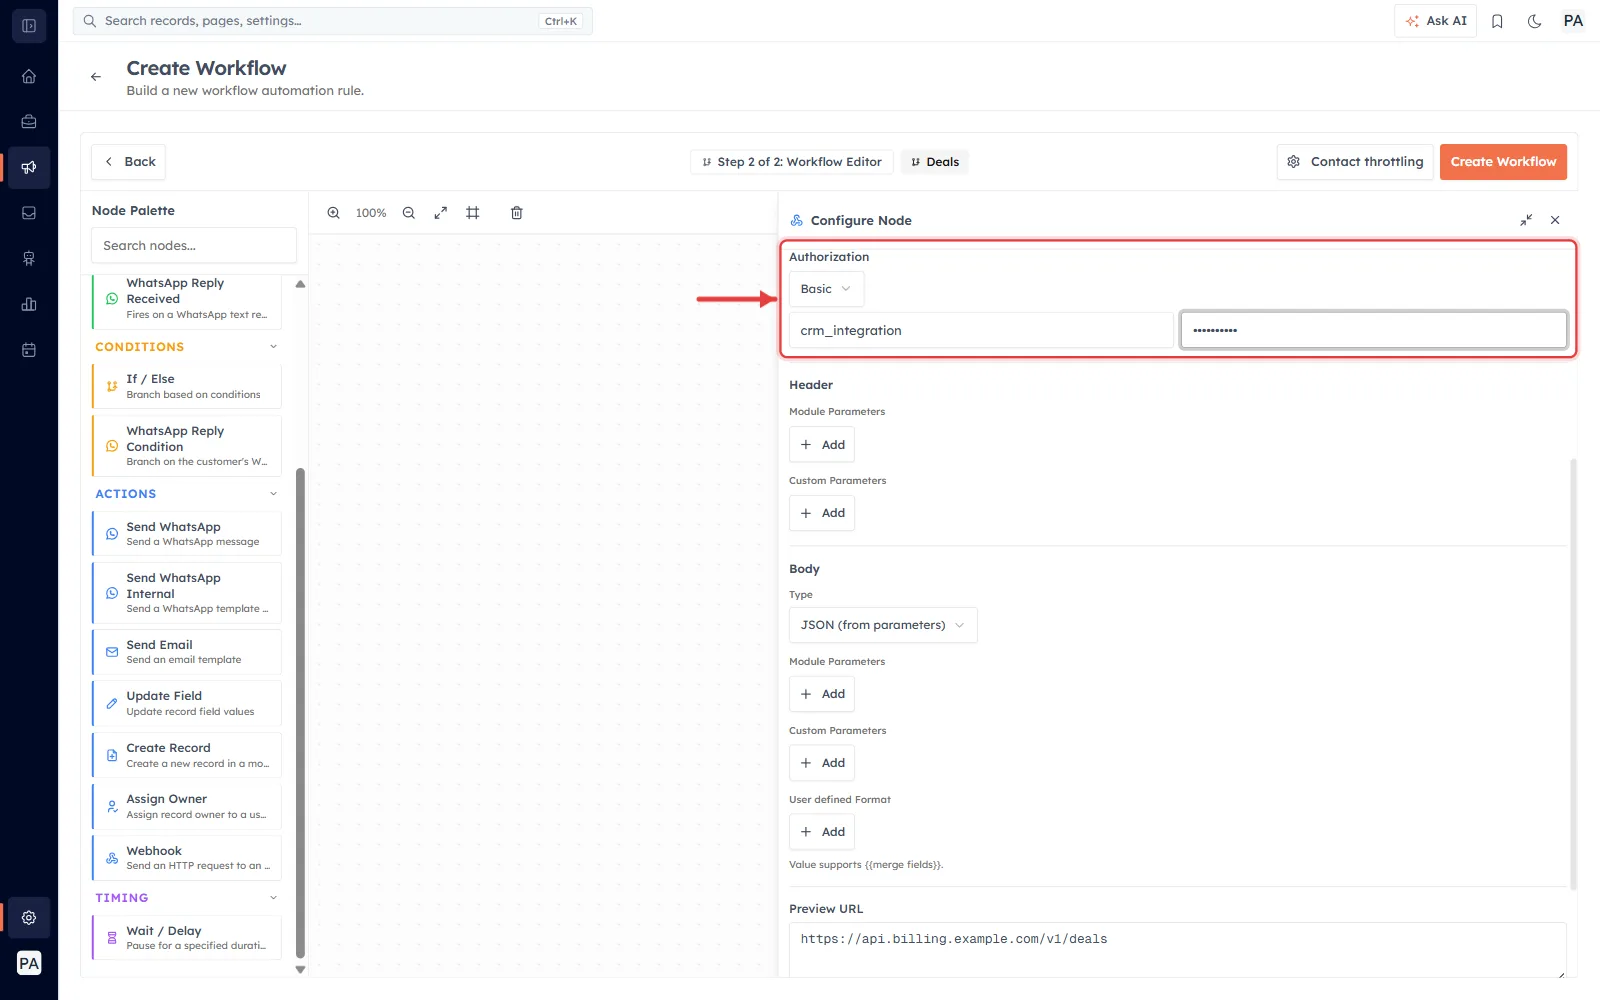
Option B — Basic Auth#
Choose Basic when the service gives you a username and password. Type both into the two boxes (red arrow) and the CRM packages them into the request's authorization header for you — you don't need to encode anything yourself.
Step 5 — (Optional) Sign the request#
Further down the panel, Signing secret is an extra layer of trust. If you set one, the CRM adds an X-Webhook-Signature (HMAC-SHA256) header so your endpoint can confirm the message really came from AI Engage and wasn't changed on the way.
✅
Authorization proves you’re allowed in; the signing secret proves the message wasn’t tampered with. Use one, both, or neither.
Step 6 — Save the workflow#
Click Create Workflow in the top-right to save it, then switch it on. From now on, each time it runs it sends a secure, authenticated request to your endpoint.
Example — copy a cURL command into the Webhook#
When another app tells you how to send data to it, it usually gives you something called a cURL command. It looks like code, but don't worry — you never have to run it. You only need to copy the pieces of it into the boxes in the Configure Node panel.
Here is an example. It adds a deal to a billing app:
curl --location 'https://api.billing.example.com/v1/deals' \
--header 'Content-Type: application/json' \
--data '{
  "name": "{{contacts.first_name}}",
  "phone": "{{contacts.phone}}"
}'
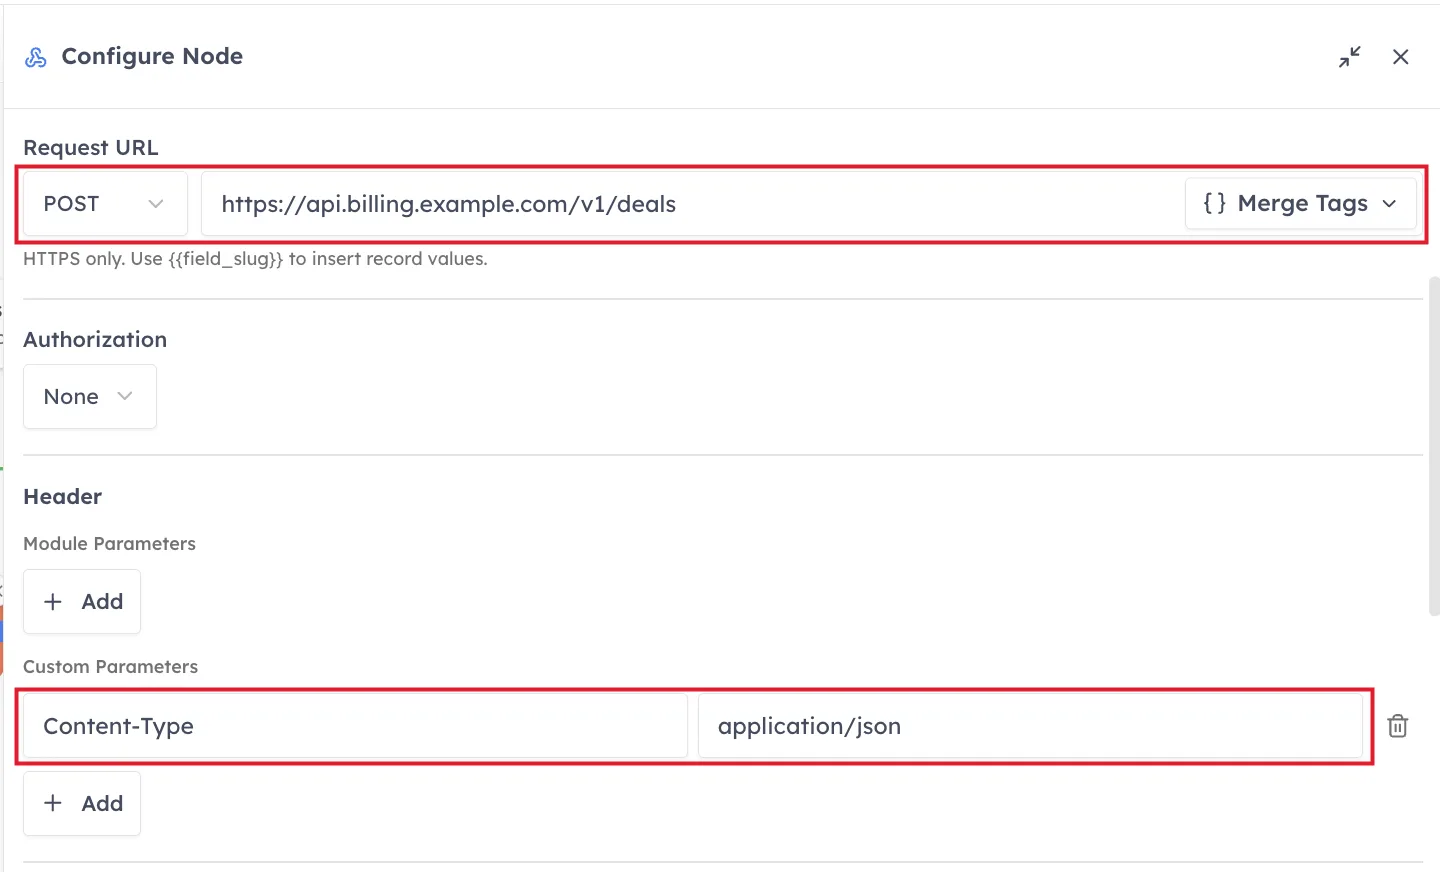
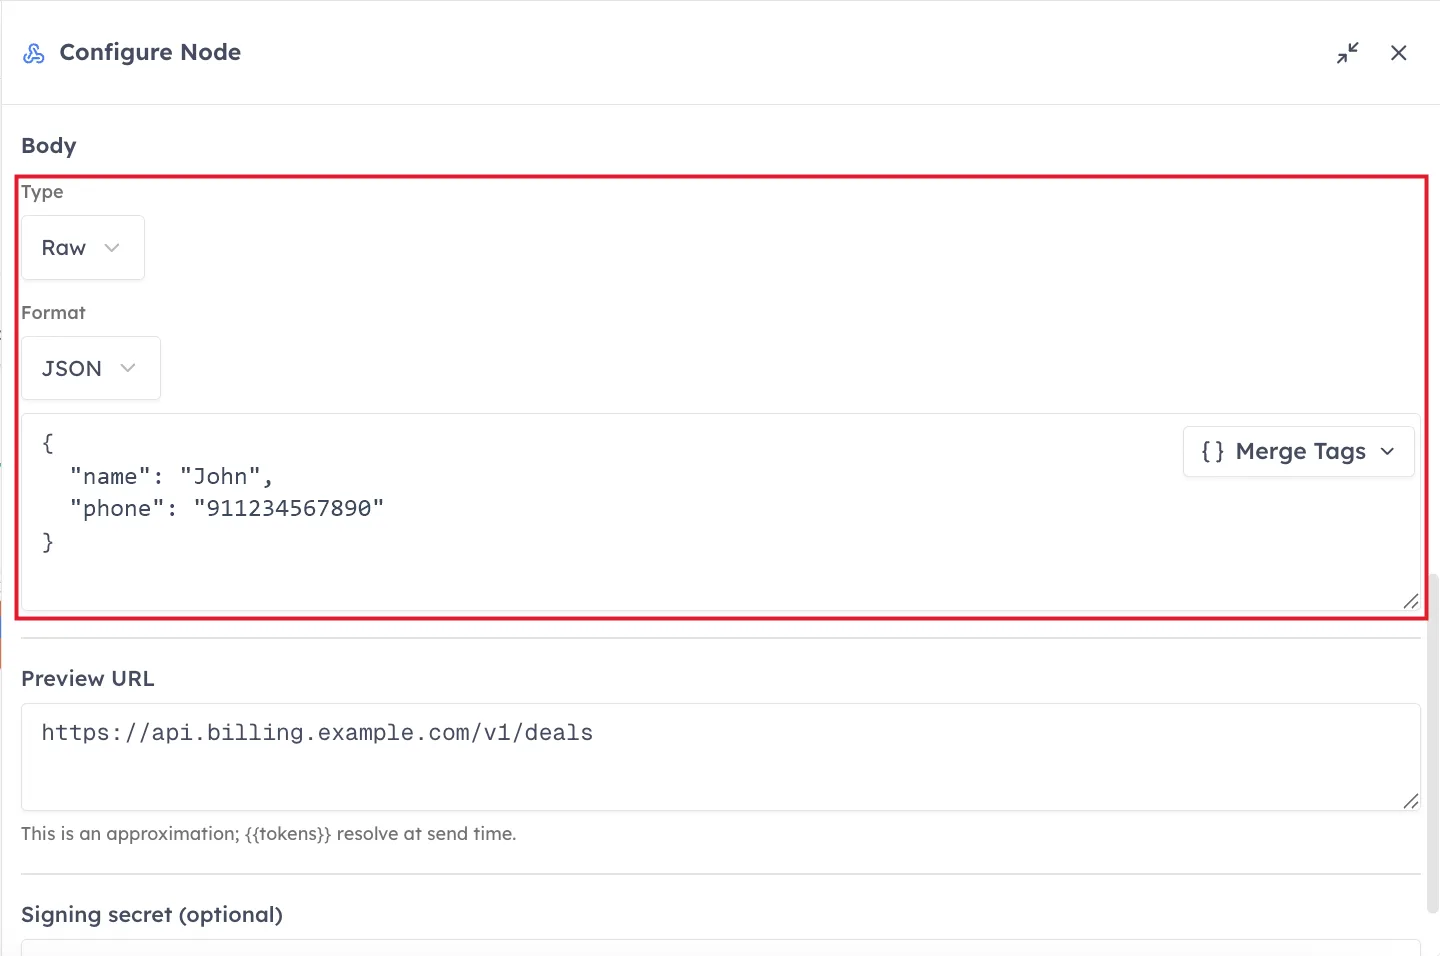
There are only three pieces to copy. In the pictures below, each one is marked with a red box.
The web address. Copy the link that comes after
--locationand paste it into Request URL. This command sends data, so pick POST in the small box on the left.The header. Every
--headerline becomes one row under Header → Custom Parameters. Click + Add, then typeContent-Typein the left box andapplication/jsonin the right box.The data. Everything after
--datais the Body. Set Type to Raw, set Format to JSON, and paste the text in.
The web address and the header sit at the top of the panel:
Scroll down a little in the same panel and you will find the body:
💡
In the picture, a sample name and phone number are typed in directly, just to show you how it looks. If you want the real details of each record to be sent instead, use merge tags like
{{contacts.first_name}} — the same way they are used in the example above. The Merge Tags button next to the box adds them for you.Where do I put the key or password?#
In this example, Authorization is set to None, because this app does not ask you to sign in. If your cURL command does have a key or a password in it, do not add it as a header. Put it in the Authorization dropdown instead, and the CRM will send it the right way for you.
Here is what to pick:
If you see
--header 'X-API-Key: abc123', choose API Key. Key Name isX-API-Key, Key Value isabc123, and Add to stays on Header.If you see
--header 'Authorization: Bearer abc123', choose API Key. Key Name isAuthorization, Key Value isBearer abc123, and Add to stays on Header.If you see
--user 'username:password'(or-u), choose Basic and type the username and the password in the two boxes.If the key is part of the web address, like
?api_key=abc123, choose API Key and set Add to to Query. Leave that part out of the URL you paste.
When you are done, look at Preview URL near the bottom of the panel. It shows you roughly what will be sent. Then click Create Workflow to save. Your finished setup looks like this:
Trigger: Deal — Record Created
Action: Webhook → POST to
https://api.billing.example.com/v1/dealsHeader:
Content-Type: application/json· Body: Raw / JSONAuthorization: API Key → Key Name
X-API-Key, added to the Header
⚠️
Treat keys and passwords like secrets. Always use an HTTPS URL, and never paste real credentials where others can see them. If a key ever leaks, rotate it in the destination system.
Was this article helpful?
Ready to implement this?
OpenAI Engage and apply what you just learned to your own workspace.
Open AI Engage CRM