Loading…


KnowledgeBase
Send a WhatsApp Campaign: Broadcast Messages to Your Contacts
What is a WhatsApp Campaign?#
A WhatsApp Campaign sends a single approved template message to a large group of contacts at once — also called a broadcast. Unlike the inbox (which is for two-way conversations), campaigns are one-directional sends designed for announcements, promotions, reminders, and follow-ups.
💡
You must have at least one Approved WhatsApp template before creating a campaign. Go to Settings → WhatsApp → Templates first if you have not created one yet.
💡
WhatsApp campaigns deduct credits from your WhatsApp balance. The cost per message varies by country and template category. Check Settings → WhatsApp → Credits for your current balance and per-message rates before sending a large broadcast.
Step 1 — Create a campaign#
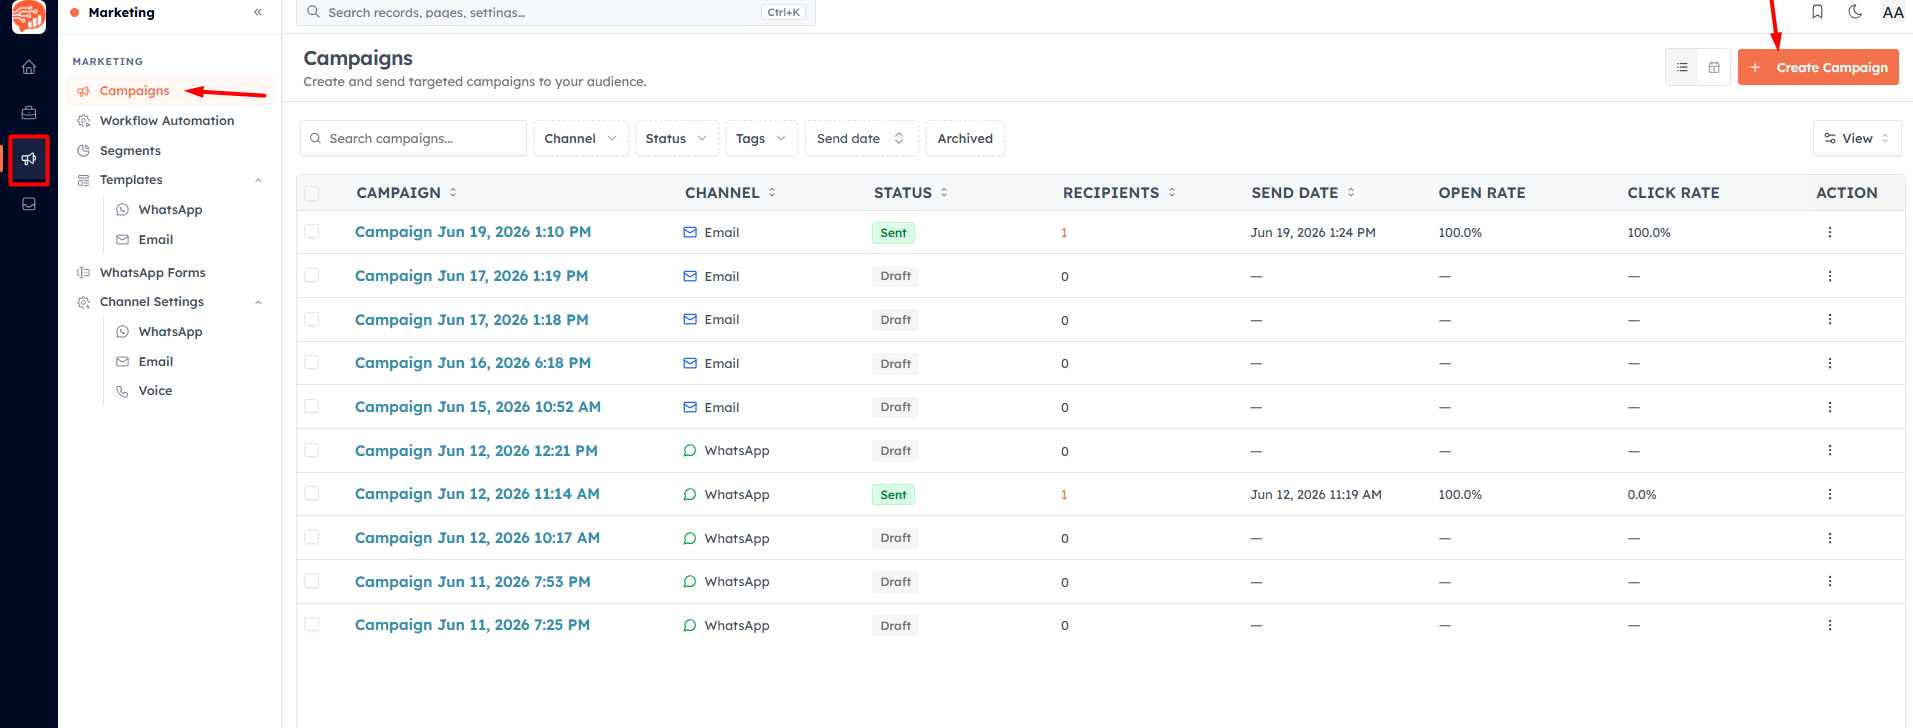
Navigate to Marketing → Campaigns. Click + Create Campaign.
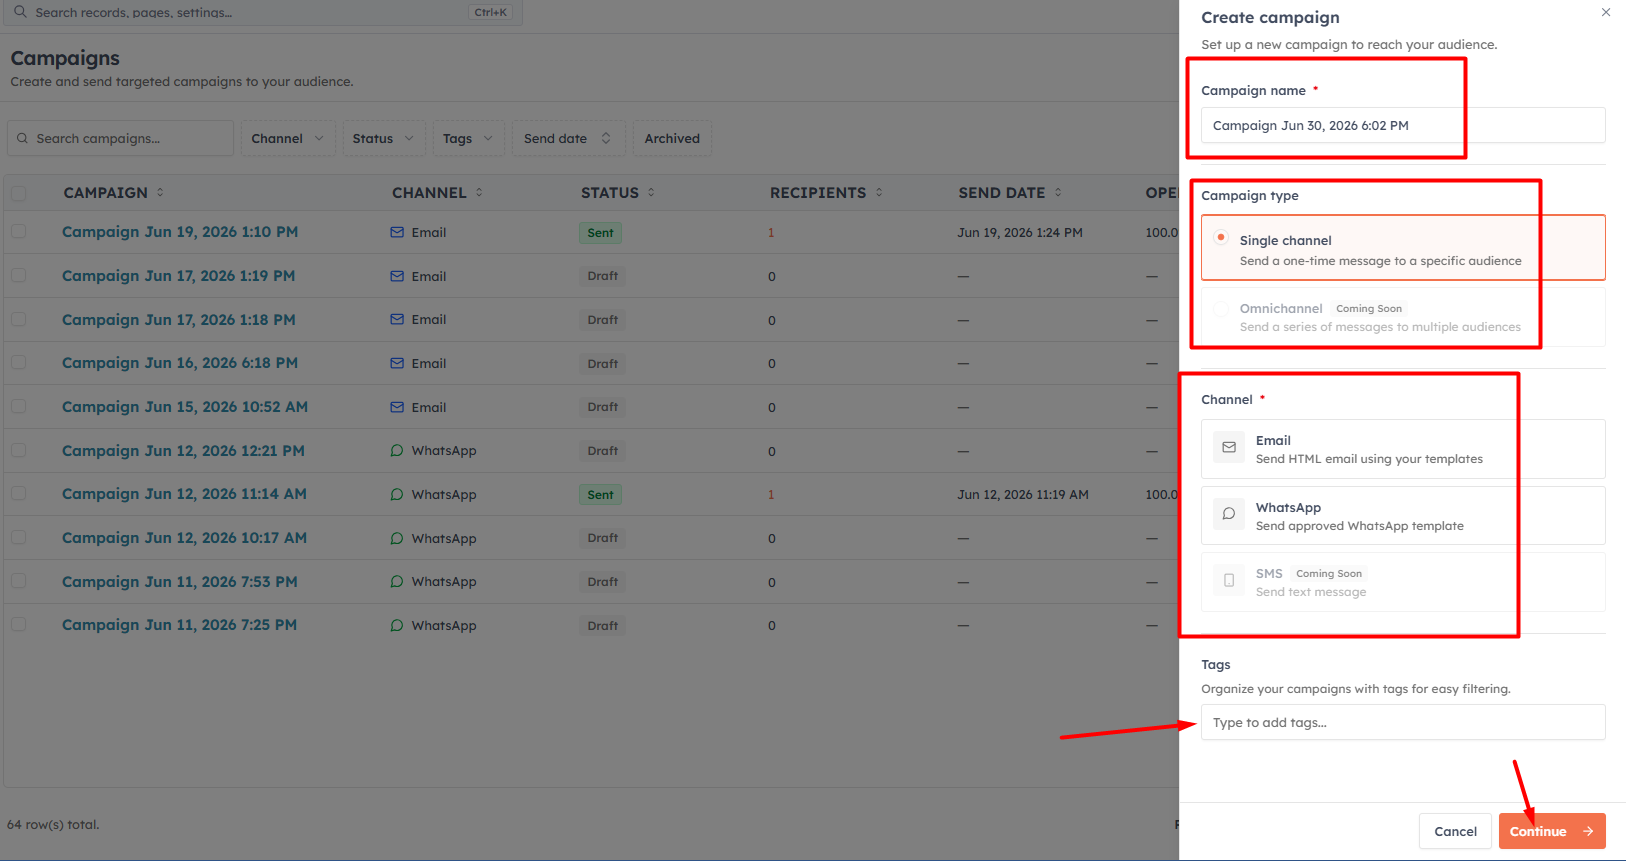
A setup panel slides in from the right. Select WhatsApp as the channel, give the campaign a name, and click Continue.
Step 2 — Select your audience#
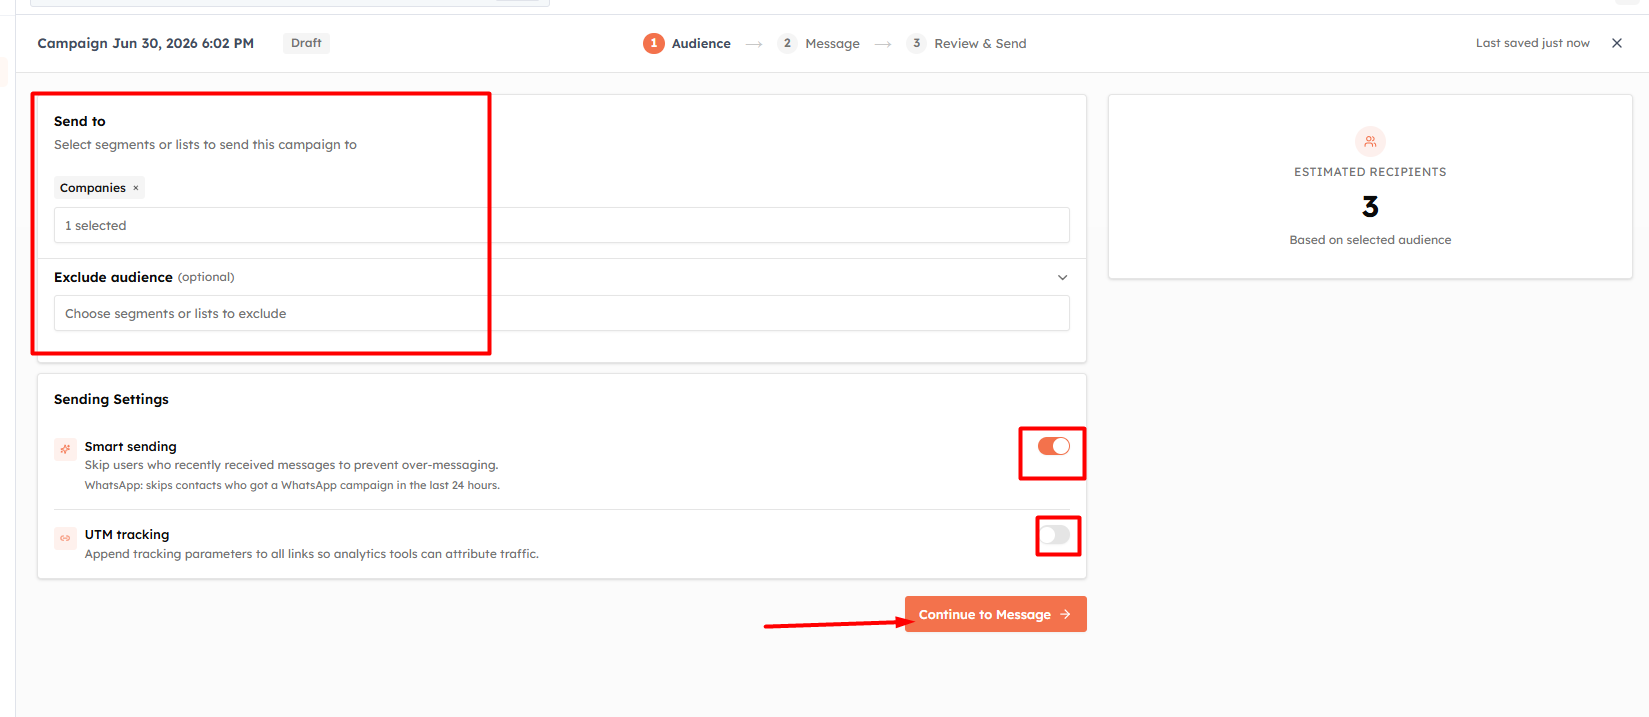
Choose who receives the campaign:
Segment — pick a pre-built audience segment (e.g., "All Active Contacts", "Enterprise Leads", "Trade Show Q2"). The estimated recipient count is shown so you know the reach before sending.
Exclude audience - Exclude the audience to whom you don't want to send the campaign.
Smart Sending - Skip the users who recently received messages to prevent over-messaging.
UTM Tracking - Track audience views and clicks using UTM parameters.
💡
Build your segment in Marketing → Segments before creating the campaign. Segments let you filter contacts by field values, tags, list membership, or activity — for example, "Contacts added in the last 30 days who have a phone number".
Step 3 — Choose a template#
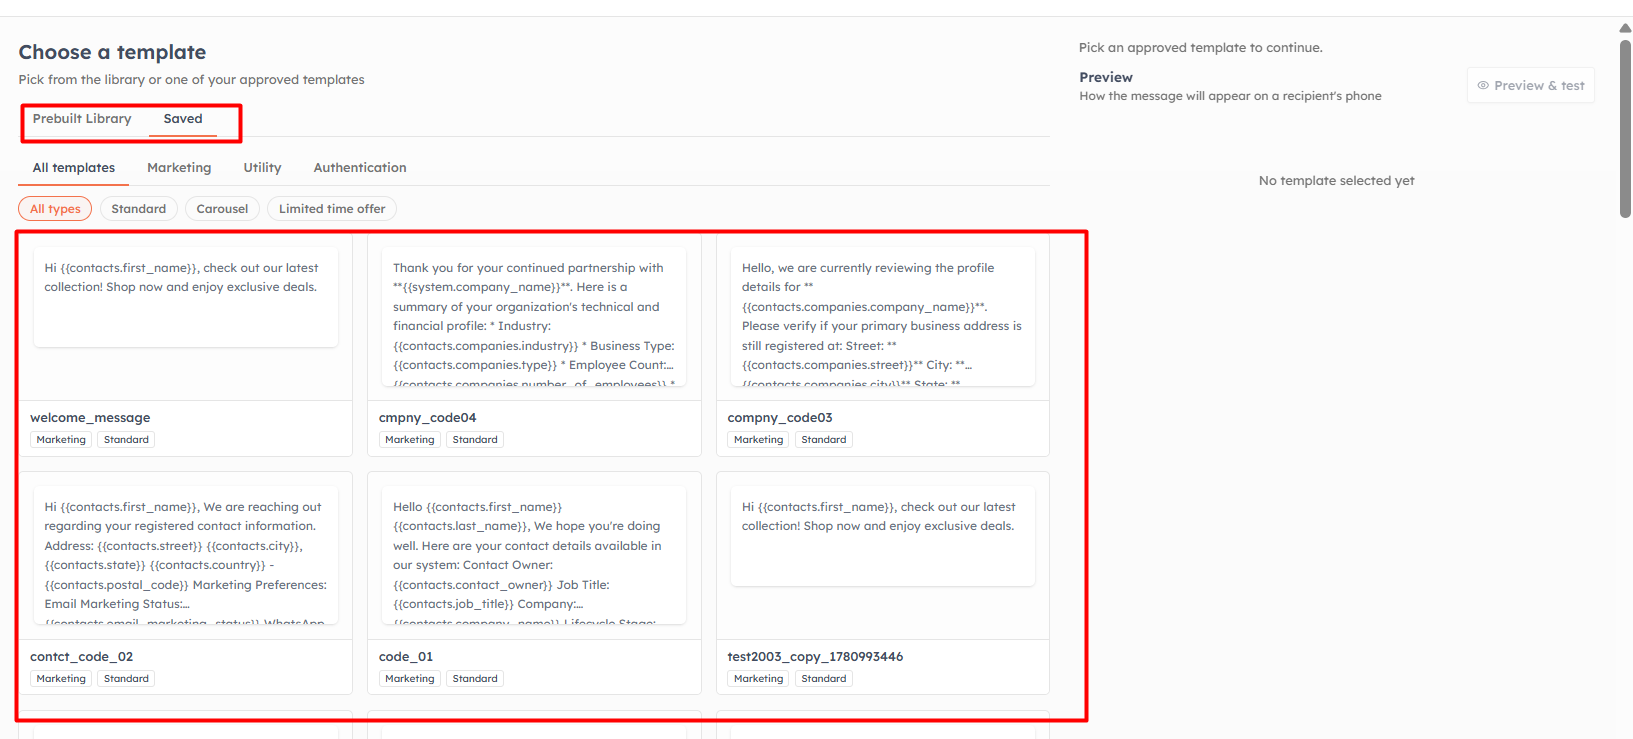
Select the WhatsApp template to send. Two tabs are available:
Saved Templates — your own approved templates ready to use
Prebuilt Library — Meta-verified templates you can clone without waiting for approval
Filter templates by category (Marketing / Utility / Authentication) and type (Standard / Carousel / Limited Time Offer). A phone-frame preview shows the exact message layout.
Step 4 — Review and send#
The Review step shows:
Audience summary — estimated number of contacts who will receive the message
Message preview — the template rendered in a phone frame with sample placeholder values
Schedule — send immediately or pick a future date and time
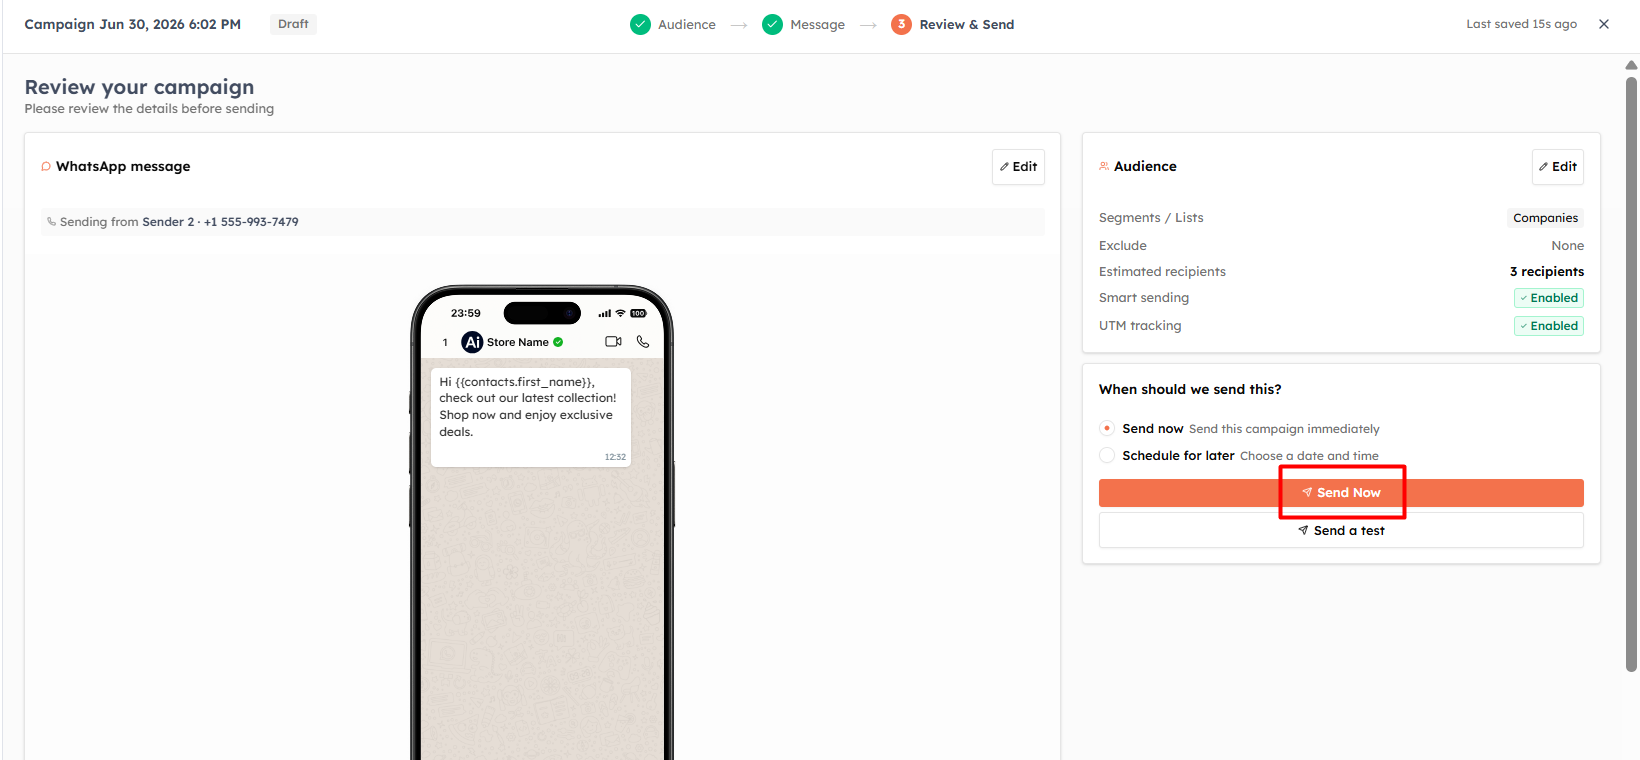
Optionally click Test Send to send the message to yourself first and verify it looks correct. When ready, click Send Now or Schedule.
💡
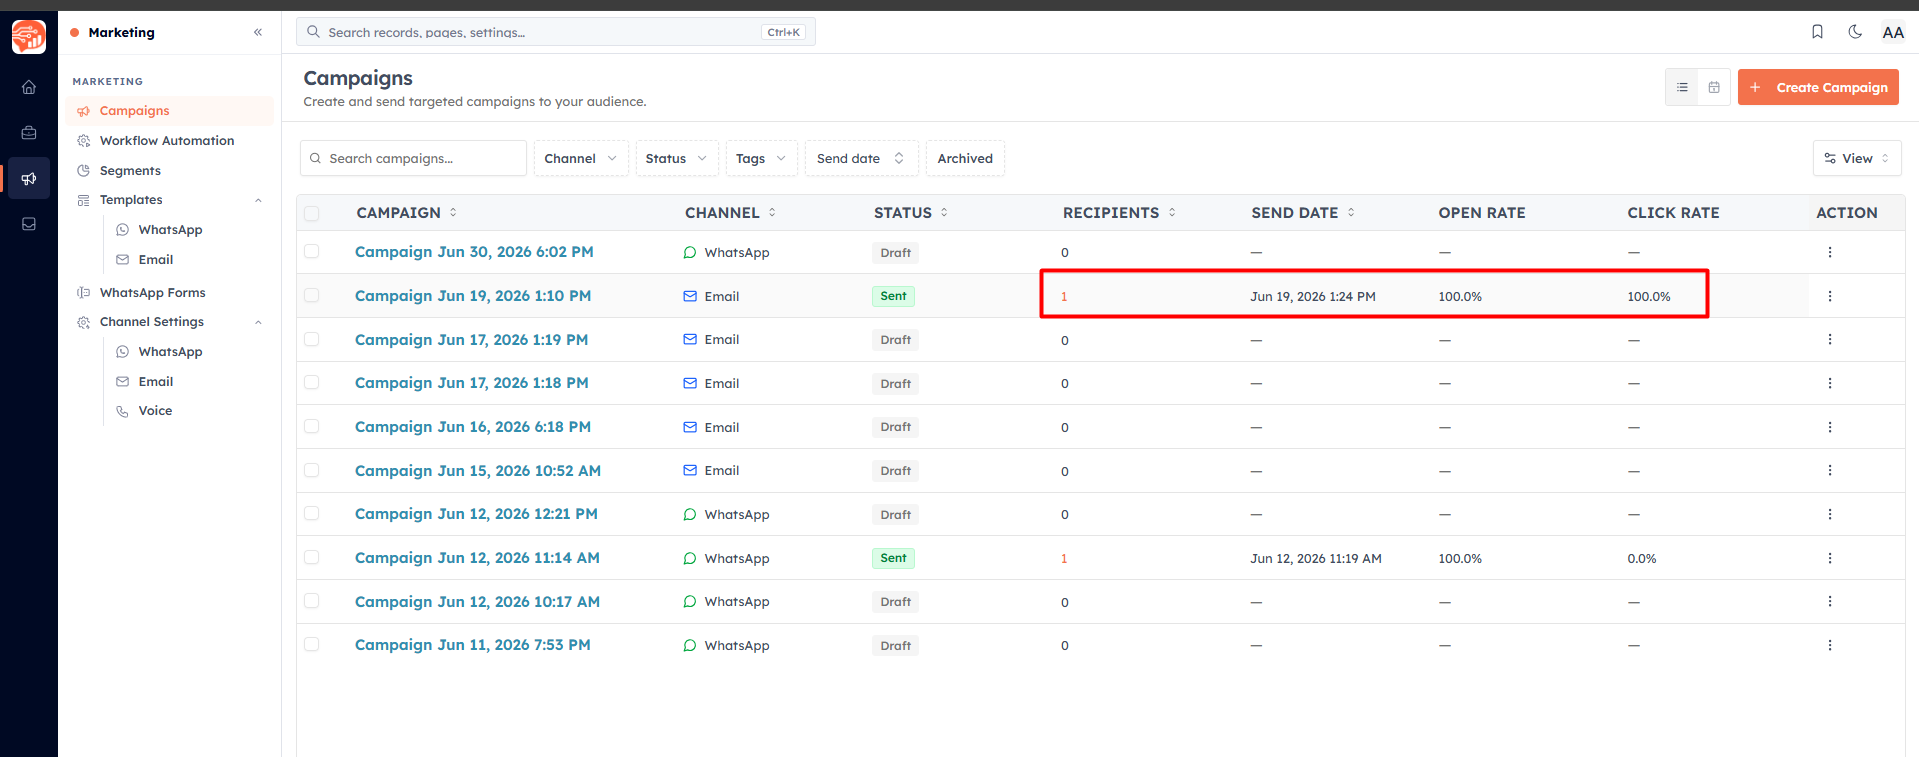
After sending, the campaign appears in the Campaigns list with status Sending then Sent. Click the campaign name to view delivery and engagement analytics.
Campaign analytics#
The campaign detail page shows per-message delivery tracking:
Sent — total messages submitted
Delivered — confirmed delivered to the recipient's device
Read — recipient opened the message
Clicked — recipient tapped a button in the template
Failed — delivery failed (with breakdown: invalid number, opted out, frequency capped, network error, etc.)
💡
Meta enforces frequency capping — contacts who receive too many marketing messages in a short period will be skipped. If you see high "Frequency capped" failures, reduce the cadence of your campaigns to that audience.
💡
Related: WhatsApp Forms — attach a form to your campaign to capture responses and qualify leads conversationally.
Was this article helpful?
Ready to implement this?
OpenAI Engage and apply what you just learned to your own workspace.
Open AI Engage CRM