Loading…


KnowledgeBase
Connect WhatsApp Business to AI Engage CRM
What you need before connecting#
AI Engage CRM connects to WhatsApp through the Meta Business Platform. Before you start, make sure you have:
A Facebook account linked to your business (personal accounts work if you create a Business Manager during setup)
A phone number to use as your WhatsApp sender — it must not already be registered on WhatsApp or WhatsApp Business App
Admin access in AI Engage CRM
💡
The connection uses Meta's embedded signup flow — you complete the WABA (WhatsApp Business Account) registration directly inside the CRM without leaving the page. No API keys to copy-paste.
💡
Remove the phone number from any existing WhatsApp or WhatsApp Business App installation before starting. A number can only be registered on one platform at a time.
Step 1 — Open WhatsApp Settings#
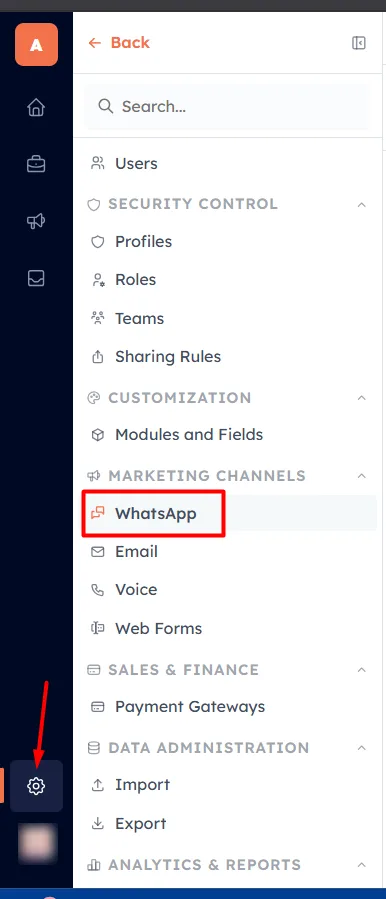
From the left sidebar, navigate to Settings → Marketing Channel → WhatsApp. The WhatsApp Settings page shows three sections: Opt-in Mode, Request for WhatsApp Sender, and Sending Countries.
Step 2 — Start the Meta signup#
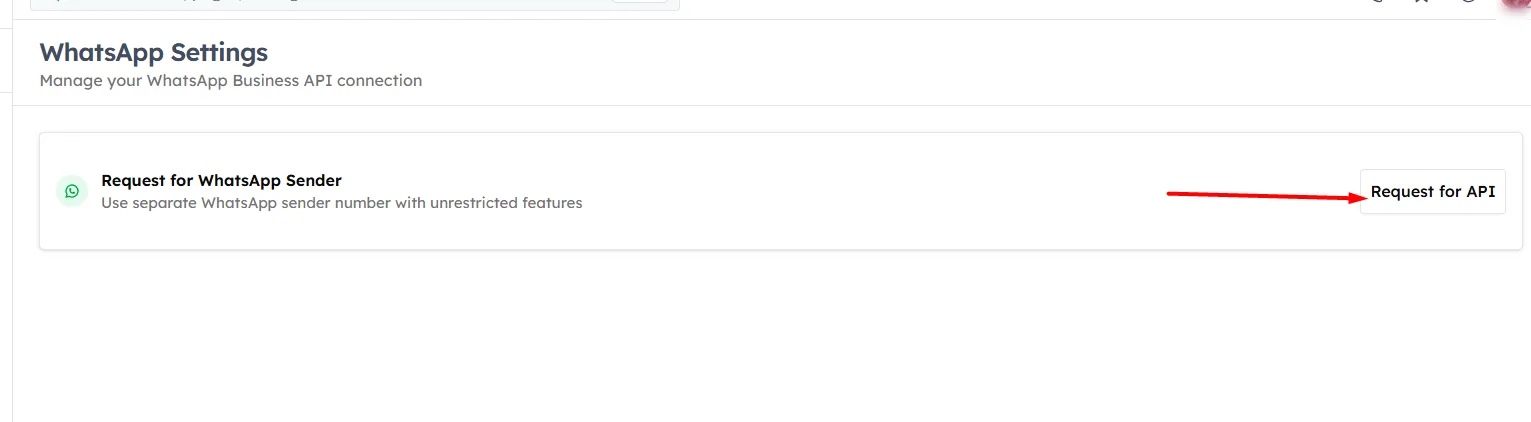
Click Request for API. A Meta-powered signup window opens inside the CRM. Follow the steps:
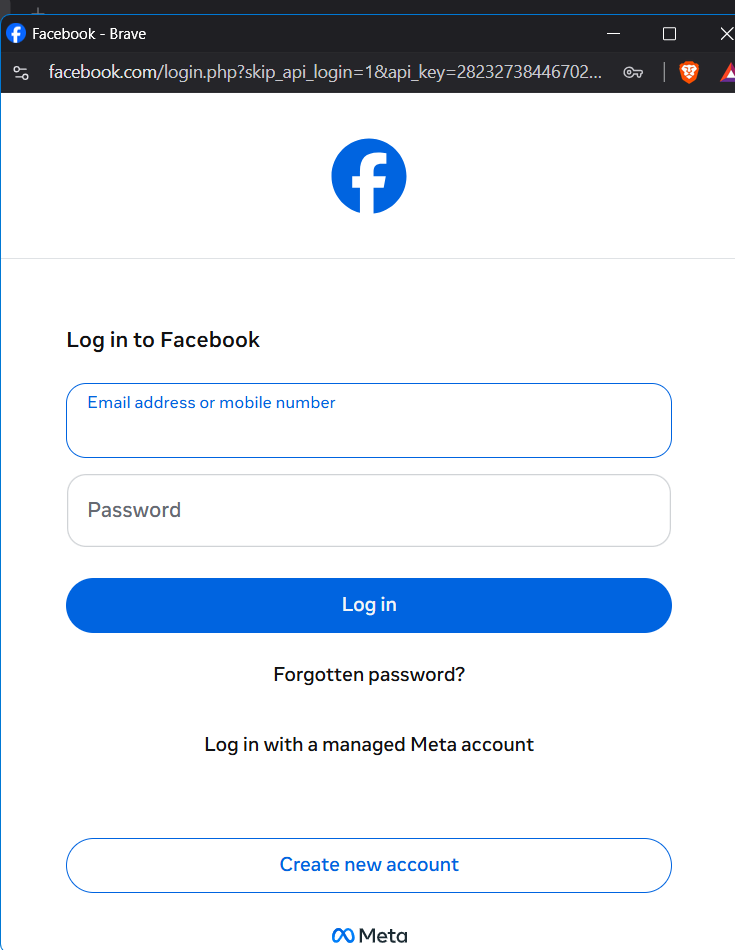
Log in to Facebook — use the account that manages your business
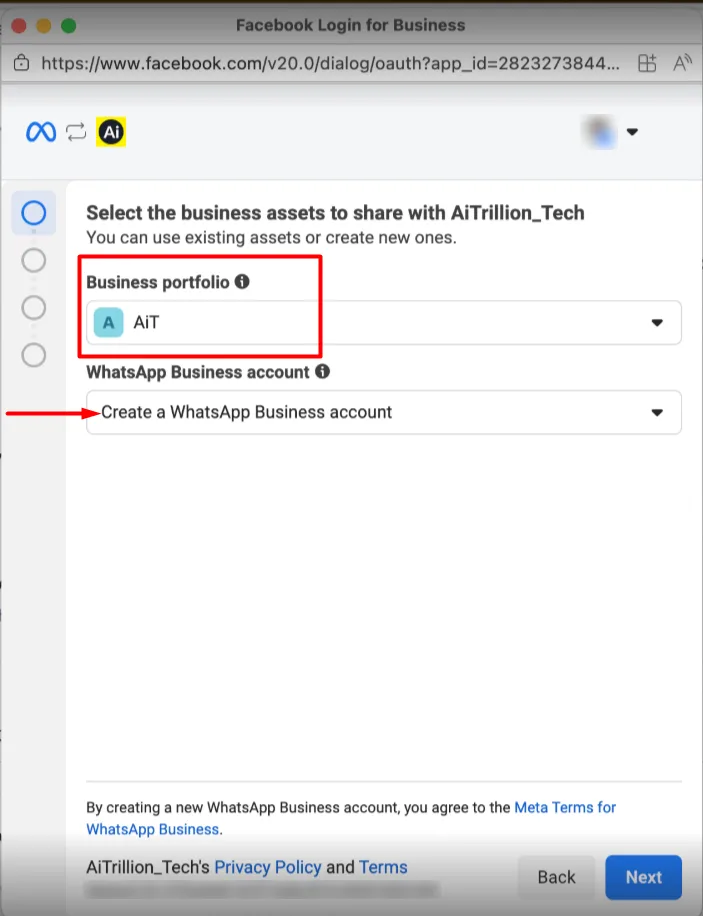
Create or select a Business Portfolio — this becomes your Meta Business Manager
Provide your business details such as:
Business name - Enter the name of the business.
Business category - Category of the business. For example, Professional service.
Website URL - Your Website/Store URL.
Country and time zone - Country and time zone of the business.
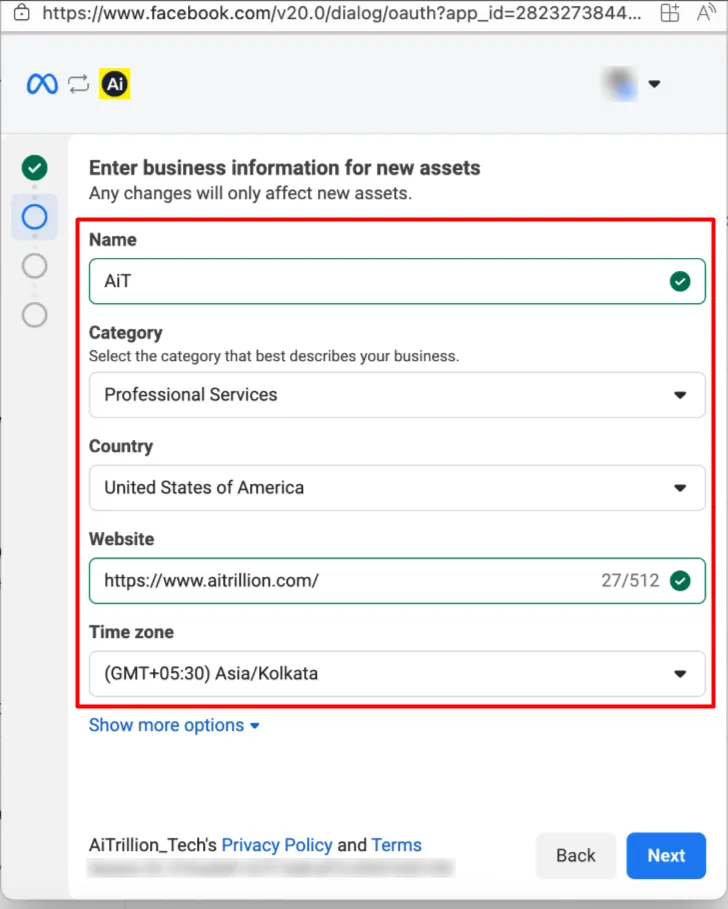
Create or Select a WhatsApp Business Account: You can either create a new WhatsApp Business account (Recommended) or connect an existing one. Here are the settings that are available:
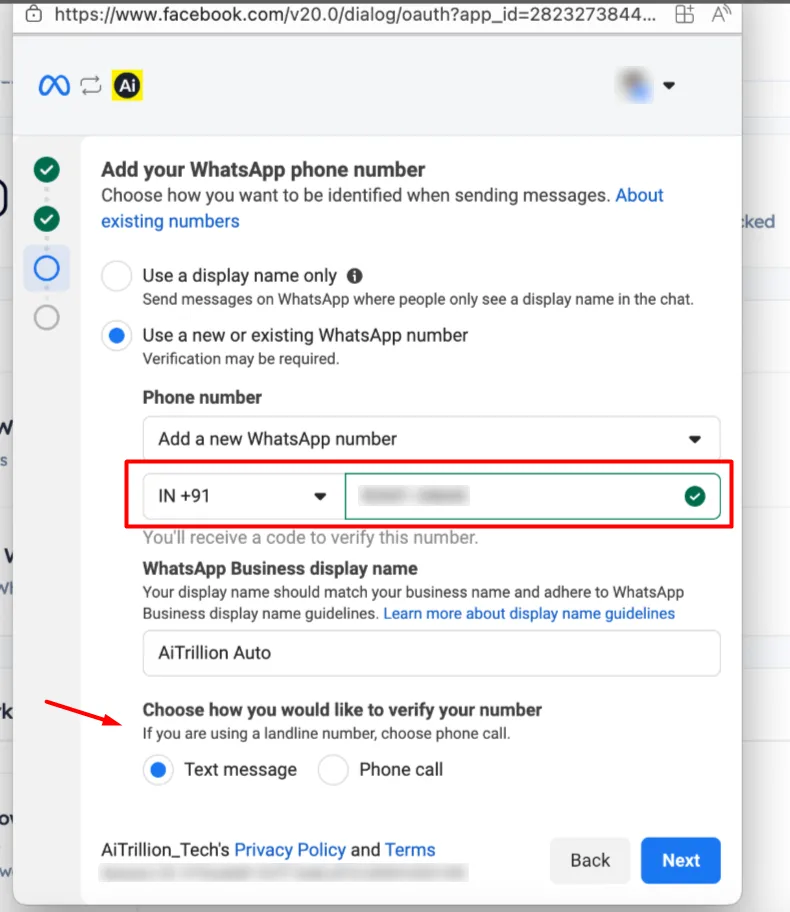
Select the WhatsApp Business account phone number or add a new WhatsApp number.
Enter the name of the business
Choose how you would like to verify the phone number: Text message or Phone number.
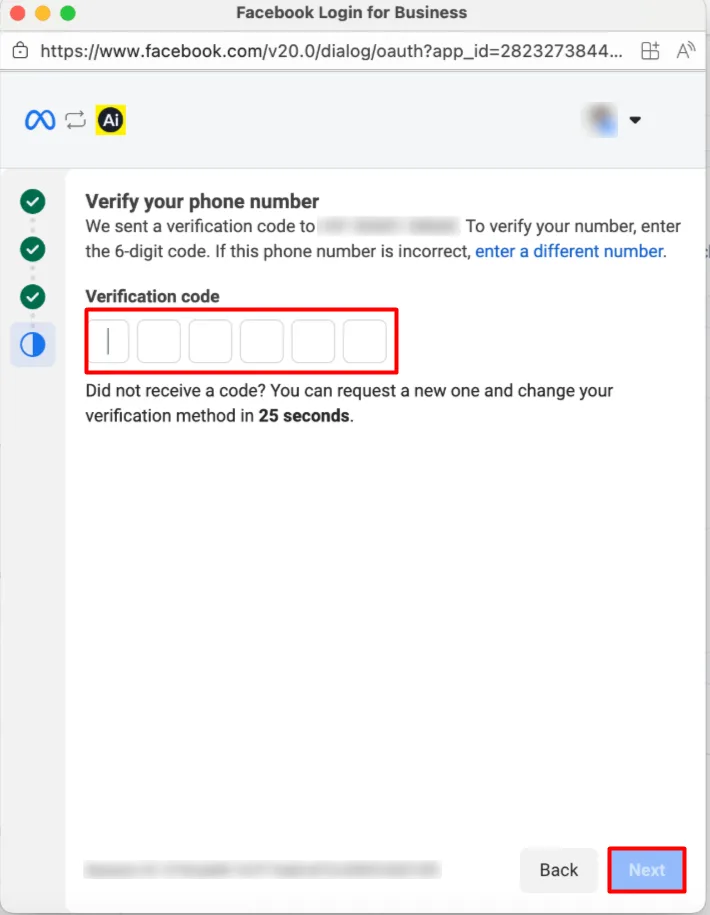
Enter the verification code that is sent to the provided number.
Click on the Next button to approve the consent to send a WhatsApp message through AiTrillion.
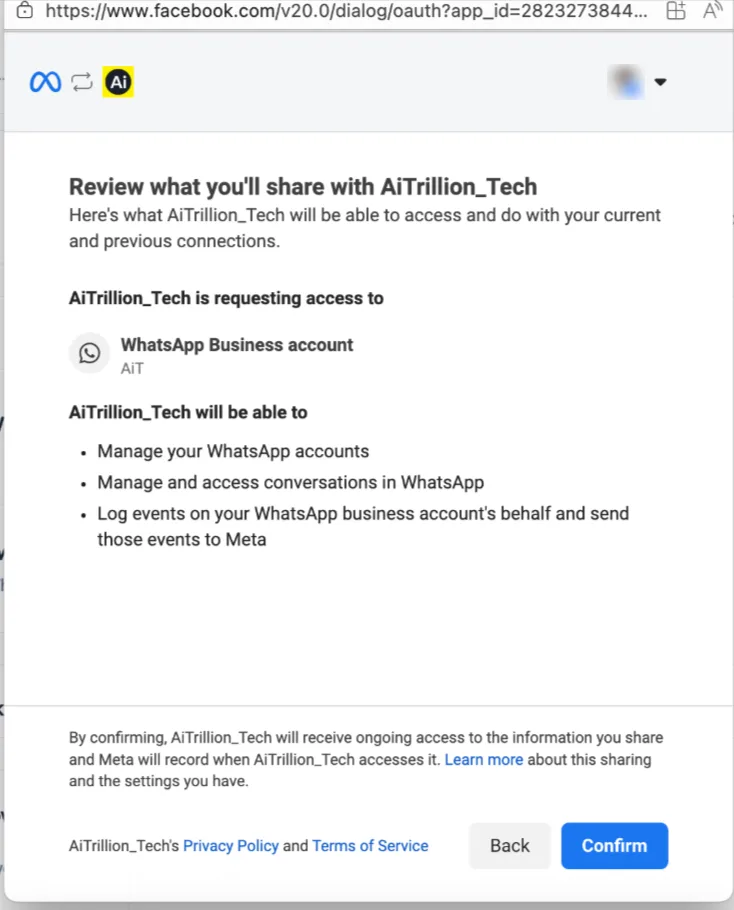
Click on Finish.
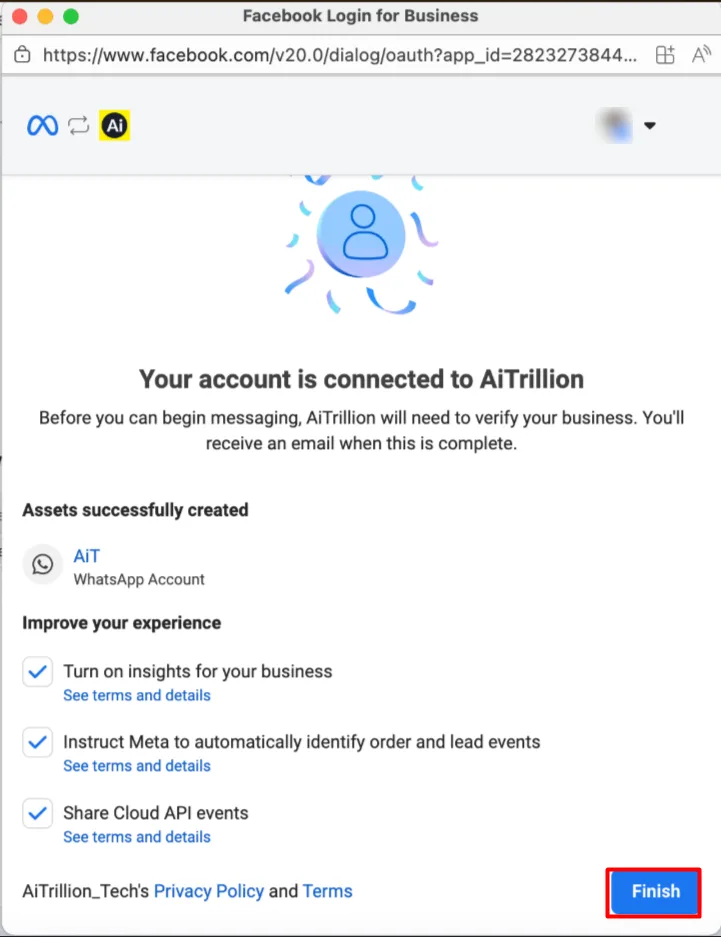
Congratulations! Now, your WhatsApp business account has been successfully created, and Ai Engage will start the verification process.
The entire signup takes 3–5 minutes. Do not close the window or navigate away while it is running.
Step 3 — Wait for approval#
After completing the Meta signup, the status changes to In Progress. Meta reviews the request and assigns your WhatsApp Business Account — this typically takes 1–2 business days.
While in progress, the page shows a spinner and a message explaining that approval is pending. You do not need to do anything during this time.
💡
If the status shows Failed, check the error details shown on the page. Common reasons: the phone number was already registered, the Facebook account does not have Business Manager access, or the business verification documents are missing. Click Retry to attempt registration again.
Step 4 — Configure your WhatsApp sender#
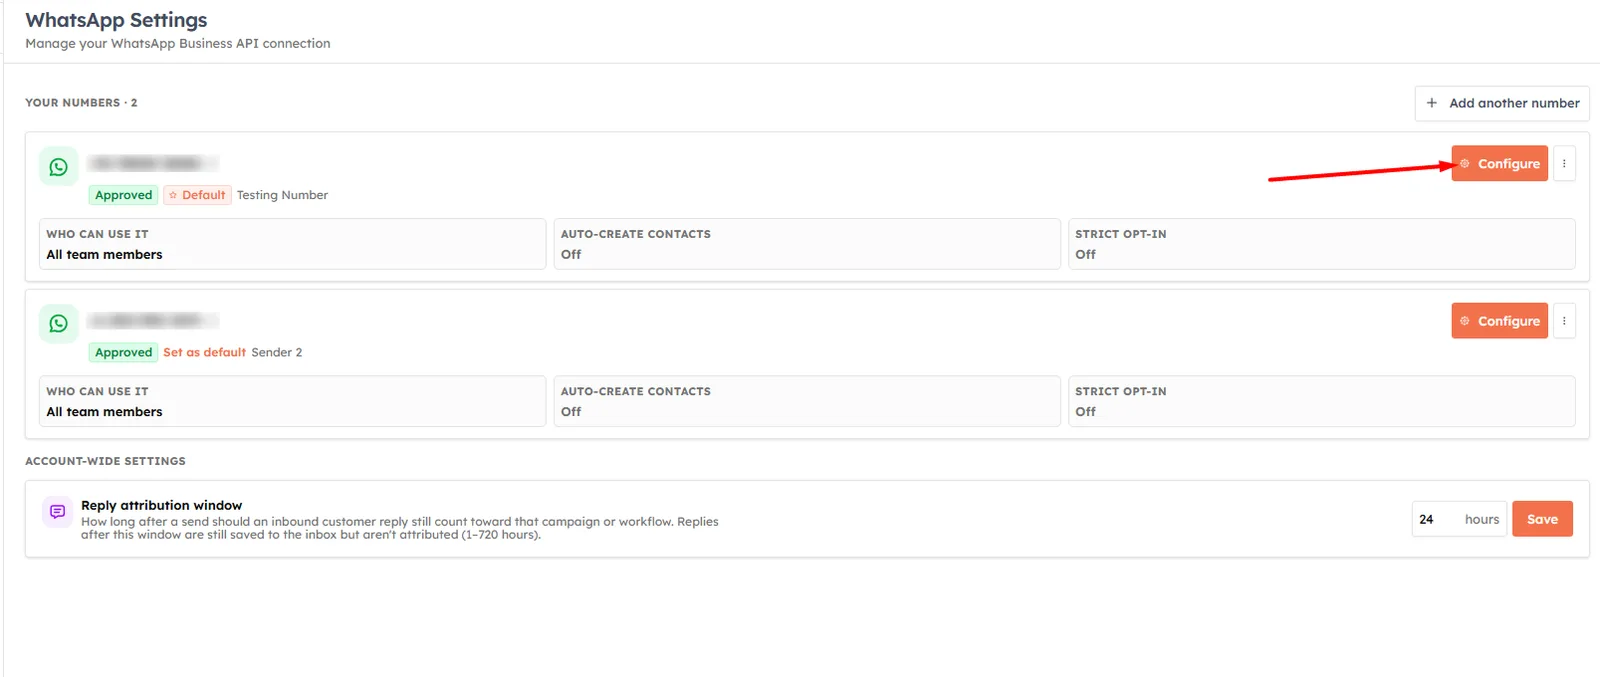
Once approved, your sender phone number is shown on the settings page with an Approved badge. Configure two optional settings:
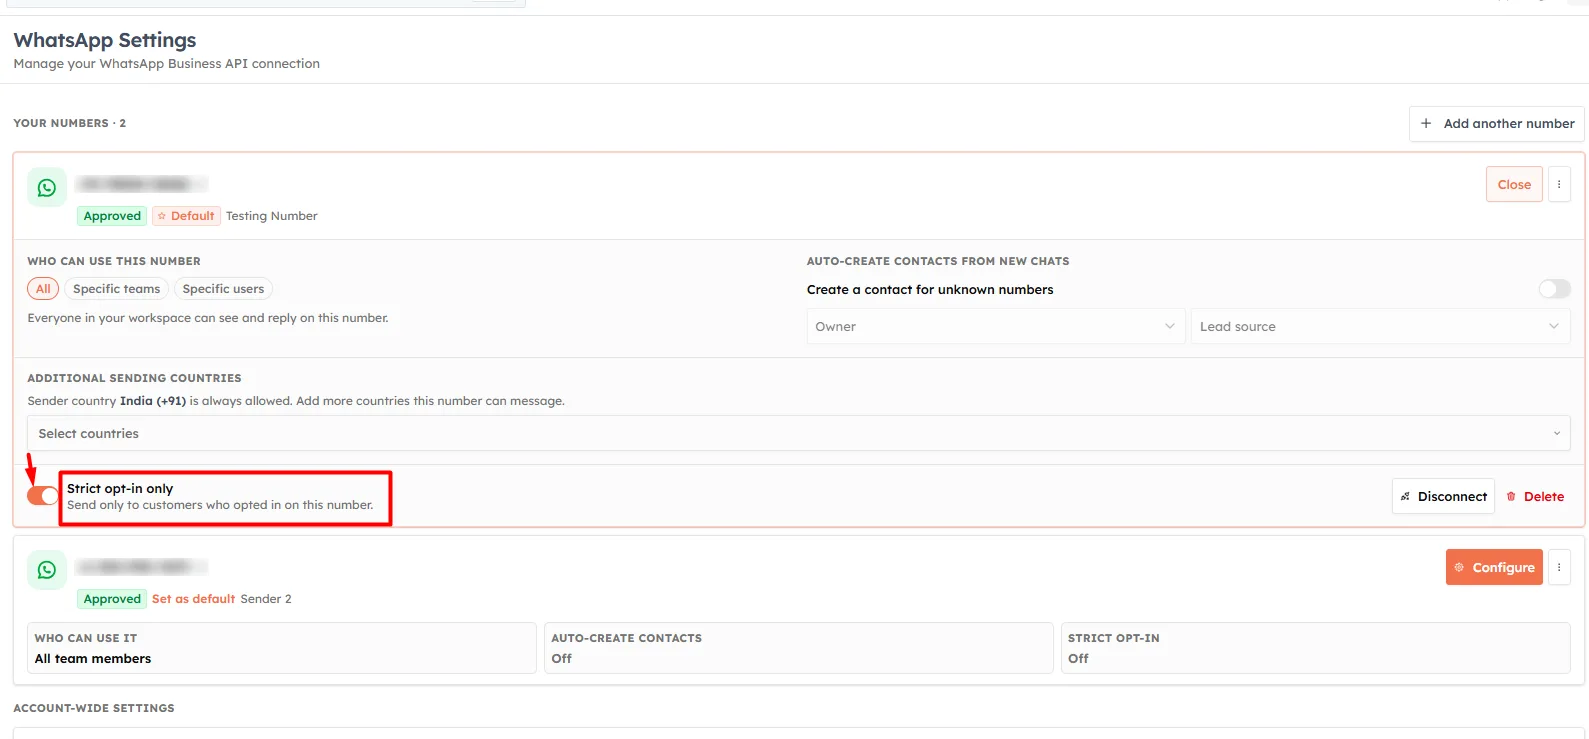
Strict Opt-in Mode — when enabled, the CRM only sends WhatsApp messages to contacts who have explicitly opted in. Recommended for compliance with Meta's policies.
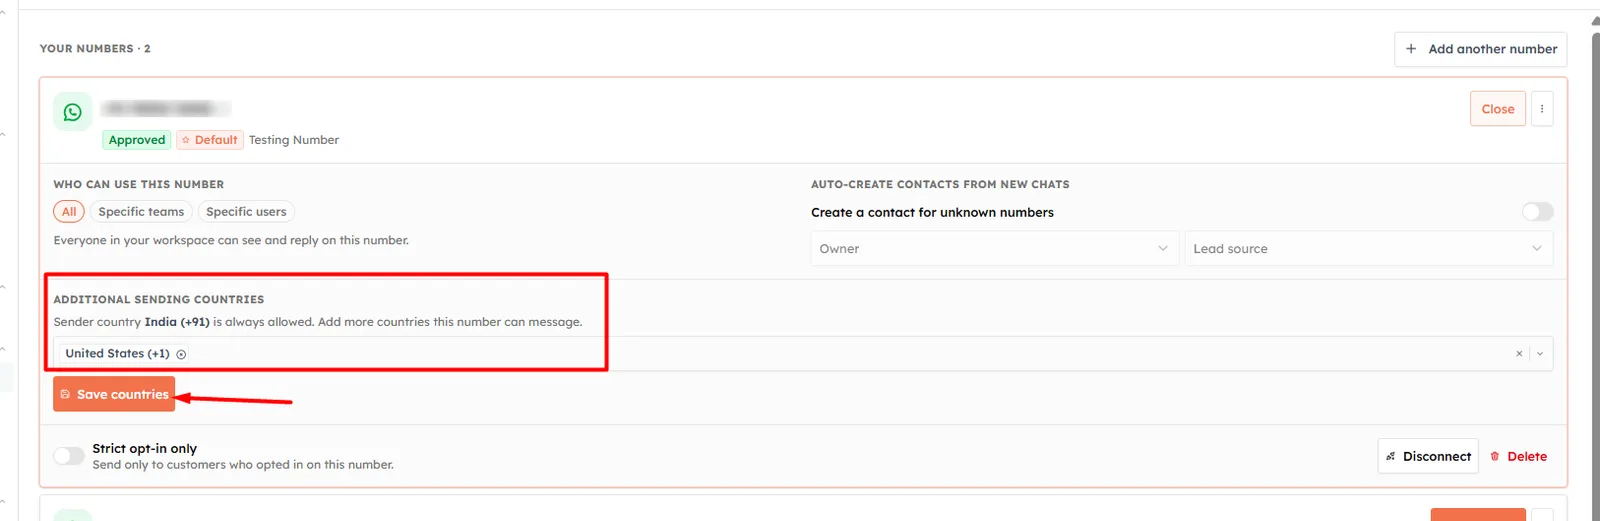
Additional Sending Countries — by default, you can send to numbers in your sender's home country. Add other countries here if your audience is international. Click Save after selecting countries.
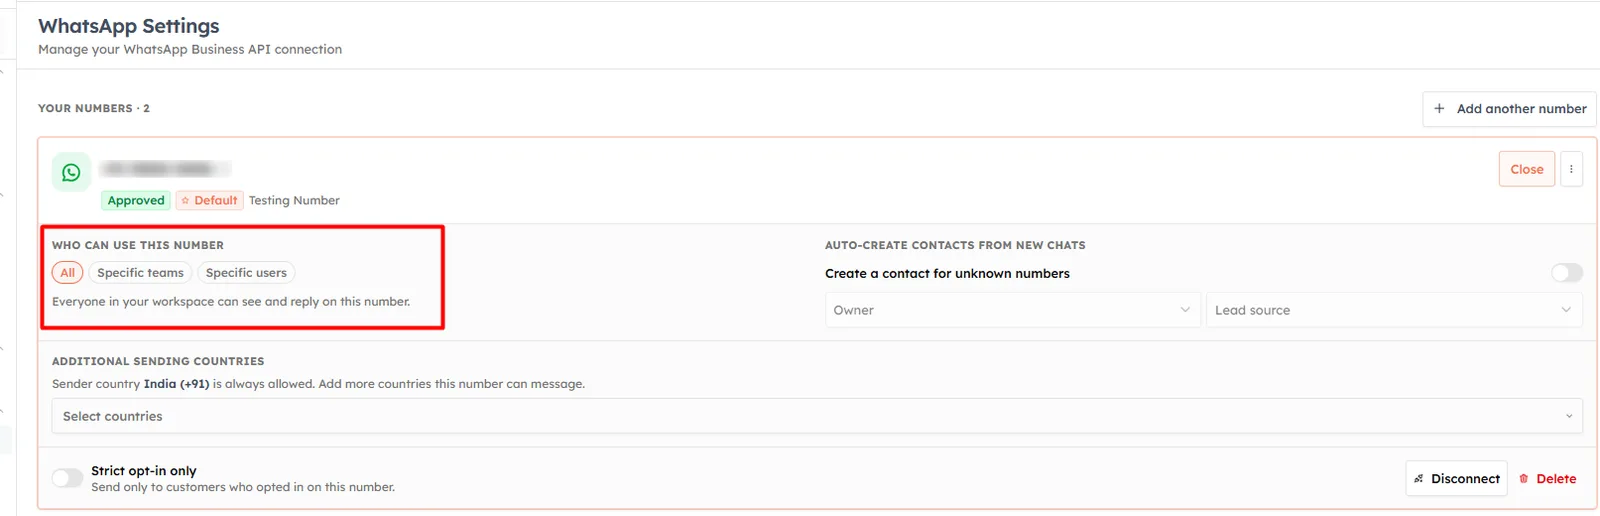
Who can use this number — Select which CRM users or agents are allowed to send WhatsApp messages via this sender number. Options typically include all users, specific roles, or individually selected team members. Use this when you want only your support or sales agents — not your full team — to have WhatsApp access.
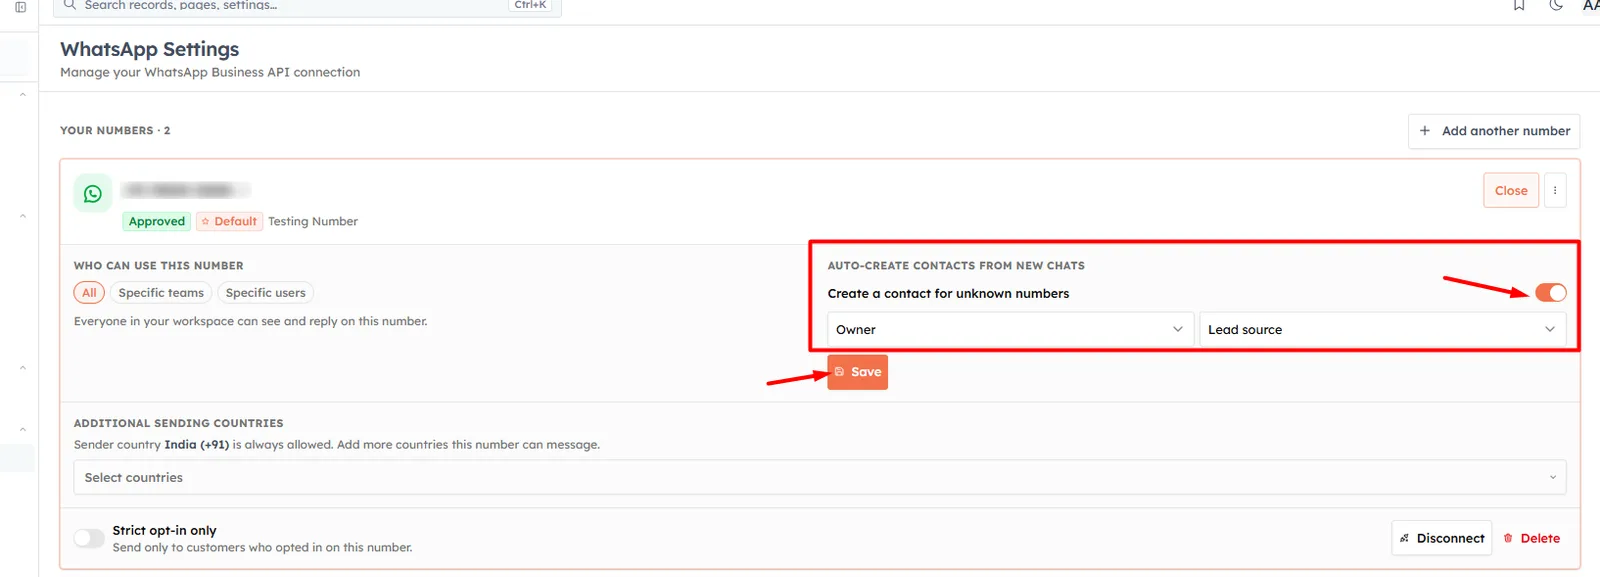
Auto-create contacts from new chats — When enabled, any WhatsApp message that arrives from a phone number not already in your CRM is automatically converted into a new contact record. The contact is created using the sender's phone number and display name. This ensures every inbound lead is captured in the CRM without manual data entry, even if the contact has never been in your database before.
💡
Your WhatsApp sender is now connected. Head to Settings → WhatsApp → Templates to create your first message template before sending any campaigns or broadcasts.
💡
Next up: Create and Manage WhatsApp Message Templates — every WhatsApp message must use a Meta-approved template.
Was this article helpful?
Ready to implement this?
OpenAI Engage and apply what you just learned to your own workspace.
Open AI Engage CRM