Loading…


KnowledgeBase
Global Date Filter
Filter the whole dashboard at once#
Instead of adjusting each tile individually, a global date filter lets you set a date range once and apply it across the dashboard. It's ideal for questions like "show me everything for this quarter."
Step 1 — Add Dashboard Filters#
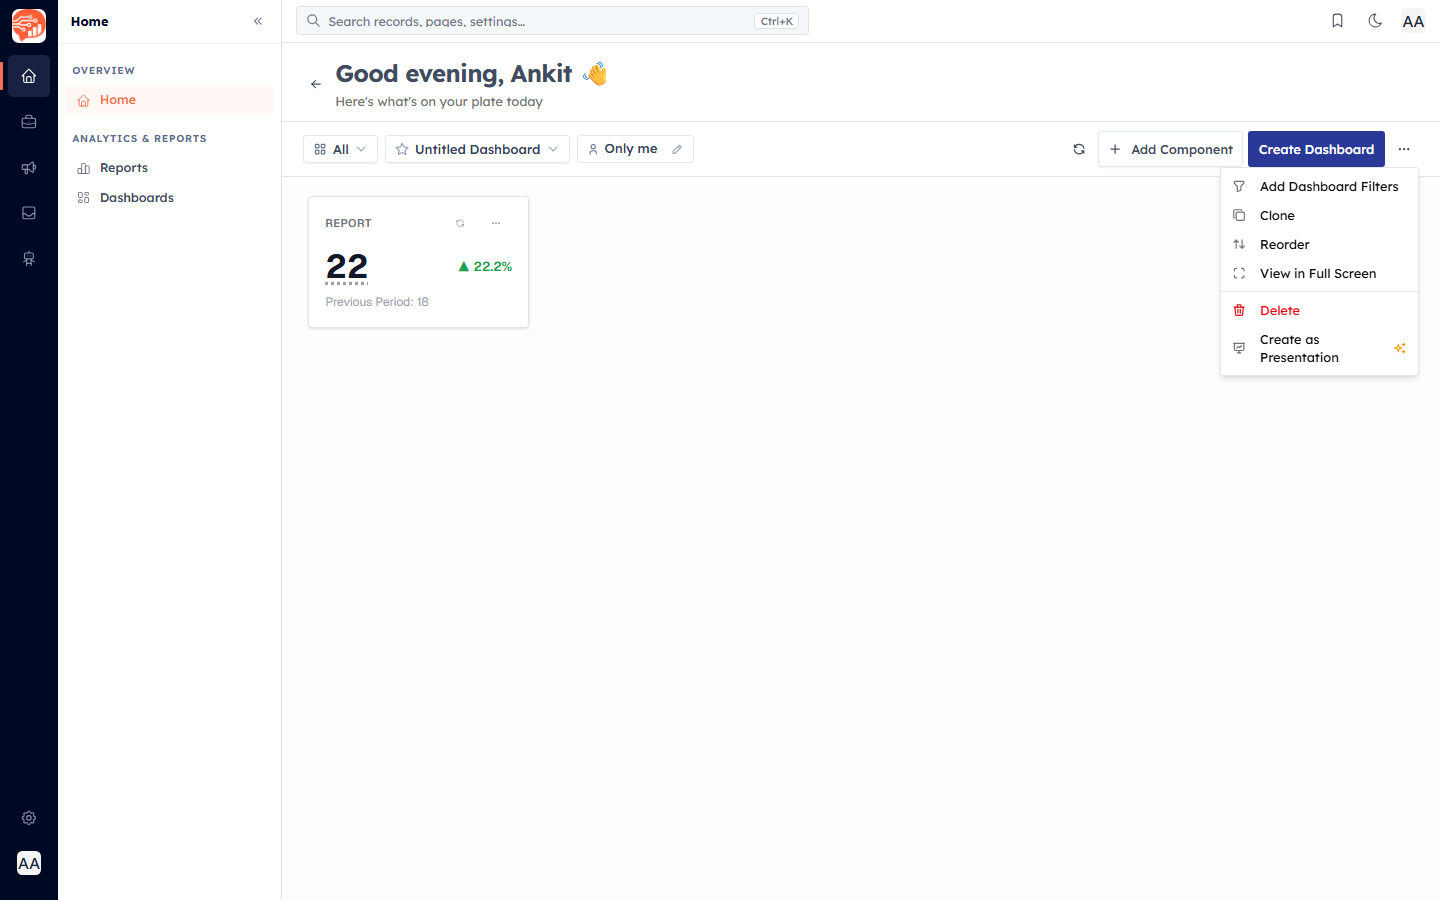
Open the dashboard's menu (top right) and choose Add Dashboard Filters.
Step 2 — Choose the date fields#
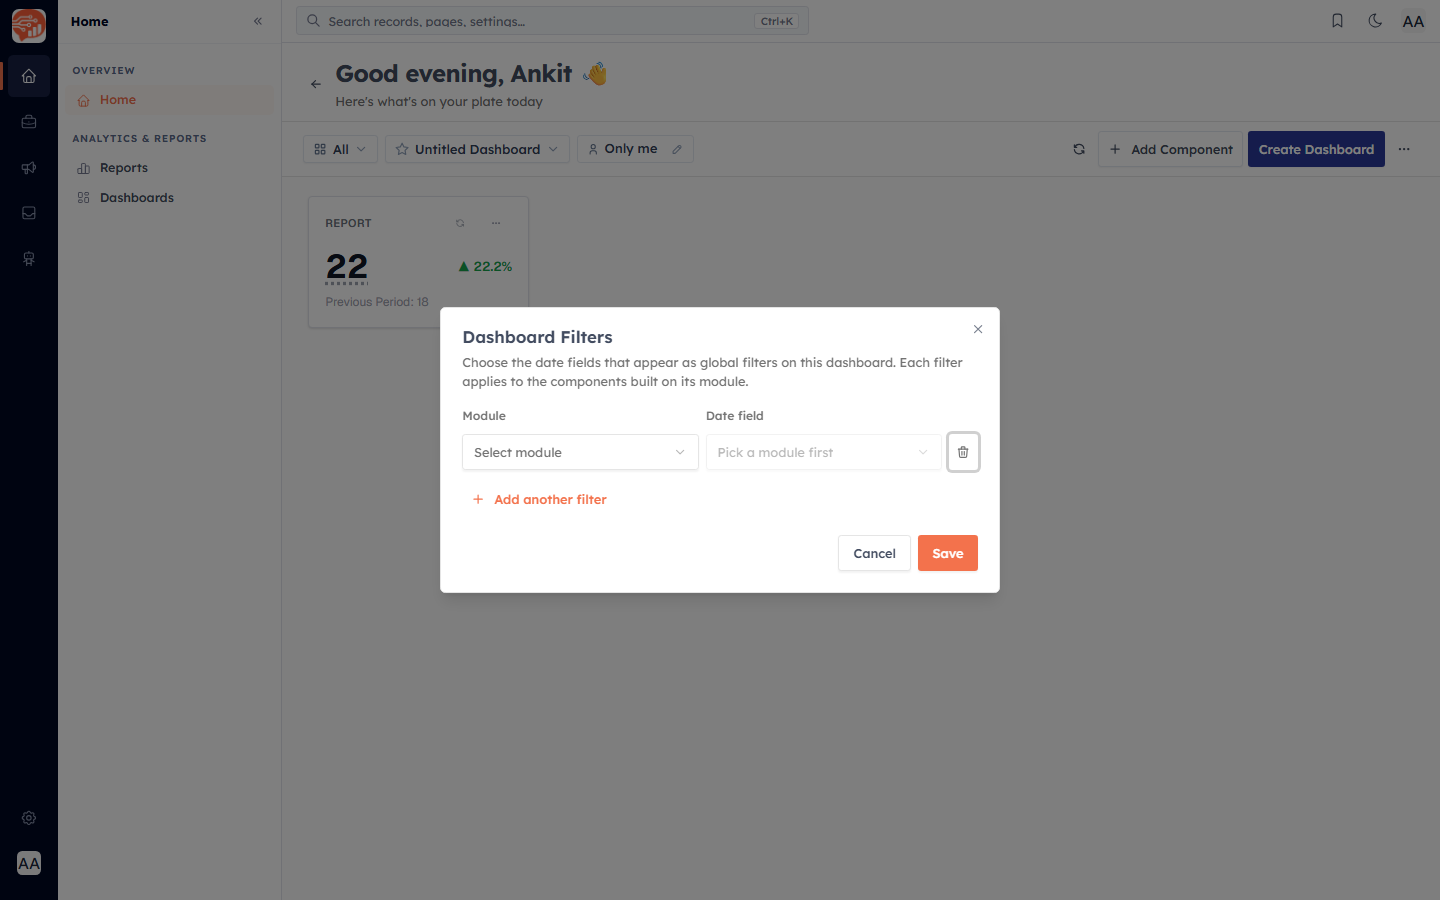
In the Dashboard Filters dialog, pick a Module and one of its Date fields. Each Module → Date field pair becomes one filter, and it applies to the components built on that module. Use Add another filter to expose more, then click Save.
Step 3 — Use the Filter By bar#
Once saved, a Filter By bar appears at the top of the dashboard with a date picker for each filter. The presets are:
Any Time (the default — no date limit)
Today, Yesterday, Last 7 Days, Last 30 Days
This Month, Last Month, This Quarter, Last Quarter, This Year, Last Year
A custom from/to range
After choosing dates, use:
Apply — refresh the whole dashboard with the selected dates for this session.
Apply & Save — do the same and make it the dashboard's default next time you open it.
Clear — reset every filter back to "Any Time".
💡
A date filter only affects components whose module matches it — a "Deals → Closing Date" filter changes the deal tiles but leaves unrelated tiles untouched. Each tile also keeps its own filter icon for one-off, tile-level filtering.
💡
That completes the Analytics & Reports guide. Start by building a report, then pin your best ones to a dashboard and filter them here.
Was this article helpful?
Ready to implement this?
OpenAI Engage and apply what you just learned to your own workspace.
Open AI Engage CRM