Loading…


KnowledgeBase
Set Up Online Payments: Stripe & Razorpay
Collect invoice payments online#
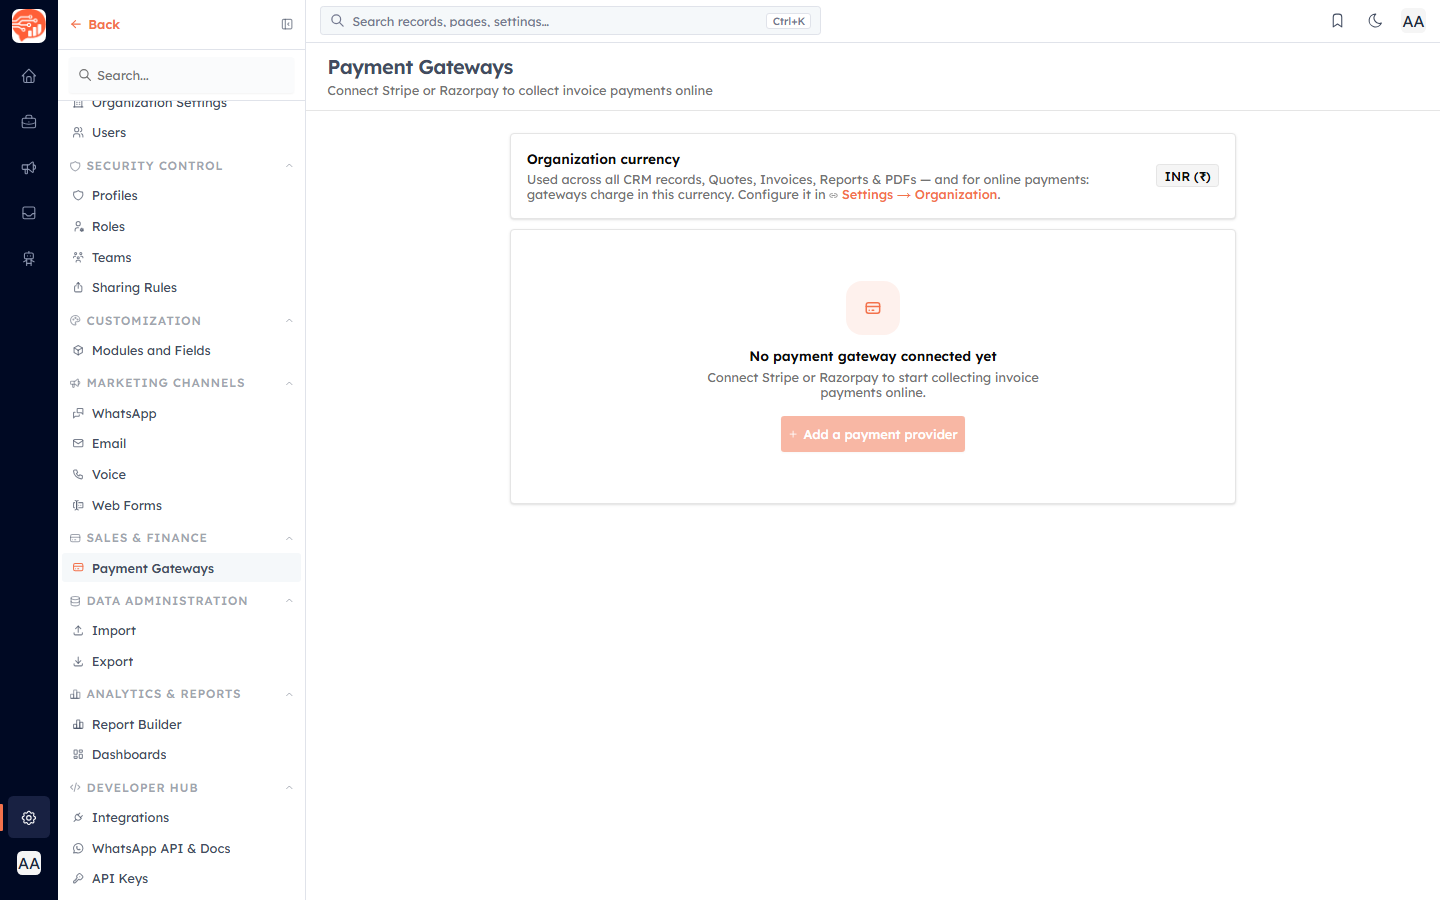
To let customers pay invoices by card or Razorpay, connect a payment gateway. Go to Settings → Payment Gateways.
💡
Payments are charged in your organization currency (shown at the top of this page and set in Settings → Organization). The platform never holds your money — funds go straight to your own Stripe or Razorpay account.
Connect Stripe or Razorpay#
Click Add a payment provider and choose Stripe or Razorpay, then enter:
Mode — Test (for trying it out) or Live (for real payments).
Publishable key — your gateway's public key (Stripe publishable key / Razorpay Key ID).
Secret key — your gateway's secret key (stored encrypted).
Webhook secret — used to verify payment notifications from the gateway.
An optional minimum amount.
A gateway can only be enabled once its keys are filled in.
Requrired Setup#
Add a Payment Provider - Stripe#
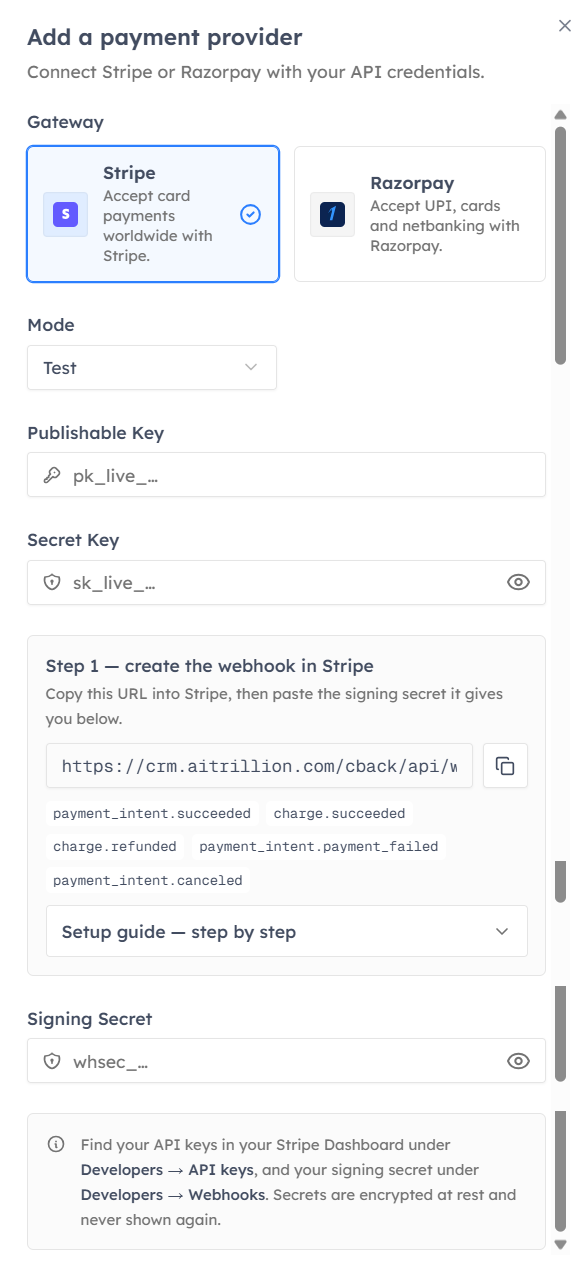
The Add a Payment Provider window allows you to connect a payment gateway to your CRM by providing the required API credentials. Once configured, your CRM can securely process online payments through the selected gateway.
Stripe#
Select Stripe to accept online payments using credit cards, debit cards, and other payment methods supported by Stripe worldwide.
Mode#
Select the environment in which the payment gateway will operate.
Test – Use test API credentials to verify your integration without processing real payments.
Live – Use live API credentials to accept actual customer payments.
Note: Switch to Live mode only after successfully testing your payment gateway integration.
Publishable Key#
Enter your payment gateway's Publishable Key.
This key is used on the client side to securely identify your payment account and initiate payment requests.
Secret Key#
Enter your payment gateway's Secret Key. To get keys, Click here.
This key is used by the server to authenticate API requests and perform secure payment operations.
Important: Keep your Secret Key confidential and never share it publicly.
Add a Payment Provider (Razorpay)#
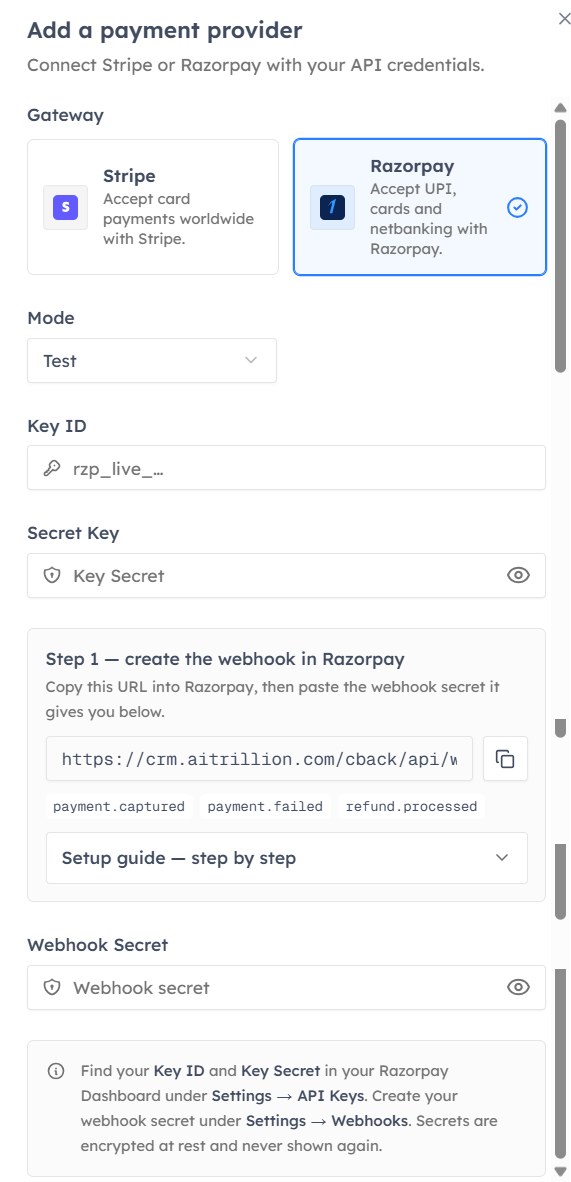
The Add a Payment Provider window allows you to connect your Razorpay account to the CRM using your API credentials. Once configured, you can securely accept online payments and receive real-time payment status updates.
Gateway#
Select Razorpay as your payment gateway to accept payments through:
UPI
Credit and Debit Cards
Net Banking
Wallets
Other payment methods supported by Razorpay
Mode#
Choose the environment for your Razorpay integration.
Test – Use test API credentials to verify your integration without processing real payments.
Live – Use live API credentials to accept actual customer payments.
Note: Ensure your integration is fully tested before switching to Live mode.
Key ID#
Enter your Razorpay Key ID.
The Key ID identifies your Razorpay account and is used to authenticate payment requests.
Secret Key#
Enter your Razorpay Key Secret.
The Secret Key is used by the server to securely authenticate API requests with Razorpay.
Important: Keep your Secret Key confidential and never expose it publicly.
Set up the webhook#
Webhooks are how the gateway tells the CRM a payment succeeded, failed, or was refunded — this is what settles the invoice automatically. The settings page shows the exact webhook URL to paste into your gateway dashboard, plus the events to subscribe to:
Stripe — payment_intent.succeeded, charge.succeeded, charge.refunded, payment_intent.payment_failed, payment_intent.canceled.
Razorpay — payment.captured, payment.failed, refund.processed.
💡
Start in Test mode, run one test payment end-to-end, confirm the invoice flips to Paid, then switch to Live.
💡
Once connected, every invoice you send includes a "View & Pay Invoice" button, and paid invoices update themselves — see Getting Paid.
Was this article helpful?
Ready to implement this?
OpenAI Engage and apply what you just learned to your own workspace.
Open AI Engage CRM