Loading…


KnowledgeBase
Adding & Configuring Web Form Fields
Building the form from your module's fields#
A web form is built from the fields of its target module. Rather than inventing new fields, you pick which of the module's existing fields to show — so everything a visitor submits maps straight onto the record with no extra mapping.
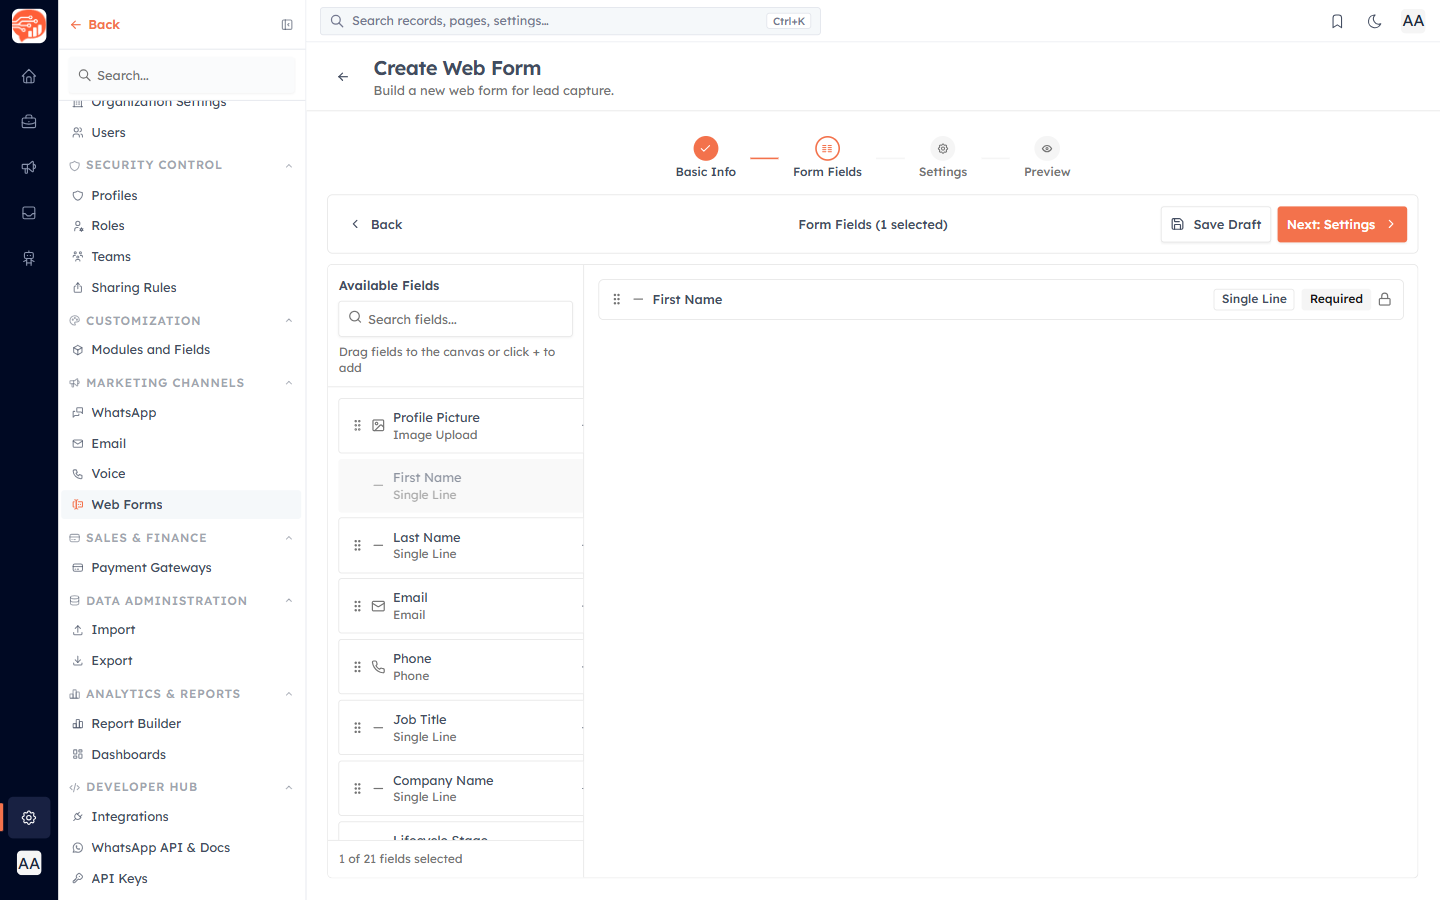
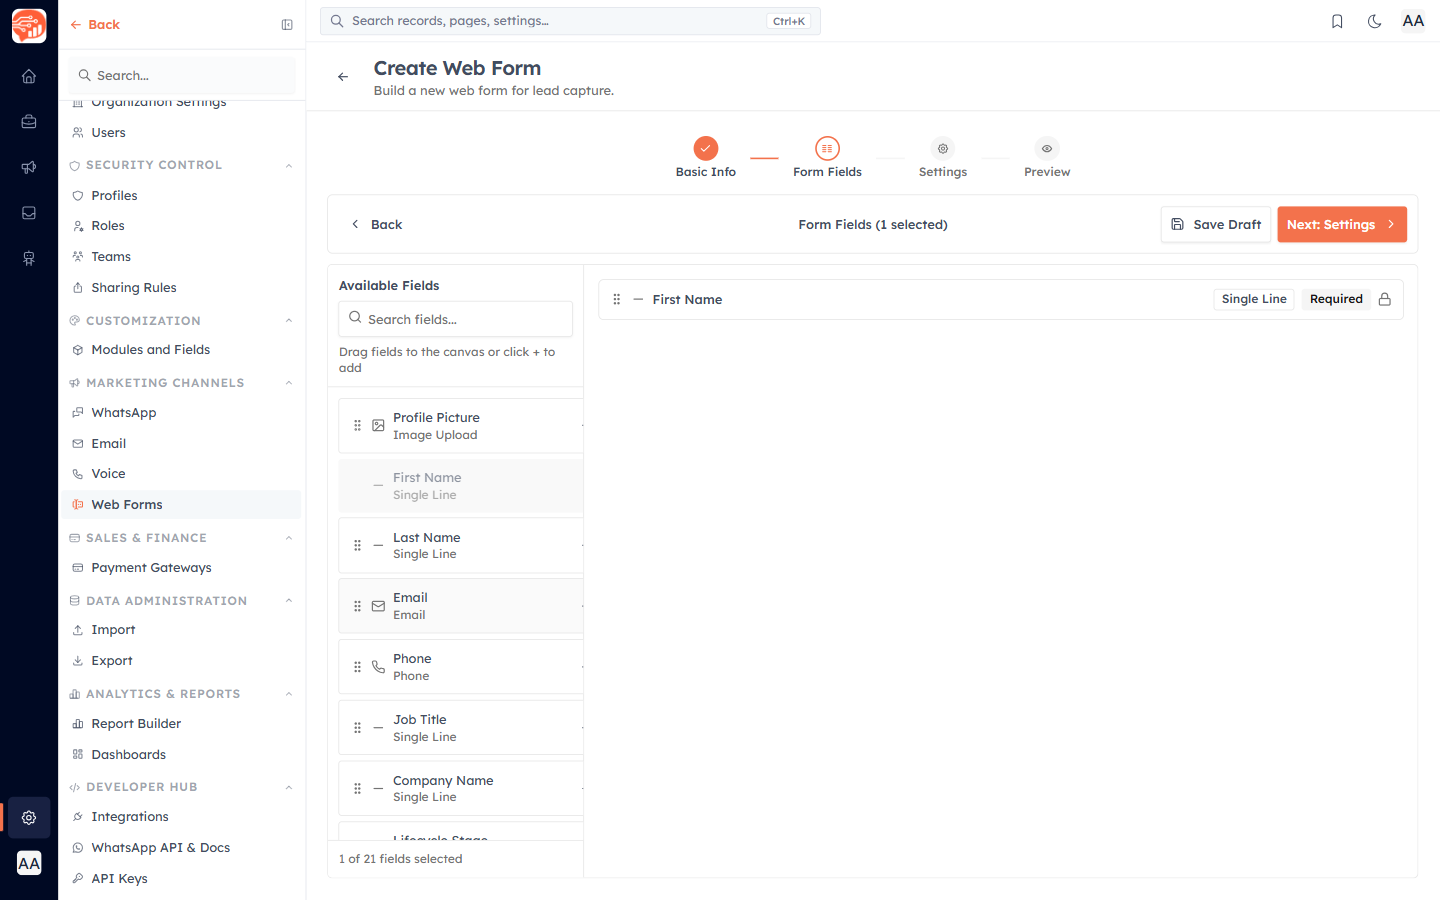
Adding fields#
The left panel, Available Fields, lists every field on the target module that can go on a public form. To add one:
Drag it onto the form canvas, or
Click the + button next to it.
Use the search box to find a field quickly. A counter shows how many fields you have added (for example "3 of 12 fields selected"). Reorder fields on the canvas by dragging them into the sequence you want.
💡
A few field types can't go on a public form — formulas, roll-ups, auto-number, user fields, and sub-forms are hidden from the palette. Everything else is available, including text, email, phone, number, date, dropdown, checkbox — plus record lookups and file & image uploads.
Special field types#
Two field types work a little differently on a public form and have their own guides:
- File & image uploads — let visitors attach files or photos, with per-file size limits. See Collect Files & Images on Web Forms.
- Lookup & related-record fields — let visitors pick an existing record (a company, product, branch) from a searchable dropdown. See Lookup & Related-Record Fields on Web Forms.
Configuring a field#
Select a field on the canvas to open its configuration panel. For each field you can set:
Label — the field name shown to visitors (rename "Phone" to "Mobile Number" if you like).
Placeholder — hint text inside the field, e.g. "+91 98765 43210".
Help text — a short line beneath the field explaining what to enter.
Required — force visitors to fill it in before they can submit.
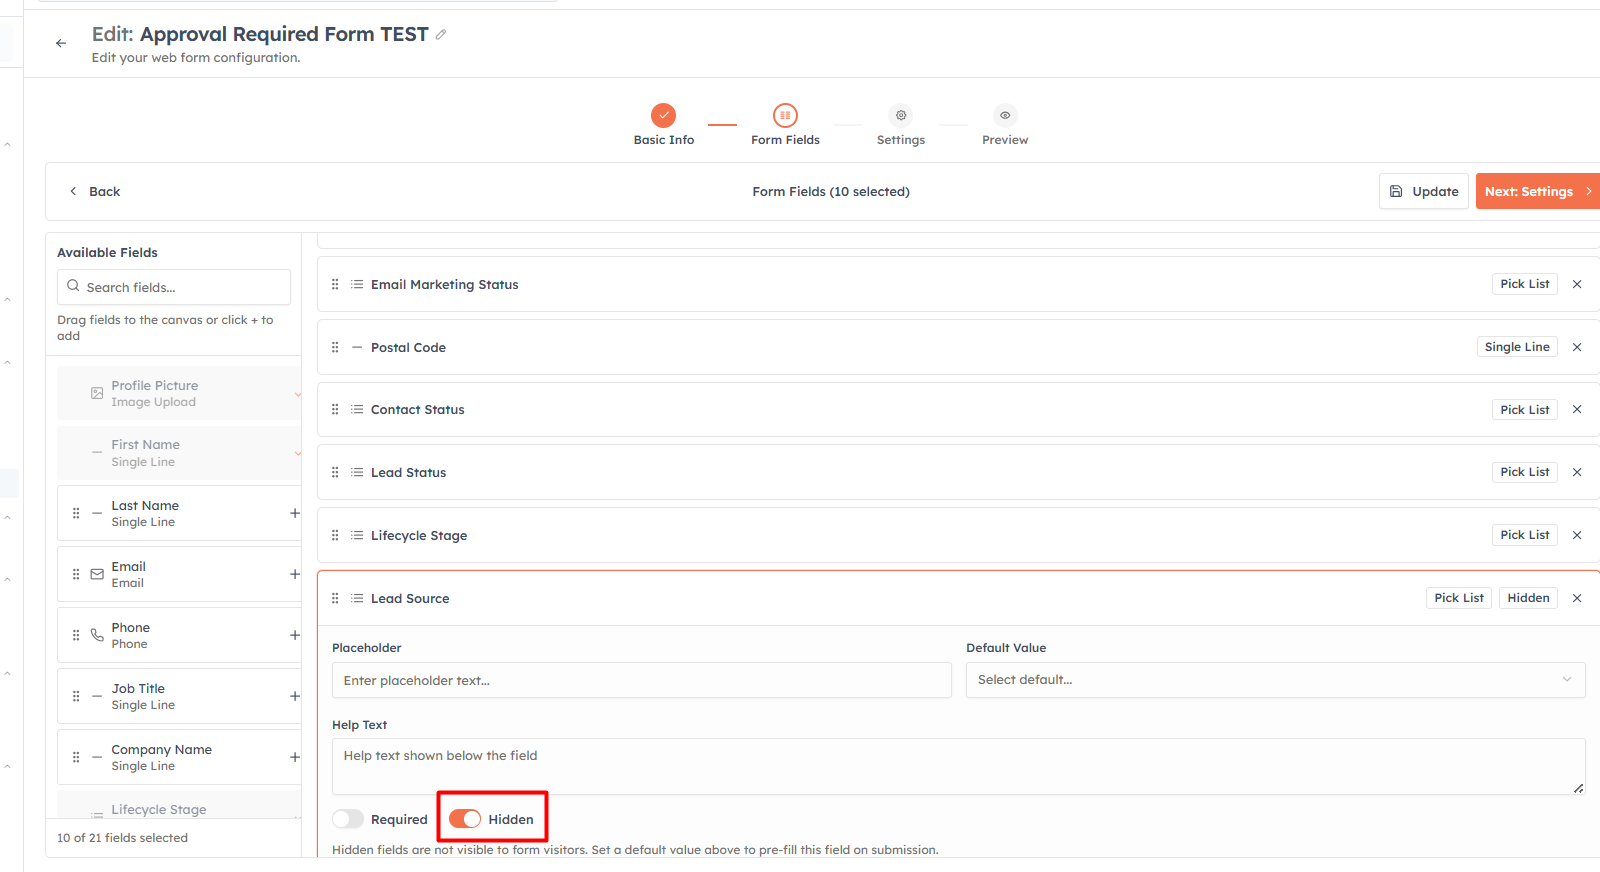
Hidden fields with a default value#
A field can be marked hidden and given a default value. The visitor never sees it, but every submission is stamped with that value. This is the clean way to tag the lead's source: add a hidden "Lead Source" field with a default of "Website", and every lead from this form is automatically labelled — perfect for filtering and for triggering workflows.
💡
Keep visible fields to a minimum — every extra question lowers your completion rate. Ask only for what you need now (often just name, email, and one qualifying question) and let a hidden field handle the Lead Source behind the scenes.
What happens when a module field changes#
A web form is built from the fields of its target module, so the CRM keeps the form in sync whenever those underlying fields change — automatically, every time the form is opened in the builder, rendered publicly, or submitted. You don't have to re-map anything by hand.
- A field is deleted or deactivated on the module — it is removed from the form automatically. In the builder you'll see an amber notice such as "1 field was removed" / "N fields were removed", explaining they were taken off because their module field is no longer available. Submissions that referenced the old field are simply not written to it (never an error).
- A field's type changes — the form re-renders using the current type, so the input always matches what the module now expects.
- A drop-down's options change — the form picks up the current option list. If a form field's pre-filled default value is no longer a valid option, that default is cleared.
Your form-level customizations are preserved across all of this — the custom label, placeholder, help text, required toggle, hidden toggle, and field order you set on the form are kept.
💡
Renaming a field's label on the module does not remove it from your forms — forms track fields by their stable internal key, not their display name. Only deleting or deactivating a field takes it off a form.
Was this article helpful?
Ready to implement this?
OpenAI Engage and apply what you just learned to your own workspace.
Open AI Engage CRM