Loading…


KnowledgeBase
Create a Web Form: The 4-Step Builder
The 4-step form builder#
Go to Settings → Web Forms and click New Webform.
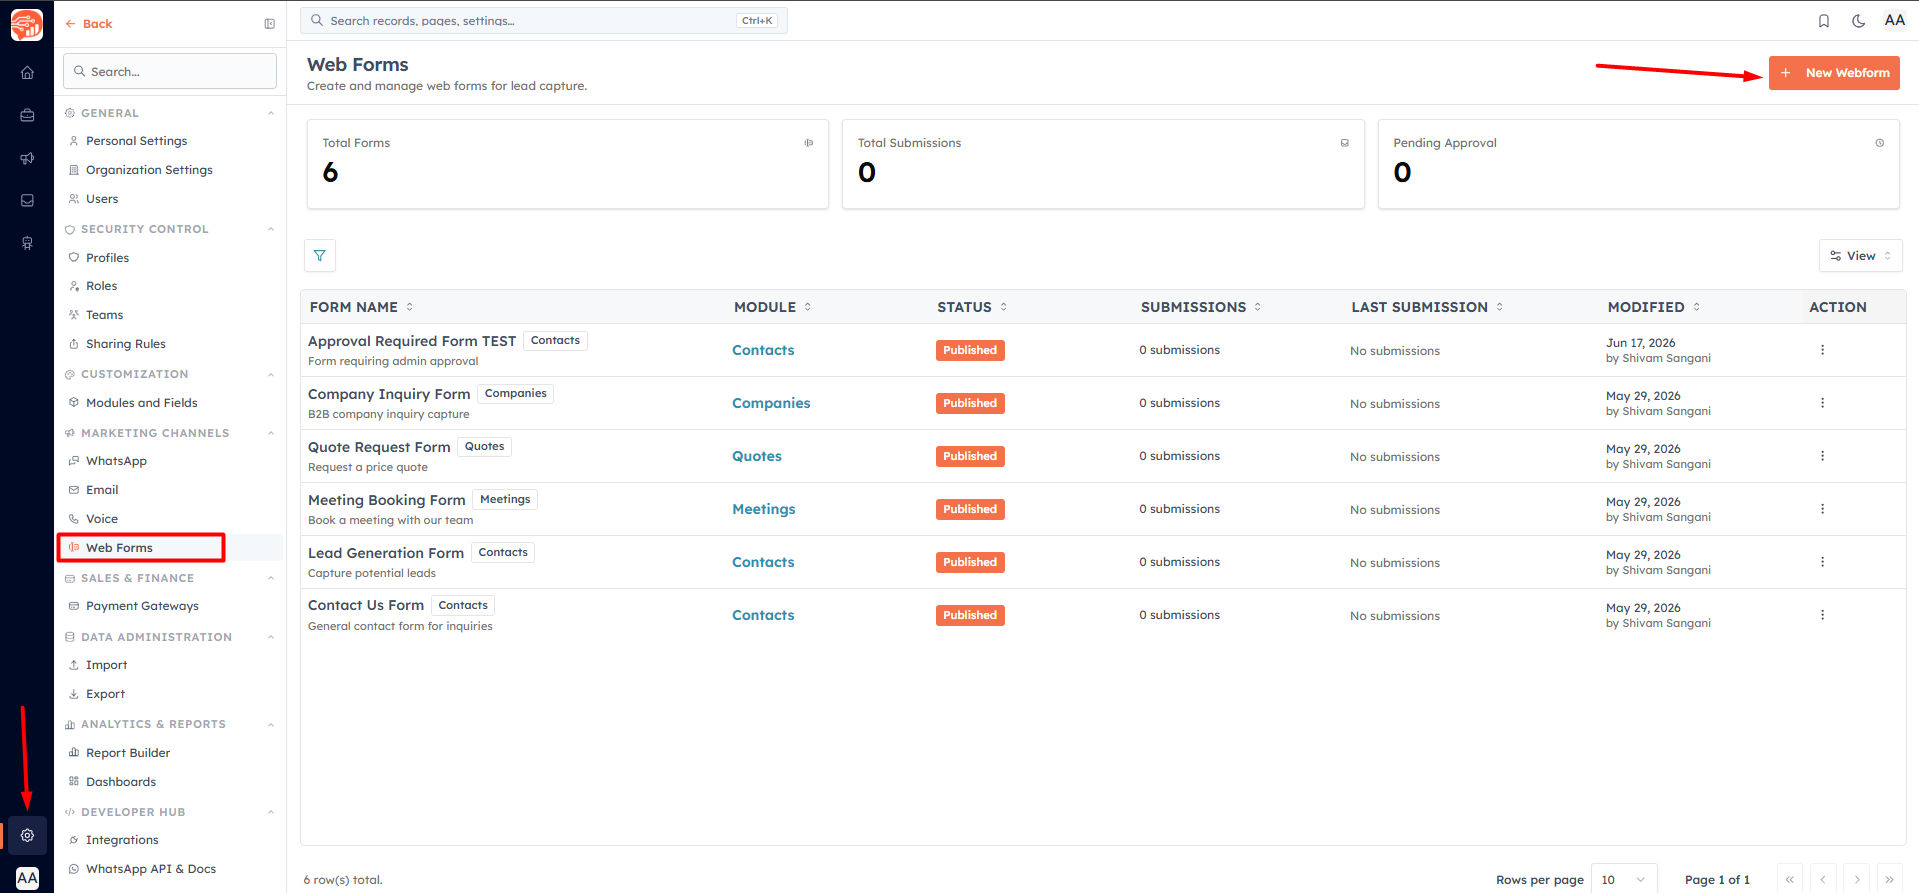
Building a form is a guided four-step process: Basic Information → Form Fields → Settings & Notifications → Preview. This article walks through the whole flow; later articles cover each step in depth.
Step 1 — Basic Information#
Set up the basics:
Form Name (required) — an internal name, e.g. "Contact Us" or "Request a Demo".
URL Slug — auto-generated from the name (e.g. contact-us) and used in the form's public web address. You can edit it.
Description (optional) — a short internal note about the form.
Select Target Module (required) — the module submissions create records in. As the screen says, "Form submissions will create records in the selected module."
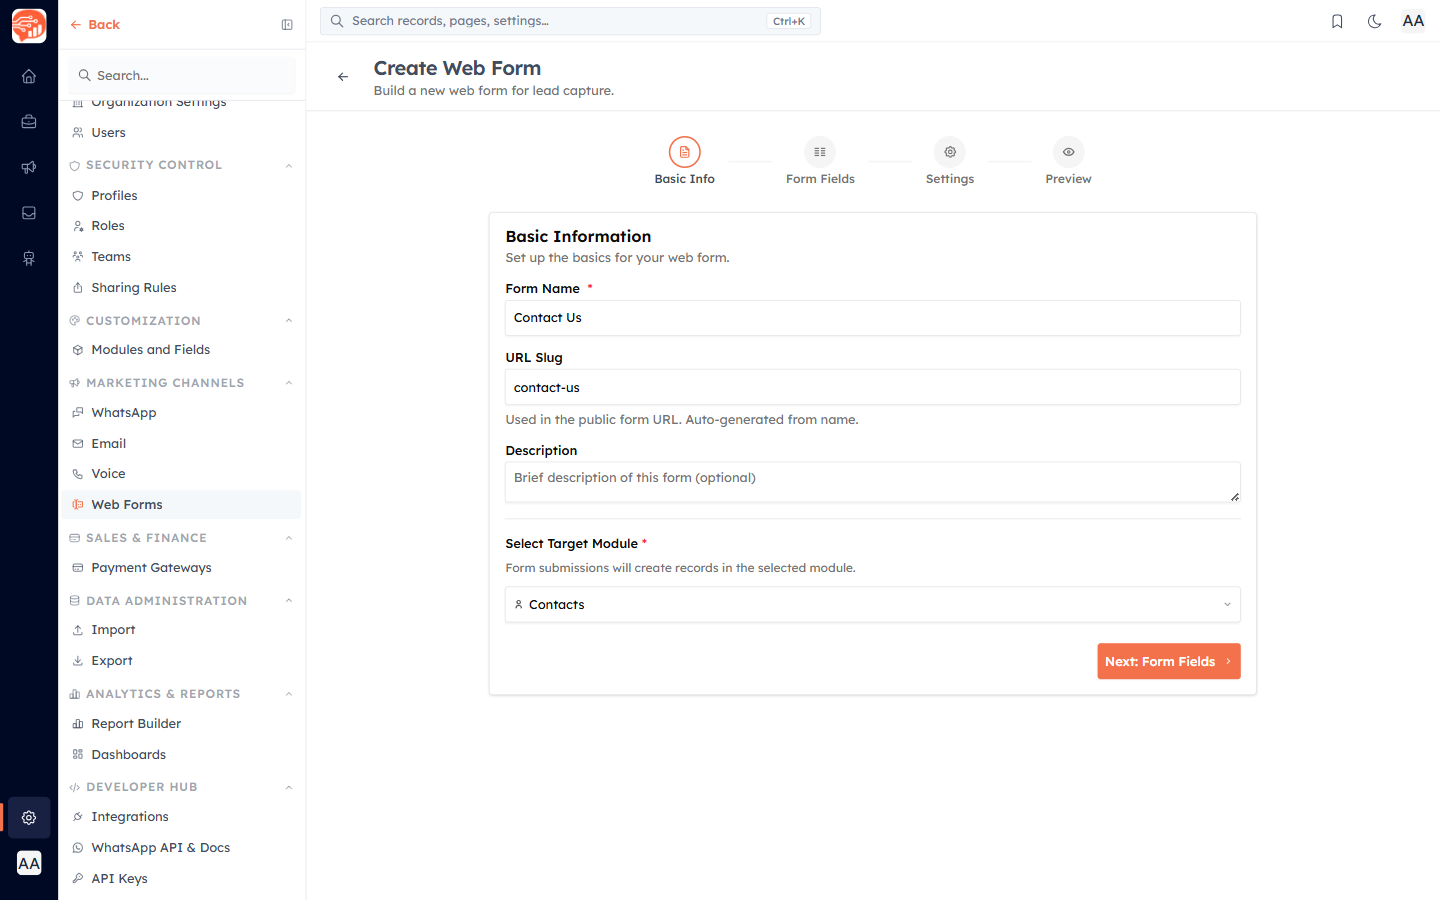
Click Next: Form Fields.
💡
Pick the right target module now — changing it later clears all the fields you have added, because fields come from the module you choose.
Step 2 — Form Fields#
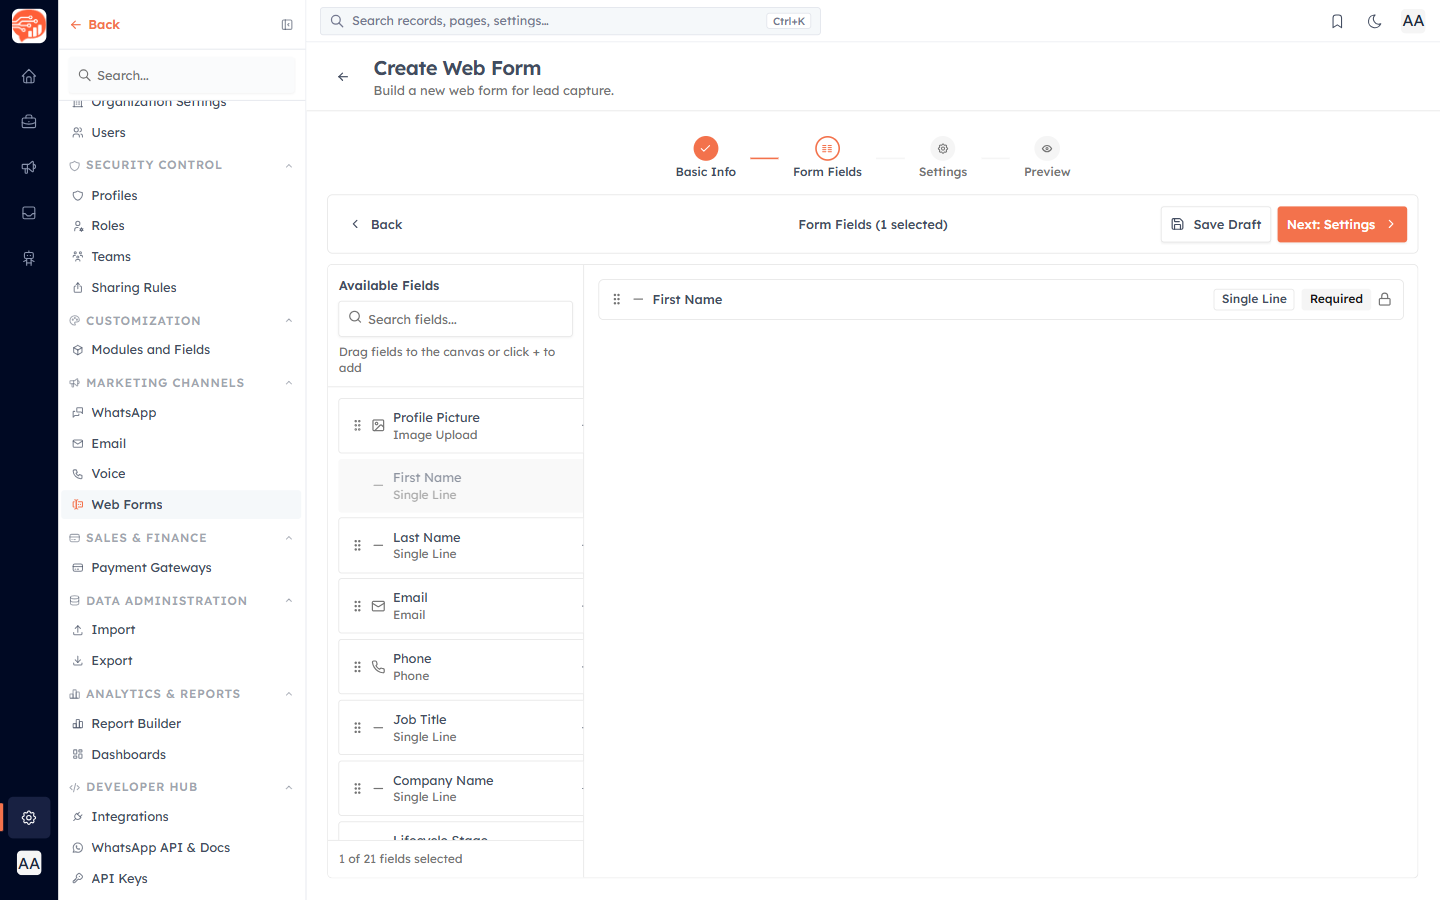
Choose which of the module's fields appear on the form. The left panel lists the module's Available Fields — drag one onto the canvas or click + to add it. Select any field on the canvas to configure its label, placeholder, help text, and whether it is required. Full details are available here - Adding & Configuring Form Fields.
Step 3 — Settings & Notifications#
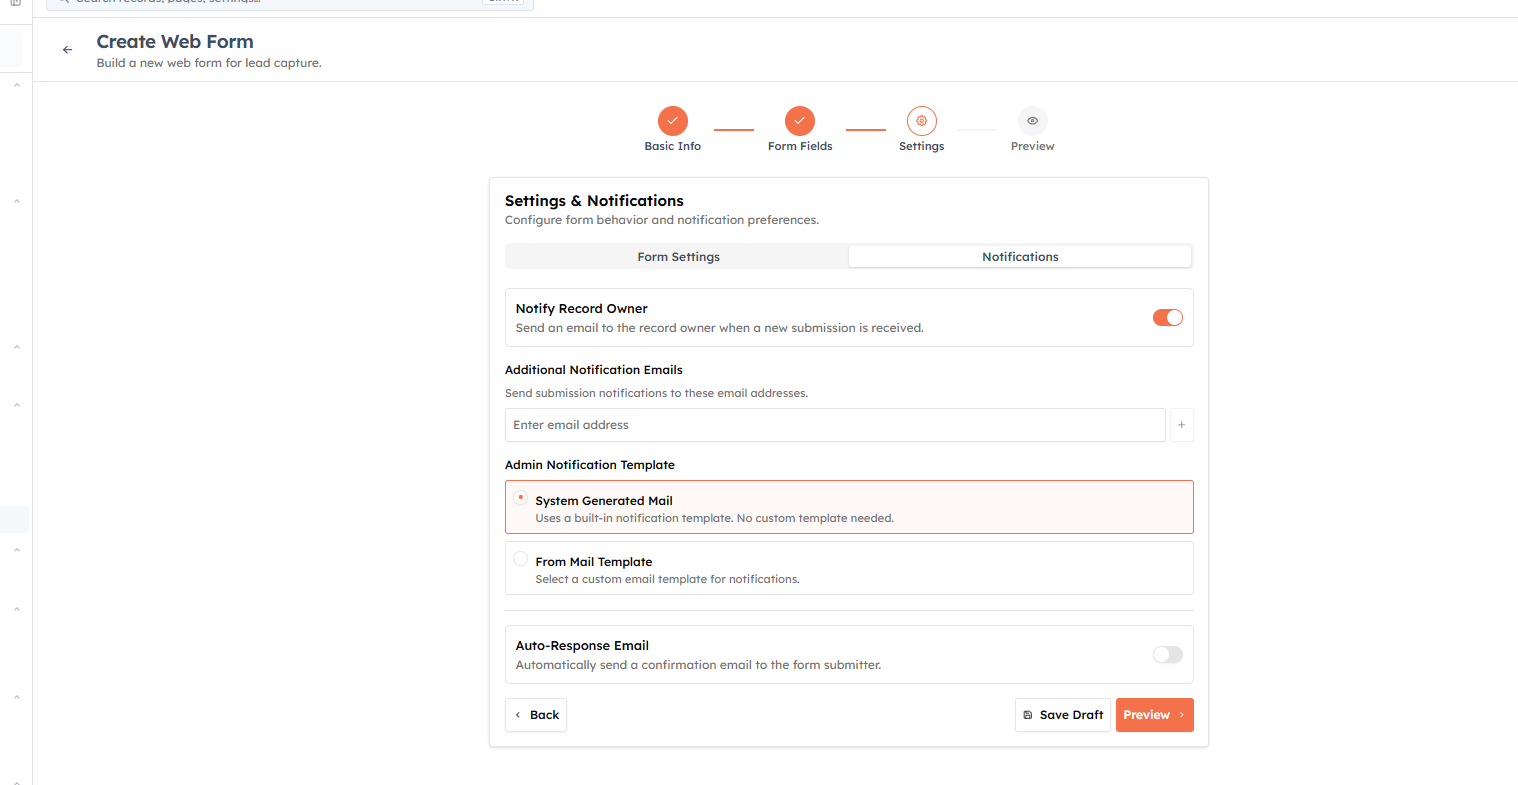
Configure how the form behaves and who gets told about submissions — the form title, submit button, what happens after submission, bot protection, record ownership, and email notifications. See Form Settings and Notifications & Auto-Response Emails.
Step 4 — Preview#
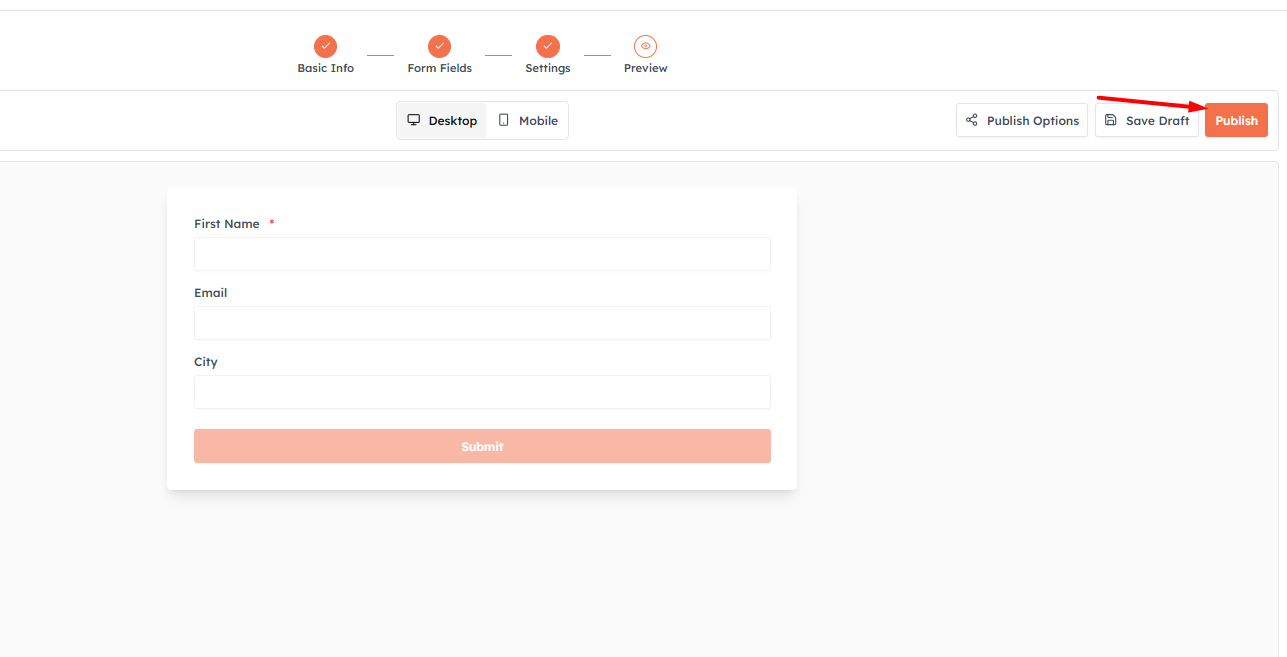
The final step shows a live preview of your form exactly as visitors will see it. Review the fields and layout, then save.
Saving and publishing#
Use Save Draft at any point to save your work without going live. A form stays a Draft until you Publish it. Only published forms can be shared or embedded and can accept submissions — see Publish & Embed Your Form.
💡
You can come back and edit a form any time. Changes take effect immediately everywhere the form is embedded — you never need to re-paste the embed code.
Was this article helpful?
Ready to implement this?
OpenAI Engage and apply what you just learned to your own workspace.
Open AI Engage CRM